


Supported by The Reject Shop
This week I set myself the challenge to style my bathroom for under $100, proving you don’t have to spend big bucks to get fab results.
Following my five bathroom styling tips, I’ll show you how you can style your bathroom on a budget without compromising on the look.
Related article: Bathroom styling inspiration: From vanity styling ideas to wall niche inspo, we have it all!
Related article: DIY bathtub shelf, how to make a bath tray
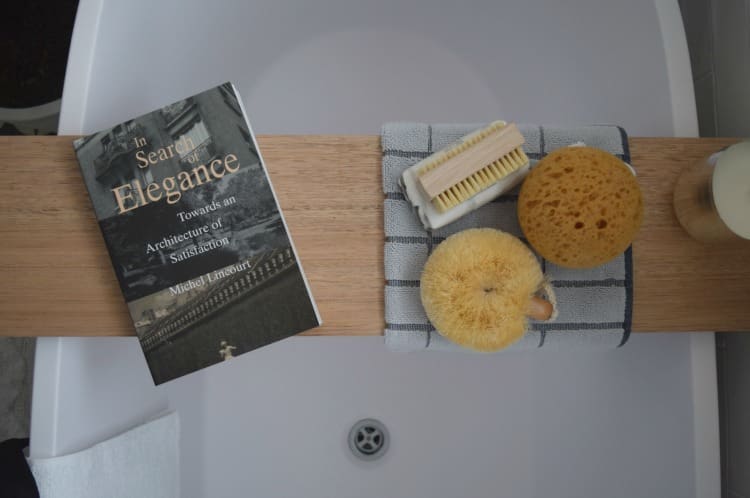
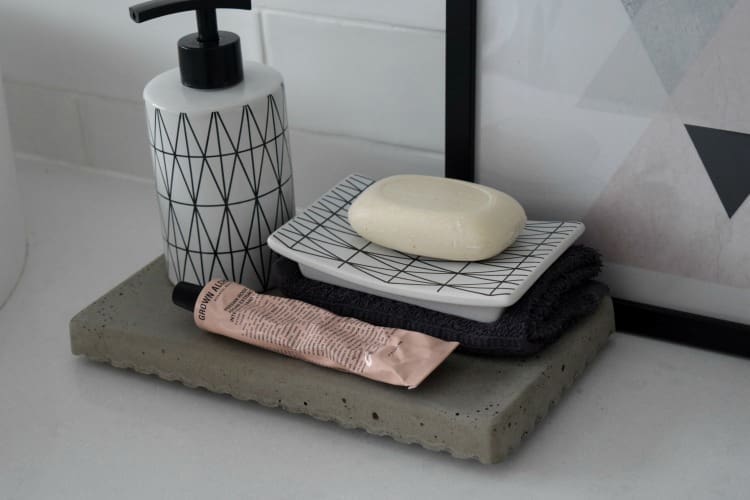
1. Layer, layer, layer
One of the quickest and easiest ways to create a sense of luxe is to layer items.
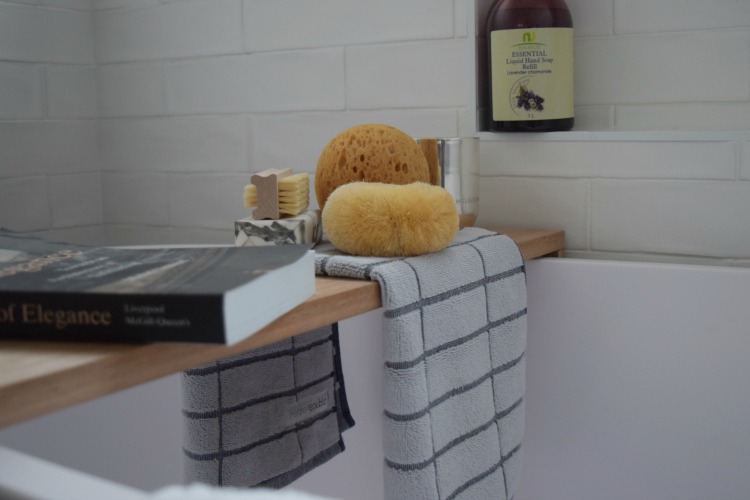
You’ll see I’ve used this trick all around the bathroom. Stacking a soap dish on top of a folded face towel on the concrete trivet, placing several items on a towel on the bath shelf, and even simply placing one towel on top of another on the edge of the bath.
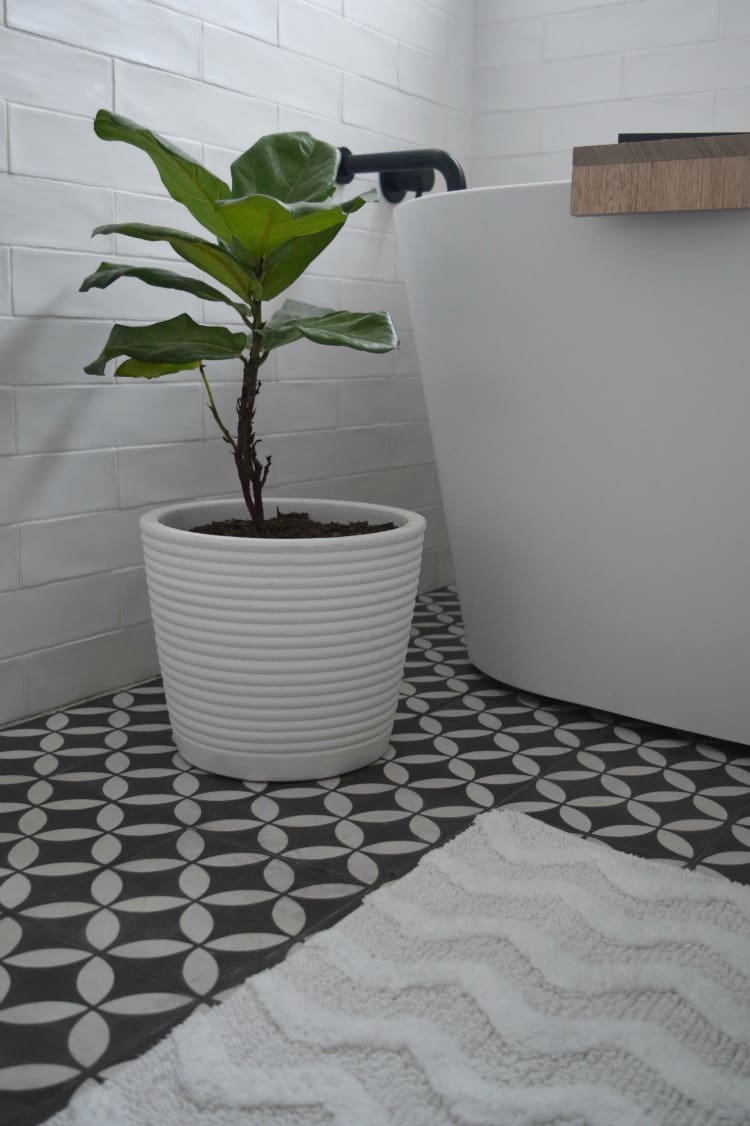
2. Embrace texture
A space can feel lacking when everything in it is flat and one-dimensional — that’s why it’s important to embrace texture.
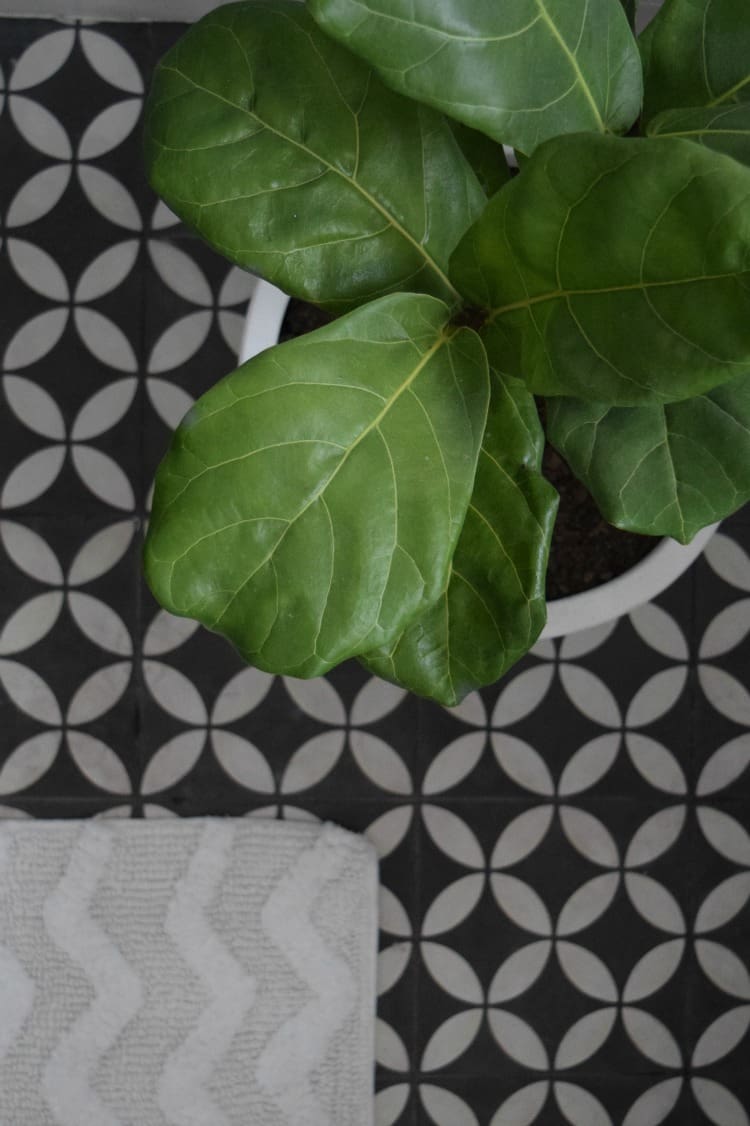
From the tufted bathmat to the ribbed pot plant, I’ve injected many textures into this bathroom. And found these clever buys at The Reject Shop.
3. DIY it
You can often make your own version of high-end bath products for a fraction of the price. For example, even the un-craftiest person could make this bath shelf and concrete trivet.
Bathtub trays often cost hundreds of dollars but this one only uses one piece of timber and glue (you might even have timber at home you could use). And concrete trivets are a great way of introducing texture to a space but buying one could easily eat up most of the $100 budget I set to style the bathroom. I made this one for peanuts using a plastic container from The Reject Shop and small pieces of dowel I had at home. Find the full tutorial here.
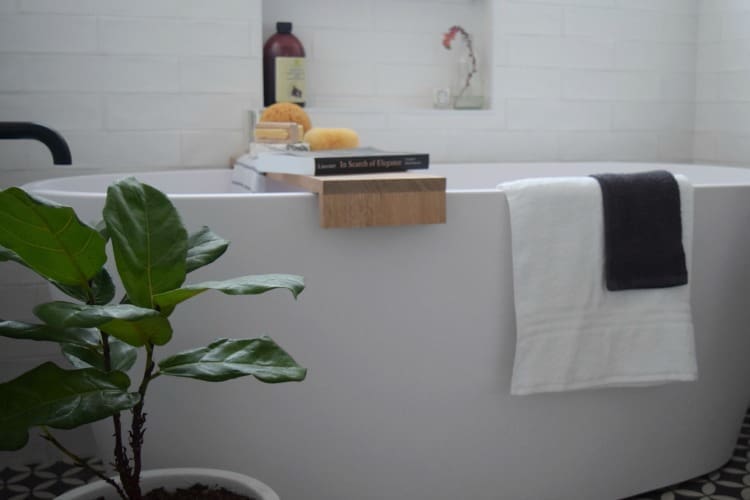
4. Add greenery
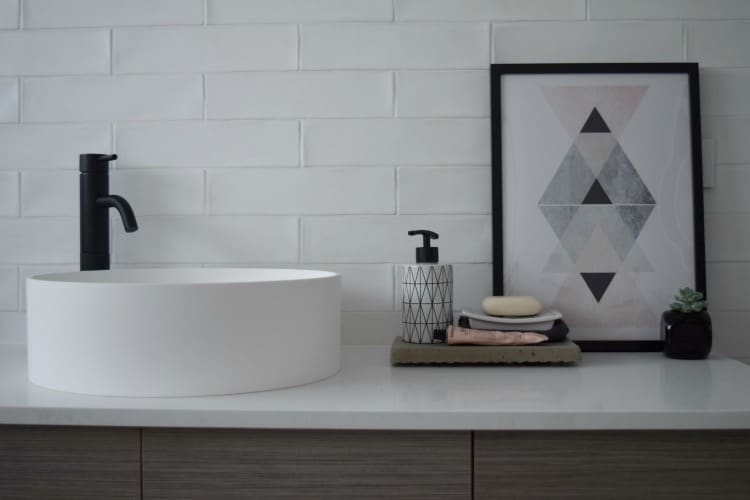
Bring life into the space with plants. Fiddle Leaf Figs are the plant of choice at the moment in interior styling but you could use any indoor plant you like. I also used succulent clippings — placing a flower in a glass water bottle in the wall niche, and planting a clipping in the black dice-shaped tea light candleholder on the vanity.

5. A spot of luxe
Using just a few branded items scattered throughout the room can make the whole space feel more luxe. For example, I’ve used a luxe hand cream and candle. You may also find affordable options of items that look more expensive, for example the artwork only cost $12 (including the frame!) from The Reject Shop but looks like it would cost much more.
Has this post inspired you to give your bathroom an update? Tell us your best bargain secret in the comments below!
More styling tips
PS – If you’ve been searching for a black toilet brush, you can also find this hot geometric one at The Reject Shop!

I have a plain bathroom grey floor tiles large vanity and mirror how can I style it
Please
Regards
Michael
Hi Michael, thanks so much for your question and sorry for the late reply – we took some time off over the Christmas period but are back on deck now 🙂 It sounds like you have a neutral bathroom, which is the perfect base for styling. Can you tell us what type of vanity it is? Timber or white? You can pick an accent colour, such as blue or green, to add interest to your bathroom by selecting towels with this colour, perhaps an indoor pot plant and a hand wash with a pop of this colour on the label. Just repeating the accent colour 3-5 times around the room will make a big impact. On the vanity, you could create a small arrangement using a tray as a base, and placing a hand soap, a tumbler with your toothbrush, and a candle or small indoor plant too. We made a short video about styling your bathroom and kitchen which you might like to check out here https://www.youtube.com/watch?v=0JQMZBZid_Q&list=PLncoc_H_8rBXFfJPjxHy6uTDtv19u0Tfp&index=9 Hopefully these ideas help 🙂
Loooove your blog so much! You inspired me to make my own bath caddy and I am totally in love with it!!! I never even thought about going into the reject shop! will do so now!
Yay! Thanks for your lovely comment, Lisa. Isn’t it an easy DIY but looks so effective, glad you love it 🙂
He he, I know, The Reject Shop is a secret place I like to go for affordable but on-trend pieces – I say it’s all about mixing designer with mainstream to create the look you love.
Soon I’ll be bringing more styling and home organisation stories thanks to The Reject Shop so stay tuned for those or you can subscribe to our e-newsletter community to get the latest news straight to your inbox http://stylecurator.com.au/subscribe-to-style-curator/ 🙂
Your bathroom is perfect Gina! So I am taking your tips as gospel. I especially love the layering tips. I took some pics today for your bathroom challenge, but I’m going to try again with some layering before I publish on Insta. Thanks.
Oh you’re too lovely Johanne! I can’t wait to see how you style your bathroom. I saw a sneak peek of your ensuite on Instagram so I can only imagine <3 I also did some more recent bathroom styling (mainly vanity ideas) which you might like to check out here http://stylecurator.com.au/bathroom-styling-inspiration/ 🙂
We have just built a new home and selected the same tiles for the splash back in kitchen. It looks fantastic. Your site has provided lots of assistance. Thanks
Hi Kerrie
So sorry I missed your comment until now and I’m so happy to hear our site has helped along the way. Have you moved into your new home now? I know what a massive task it is to settle in and make a new space your own so I hope that’s all going well. Let us know if you are facing any challenges we could help with or are looking for inspiration for a certain room or zone of the house – we love to write posts that are a response to what readers have told us.
Have a lovely day,
Gina x
Love it. Wouod love to know where the succulents and plant is from?
Dont worry in my excitement of scrolling and seeing all the pics…i just went back and read through the detail…. ??
He he 🙂
Love this Gina!! You have got me inspired! Any tips on how to hang frames on tiled walls? Do most of those stick-on picture hooks work? x
Yay, love to hear I could inspire you Emma! Hanging frames on tiles can be tricky which is why I just opted to rest the artwork on the vanity. Those 3M Command hooks are amazing though and they claim to stick to ceramic tiles so that would definitely be my first choice before drilling into any walls and potentially cracking tiles. If you find they don’t work because your walls are too textured or your tiles aren’t sealed, drill into the tile using a porcelain drill bit (either soft or hard drill bit depending on the tile) and then put a plug into the hole and then screw in the hook as you would gyprock. If you use the right drill bit to pre-screw a hole, your tile shouldn’t crack. Hope this info helps!
I love this! Bargain styling tips are my favourite! Goop The Reject Shop!! Awesome buys! But I’m totally crushing on your floor tiles (insert love heart eyed emoji here)
Oh thanks Dan xx I was so impressed with the homewares at The Reject Shop, they’ve totally lifted their game 🙂