


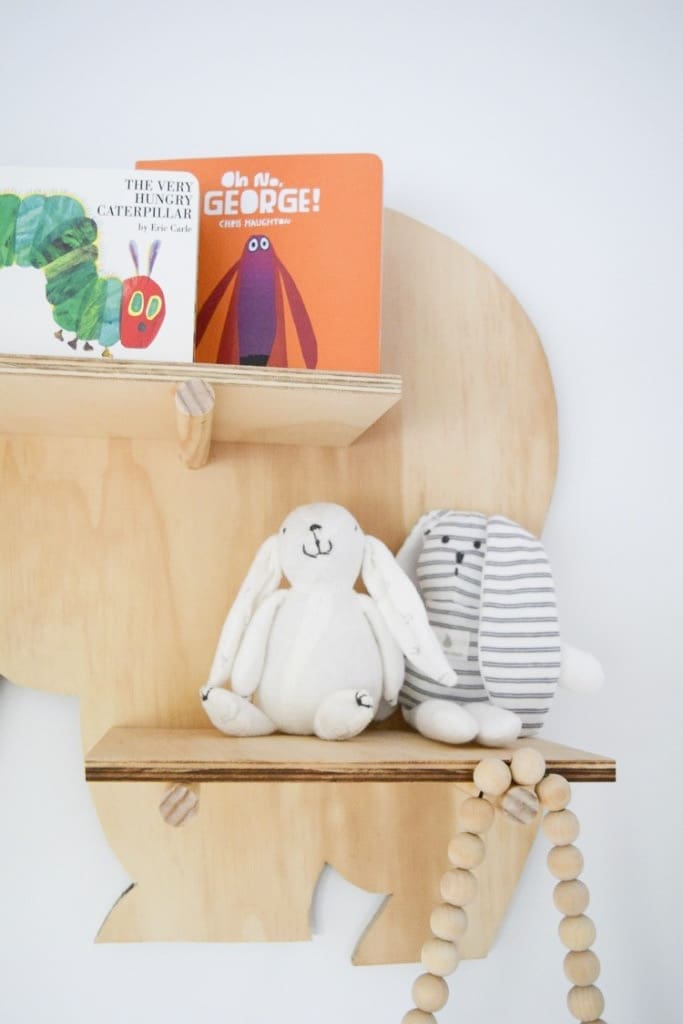
Baby Ciancio could come any day now so lately I’ve been focusing my attention on the nursery. I mentioned in the fluffy pouf tutorial that I don’t know if I’m having a boy or girl so have decided on a neutral nursery with a colour palette of grey, white and pastel mint, and a bit of a bear theme.
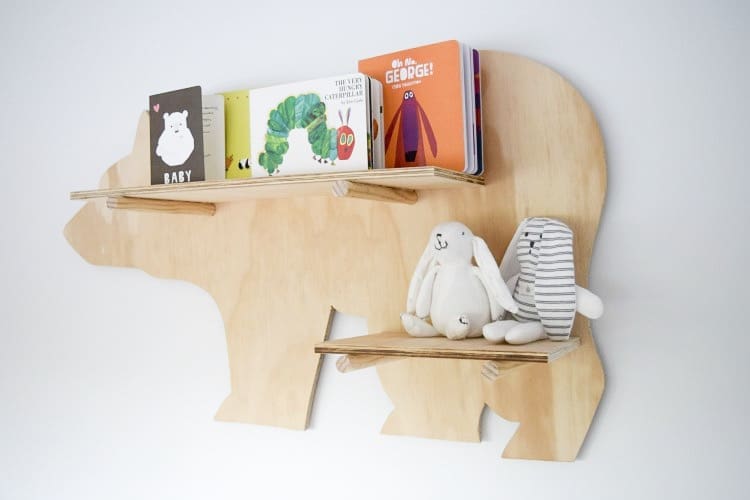
Today I’m excited to share my first bear DIY — a ply bear shelf — and I couldn’t be happier with how it turned out!
Related article: DIY baby play gym: Make a stylish timber play gym
Related article: 20 of the best-ever Kmart hacks for kids
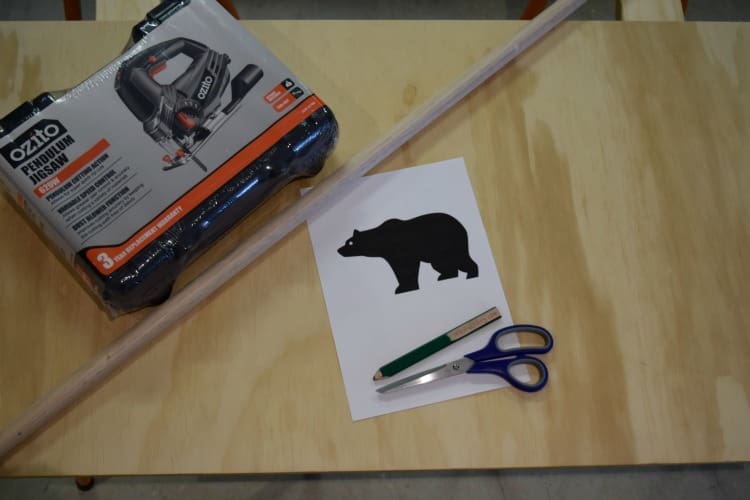
Items you will need:
- Sheet of ply (the finished size of this shelf is approximately 1m by 60cm but you could make it any size)
- Bear silhouette (or any other shape you want to use)
- Jigsaw
- Drill
- Spade drill bit (at whatever size dowel you select)
- Clamps
- Level
- Measuring tape
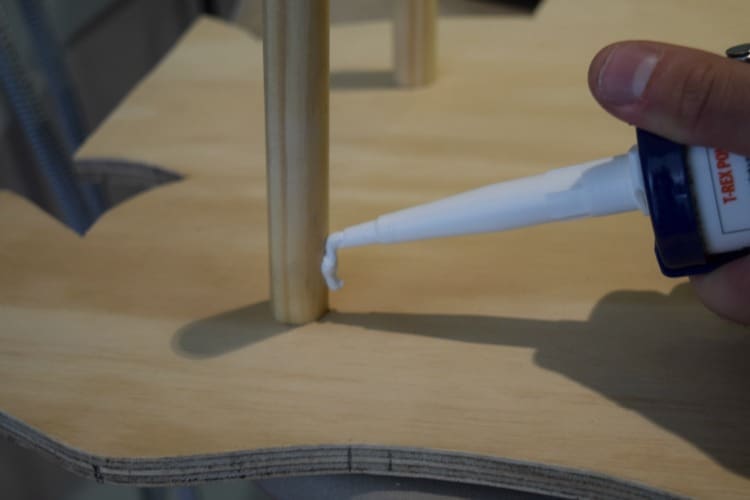
- T-Rex or very strong timber glue
- Dowel (I used 20mm diameter)
- Mounting brackets or hooks
- Pencil
- Eraser
Steps:
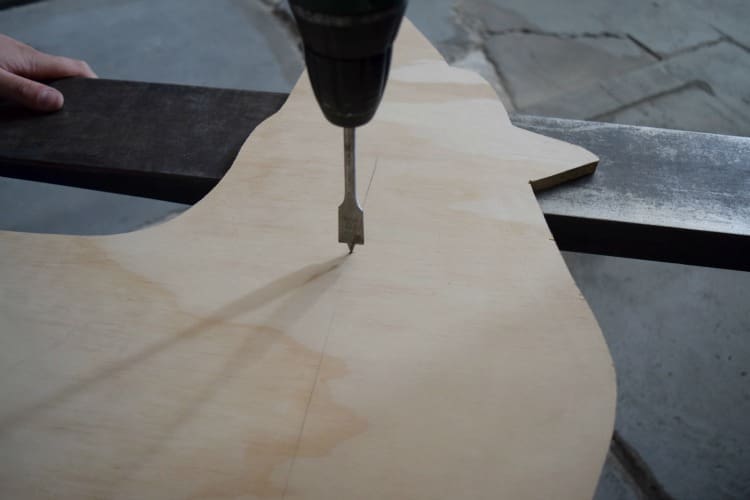
1. Draw your silhouette onto the sheet of ply. I used a trick of placing the image in front of a light which cast a large shadow onto the ply but you could simply print out a full size image or use freehand.
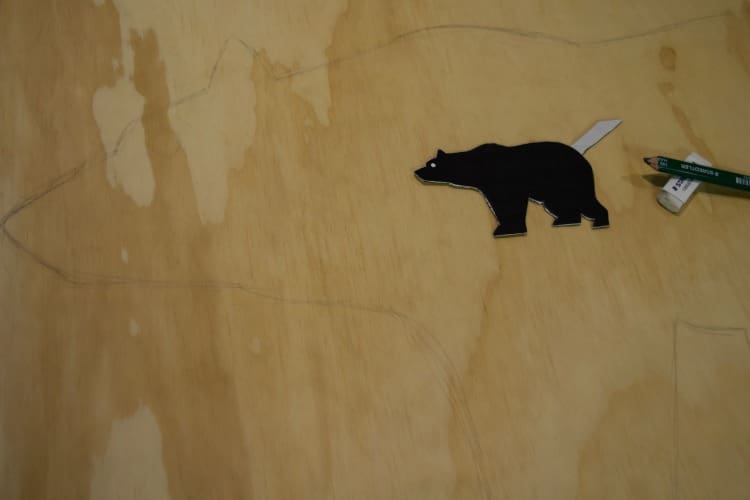
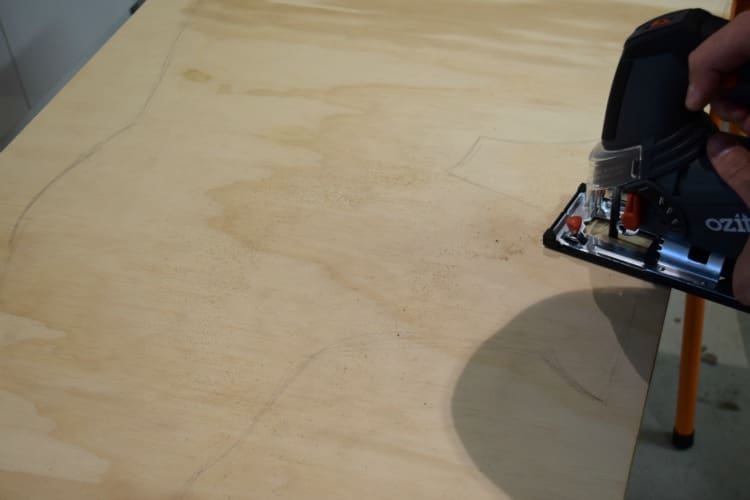
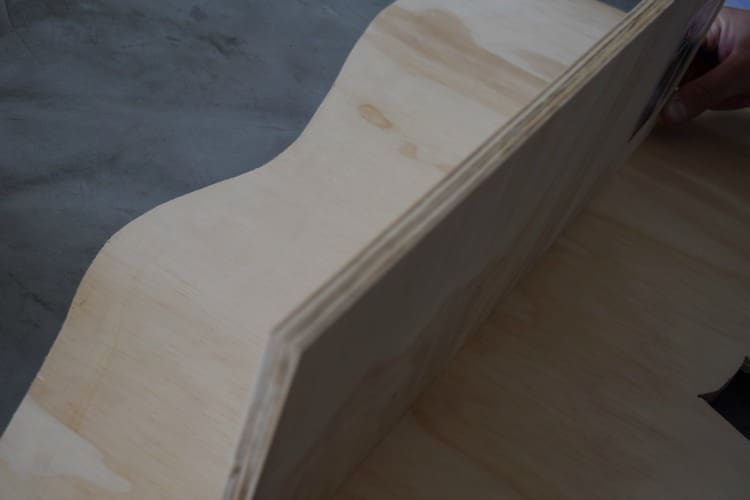
2. Once you’re happy with your shape, use your jigsaw to cut it out. Tip: it’s a good idea to clamp the ply down to prevent it slipping and be sure to watch your fingers!
3. Next you’ll need to decide on the placement and size of shelves. I opted for two shelves — one at 54cm long and 20cm deep, and the other at 28cm long and 20cm deep. Use your level to draw a straight guiding line where the shelves will be.
4. Mark where you want the dowel shelf supports (I placed these around 10cm in from the edges of the shelves) and drill out the holes using the spade drill bit.
5. Before adding the dowel, I attached my mounting bracket to the back of the bear. This timber has a 45 degree edge along the bottom and will slot into a piece of timber I drilled into the nursery wall with an opposite 45 degree edge along the top. (There’s a helpful video on Youtube here which explains the method.) You could mount the shelf in many ways though, such as adding hooks to the back of the bear or you could even screw the ply bear shelf directly into the wall.
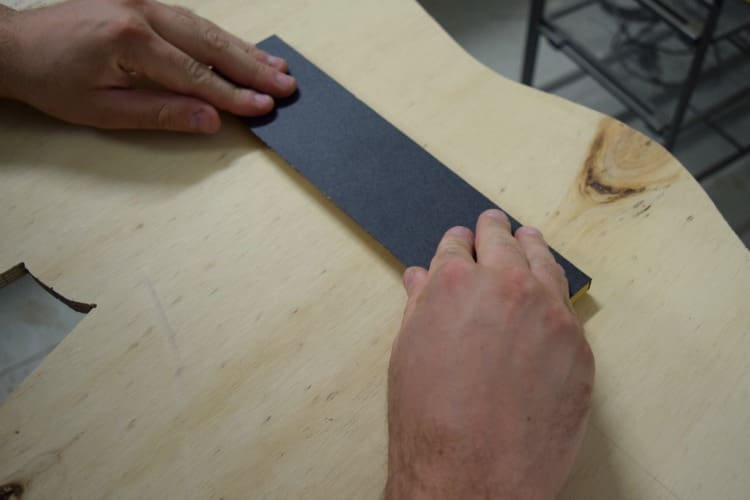
6. Finish your bear shelf by gluing dowel and shelves into place.
And that’s it! At the moment, my collection for the baby is a little limited so I’ve displayed some of the lovely cards and books I’ve received but over time, I’m looking forward to turning this into a shelf to display his or her favourite toys and treasures!
You may notice I chose to make the dowel posts a bit longer than the depth of the shelves, this is so I can hang items from the dowel 🙂 Alternatively, you could use copper pipe instead of dowel to support the shelves for a hint of bling.
Has this DIY inspired you to try something similar? I’d love you to tell me in the comments below!
More nursery and kids inspo
That’s amazing Gina. You are very clever.
Thanks Anthea 🙂 This little bear shelf makes me so happy every time I see it when I walk past the nursery. I’m picking up the cot tomorrow and cannot wait to finish this space and share it! x