


There’s no denying that wall panelling is trending in a big way in interiors!
From kitchen cabinetry to feature walls, we’re seeing wall panels used in a range of ways to add texture and a decorative rhythm to spaces.
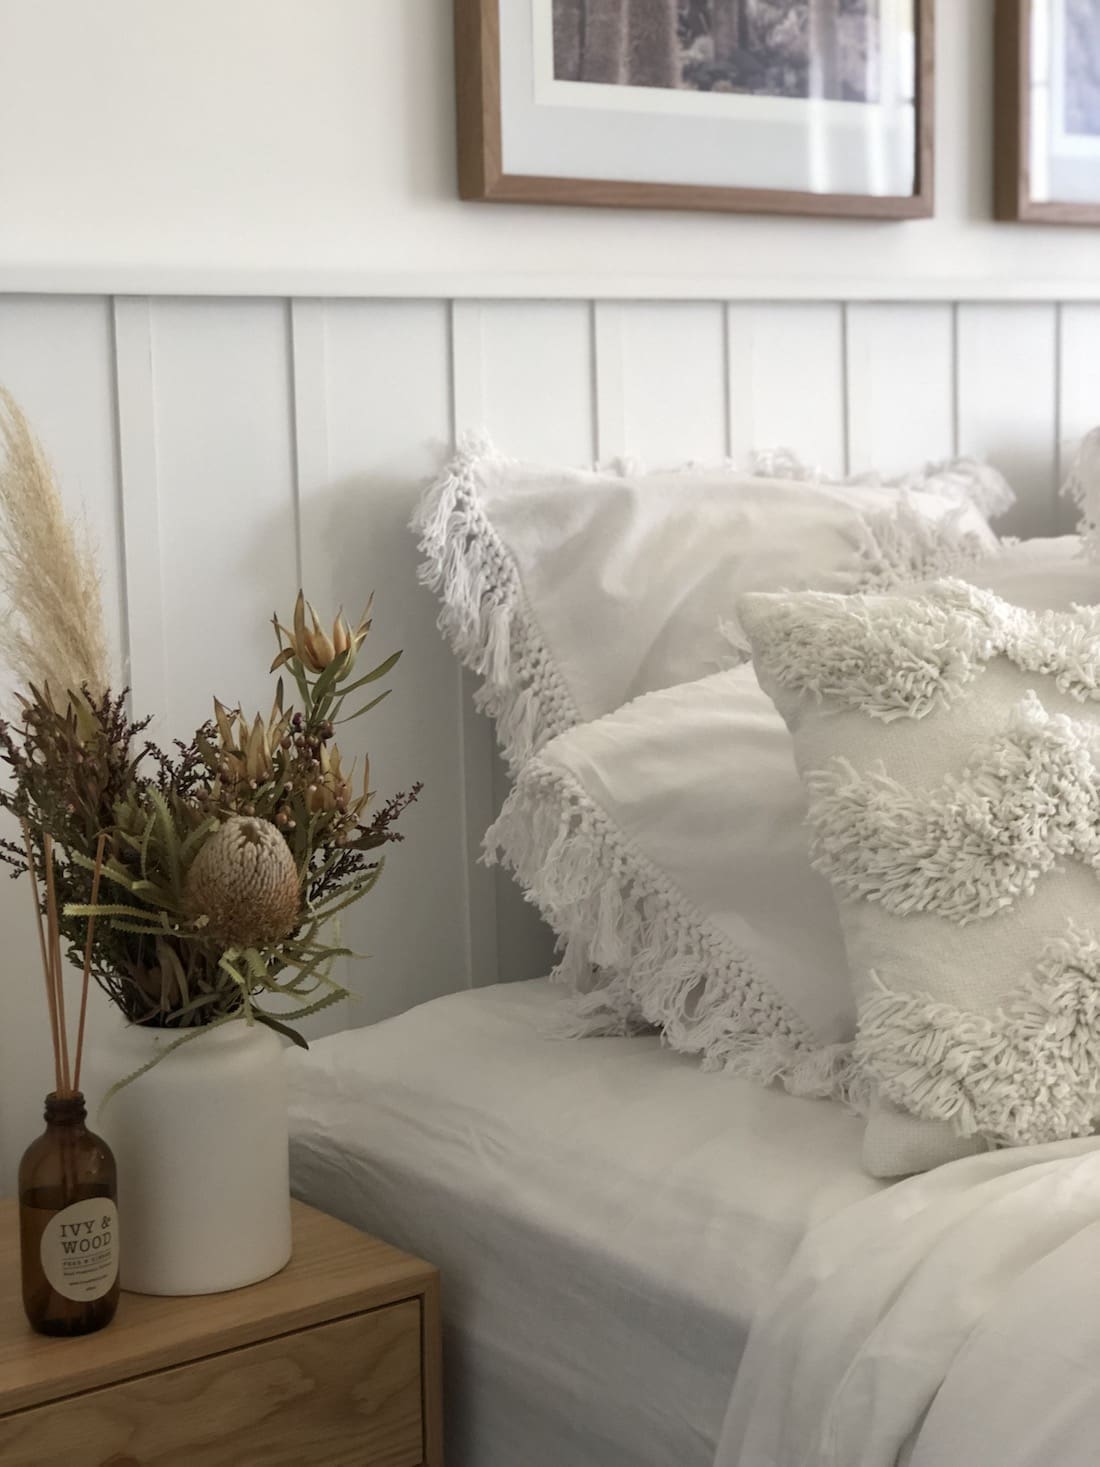
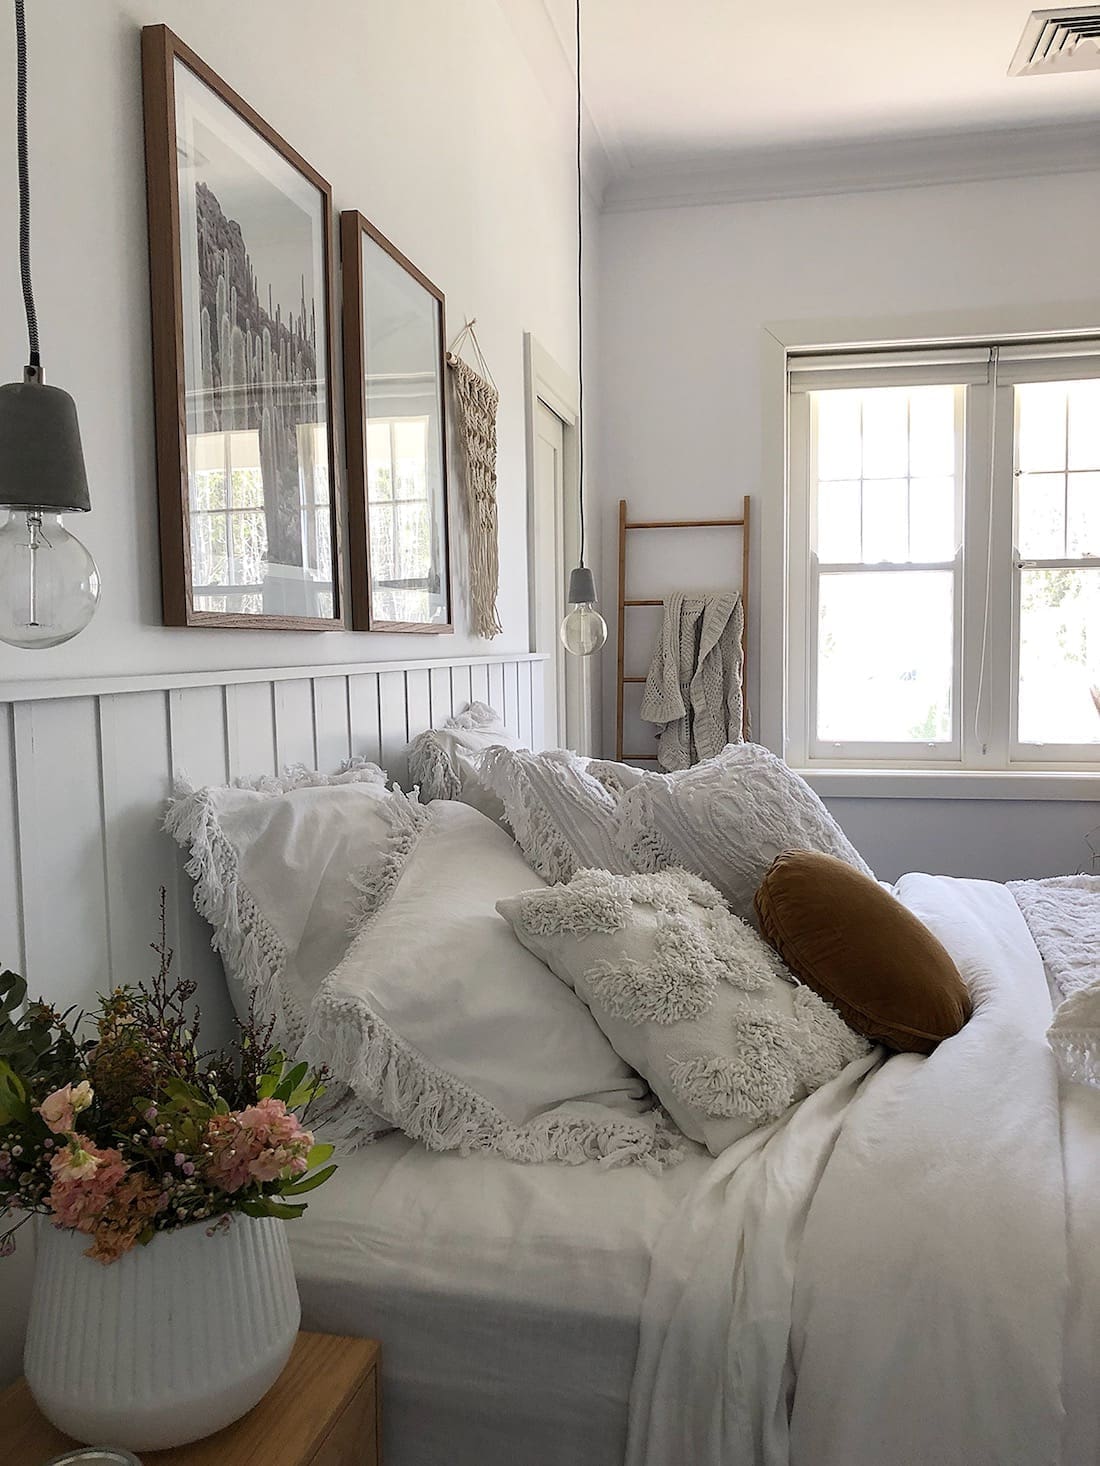
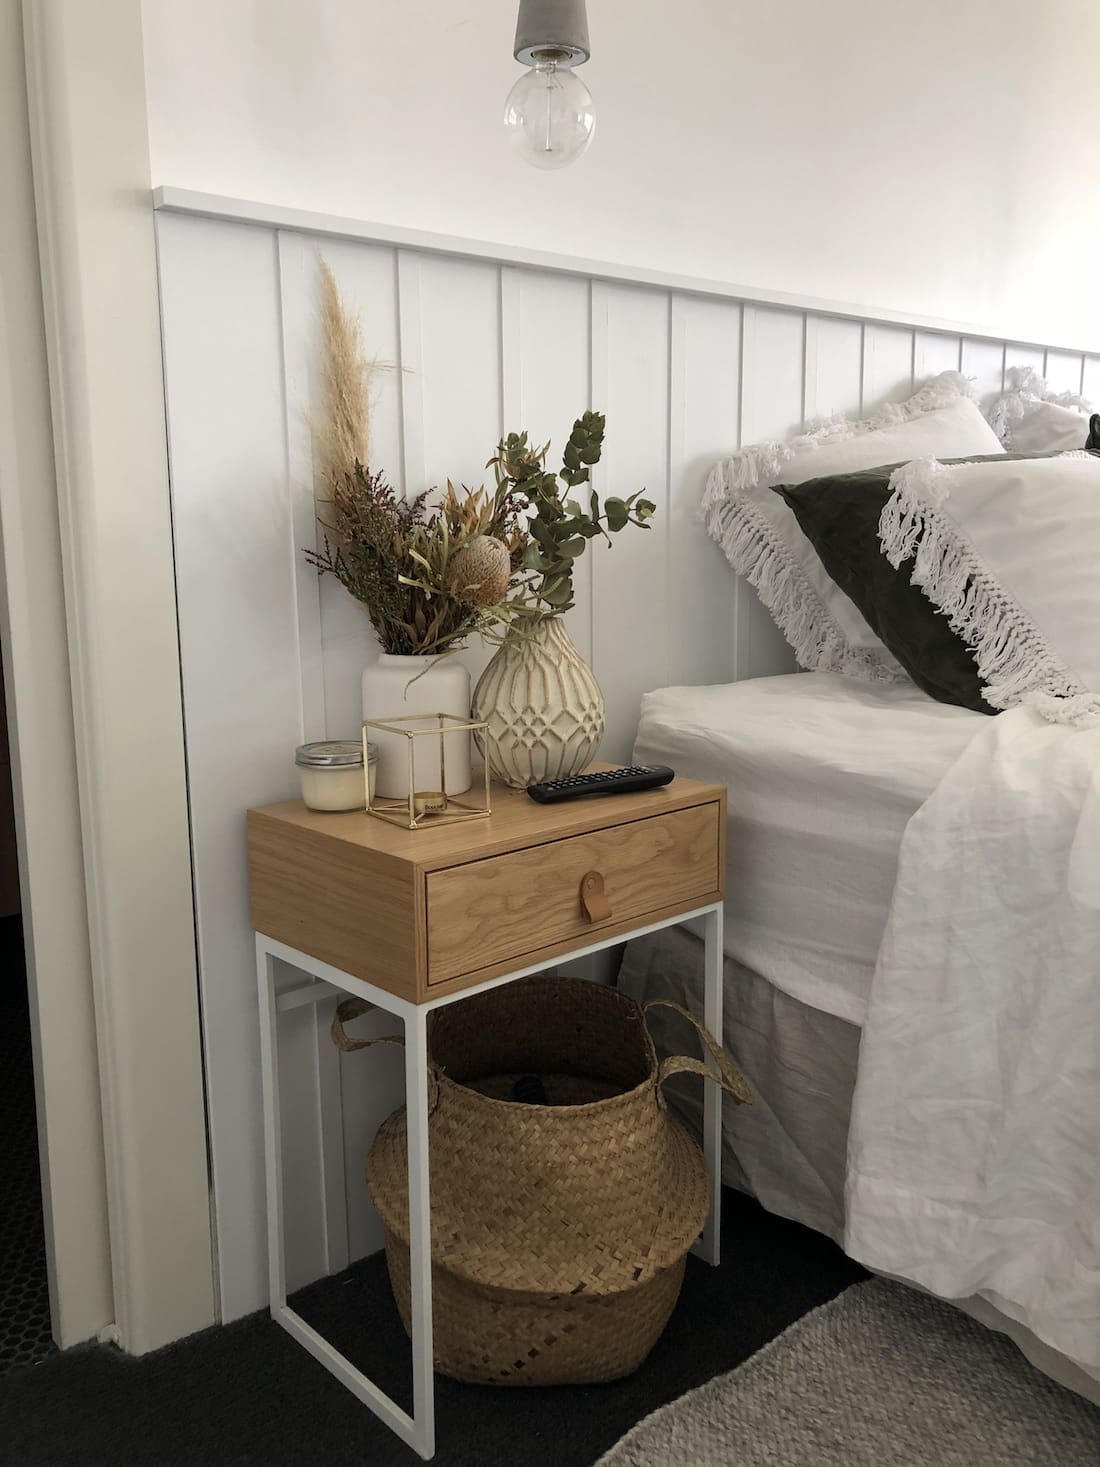
Mikahl Tierney is an expert renovator who created her own DIY wall panel bedhead! She says it’s an inexpensive and easy weekend project, and because it doesn’t need to be fixed to the wall it’s a great idea for renters too.
We loved it so much, we asked her to share how she made it.
Related article: 8 of the best DIY bedhead ideas
Related article: Sleep solution bedroom makeover with IKEA
Items you will need:
- 1-2 lengths of easycraft panels depending on your wall width (have these cut to size at the hardware store)
- Adhesive wood glue
- A length of timber to glue on top (can be rounded or square profile depending on the look you want)
- Optional strips of timber or packers (used 25x3mm masonite hardwood packer)
- Paint in your choice of colour (used Lexicon half strength)
Steps:
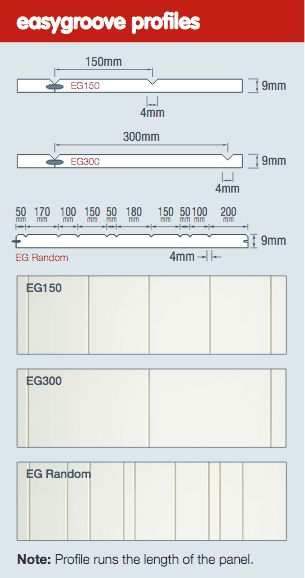
1. Measure your wall or the size of the bedhead you want to create and have the easycraft panels cut to size at the hardware store (available at Bunnings). There’s a wide range of profiles and finishes available, and some of the most popular profiles can be seen below.
Mikahl’s local Bunnings only had the heritage profile easycraft panels in stock but she wanted a more modern look which is why she did a little hack using extra lengths of timber (shown in step 3). You can skip this step if you like the traditional profile or you could special order the modern profile in (Mikahl didn’t want to wait for it to arrive which is why she came up with this solution).
2. Interlock the wall panels and glue the top strip of timber on top with wood glue (tip: Mikahl pushed the bed ensemble back against the board so it stayed in place until the glue dried).
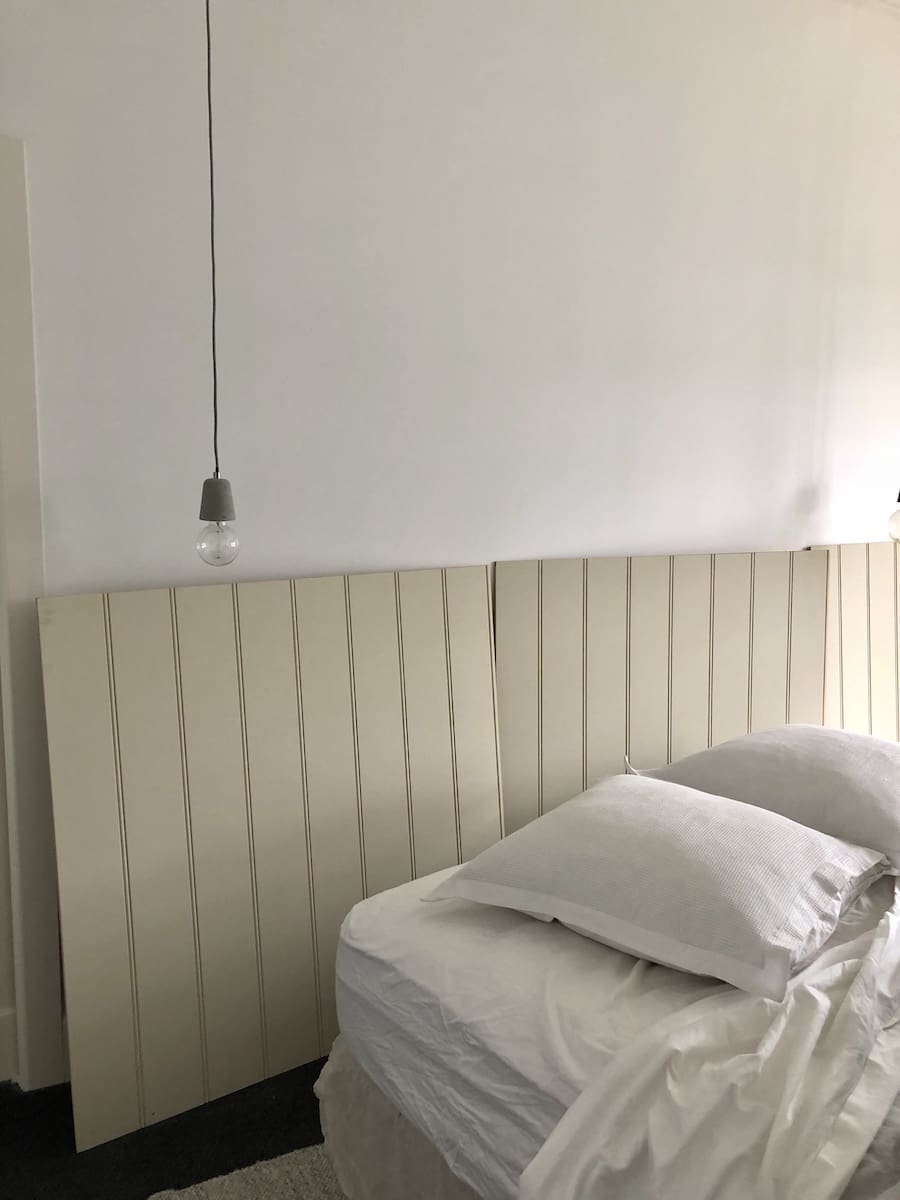
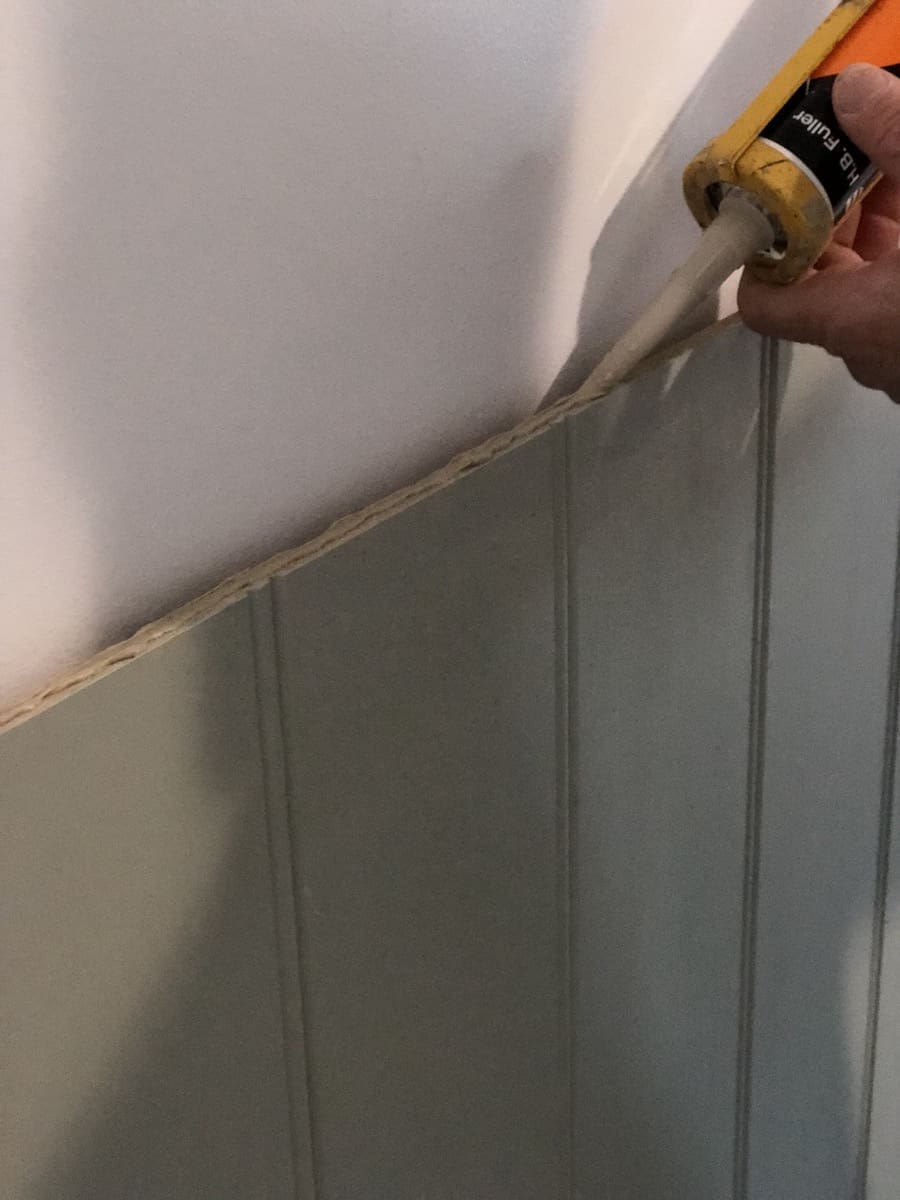
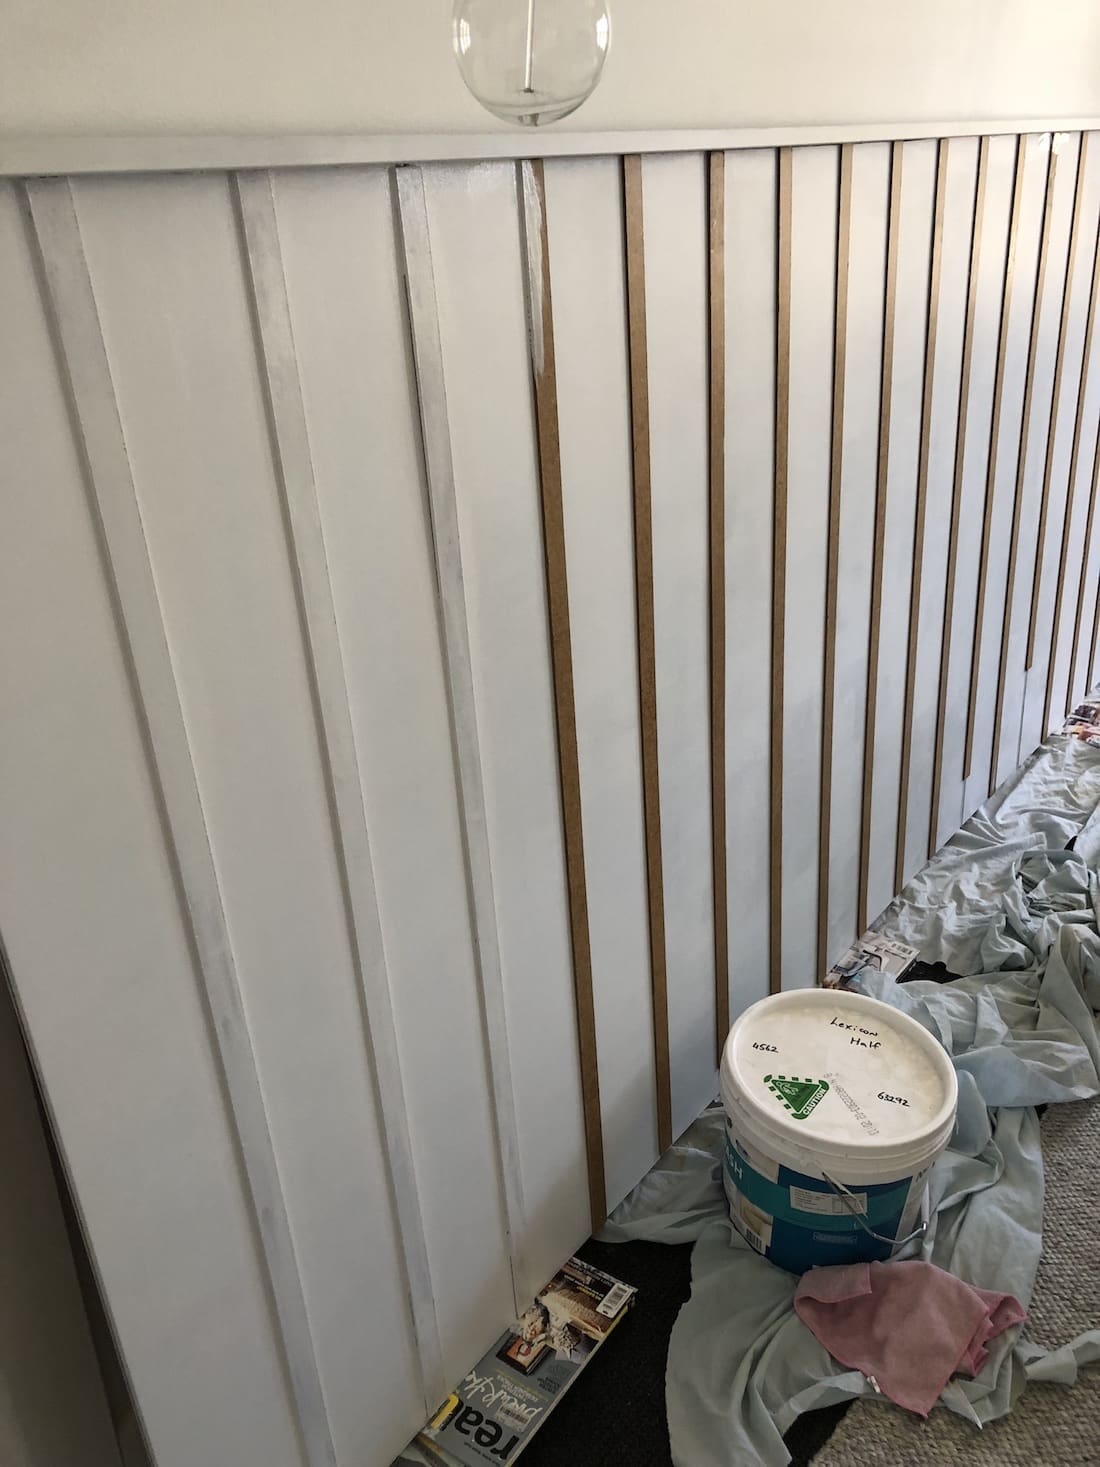
3. Optional step: if you want to create a modern profile like Mikahl, glue strips of timber on top of the grooves. She used these 25x3mm hardboard packer strips that she had left over from another project. Simply cut lengths at the height of the bedhead and glue the individual strips.
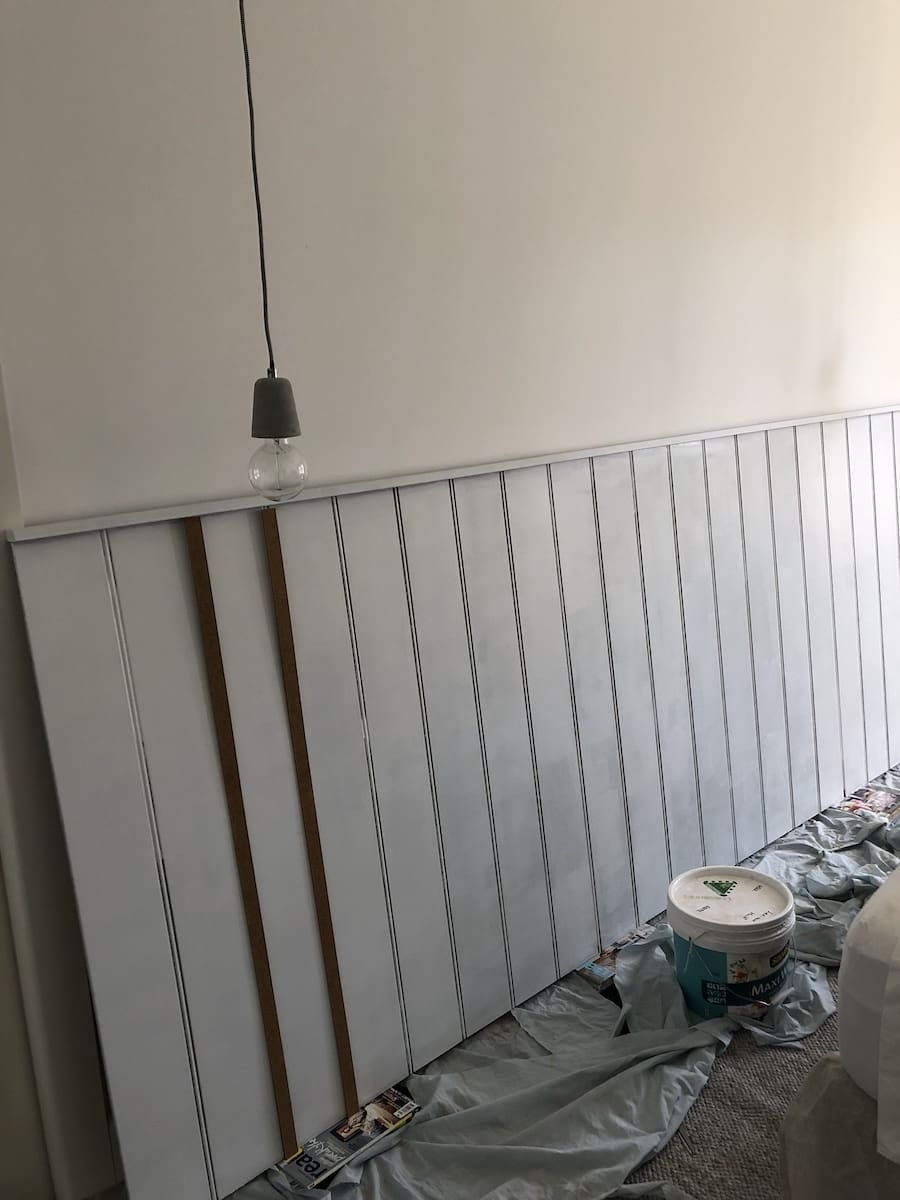
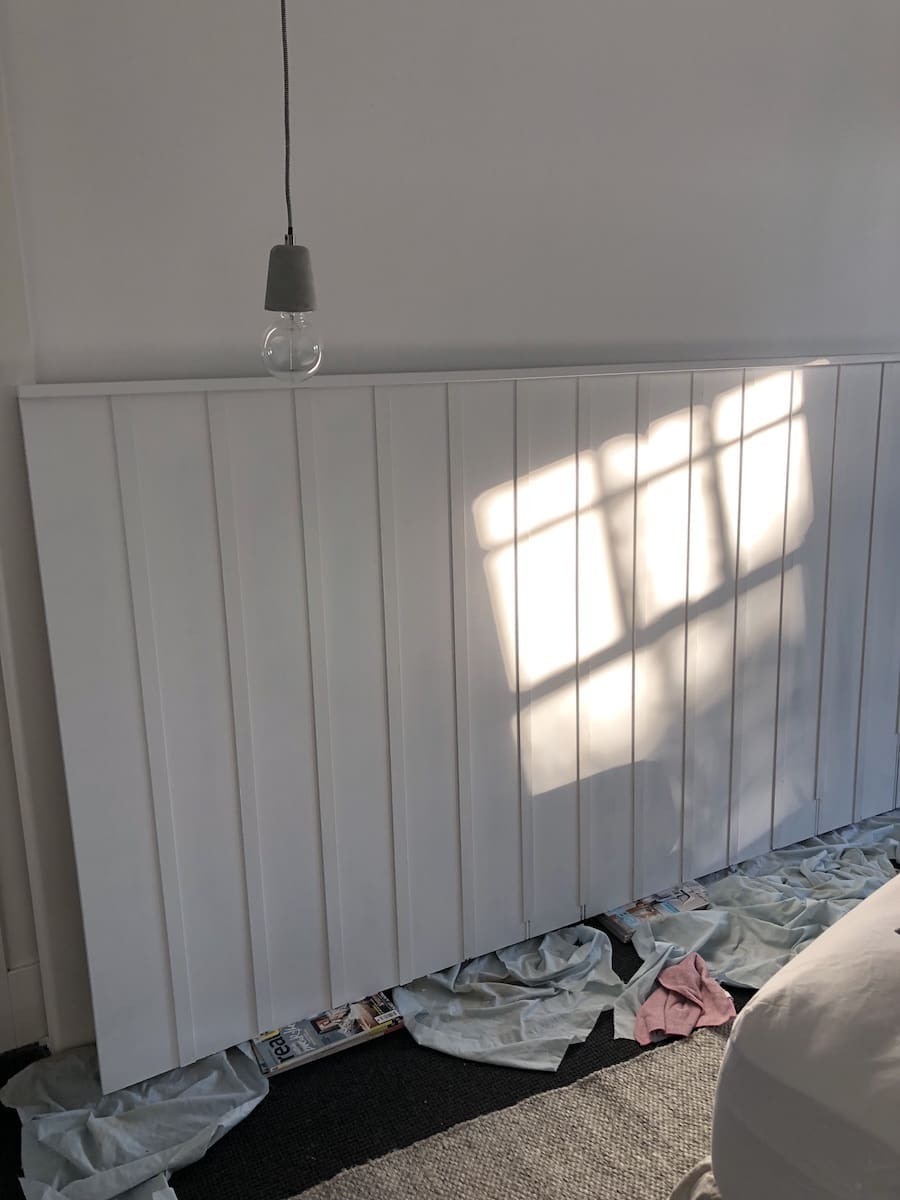
4. Once dry, paint the bedhead. Mikahl used Lexicon half strength but says when she gets time she plans on experimenting with colour.
5. Position the bedhead against the wall — by pushing the bed against the bedhead, it will stay in place but you could secure it with screws if you like.
That’s it! This easy DIY bedhead cost Mikahl around $150 but she already had the glue, packers and paint at home. These products aren’t expensive though so at most the total project would set you back $200.
Have you been inspired to try this DIY wall panel bedhead tutorial? Or have you used wall panelling in your bedroom? Tell us about it in the comments below!
Check out more DIYs
About the author

Building, renovating and restoring homes with her husband for over 20 years, Mikahl is not only a talented woman of style but also a mother to four gorgeous children. She’s recently completed her latest build, a luxe and contemporary home. Follow her on Instagram for regular interiors inspiration, including loads of plant love!
Instagram: @maddison.bloom
This article was first published in October 2018
Absolutely inspired by this post!!
Yay, love reading that! I’d love to see pics of your wall panel bedhead if you make one 🙂