When we discovered Haily Trans’ gorgeous home in Real Living mag, we just had to find out more about her!
Turns out this talented lady is a weaving artist, jazz musician and serious lover of her two dachshund children, Brian and Harvey.
We love her weaving so much, we invited her to share a unique DIY just for our SC readers!
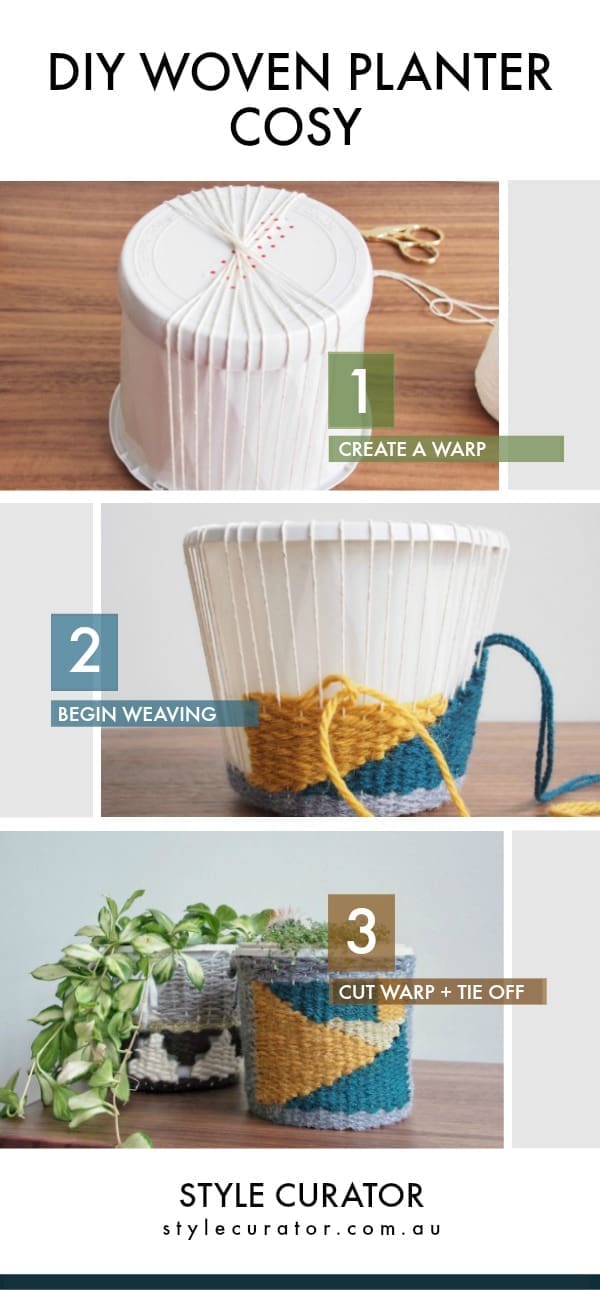
Haily has created the most adorable woven planter cosy tutorial with loads of pics so you can easily follow along. Enjoy!
Related article: DIY kokedama (aka DIY hanging moss ball planter)
Related article: Make this soft and stylish pom pom throw for winter
Words by Haily Tran
When I was initially asked to contribute a tutorial, I had so many ideas running through my mind I almost didn’t know where to begin. My home and work space is almost entirely surrounded by textile art, musical instruments and plant life. So I thought I’d share with you one of my favourite woven creations that allows you to explore your creativity but to also create something practical and beautiful for your home.
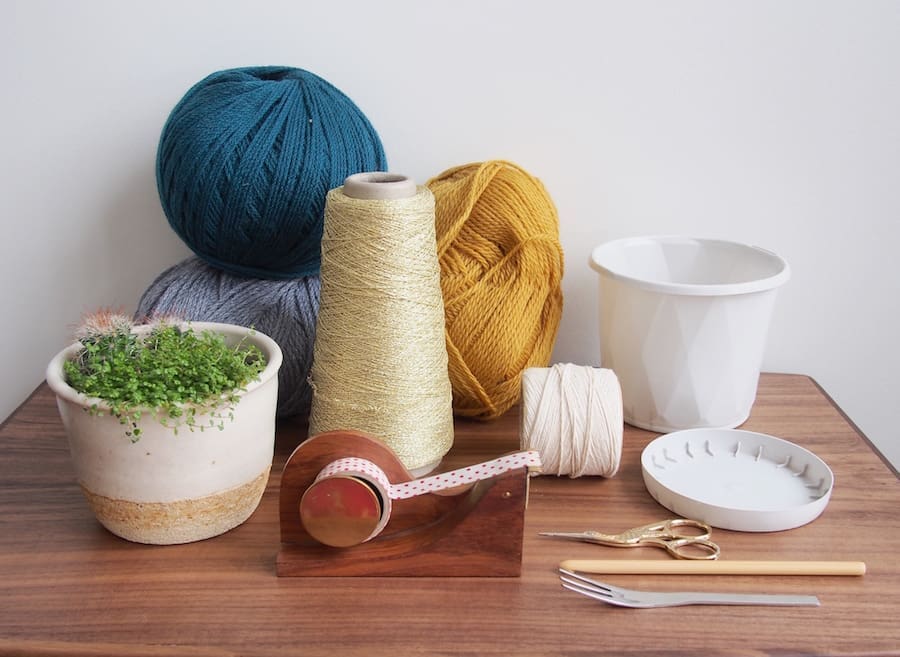
Items you will need:
- Plant container and matching dish from a hardware store
- Warping yarn
- As many different coloured yarns you would like for your creation
- Sticky tape
- Yarn needle
- Crotchet hook no larger than 6.5mm
- Scissors
- Small beater/fork
- Your chosen plant that fits inside your container from above
Steps:
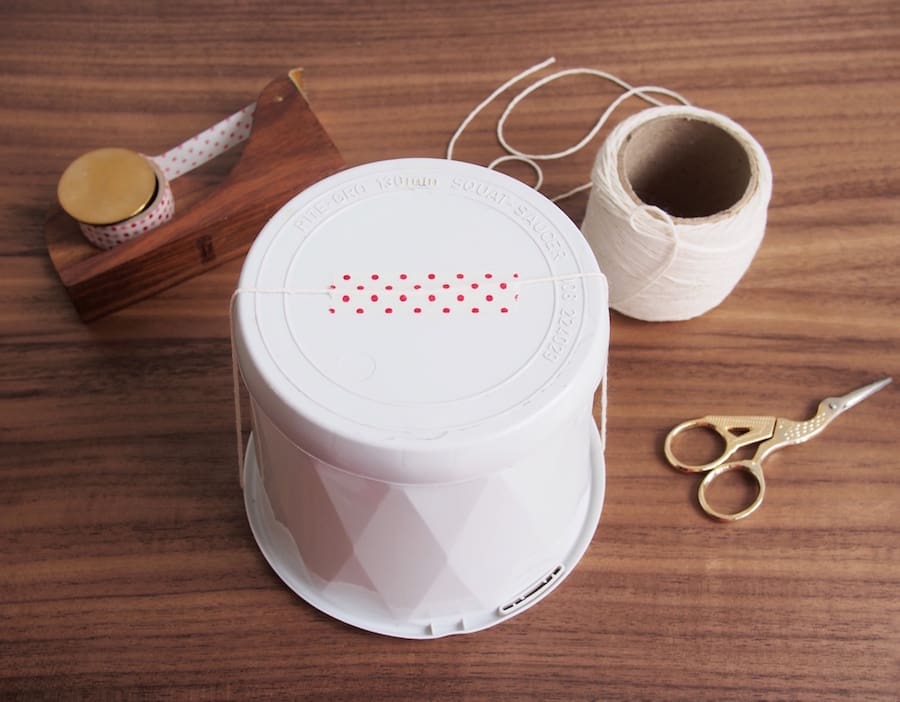
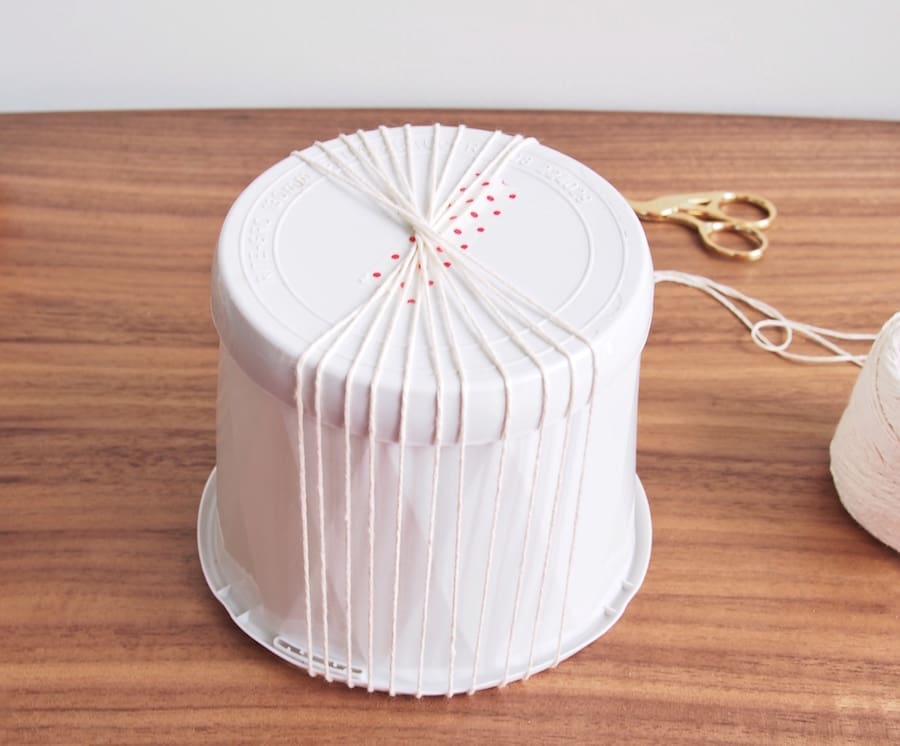
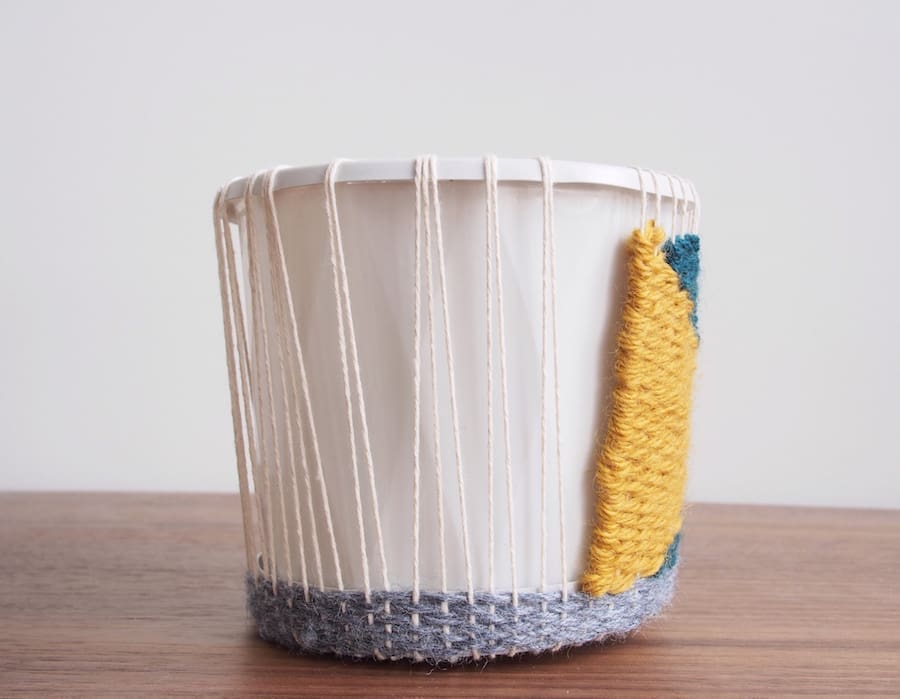
1. Begin by taping your warp to the bottom of the dish. Because this kind of warping is not on a traditional flat loom, you may find it difficult to warp evenly unless you tape it down.
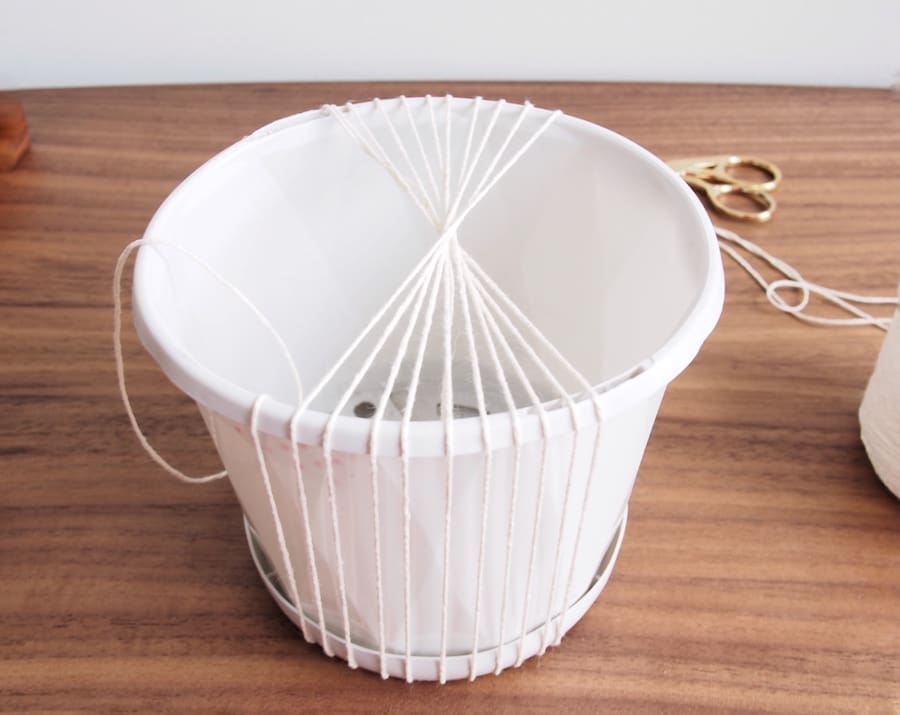
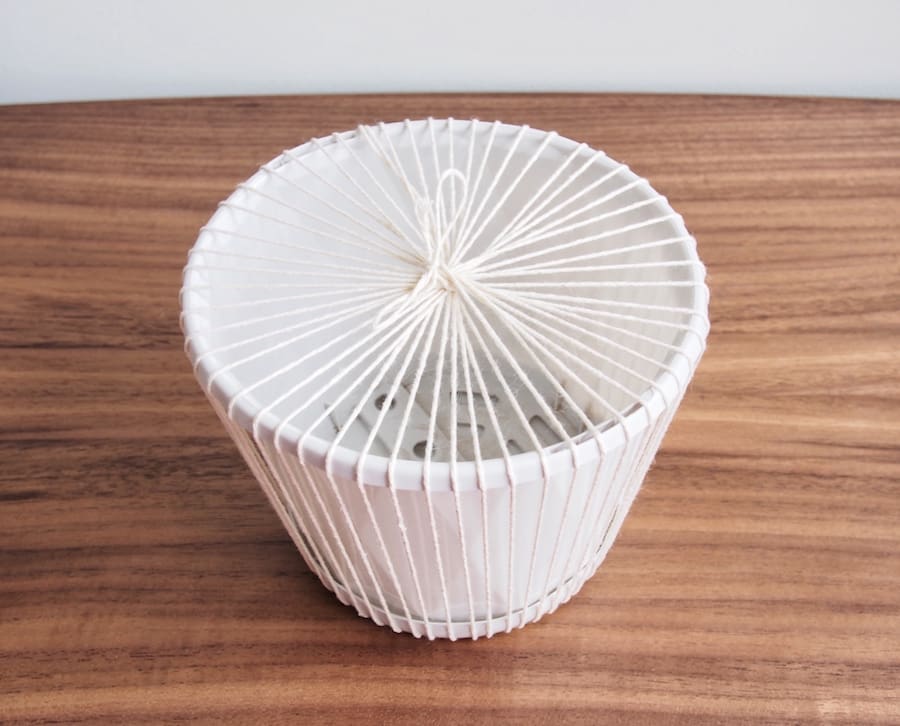
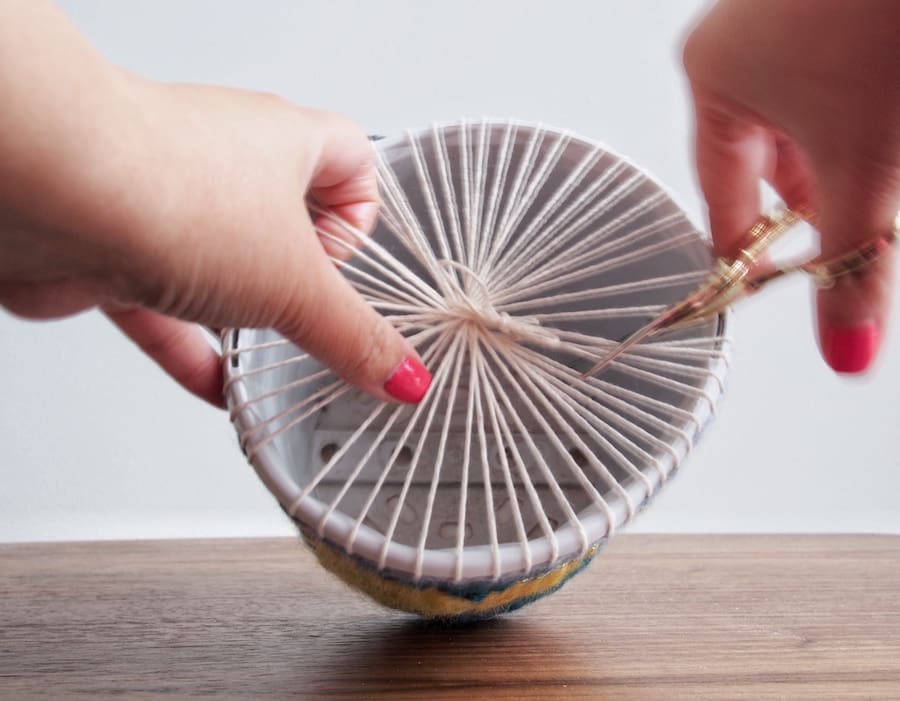
2. Begin warping by completely covering the dish and container in a clockwise motion. Try to keep the tension as tight as you can in order for the yarn to keep its position as you progress. Unlike a loom, there is nothing holding it in place except for your tension. Keep you fingers on the bottom centre of all the yarn as you progressively warp. Continue wrapping until the container is entirely covered, tying a knot at the top centre.
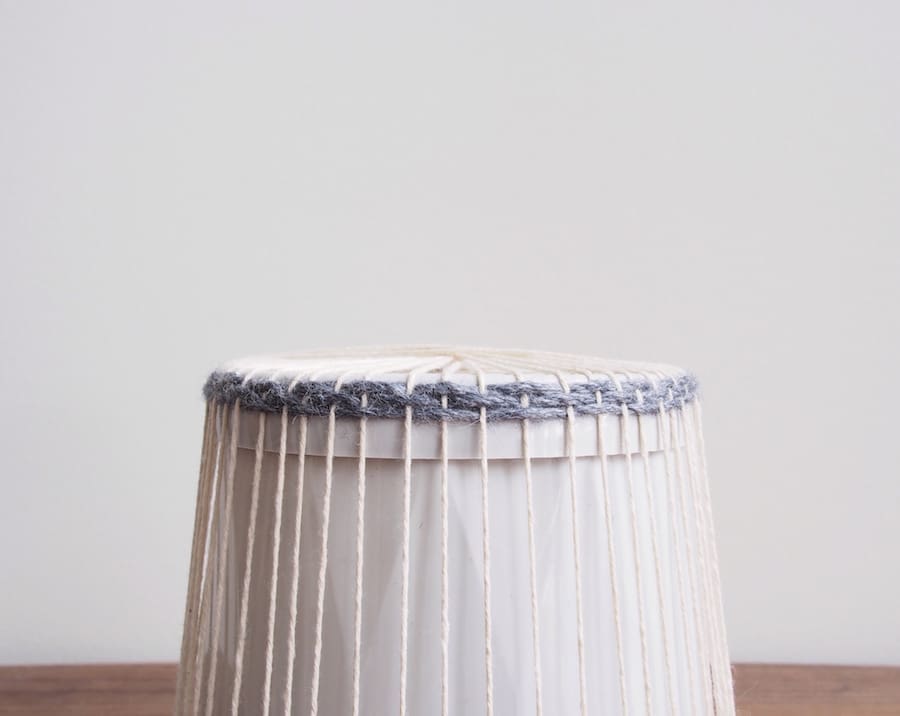
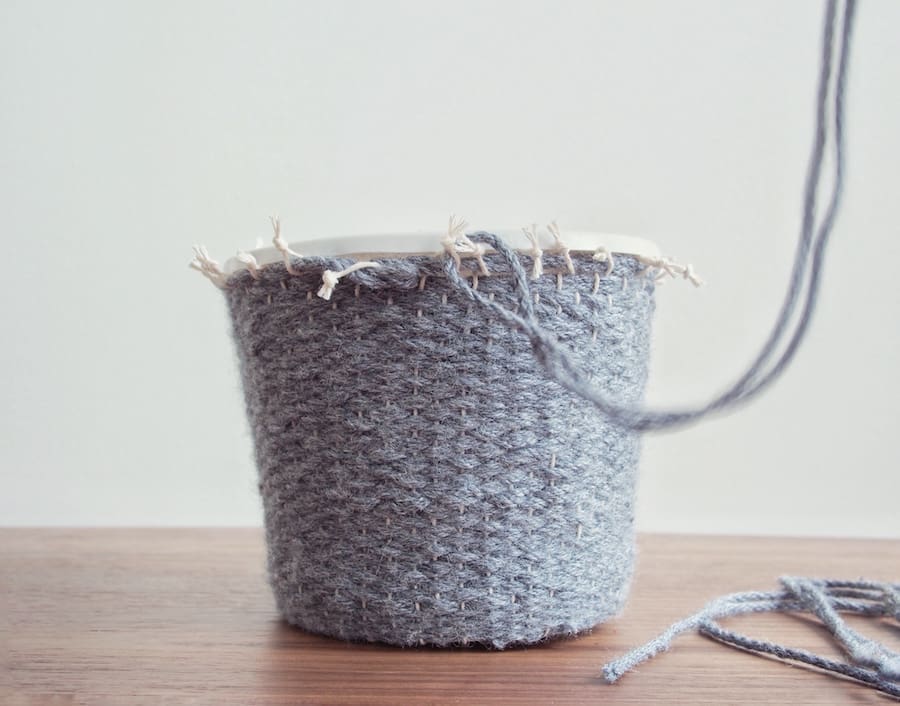
3. Begin your weft with one single chosen yarn and weave through each warp individually. This is the only specific instruction I will give you in terms of what style or design you would like to create. I have suggested this because it will keep your warp tight and in shape thus allowing you to become more creative with other weaving techniques later on.
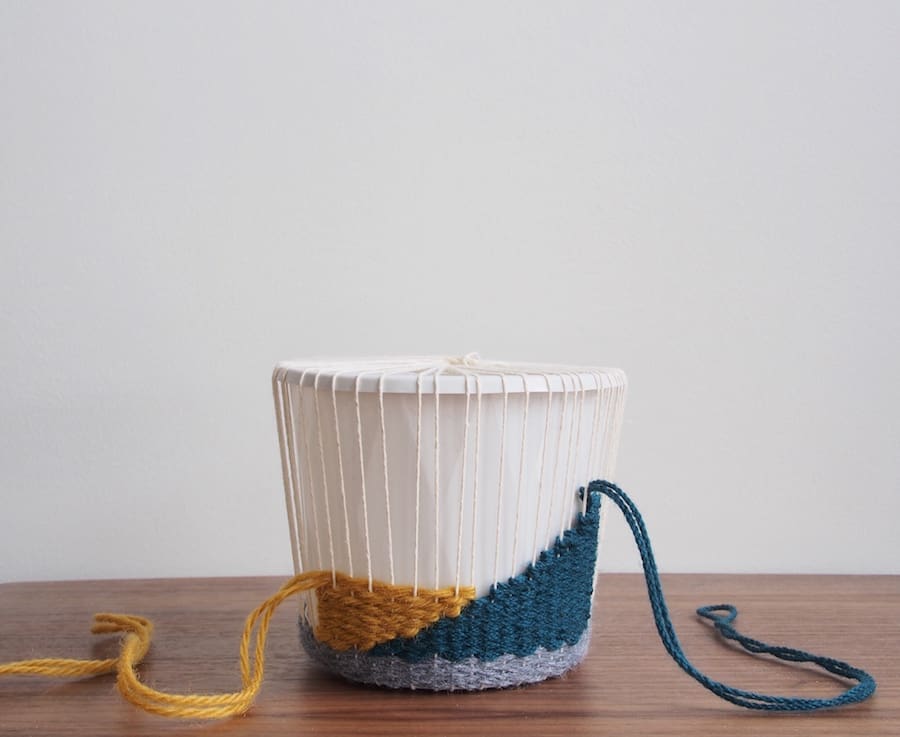
4. Let the fun begin! By working on a curved medium such as this plant container, you will need to think about how your design will have a different outcome compared to a flat surface loom. Your creative mind is limitless!
Remember, if you are doubling up your yarn, always begin with the loose ends so that you are left with a hook once you are nearing the end. That way you can simply hook another piece of yarn through it to continue with ease.

5. Reposition your warp. After a while, you will notice your warp will become uneven. It is common that some of the warp ends up bunched up and others too far from the last. Reposition them evenly so that you can continue weaving without leaving holes at the end. Repeat this step as you progress in your design.
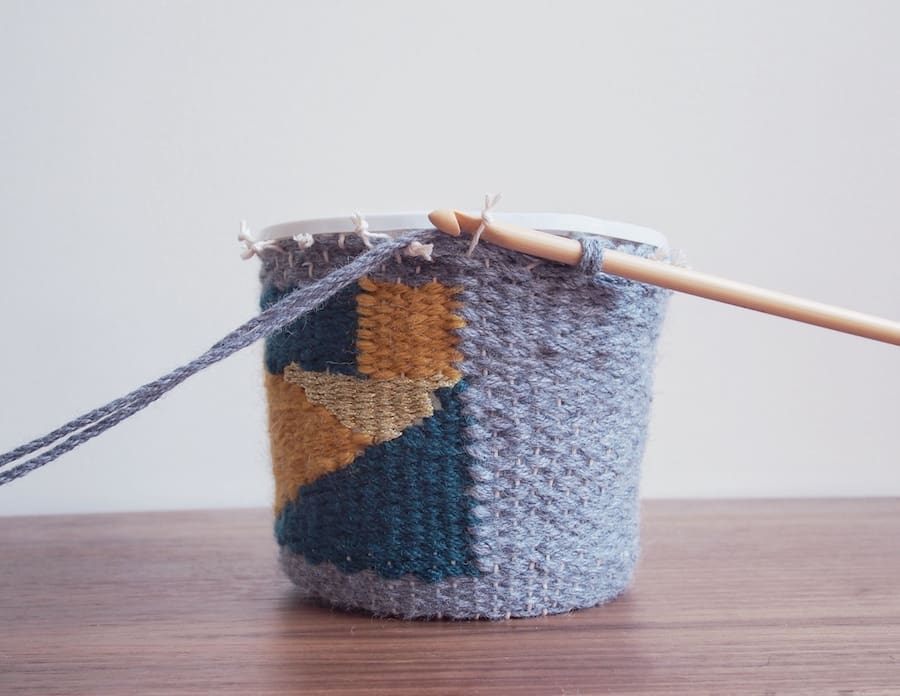
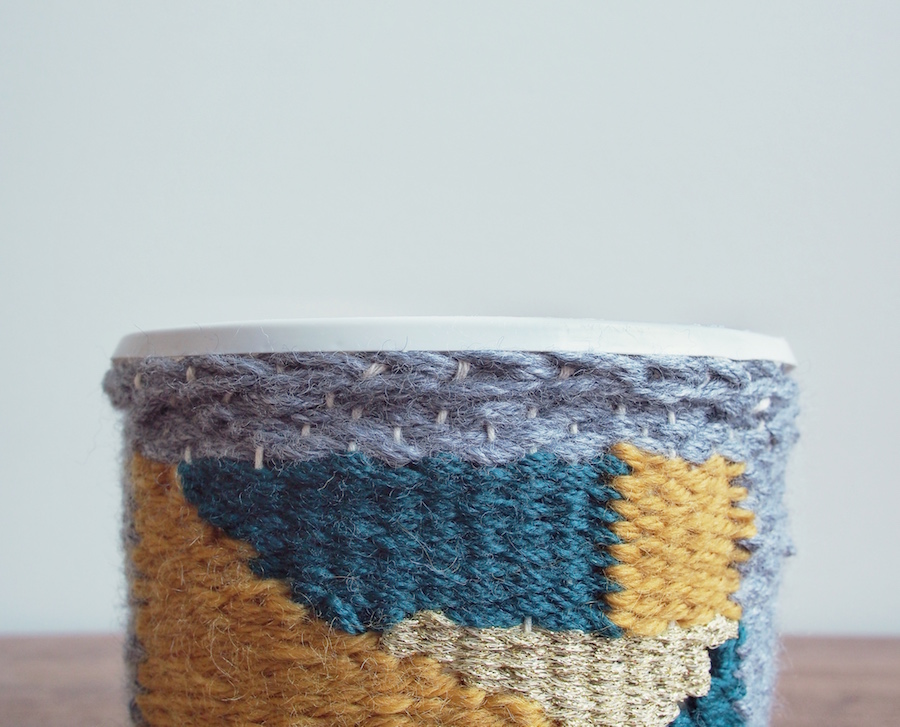
6. Once you have completed your design. You will need to cut your warp from the top of the container. It should be relatively even as shown in the photos below. When you cut the warp, make sure you cut it at the point closest to the centre as you can. This will allow you the most length to knot with, in order to finish off your piece.

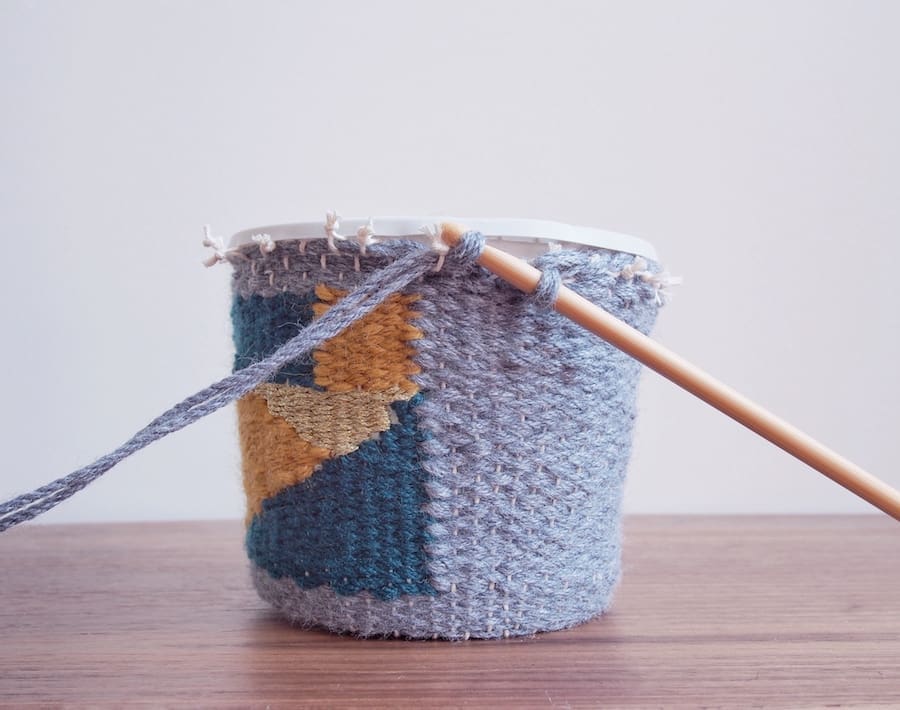
7. Now you can begin to knot the loose warping ends. Take two warp strings that are closest to each other and knot them together. Try to not make the knot too close to the weave. You want to leave approximately 5mm so that you can fit a crotchet hook through it.

8. Finishing off. This is an optional way of finishing off your planter cosy. If you are not comfortable with crochet hooks you don’t have to finish off in this way. In fact, you can leave the knots as they are and your weave will not fall apart.
Begin by using a piece of yarn approximately two arms length. Pull one end through a warp knot that you have made. Put your hook through the same hole from the right side. Wrap the yarn (that is doubled up) over the hook. Pull this piece of yarn through the hole with your hook.
9. Once you have done this, you should have the doubled up yarn still on your hook. Leave it on the hook and stick the hook into the second knot to the left (as shown in the photo below). Repeat by wrapping the yarn over the hook and pulling the yarn through. You will have 2 x doubled yarn pieces. Using your hook, pull the left yarn through the right yarn so that you are left with a similar finish as the third pic below.
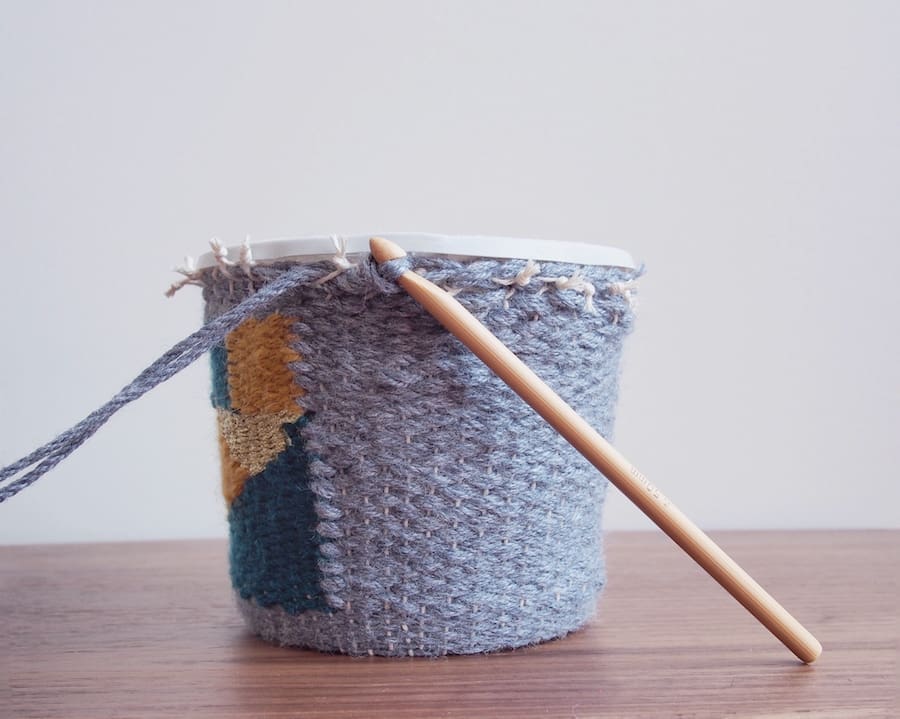
10. Repeat ‘Step 9’ working around the container anti-clockwise through your warp knots until your finished off ends look like the photo below. Tie a knot with your two loose yarn ends to secure it.
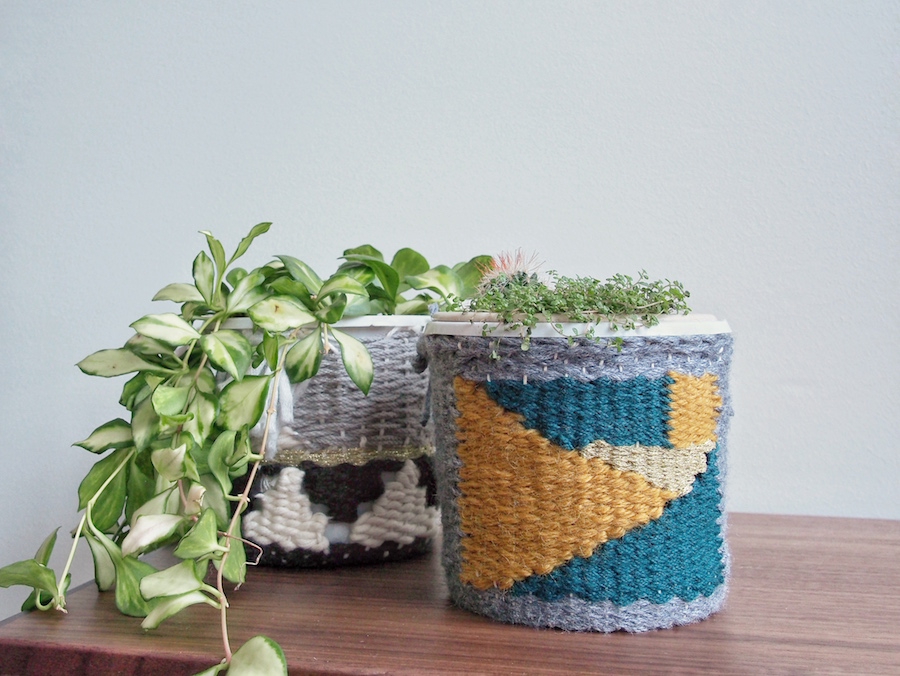
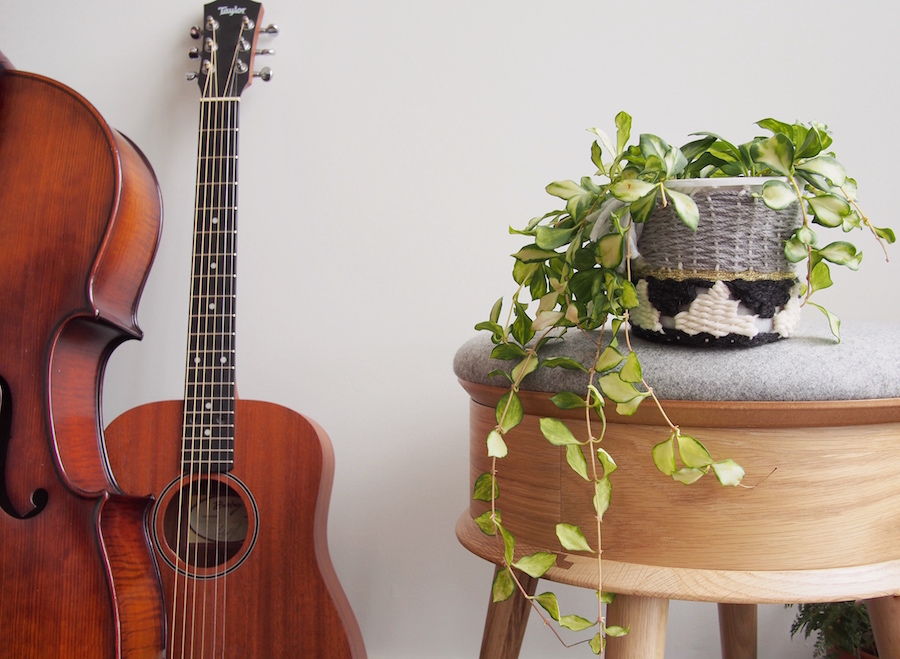
I have made 2 different cosies for you to see. The black and white one does not have the crochet finishing.
If your woven planter cosy looks anything like it — congratulations! You have completed your planter cosy!
Wow, thank you Haily for this fab woven planter cosy tutorial! Goes to show there’s a lot more involved to weaving than first meets the eye. This is a skill we’ve always wanted to learn so hopefully you’ve been inspired to give it a go too! What were your thoughts on this DIY? Let us know in the comments below.
About the author
Haily Tran founded B for Brian in 2011 to raise funds for the Lort Smith Animal Hospital. She is a creative who makes woven tapestry wall art and is inspired by her love for colour, fibre, nature and music. Today, B FOR BRIAN has grown into a group of over 20 artists and makers to bring you a curated collection of painted artwork, handmade tapestry tools, ceramic pieces, wooden and linen homewares as well as natural body products.
Instagram: @b_for_brian_
Check out more DIYs here
This DIY was first published in August 2016 but given many of us are currently isolated at home, we’ve reshared it 🙂