


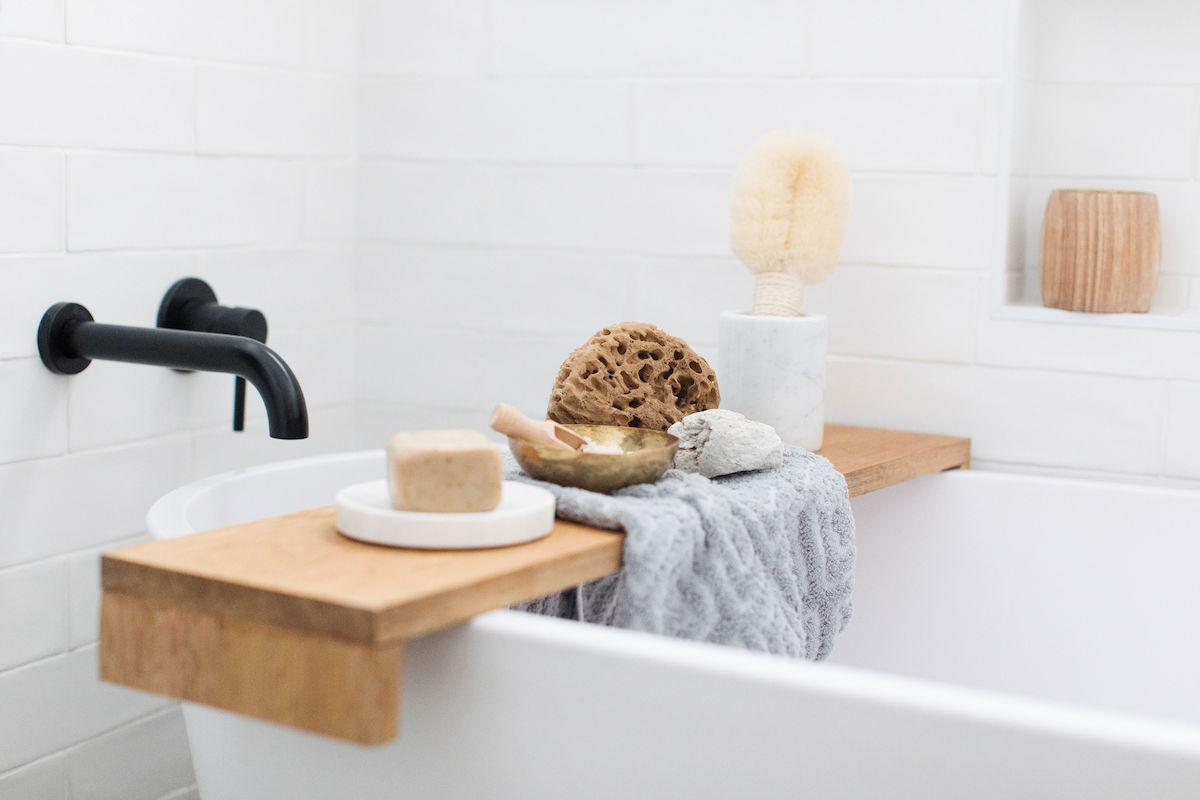
Having a bath is such a relaxing experience, the perfect way to unwind… until the book you’re reading gets all soggy or you find you have nowhere to rest your drink! Oh the stress! Unless you have a bathtub shelf.
These shelves or trays sit across the top of your bath and can hold anything from books or magazines to candles and body brushes.
If you’ve looked at buying one, you’d know they often cost hundreds of dollars but today we’re going to show you how to make a beautiful hardwood bathtub tray for peanuts!
Related article: Bathroom DIY ideas that are actually stylish
Related article: DIY grid tile tissue box cover: Making flu season chic!
Items you will need:
- Piece of hardwood (we bought a piece 1.8m long by 18.5cm wide and 1.8cm thick)
- Saw (or have it cut to size in store)
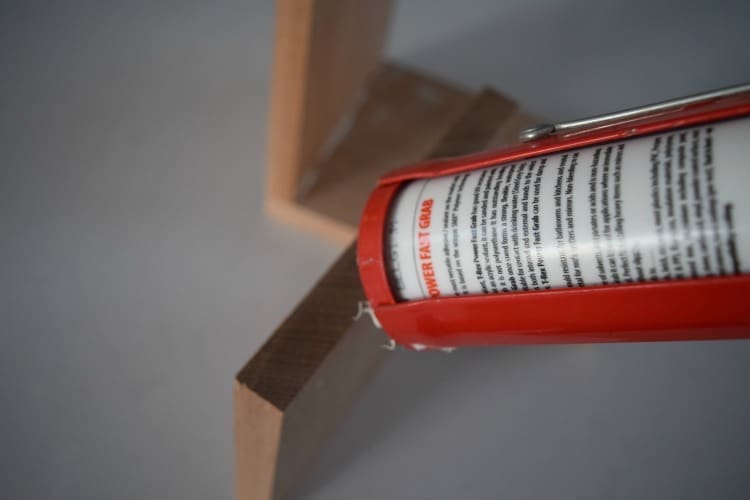
- T-Rex or timber superglue
- Timber oil or varnish
- Felt floor saver stickers
- Measuring tape
- Sandpaper
- Old rag
Steps:
1. Measure the width of your bathtub from each outside edge and cut the timber down to 5cm longer than the width of your bath.
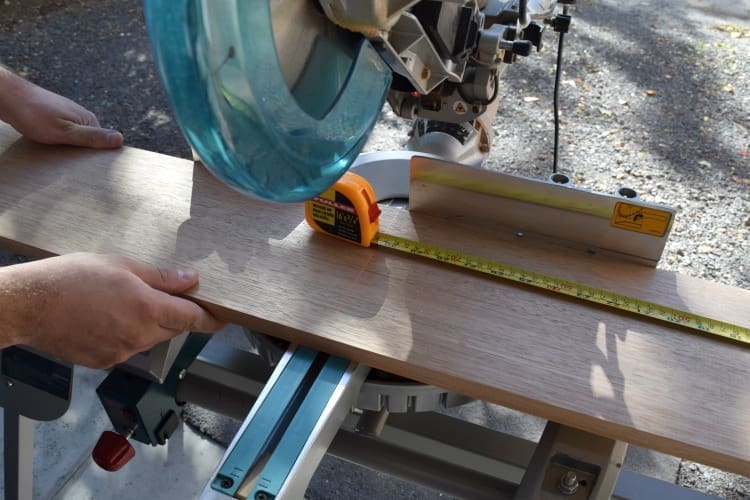
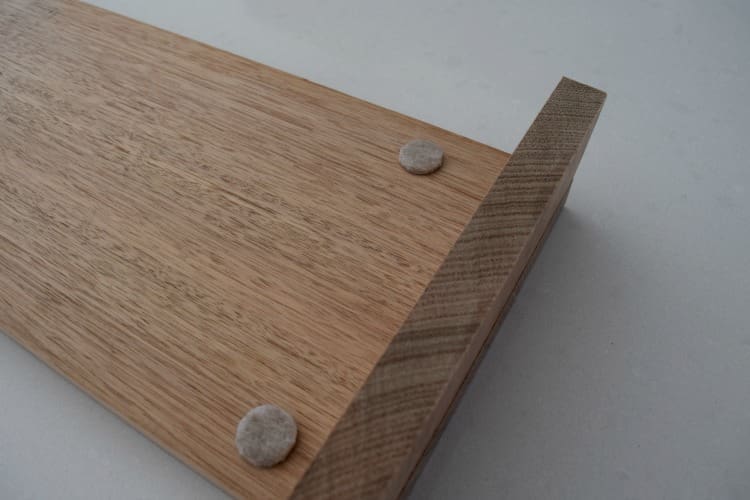
2. Cut two shorter lengths that can be glued to the underside of the plank (this will prevent the tray falling off your bath). You could make these as short or long as you like but we opted for 5cm lengths. Glue the shorter lengths to the underside of your board.
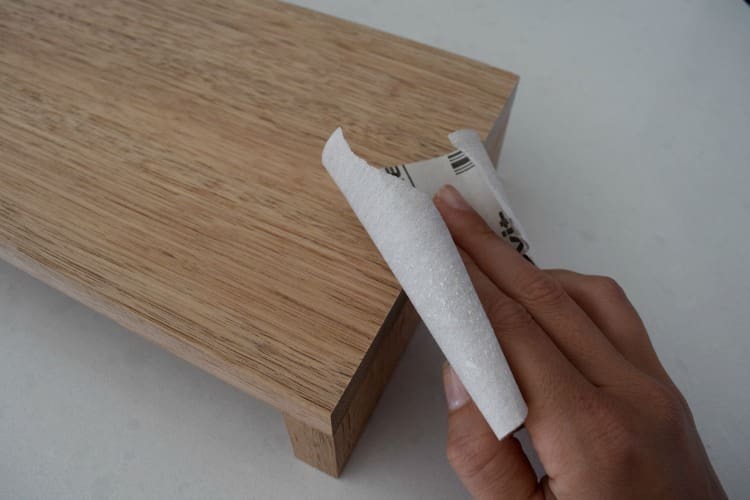
3. Once dry, lightly sand the tray with fine sand paper.
4. Apply felt feet to the underside of the tray to prevent it from scratching your bath.
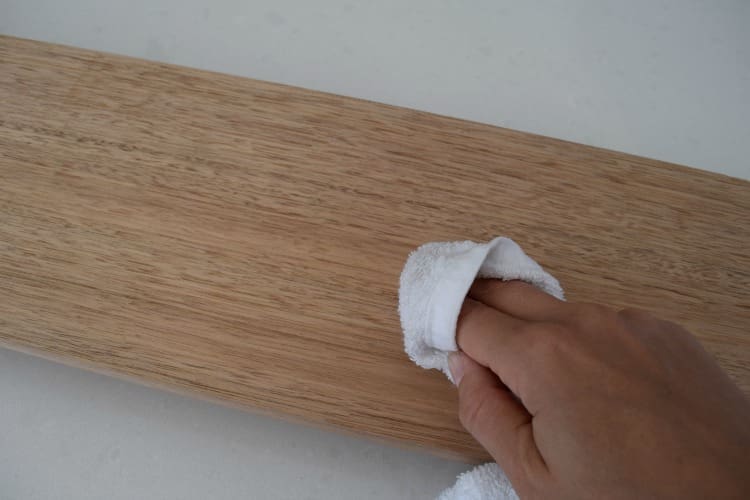
5. Clean and finish by applying a light coat of timber oil or you could stain the timber in varnish if you prefer a darker timber look.
It’s that easy! Now you really can relax and unwind in the bath 😉
Tips:
– Go easy on the glue as you don’t want it to seep through to the outside timber — it will be difficult to remove and look messy.
– If you’re handy with the power tools, you could try a more challenging version of this bath tray and mitre the edges at a 45 degree angle. We’ve also seen bath trays with a special cut out to hold a wine glass which is another idea for the more advanced DIYers.
If you like this tutorial, why not ‘Pin’ this image to your Pinterest account so you can easily find it when it’s time to make it.
More DIYs for the home

Such a great idea! Looks so effective too 🙂
Thanks Nick, we always love a DIY that looks like the real deal but saves big bucks!