


We love discovering new talent and one clever creative who recently caught our eye on Instagram is Brigid Donelly with her playful and cheerful hand lettering and watercolour artworks.
Today Brigid is here to teach us how we can create our own with her DIY hand lettering for beginners tutorial.
Words by Bridget Donelly
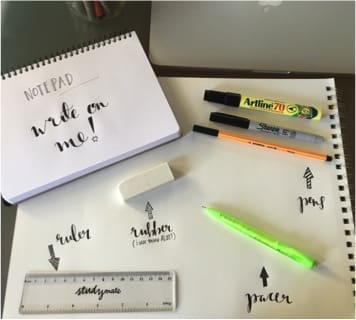
Items you will need
- Pencil or pacer (I prefer pacer for a lighter sketch)
- Visual diary/notebook (I used Windsor & Newton A5)
- Fine point pen (I use Stabilo point88 fine 0.4)
- Thick marker pen (any Sharpie or Artline pen is fine)
- Rubber
- Ruler
- Extras: print a few of your favourite fonts from dafont.com or similar
Steps:
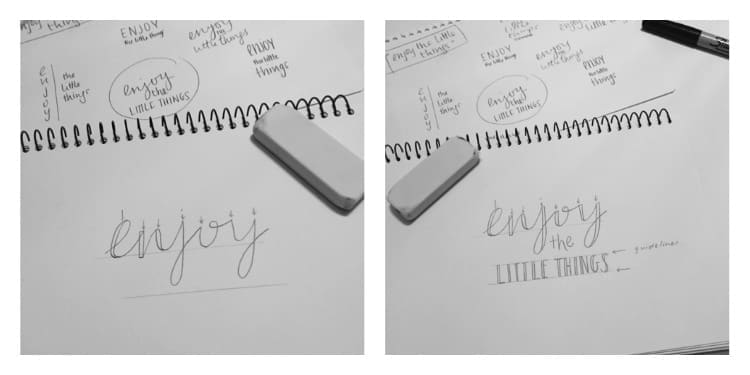
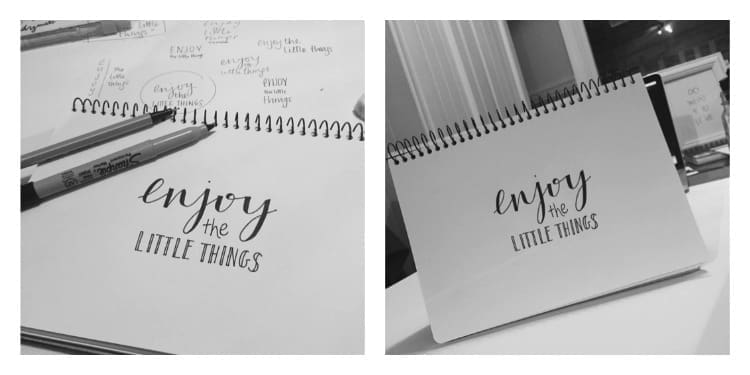
1. Choose your quote. For this tutorial I will be using “Enjoy the little things”.
2. Start by sketching a few different compositions of the quote. No need to do these perfectly, just try a couple of different ideas and see what works — be creative!
3. Once you choose your favourite composition, focus on the style of lettering you want to create. I will be using a faux calligraphy style for ‘enjoy’ and a smaller basic type for ‘little things’. It is important to think of what words you want to emphasise in your piece and choose the style accordingly. Rule a general outline on the page and start with the major word/s (a rubber will be your best friend during this stage — use it a lot!!).

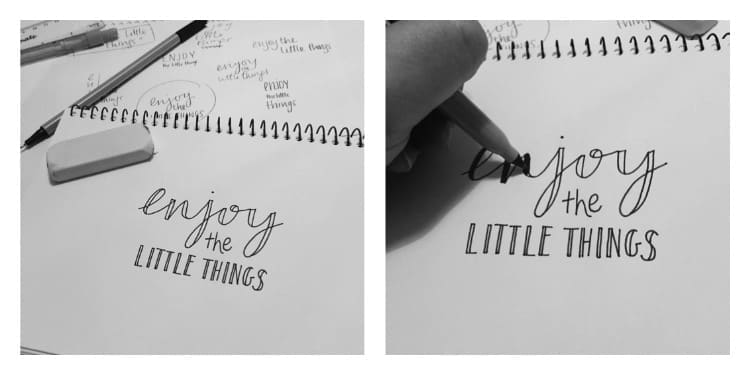
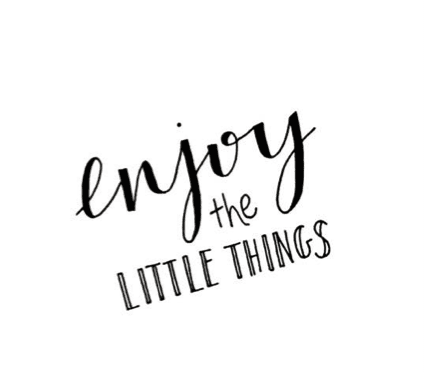
4. To do faux calligraphy you need to write your word in cursive then go back and draw an extra line on every downstroke as shown below. Once you fill in the thick lines it will give the illusion of beautiful calligraphy!
5. At this point I realised my guidelines were too close together, so use your trusty rubber to redo! I have chosen to make ‘little things’ a tad smaller and have ruled in a second guideline to keep some consistency. Similar to the double stroke faux calligraphy, I have created a plain type with a double line but this time I will not be filling in create some contrast.
6. It is important to make sure you’re happy with your pencil sketch as once you ink your piece there is no going back! The first pen I always use to ink my drawings is the Stabilo point88 fine 0.4, it may not be an expensive, fancy marker but it doesn’t bleed and creates a steady fine line which is great to build on — as a beginner finding inexpensive tools is great while you are trying to find your style!
I like to ink the outline of the piece completely and then fill in the downstrokes. Use the fine Stabilo pen to fix up any imperfections but remember hand lettering is not supposed to be perfect so don’t worry too much!
7. Once you have finished your piece, I like to take a photo/scan it and use the Ludwig filter and full contrast to intensify the whites and blacks. You now have a digital image which you can use as a print or card! For a more professional looking print I suggest using cardstock or a thicker paper (approx 180gsm).
8. Voila! You have your very own creation! Remember, hand lettering is not about perfection but creativity — practice makes perfect and lettering something new and challenging each day is the best way to improve!
If you’d love to learn even more about hand lettering, Brigid recommends the ‘Better Lettering’ six-part course by Caroline Kelso where she learnt these skills. You can also shop her hand lettering designs on Etsy.
You might also like to check out the handlettered works of Shenton & Thrello here.
About the author
Bridget Donelly is a Brisbane-based Graphic Designer and Hand Letterer. She creates custom prints and invitations, including hand lettered wedding invitations and stationery.
Instagram: @b.donellydesigns
thank you for this! we are staging our home to sell and i used this tutorial for inside some ‘neutral’ picture frames. I even changed my quote and used ‘enjoy the little things’. thank you!
Hi Kelly, so glad this tutorial came in helpful and what a great idea! All the best selling your home!