


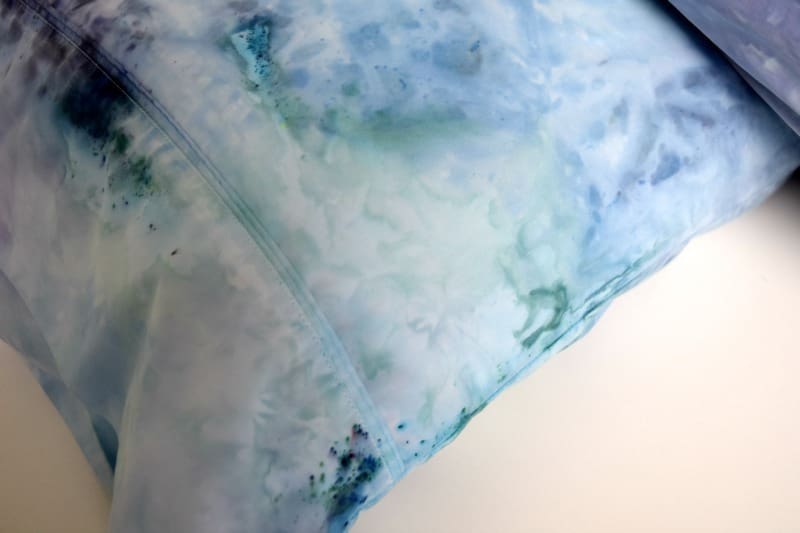
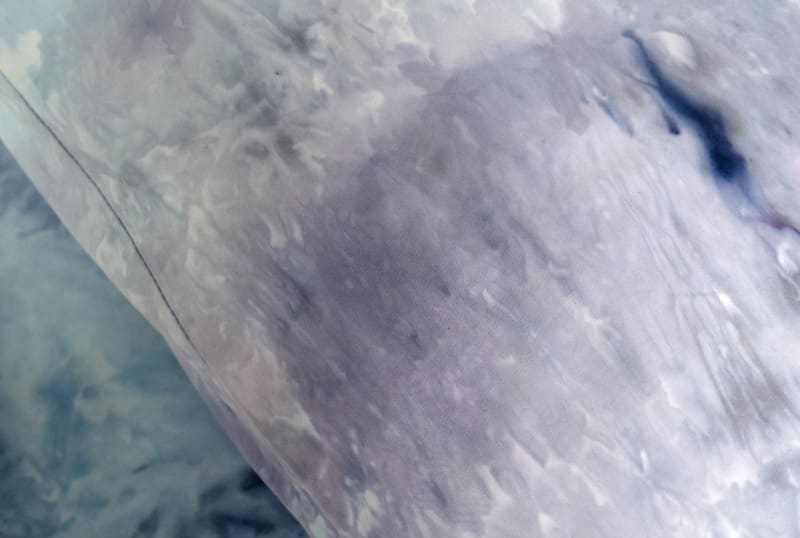
Ever since we interviewed Emma Cleine from Lumiere Art & Co last year and she told us about ice dyeing, we have been dying to try it out (excuse the pun 😉 ).
Emma told us it’s fun to do but it isn’t until you see the results that you get super excited! One of the best things about this technique is that every item you dye will be completely unique and the results will always surprise you.
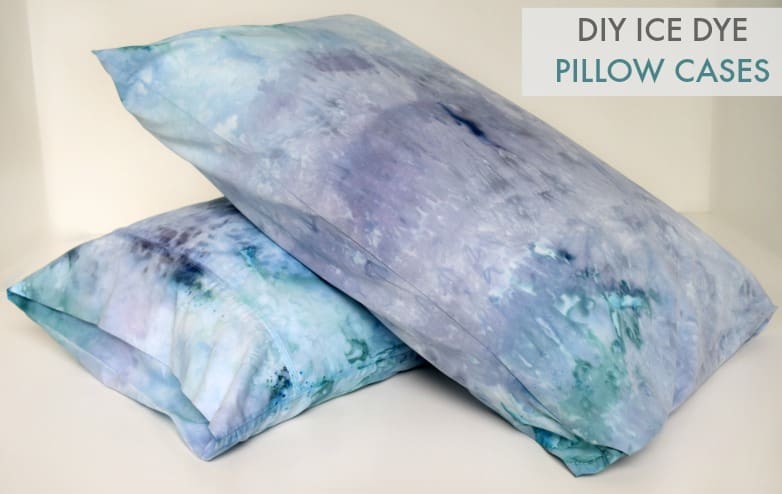
Today we’re dyeing old pillows but the possibilities are endless — you can create cushions for your living room, bedspreads or even tablecloths. It’s also a great technique to use on older items, like bedding that’s slightly discoloured, to give it a fresh new look!
Related article: Make your own dip-dyed felt vase
Related article: 14 of the best home decor DIYs using rope
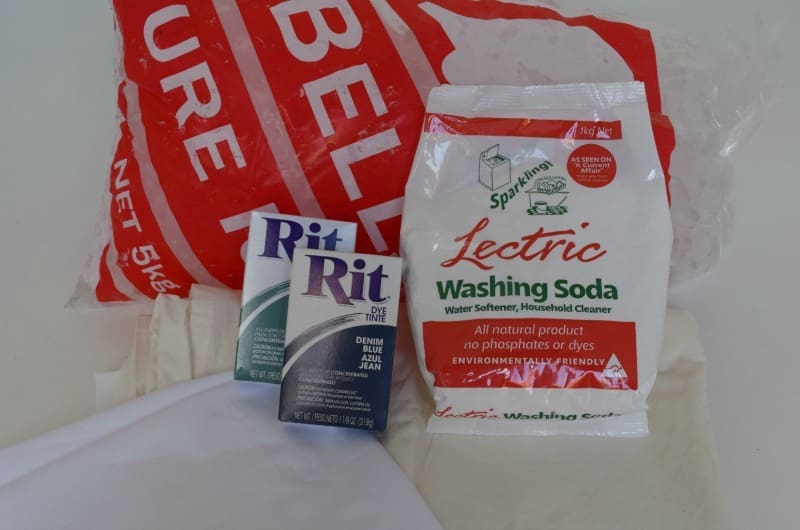
Items you will need:
- Pillow cases (or any textile item you want to ice dye)
- Washing soda (also known as ‘Lectric soda’, ‘Prepact’ or ‘Soda ash’)
- Oven rack or cooling rack
- Tub big enough for the cooling rack (we used the laundry sink)
- Gloves
- Ice
- Powdered dye
Steps:
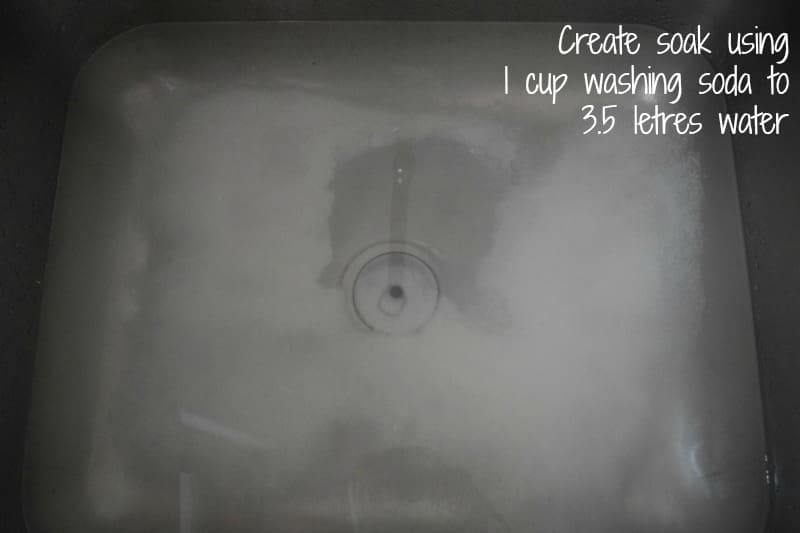
1. Prewash the item you want to dye and then soak it in a tub of washing soda mixture (1 cup soda per 3.5 litres of water) for 20 minutes.
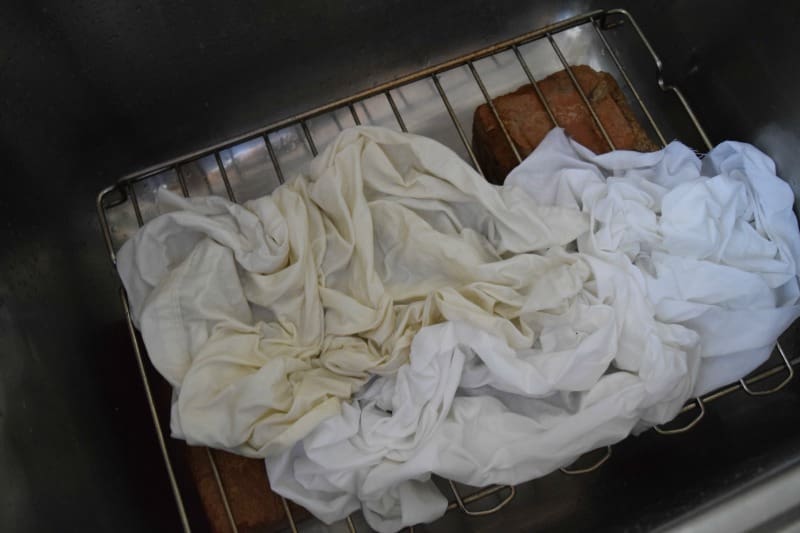
2. Wearing rubber gloves, remove the fabric from the bucket and ring out water.
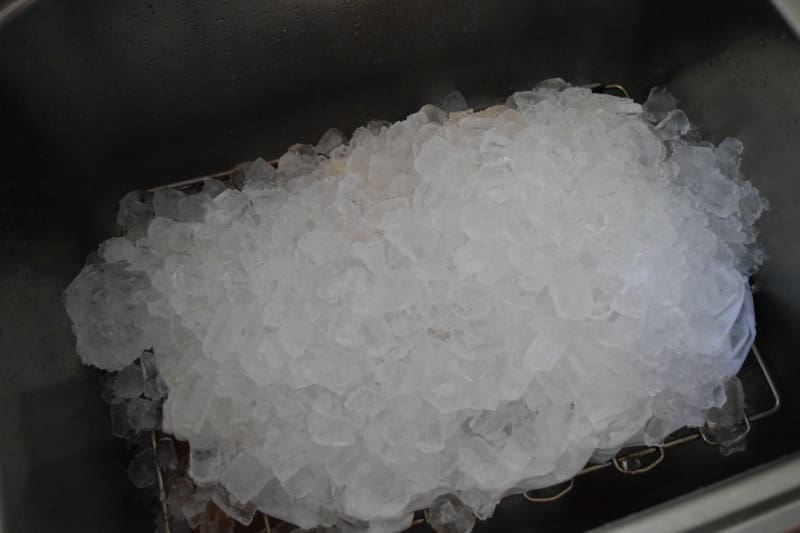
3. Place fabric on cooling rack in tub (we lifted our rack up by placing bricks beneath). Scrunch or arrange the fabric how you want.
4. Cover fabric in ice (you can use ice cubes or crushed ice for different results, or a combination of the two!).
5. Sprinkle dye powder over the ice until you are happy. You can use as many colours as you like but we opted for shades of blue. (To create the two pillowcases and the piece of fabric, we used approximately 1 1/2 tablespoons of dye — so go easy!)
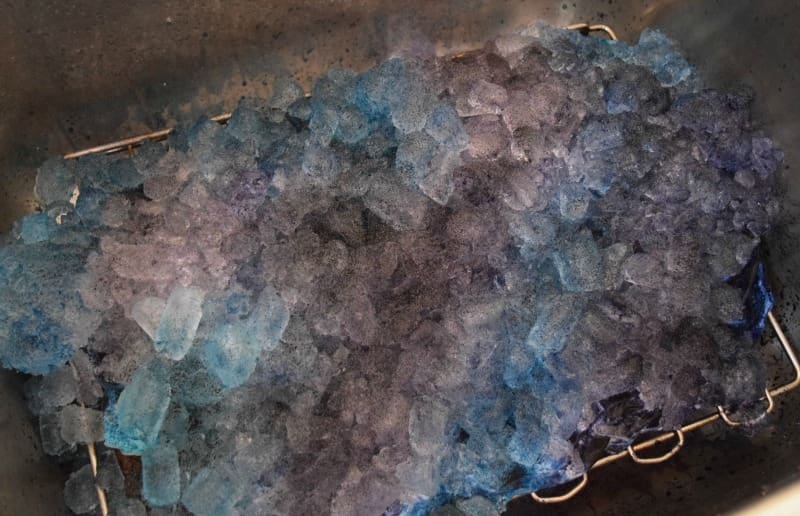
6. Leave for 24 hours or until the ice is completely melted.
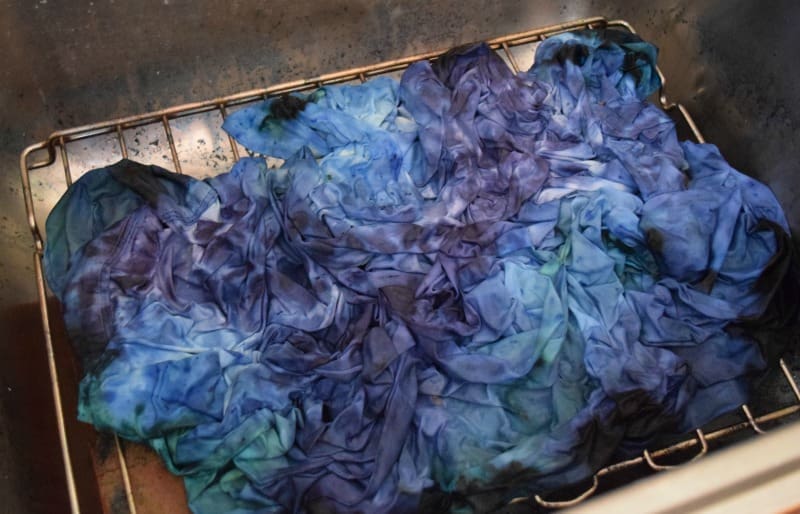
8. Rinse the fabric under cold running water until the water runs clear. Then wash in the washing machine.

Hot tips:
– Cotton generally gets the best results but you can use a range of natural fabrics that absorb dye. Polyester will not get the same results unless you buy a special dye.
– Wear old clothes or protective clothing as things can get messy!
– Take it easy with the dye as it’s strong stuff, you only need a light sprinkle!
What do you think of our DIY ice dye pillow cases? What will you ice dye? Tell us in the comments below!
Hi ! I am from Chile and I´ve never heard washing soda…..do you think I can substitute with baking soda ?? anyone knows ??? thanks !!
Hi Francisca, we hadn’t heard of washing soda before either but when we went to the supermarket we did find one small bag tucked away on the bottom shelf so it is worth double checking to see if it’s available. The only use for the washing soda is to completely clean the fabric without leaving any soapy residue so we would suggest washing the fabric in a normal load and then again doing a rinse with white vinegar. You could also try by skipping this step and just increasing the amount of dye you use. Hope this info helps!
It’s so fun and we love the results! Next we’re going to try one with contrasting colours like blue and orange, and another one just with black dye to get a marbled black and white look 🙂
We’d love to see the results of your ice dyeing Mikaela!!
This is such a cool and easy DIY =) I might include this technique in a future project kit I think! x
I love ice dyeing, some really cool results! Ive also done it by making ice cubes from ready mixed dye for some fun patterns!
Thanks Charlotte and love the products on your blog!