Today we have Laura Varsanyi here sharing her clever and stylish DIY marbled prints tutorial. Laura has a passion for updating traditional craft disciplines and miniaturising and modernising them.
Related article: DIY crystal artwork: Natural crystal pieces in box frame
Related article: DIY outdoor wall art: Make your own abstract wall art
Words by Laura Varsanyi
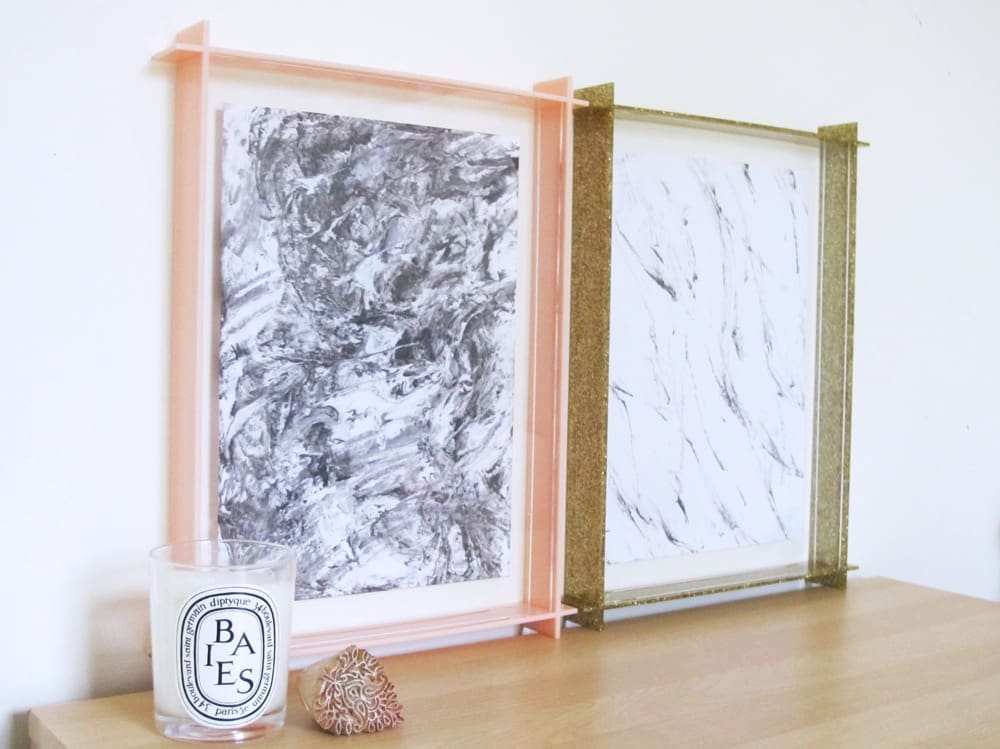
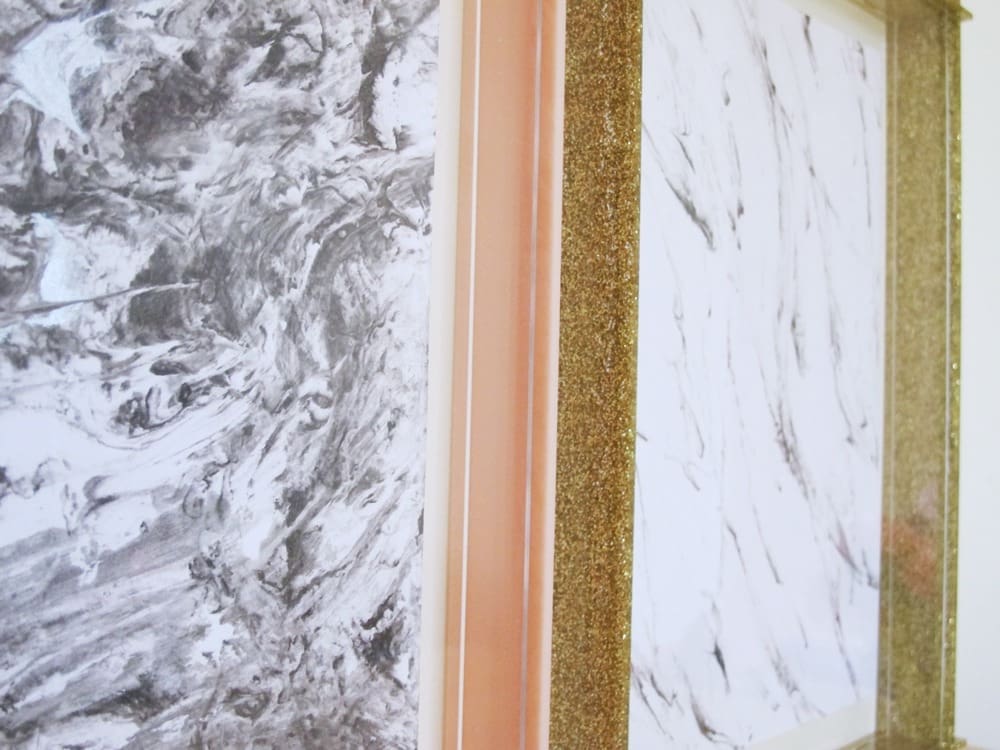
White Carrara marble, blush pink and gold are just such an irresistible combination. It’s so easy to make and you can get a very elegant result.
Marbled printing is often done with oil paints and turpentine. Using shaving foam as a carrier is easier, more fun and smells better!
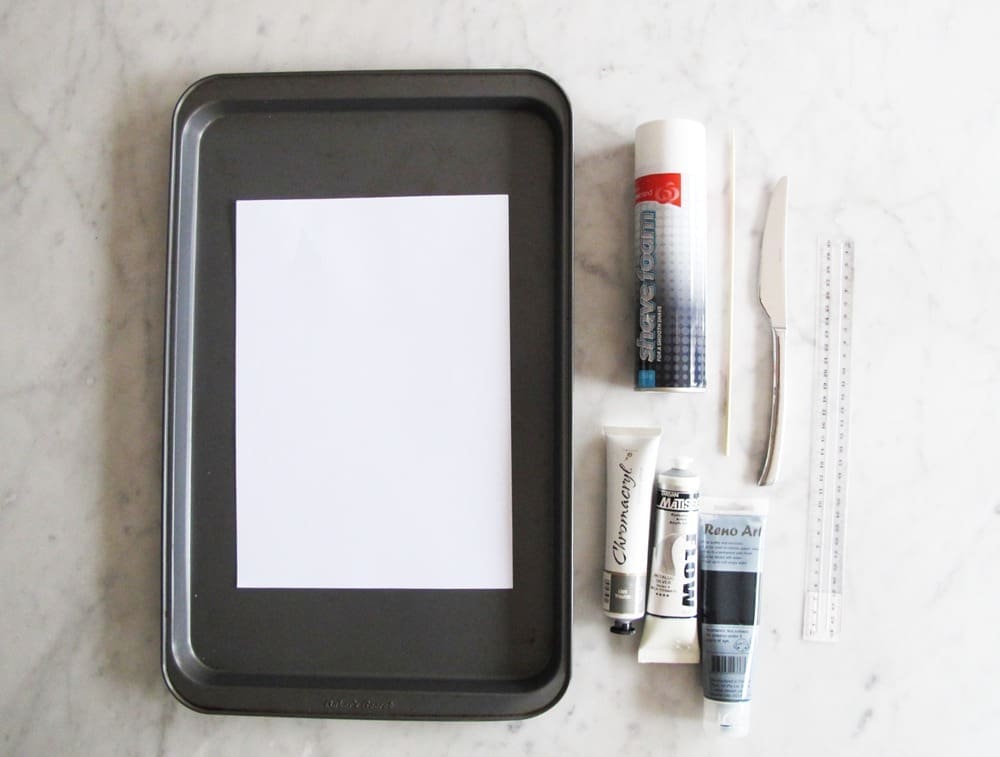
Items you will need:
- 2 x flat trays larger than the size of the print you want to make
- Shaving foam
- A4 paper (a slightly thicker GSM is preferable)
- Acrylic paint (I used black and silver but this project also looks great in bright neon colours)
- A butter knife
- 2-3 wooden skewers
- A plastic ruler and/or your old library card

Steps:
1. Lay out everything you need for this project so you can work without fuss.
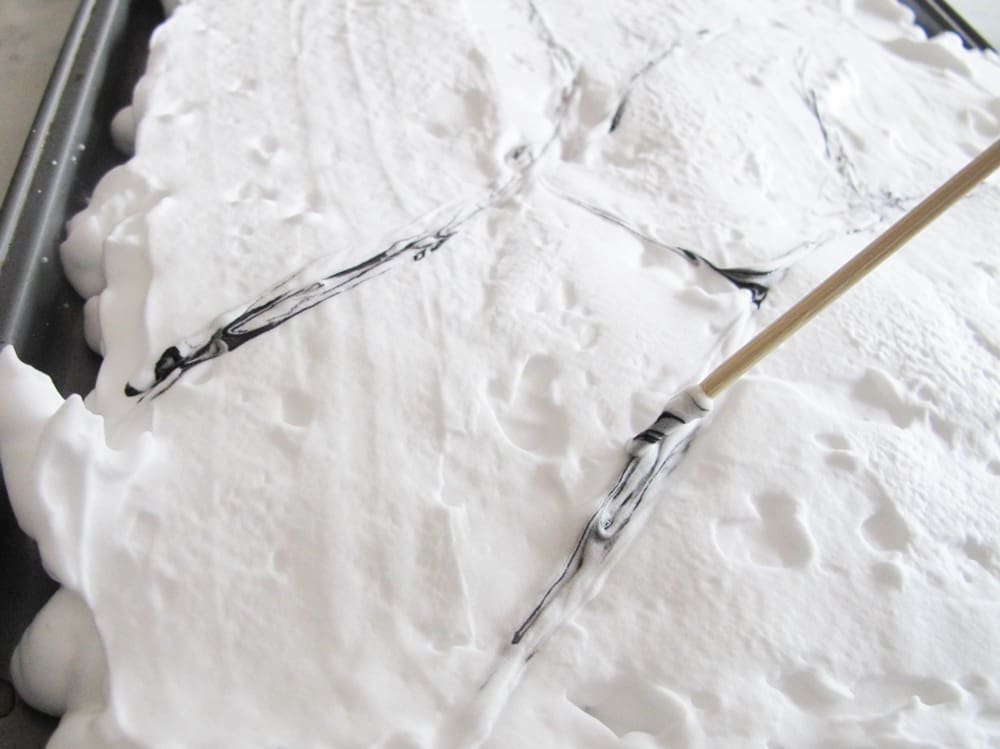
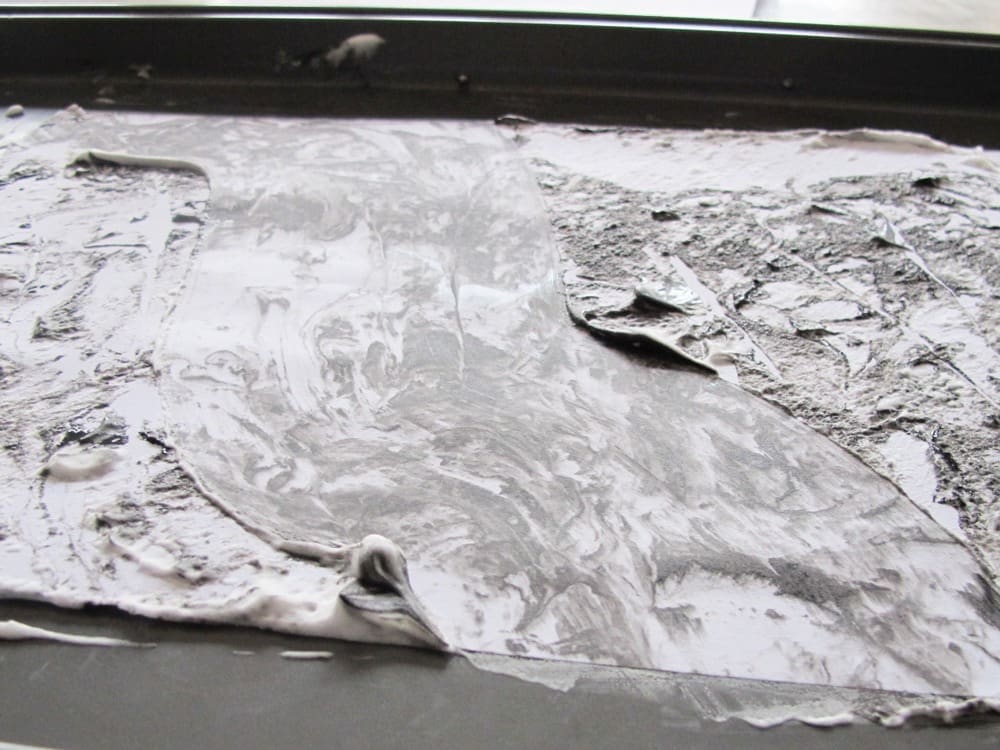
2. Fill one tray with shaving foam and slick it flat with the butter knife.
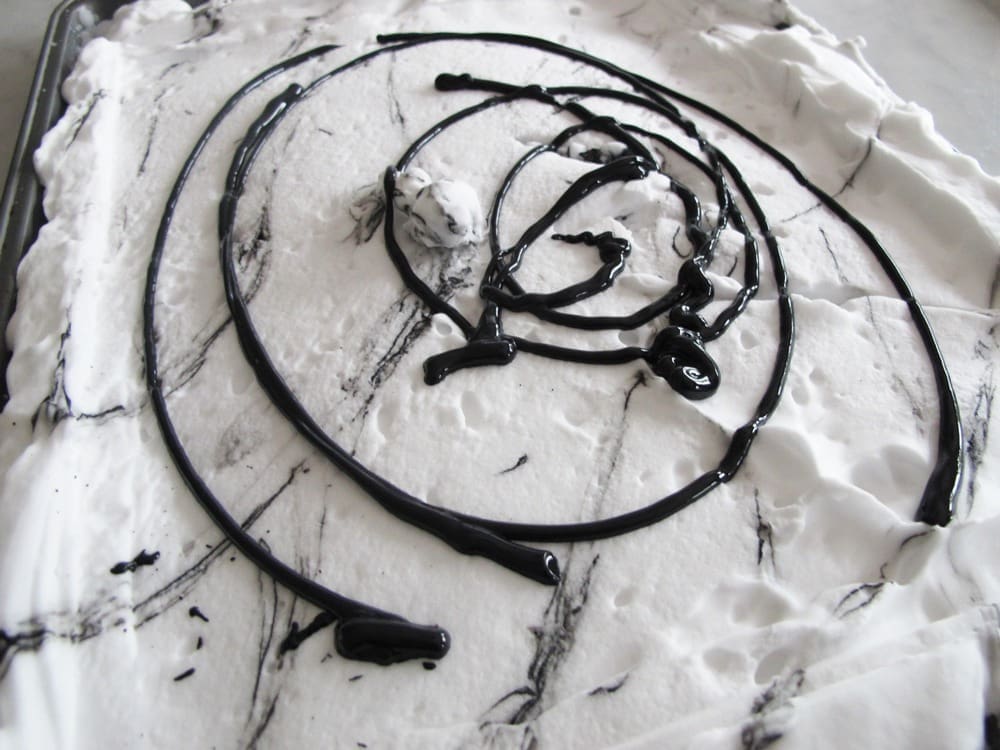
3. Get your paint and skewer and draw your marble veins into the foam. Do this by dipping the skewer into the paint and dragging just the tip of it through the foam. Try to create veins heading generally in the same direction to get a more realistic marbled result.

4. Press your piece of paper onto the foam and rub it all over with your fingers so all the paper is stuck to the foam.

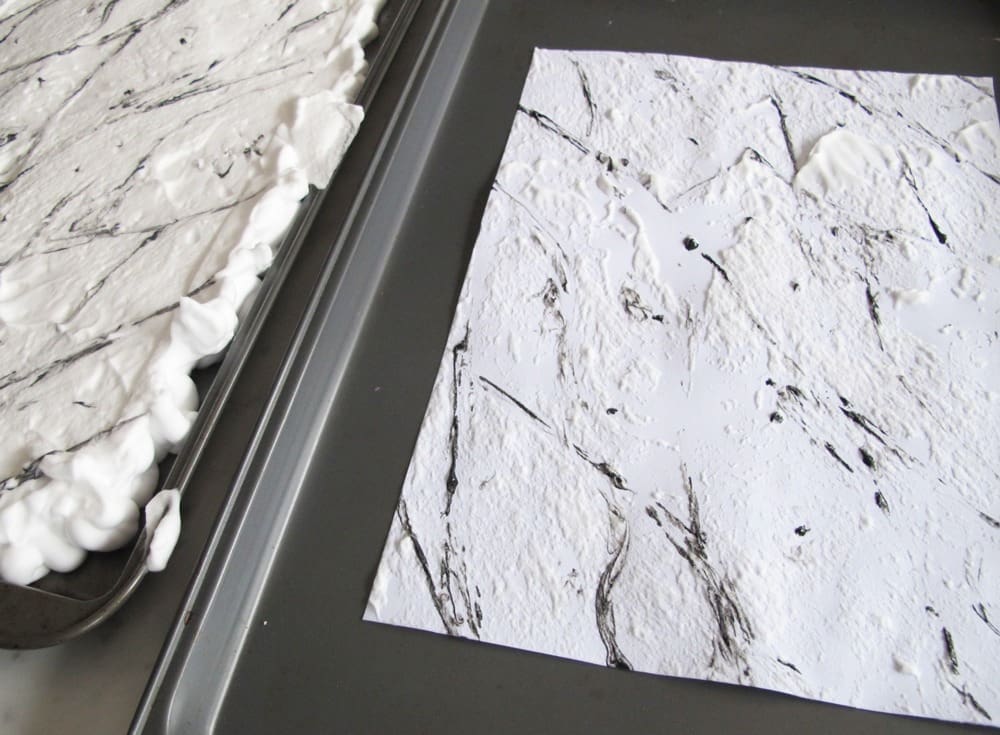
5. Peel it off and lay it on your second tray, facing upwards.
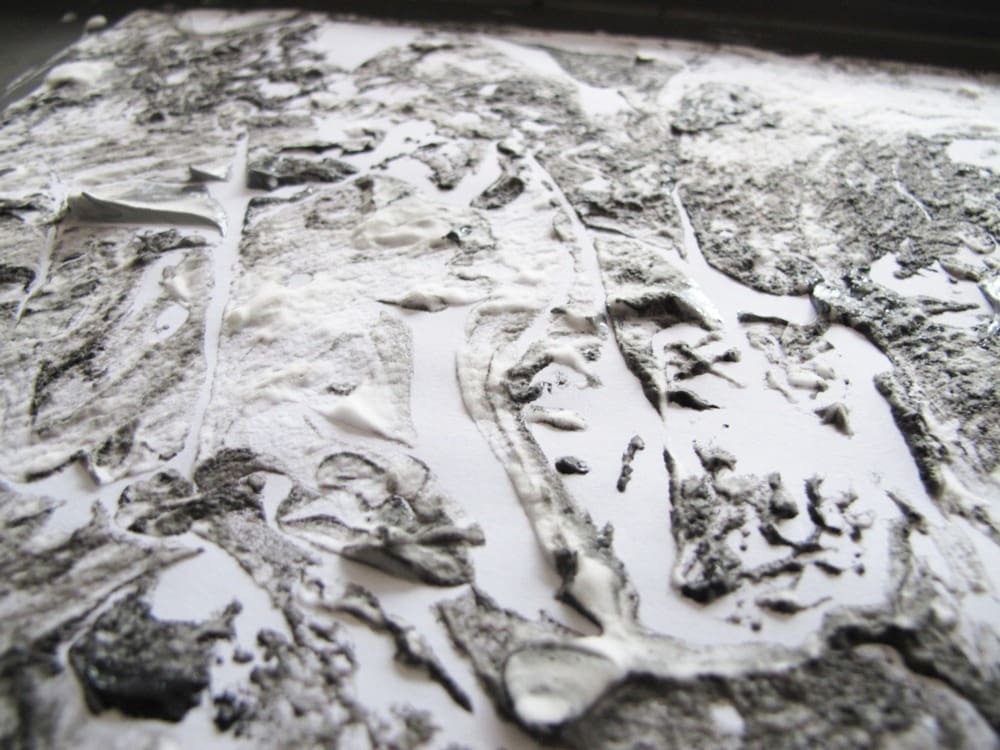
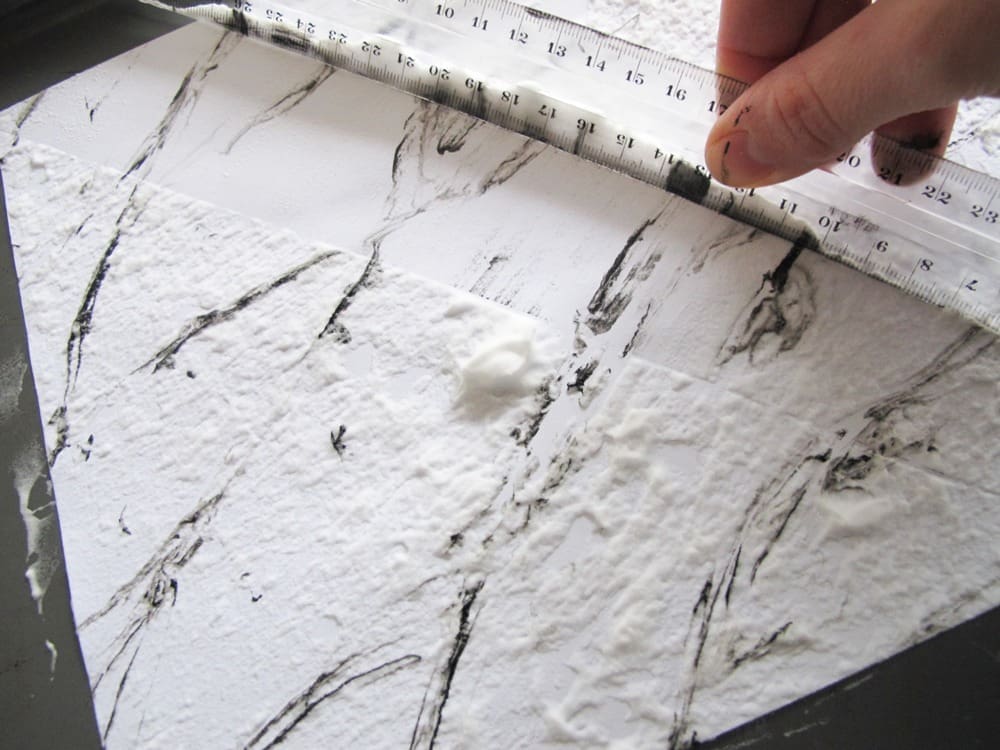
6. Using your plastic ruler or library card, scrape over the paper to remove the excess foam and paint. Make sure you scrape in the direction of the veins you painted. Avoid scraping repeatedly in the same spot as you will lose definition and may tear the paper. You can repeat steps 4-6 to make as many prints as you have paper!
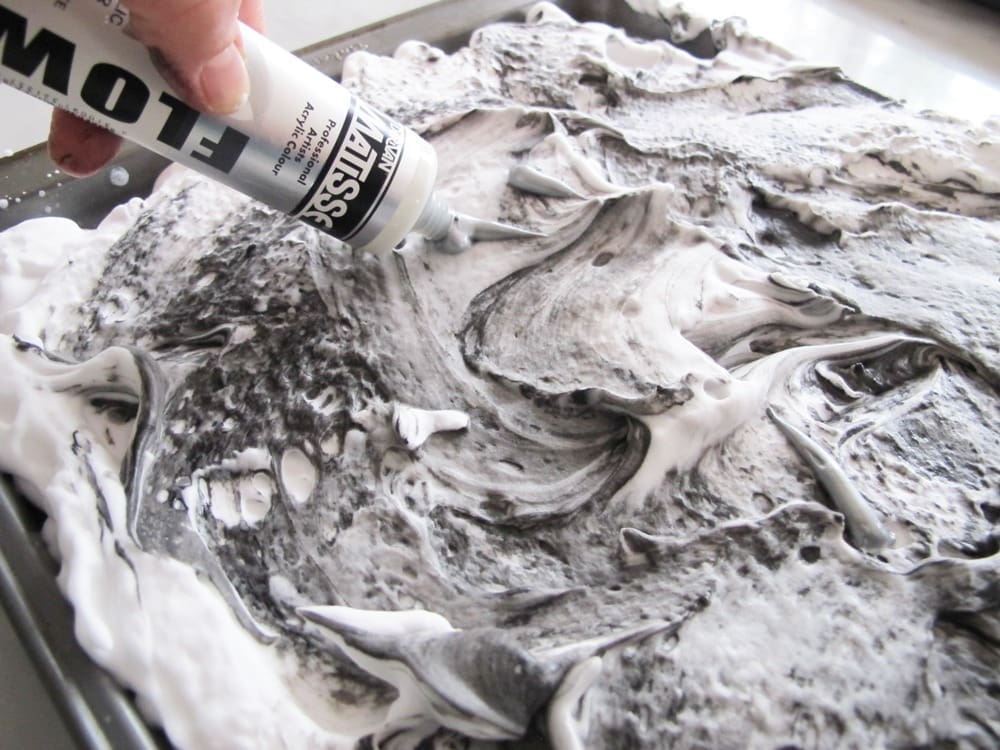
7. I then created an inverse marble print by adding lots of black paint to the shaving foam, mixing it through minimally, adding blobs of silver paint and repeating steps 4-6.

8. Set your prints aside to dry. They will curl slightly but once they are dry you can press them under a heavy book overnight.
Once you’ve made your DIY marbled prints you can even photograph them and print them up into cushions, smart phone covers, and wrapping paper.
Check out more DIYs