

With Easter fast approaching, I’m sharing a new tutorial to make these gorgeous and lush DIY speckled Easter egg bath bombs. These make a fabulous gift idea, especially if you’ve been looking for Easter gift ideas for adults!
You can customise this tutorial to create whatever scent, colour or style of Easter egg bath bombs you like. For example, you could create feminine and natural eggs by using dried flowers (think dried lavender or rose petals), or you could try something a bit more colourful by using different food dyes (love the idea of ombre or dip dyed eggs). You could also get decorative by incorporating sugared flowers or even body glitter — the possibilities are endless!
I love the minimalism of these eggs and the way they mimic natural eggs so I’ve kept with a black and white speckle theme. Watch this short video to see how I made them or follow the written instructions below!
Related article: Easy and elegant DIY Easter wreath
Related article: 5 fabulous Easter table setting ideas

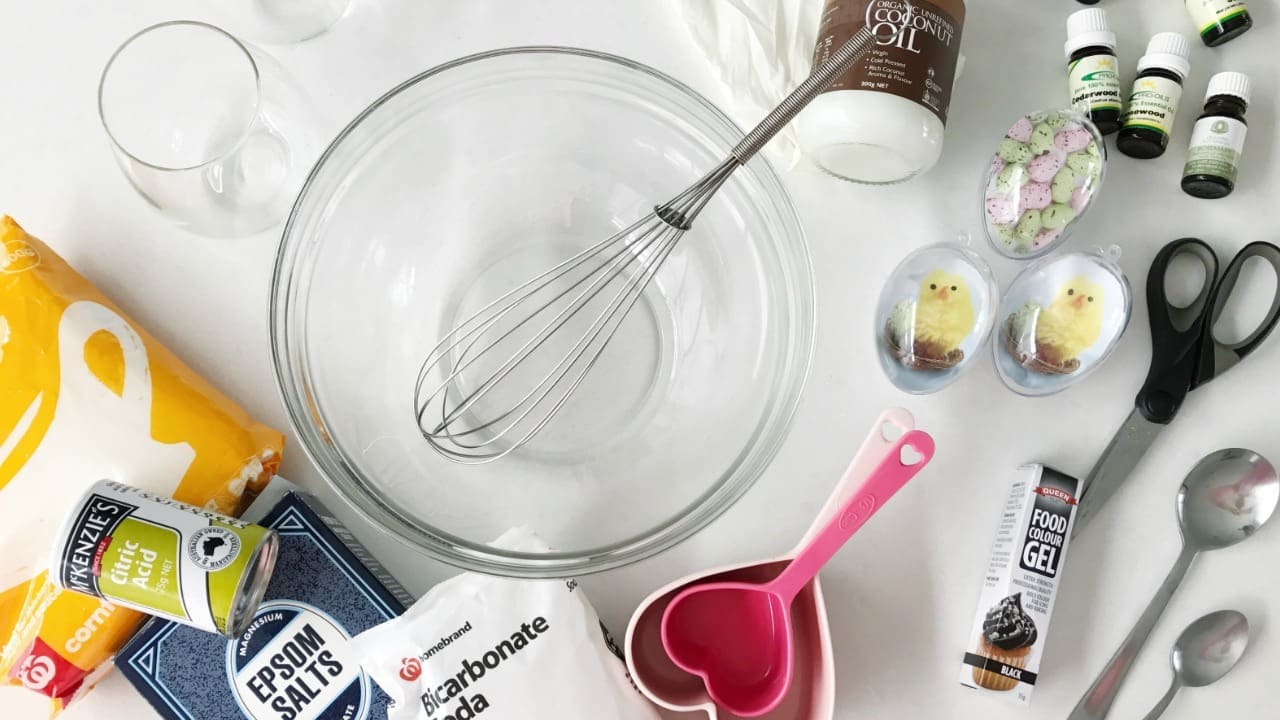
Items you will need:
- 1 cup baking/bicarb soda
- 1/2 corn starch/flour
- 1/2 cup citric acid
- 1/2 cup Epsom salts
- 3 tsp. coconut oil (or olive oil)
- 1 tsp. water
- 2-4 tsp. essential oil (depending on how strong you want to make them)
- Black food colouring
- 2 bowls (and additional bowls if you want to create more scents and colours)
- 2 small glasses/jars (and additional ones if you want to create multiple scents or colours)
- Spoon
- Egg mould
- 2 sets latex gloves
These quantities will make 3 large egg bath bombs so if you would like to make more, simply double or triple the quantities.

Steps:
1. Place all the dry ingredients (baking soda, citric acid, Epsom salt) in a bowl and combine evenly.
2. In the glass or jar, combine all your wet ingredients (coconut oil, water, essential oils) and stir well.
3. Divide your wet mix and place 1/3 into a separate glass and colour this with black food dye. You will need around 1/2 a teaspoon of dye.
4. Now put 1/3 of your dry mix into a separate bowl and add the black mix you just created.
Put your gloves on and use your hands to combine the ingredients well.
If you use coconut oil like I did, you can simply add all the wet ingredients (thick paste consistency) to the dry and begin mixing by hand but if you use olive oil or a different liquid oil, you will NEED TO TAKE THIS STEP SLOWLY and only add droplets of wet ingredients at a time, combine them well and then add more and repeat until fully combined. This will prevent the dry ingredients from reacting and fizzing because you want to save that until bath time!
You may need to add more black food dye to get the shade of black you want. Continue combining the ingredients until you have an even ‘wet sand’ product.
5. Then put on a fresh pair of gloves and combine the remaining wet ingredients to the remaining dry ingredients. Continue to mix until combined well.
6. Sprinkle the black bath bomb mix into the bowl with the white bath bomb mix and gently pack your egg mould. You want to overfill both halves and then firmly press them together until they click.
7. Use the back of a spoon to gently tap the mould and then free the bath bomb. DON’T rush this step or force the mould or you will break your bath bomb. Just keep gently tapping until the mould can slip away.
8. Repeat until you have created all your eggs. Allow these to dry for 24 hours before packaging or using them.
That’s how easy it is to create these luxurious DIY speckled Easter egg bath bombs! This DIY will create 3 bath bombs so as I mentioned above, if you would like to create more than that simply double or triple all of the ingredients.
We hope you love this DIY Easter tutorial. There’s plenty more Easter inspo to check out on the blog, including our favourite Easter decor and Easter decoration ideas. Happy Easter x
More Easter inspo


Such a cool DIY and really enjoying the video content. I’ve heard bath bombs are hard to make but this looks easy enough… Wish me luck!
Thanks so much Sarah. Yep, this tutorial is super easy. Some tutorials use a liquid oil which means you have to add the wet ingredients slowly, mix them through thoroughly and then add more wet ingredients which makes it more tricky (apparently if it’s liquid and you add it all at once they can already begin fizzing and fail). You should definitely give it a go 🙂