Make your own Christmas clay ornaments with our easy DIY tutorial using ingredients from your pantry! We’re on a mission to help you create a stylish and festive home without spending a fortune. This DIY Christmas clay ornament tutorial is a quick and fun craft activity, perfect for adults and kids alike. Use it to make beautiful personalised Christmas tree decorations, gift tags, name place settings and also homemade gifts.
You can get as creative as you like with your ornaments. Keep the look minimalist and restrained using a circular or star cookie cutter, or go totally kitsch using fun shapes, brightly coloured paint and glitter!
Related article: Adorable concrete Santa decor Christmas DIY
Related article: 17 space saving Christmas trees: Alternative Christmas tree ideas


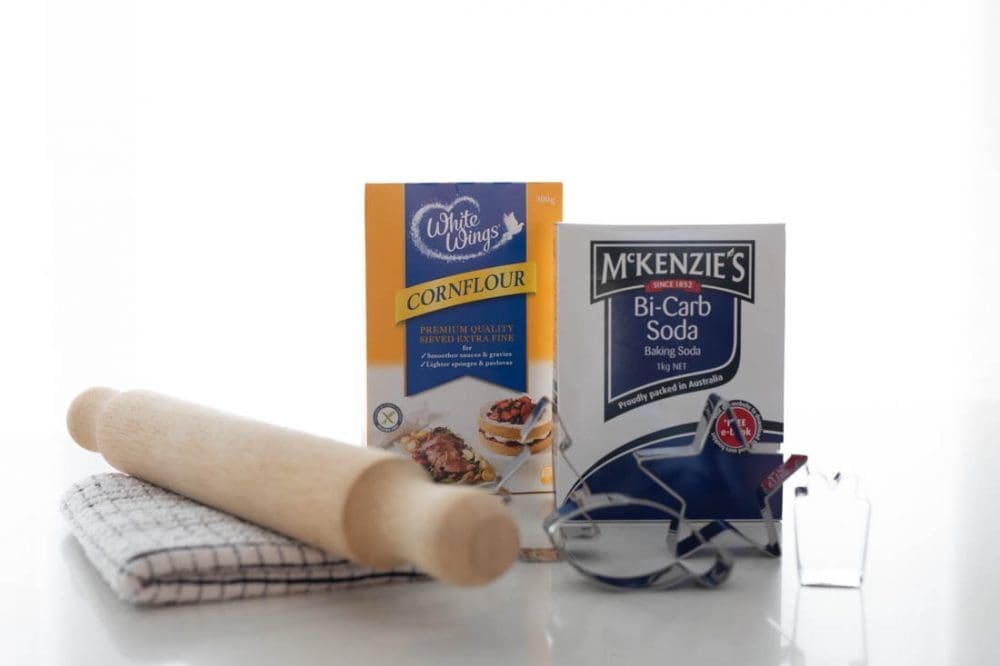
Items you will need
- 1/2 cup corn flour (or corn starch if you are in America)
- 1 cup baking soda
- 3/4 cup water
- Pot
- Tea towel
- Rolling pin
- Wooden spoon
- Measuring cups
- Cookie cutters
- Baking tray
- Baking paper or alfoil to line tray
- Toothpick
- Paint, glitter or other items to decorate
Steps:
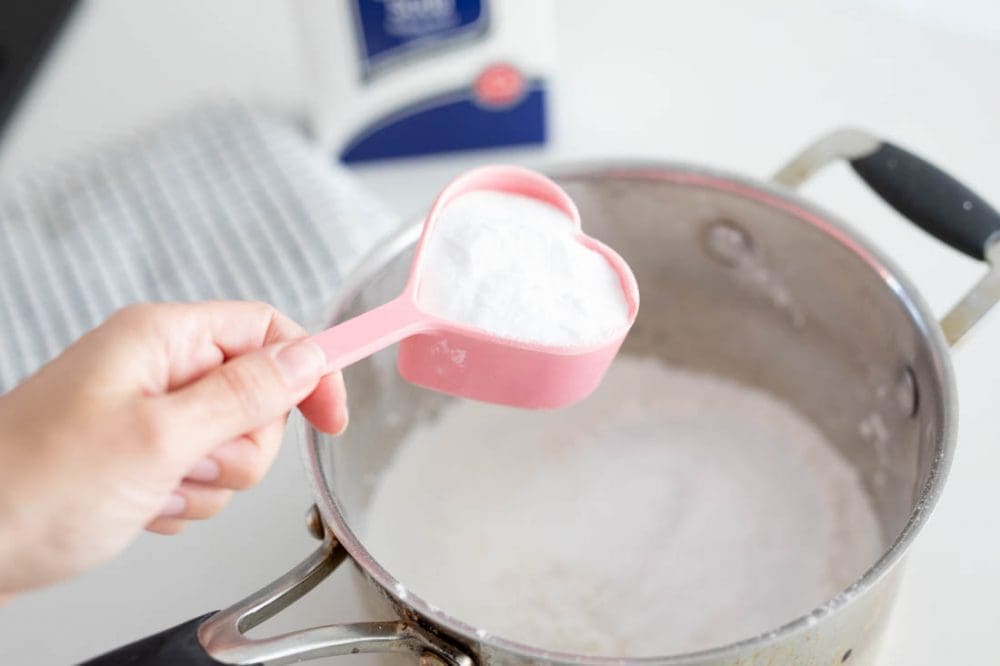
1. In a pot, add the corn flour, baking soda and water and mix until smooth.
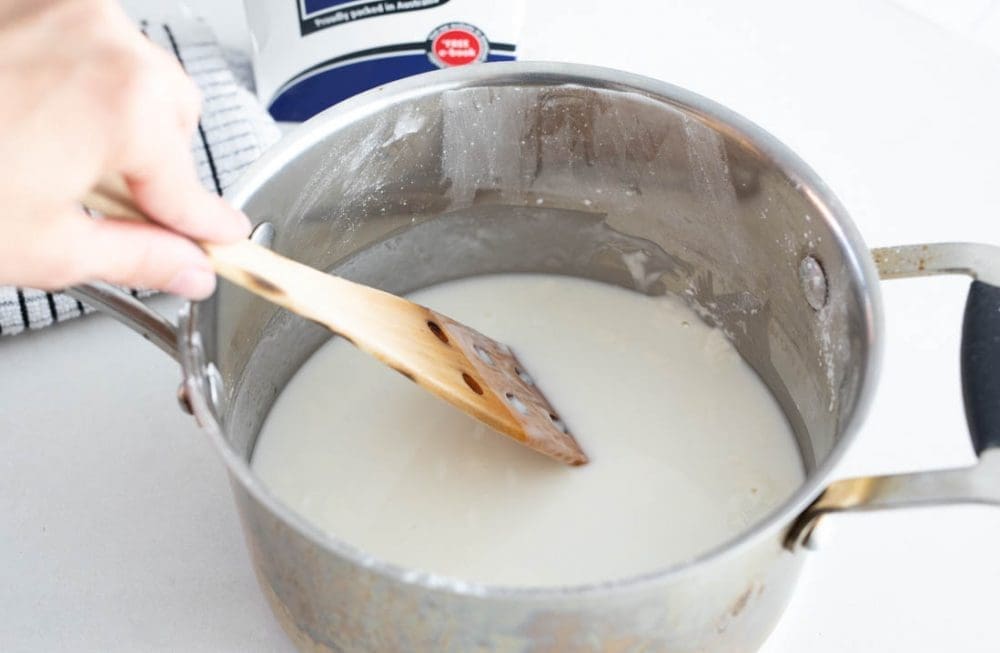
2. Cook over medium heat until it thickens and forms into a fluffy dough.
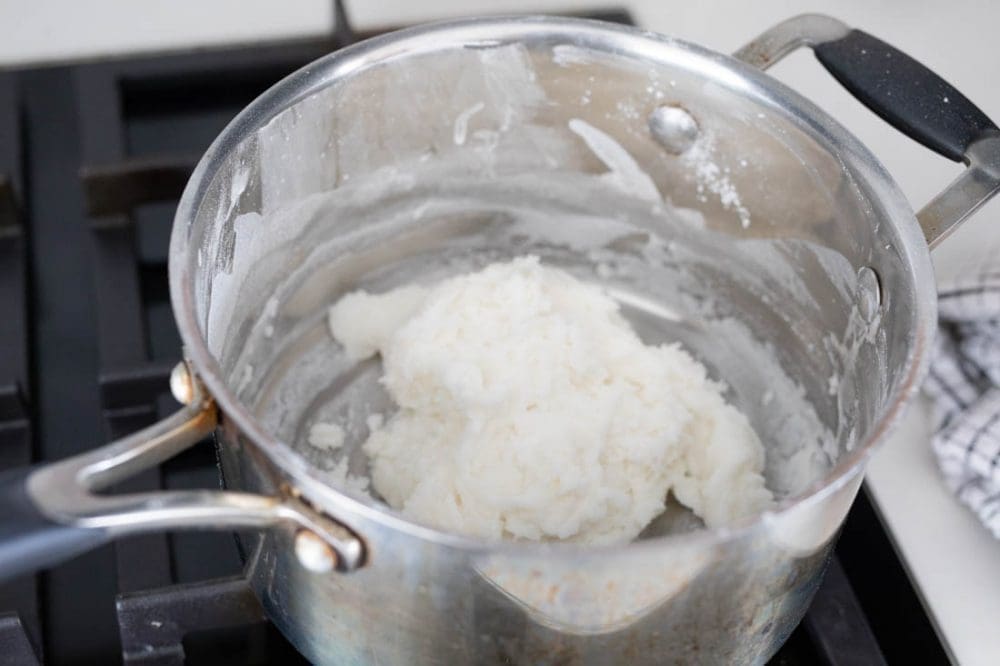
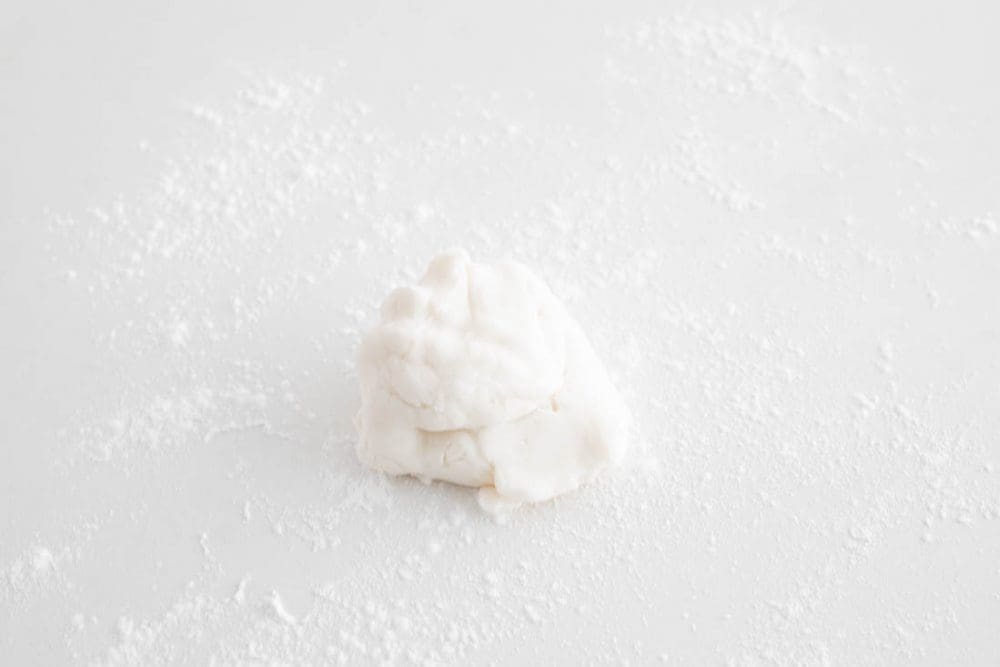
3. Turn off the heat and place a damp tea towel over the pot until the dough has cooled.

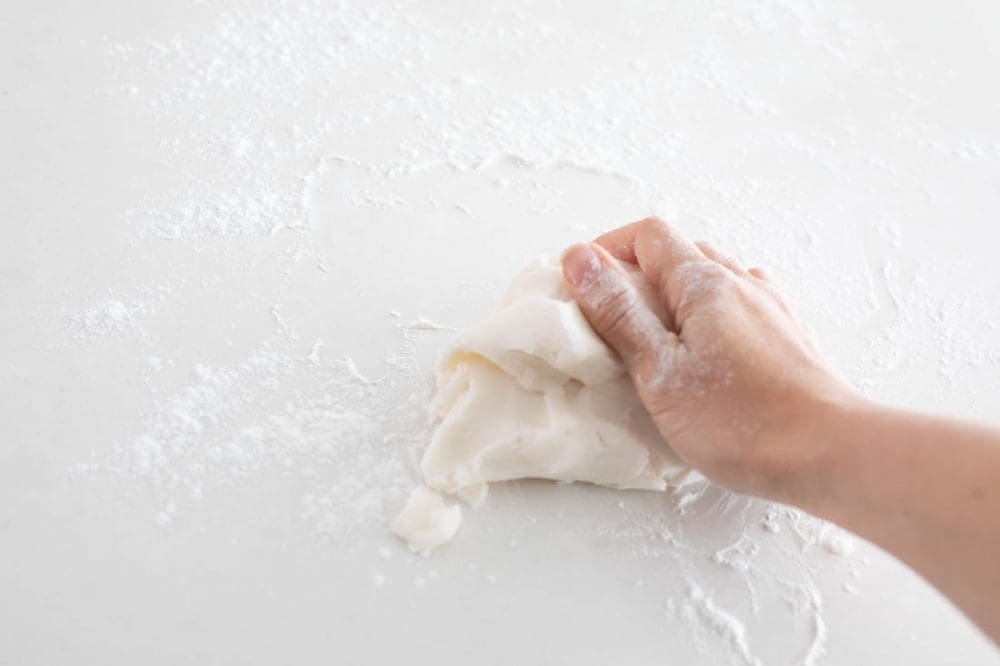
4. Once the dough has cooled, knead it out on a clean work surface that’s dusted in corn flour.
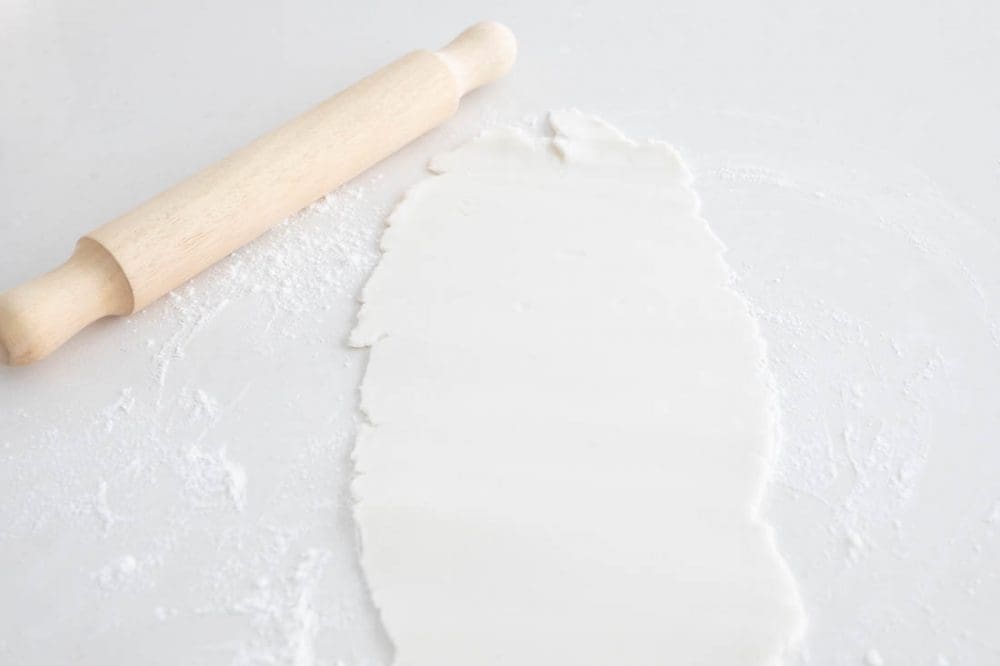
5. Roll the dough out until it’s about 1-3mm thick (if it’s too thick, it is more likely to crack or warp when you bake it in the oven).
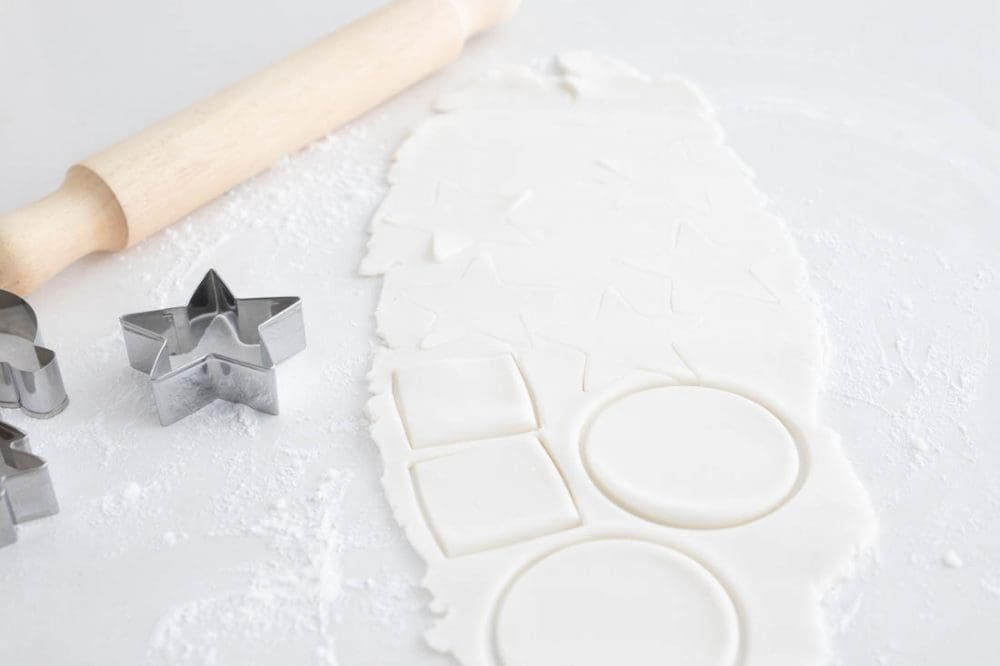
6. Use a cookie cutter to cut out the shapes you want and then carefully remove the excess dough.

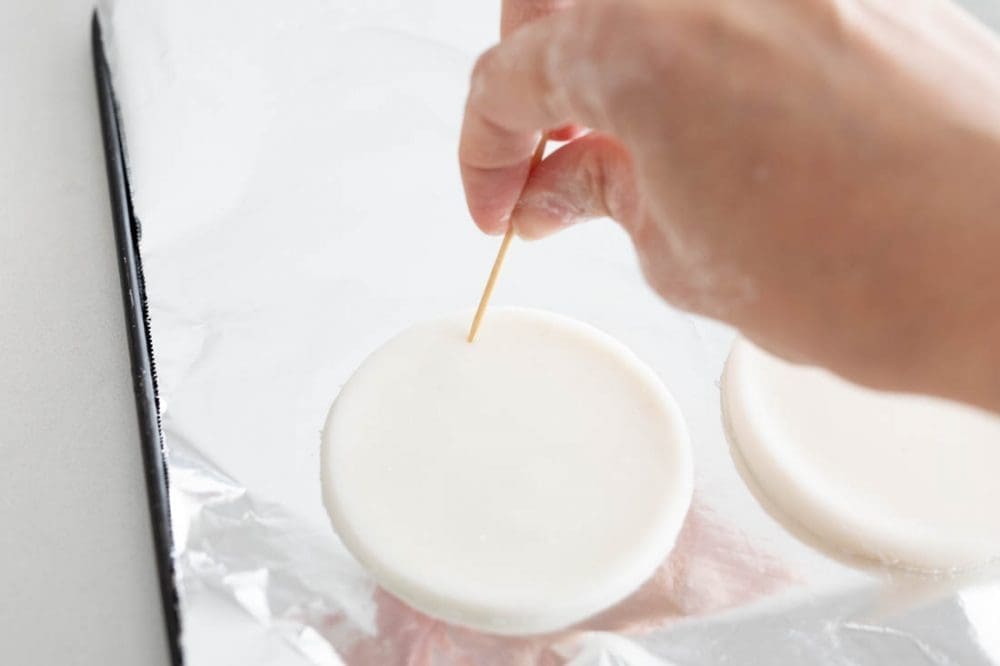
7. Place the forms onto a baking tray that’s lined with baking paper or alfoil and use a toothpick make a small hole at the top of the ornament so you can hang it.
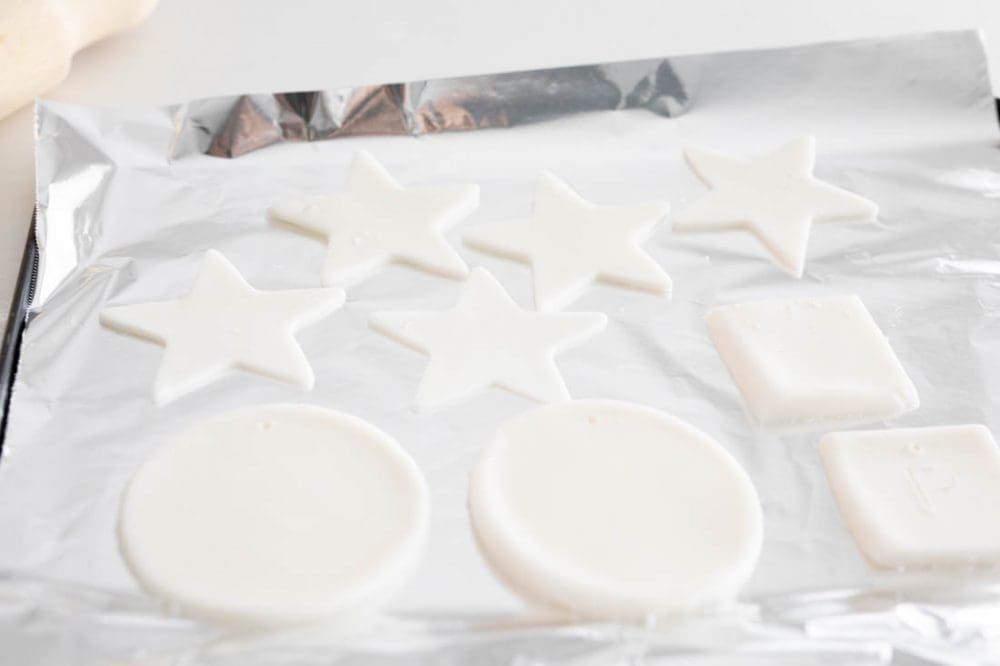
8. Bake in the oven for 5-10 minutes at 80 degrees. Flip the shapes over and bake for another 5-10 minutes. You’ll know they are ready when they become bright white all over.
Tip: it’s better to under-cook them than overcook them. If they are on the under-done side, you can leave them in the sun to harden for a day or two but if you bake them for too long they may crack. Leaving them in the oven too long can also cause them to discolour or burn.
9. Once they have cooled, you can hang them on your tree or paint and decorate them however you like! We placed several plain white stars on our tree and used the rest as personalised gift tags. Keep on scrolling to see how they look as gift tags!


DIY personalised gift tags
This tutorial can also be used to make DIY personalised gift tags and here’s how!
1. If you’re not confident at hand lettering, print off the names in the fonts you like. You may also like to check out our hand lettering for beginners tutorial here.
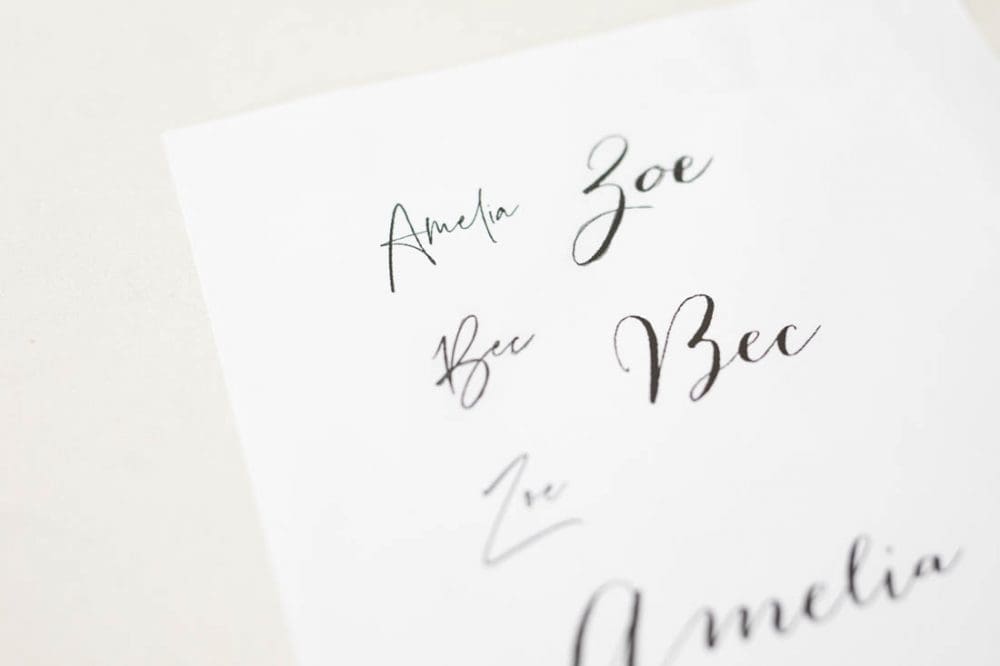
2. Then on the reverse side, use a pencil to shade over the name.

3. Place the paper over the ornament and use your pencil to trace out the name to leave an imprint on your clay tag.
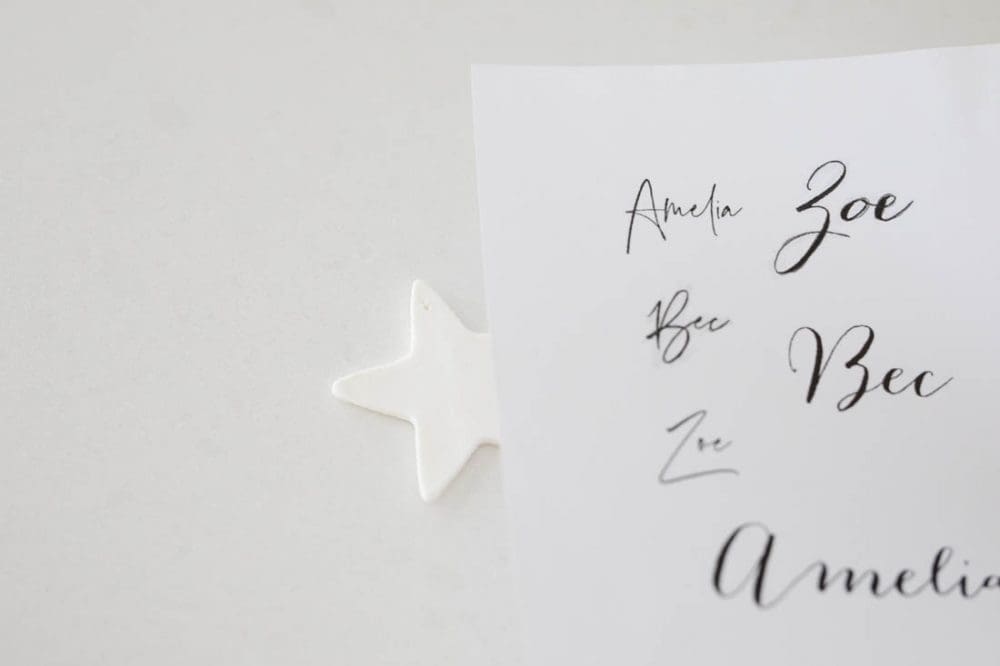


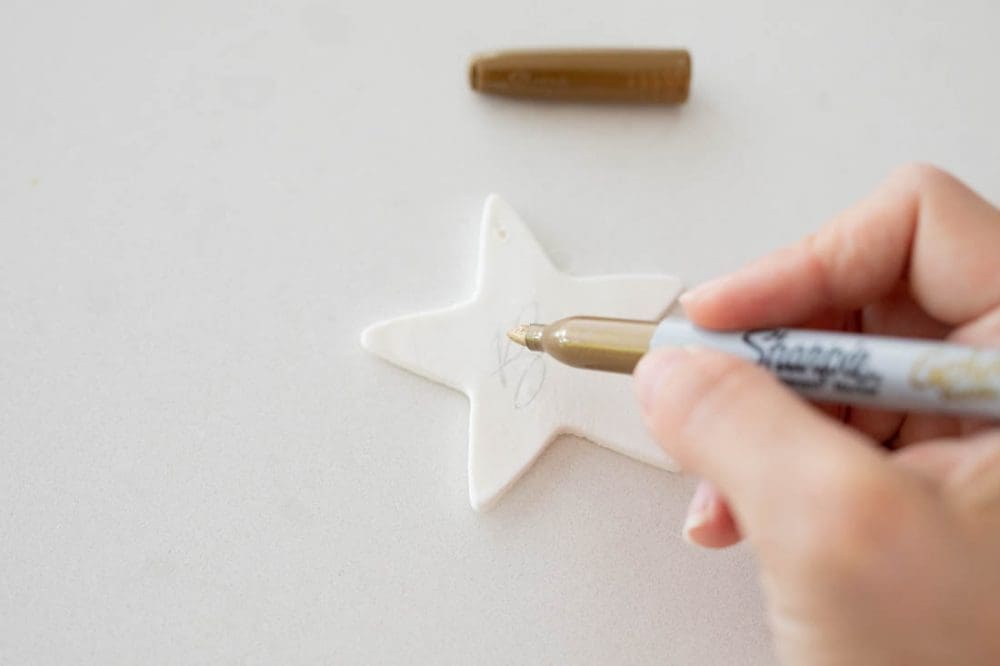
4. Use a gold Sharpie pen (or whatever colour you want) to write over the pencil outline and then attach to your gift.


Tip:
You can leave the surface of your ornaments smooth or make impressions into the dough before you bake them — think cookie stamps that allow you to imprint words, leaves or flowers, or even your dog’s paw!
Check out more Christmas inspo
This article was originally published in November 2014 and has been updated with new images and information.