
Before I start this post, I should say that under no circumstances should you waterproof your home without a licensed waterproofer there to supervise and sign off on the job…
But with said licensed person supervising, this weekend I got my hands dirty learning how to waterproof our bathrooms in the small house at our block.
The process was surprisingly much easier than I thought and here is how we did it.
Related article: My bathroom mistakes to avoid!
Related article: DIY concrete countertop: Before and after kitchen makeover
1. Clean the area
It’s important the bathroom is clean before you begin the job so the waterproof can adhere to the substrate (aka the thing your tiles need to stick to — can be concrete, villaboard etc). We thoroughly swept the bathroom twice to get rid of all the insulation and dust from the villaboard.
2. Prime
We used CTA Aquablok W1 waterproofing membrane and CTA Ecoprime as the primer. Priming helps further clean the substrate and create the perfect surface for the waterproof to bond to 🙂 Picking the right primer depends on the waterproof that you use.
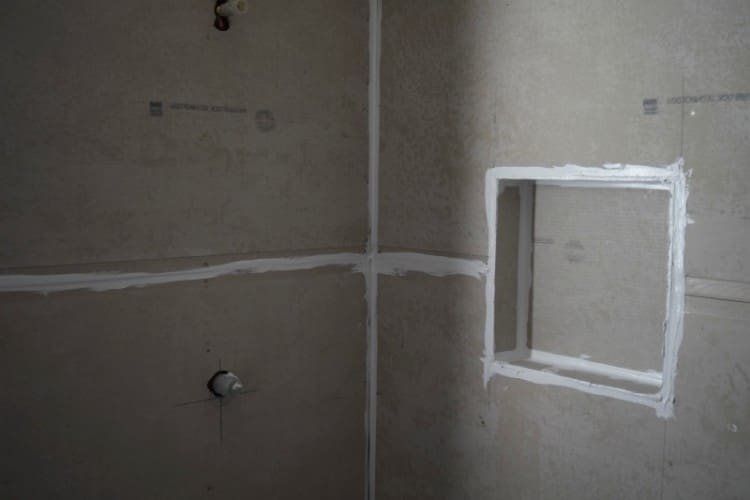
3. Bond breaker
We used Polyurethane (but could also have used Neutral Cure Silicone) to caulk the gap where the villaboard sheets meet. So around all the edges of the room and in and around the shower niche we spread Polyurethane to fill the gaps. The bond breaker is also an important buffer between the floor and walls to prevent the waterproof cracking in the corners.
4. Install/waterproof shower angle
Because we didn’t drop our concrete slab, we had to raise the shower area to be able to create enough fall to the waste (the other option would have been to have a step at the door and make the whole bathroom floor fall to the waste but we didn’t want to have a big step at the door). We used Polyurethane to secure a 40mm by 40mm polished aluminium angle for the base of our shower.
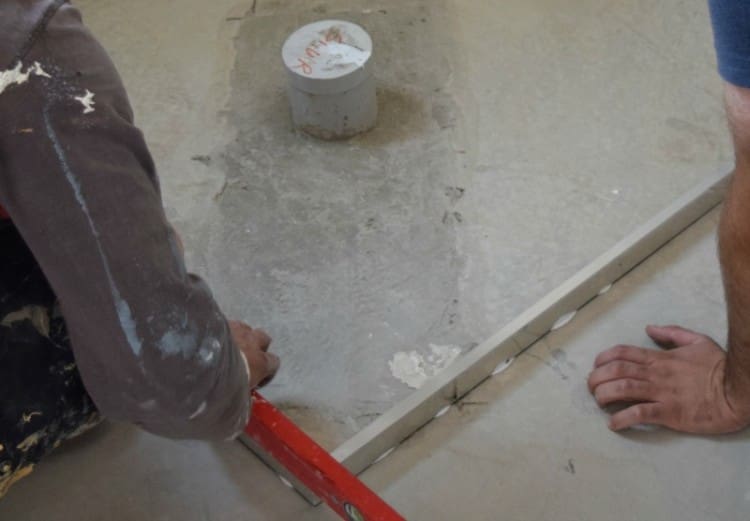
5. Cut down waste pipe
Next, we cut down the waste pipe and ground the floor around the waste so the floor waste and PVC reducer would sit roughly 10mm above the floor.
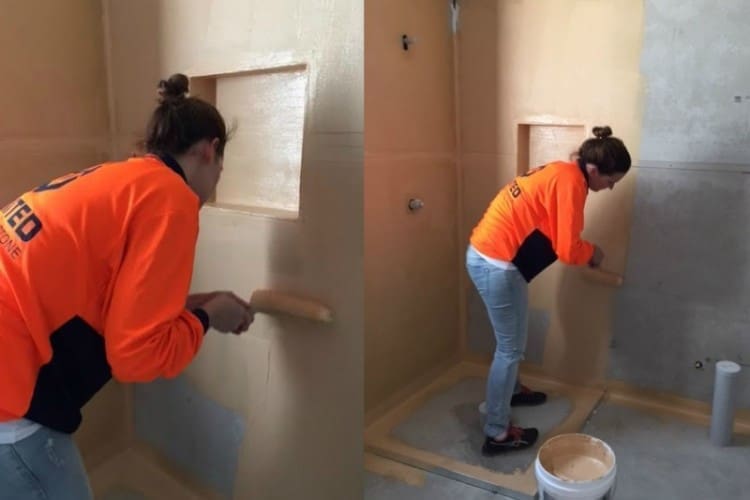
6. Waterproof
Then we pulled out the paint brushes and rollers to lay on the waterproofing. We applied two generous coats but not too thick or it won’t dry. (The dry film thickness after two coats should be 1.2mm 🙂 )
He says the steps to waterproof a second story are completely different so I’ll update you on how that goes when we have to waterproof our ensuite 🙂
Have you ever waterproofed? Or what new skills have you learnt while renovating or building? I’d love to read about it in the comments below!


Comments are closed.