
Beeswax food wraps are a fabulous alternative to clingwrap or plastic film and go a long way in helping to reduce plastics around the home. But if you’ve attempted to make your own beeswax wraps, you’ll know simply adding beeswax to cotton isn’t enough. So what else should you add? We’ve searched high and low, and attempted a lot of recipes, to bring you this DIY beeswax wraps tutorial that actually works!
Keep reading to find out what materials you need and the steps to make DIY beeswax wraps that cling without leaving residue. We’re betting you’ll make a bee-line to your local craft store in no time!
Related article: 11 easy ways to reduce plastic around the home
Related article: Fridge organisation: How I took my fridge from disgusting to dreamy
Items you will need:
- 100% cotton fabric
- 2 tablespoons jojoba oil (available at Biome)
- 6 tablespoons food grade pine resin (we bought it on Etsy)
- 1 cup beeswax pellets
- Pot
- Glass jar (use an old pasta sauce or olive jar as it will get ruined)
- Crimping scissors
- Old spoon or paddle pop stick to stir (again, this will get ruined)
- Baking tray
- Baking paper
- Paint brush
- Tongs
Alternatively, if you only want to make a small batch, it may be easier and more affordable to buy a ready-made DIY beeswax food wrap kit.
Steps:
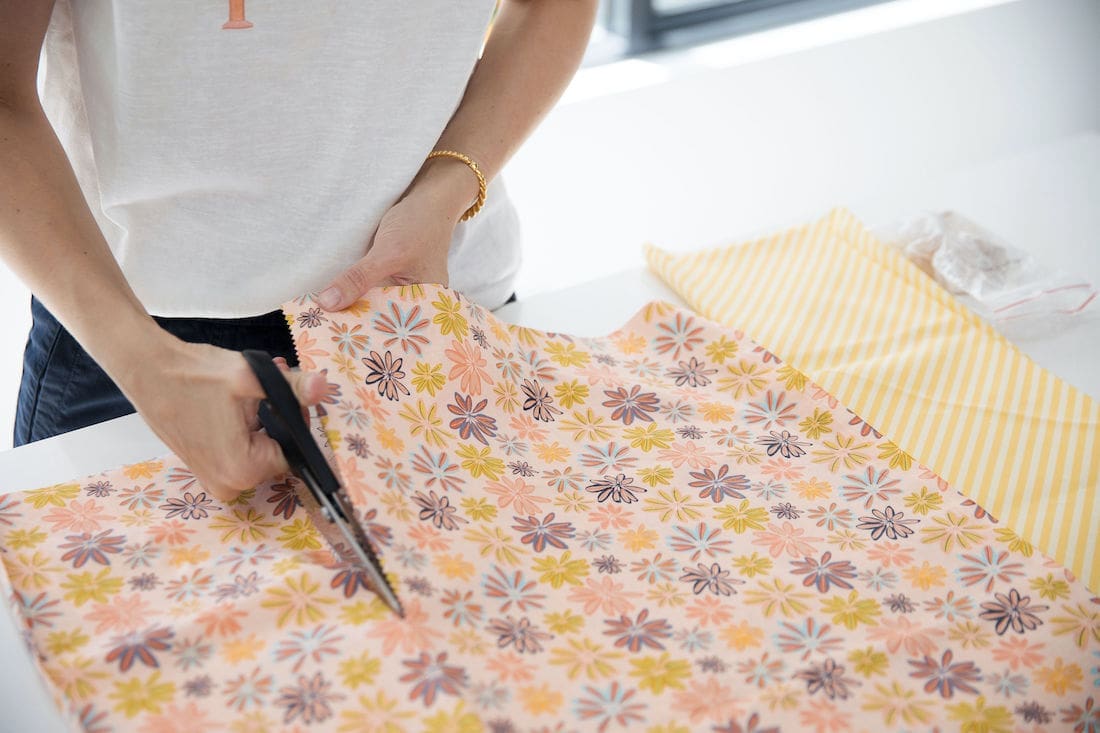
1. Firstly, pre-wash the fabric as cotton generally shrinks.
2. Once dry, use crimping scissors to cut the fabric to into your desired shapes and sizes. If you’re unsure what sizes to cut, common sizes are 20cm x 20cm for small, 28cm x 28cm for medium and 35cm x 35cm for large. However, you can make them any size or shape you like. Use crimping scissors to avoid frayed edges.
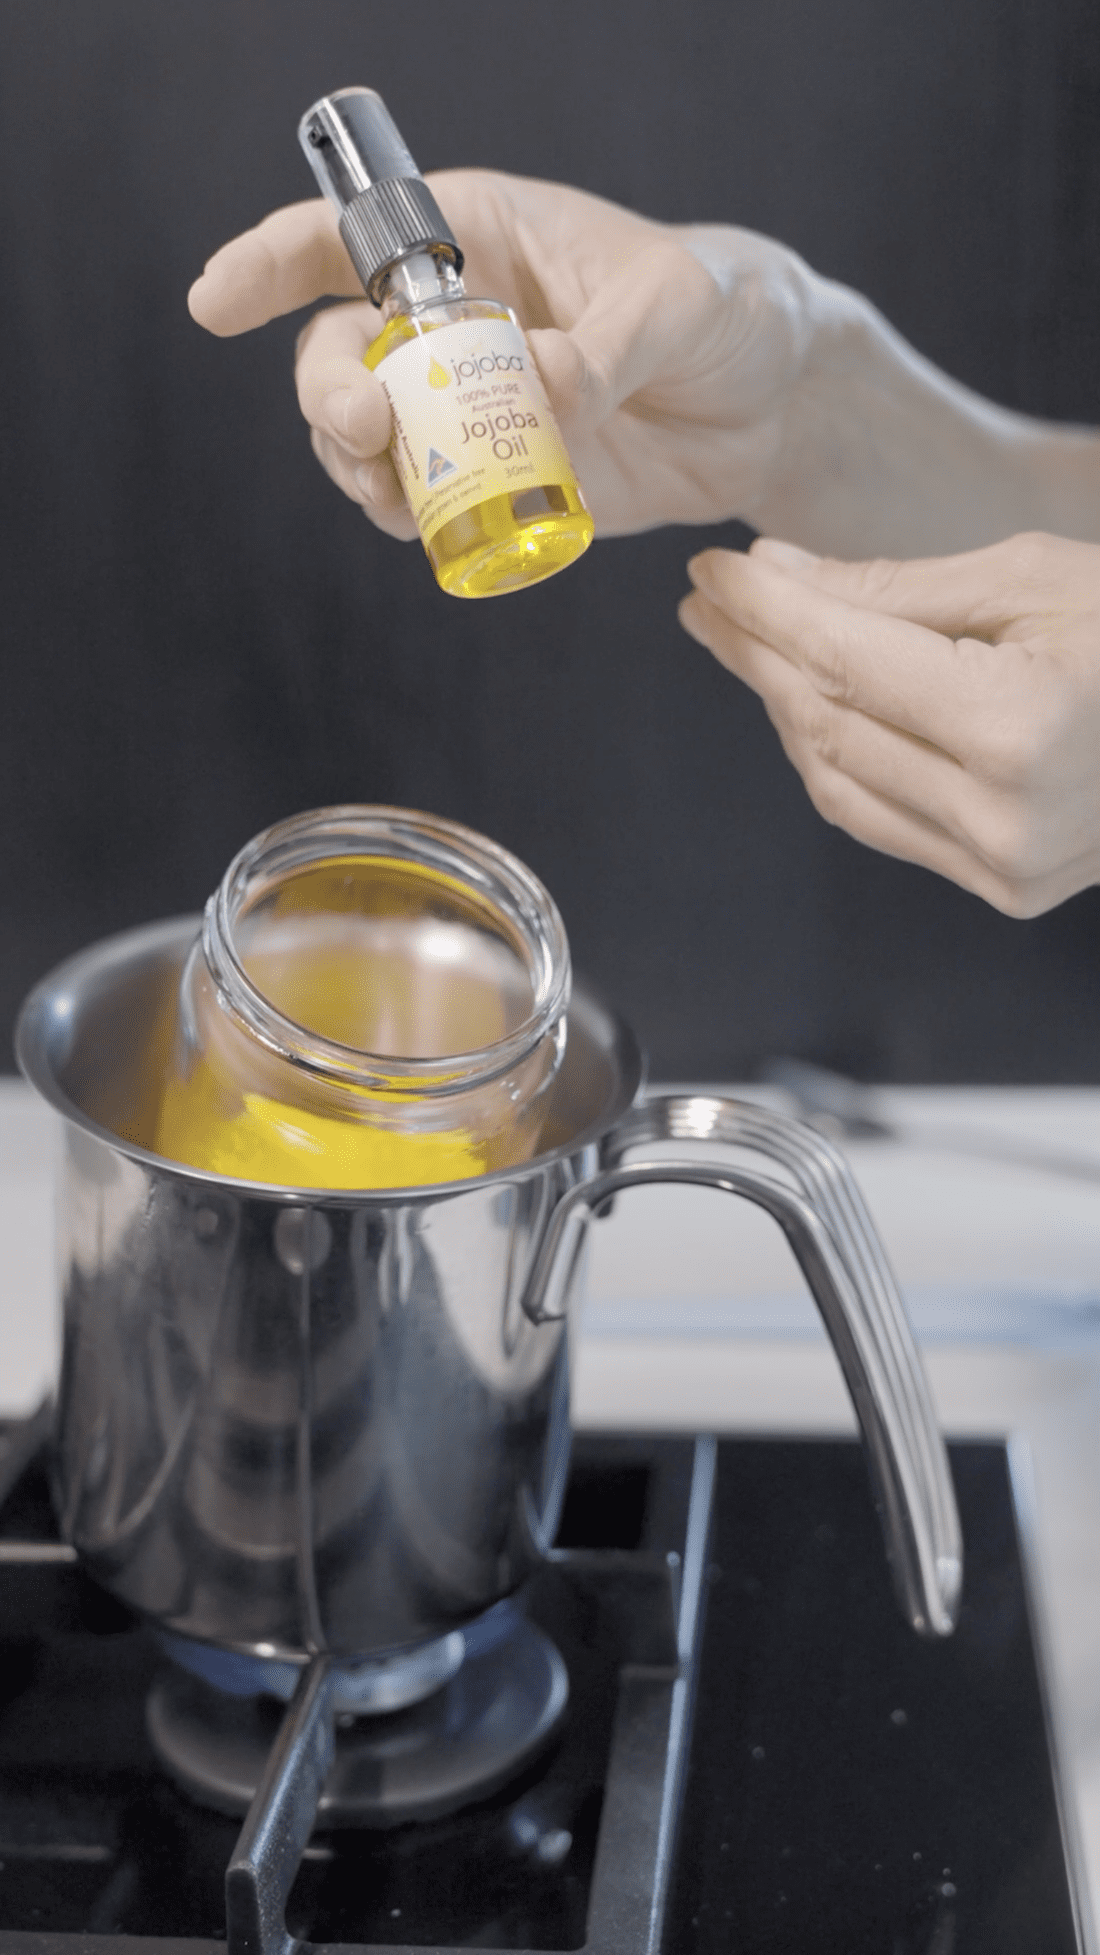
3. Then add the the jojoba oil, pine resin and beeswax pellets in the glass jar. Create a double boiler set up on your cooktop by half filling a pot of water and placing the glass jar of ingredients inside.
Then boil the ingredients until they are fully melted. This should take around 45 minutes.
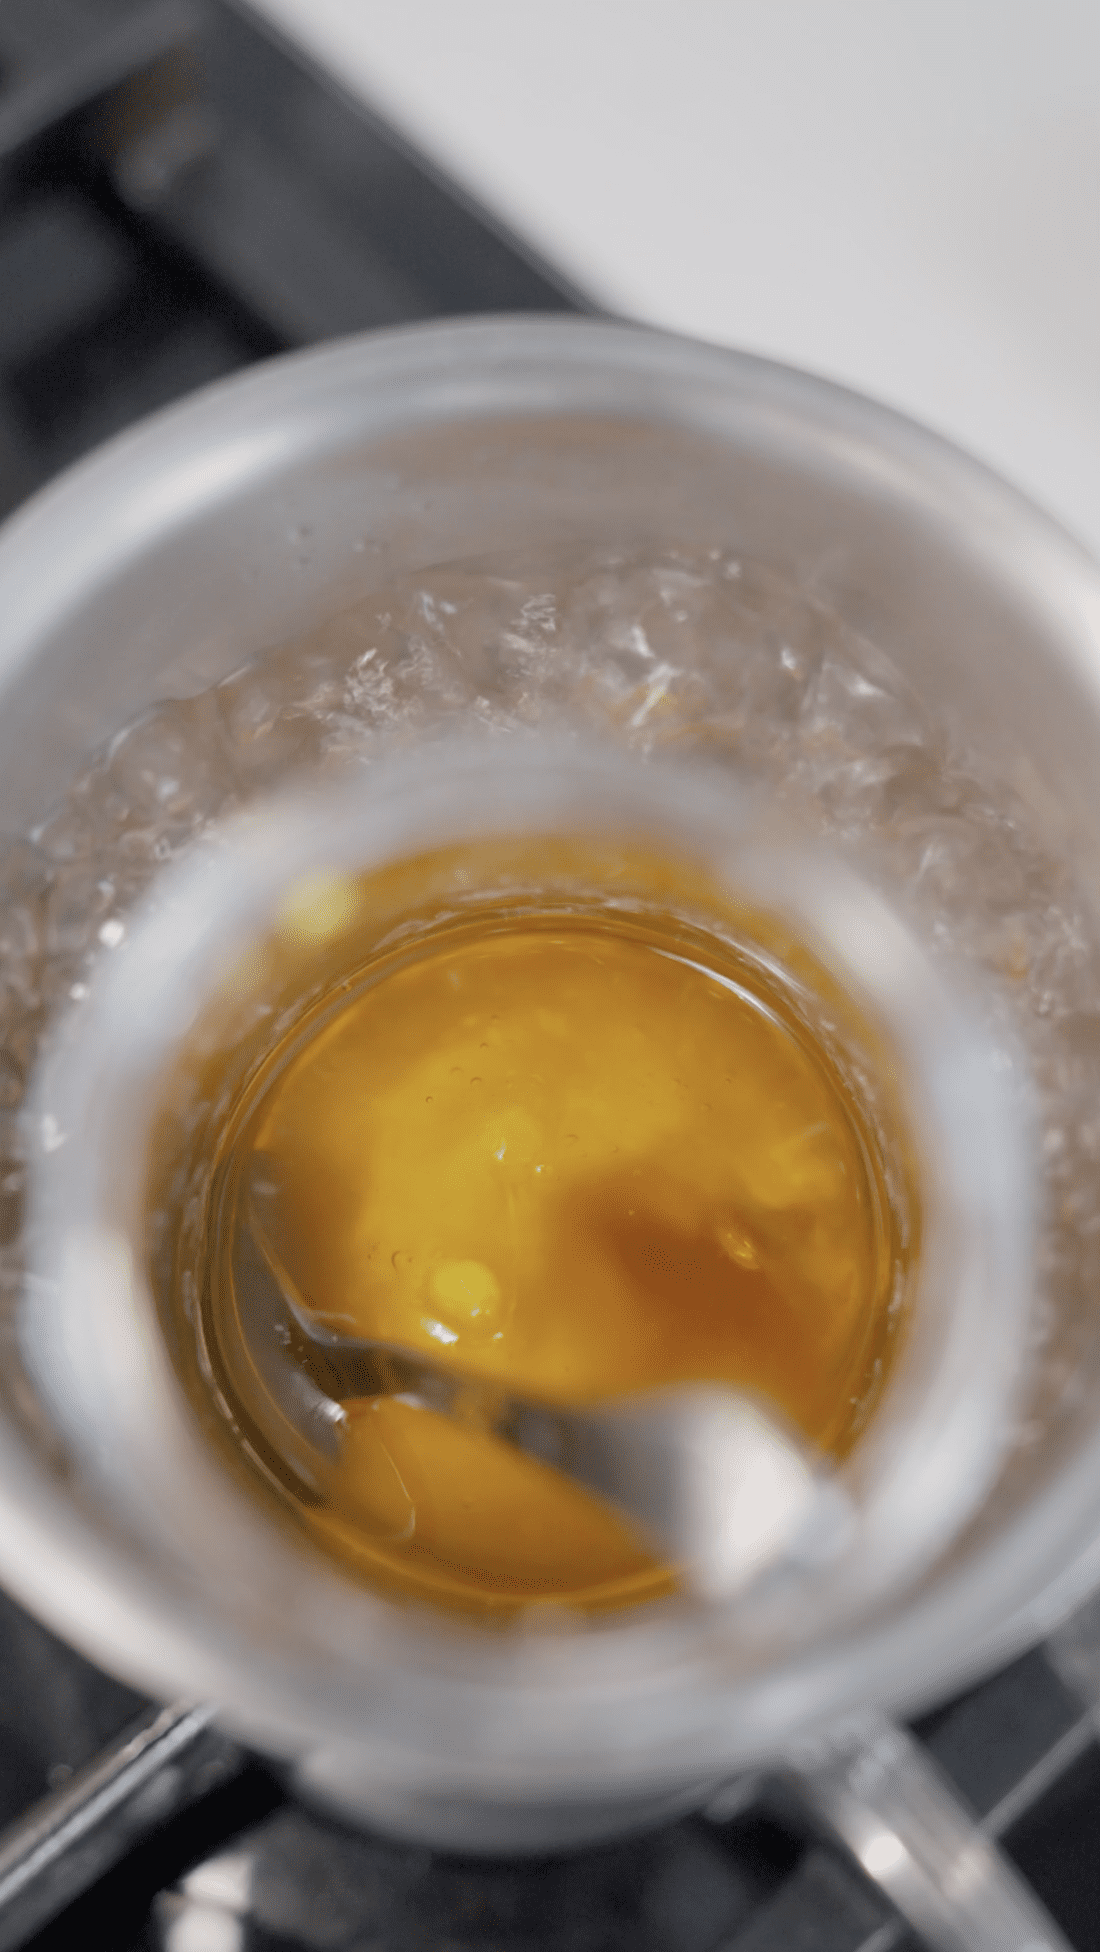
4. Once the ingredients in the jar are fully melted, turn off the cooktop and carefully remove the glass jar of golden lava.
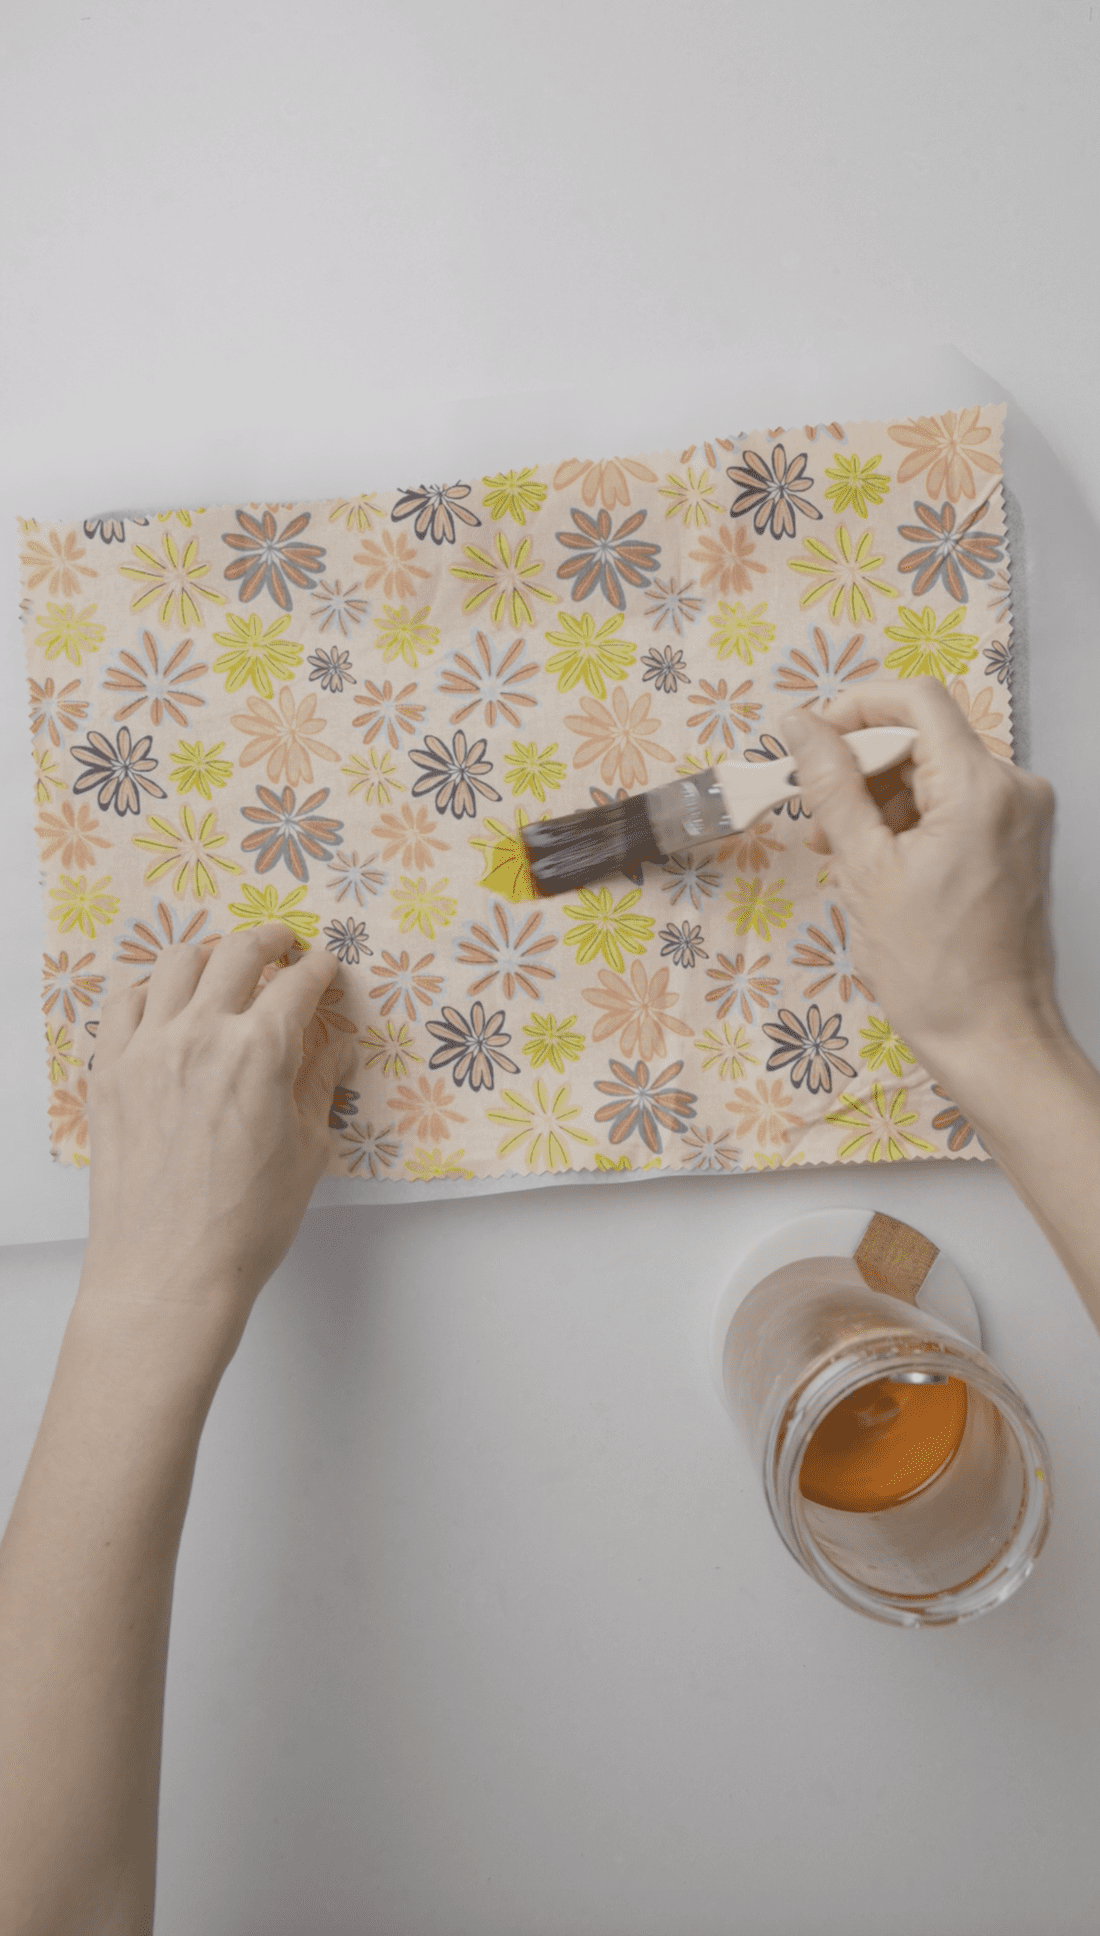
5. Preheat oven to 150 degrees.
6. Then line a baking tray with baking paper and place your piece of fabric on top. For best results, you want a generous amount of liquid to soak into the fabric. So paint both sides of the fabric before placing the tray in the oven for 3 minutes.
7. Then remove the baking tray from the oven. Use tongs to carefully lift the fabric and hold it over the baking tray, allowing excess wax to drip onto the baking paper. Because this liquid is difficult to clean once dry, wait until all the excess wax has stopped dripping before moving onto the next step.
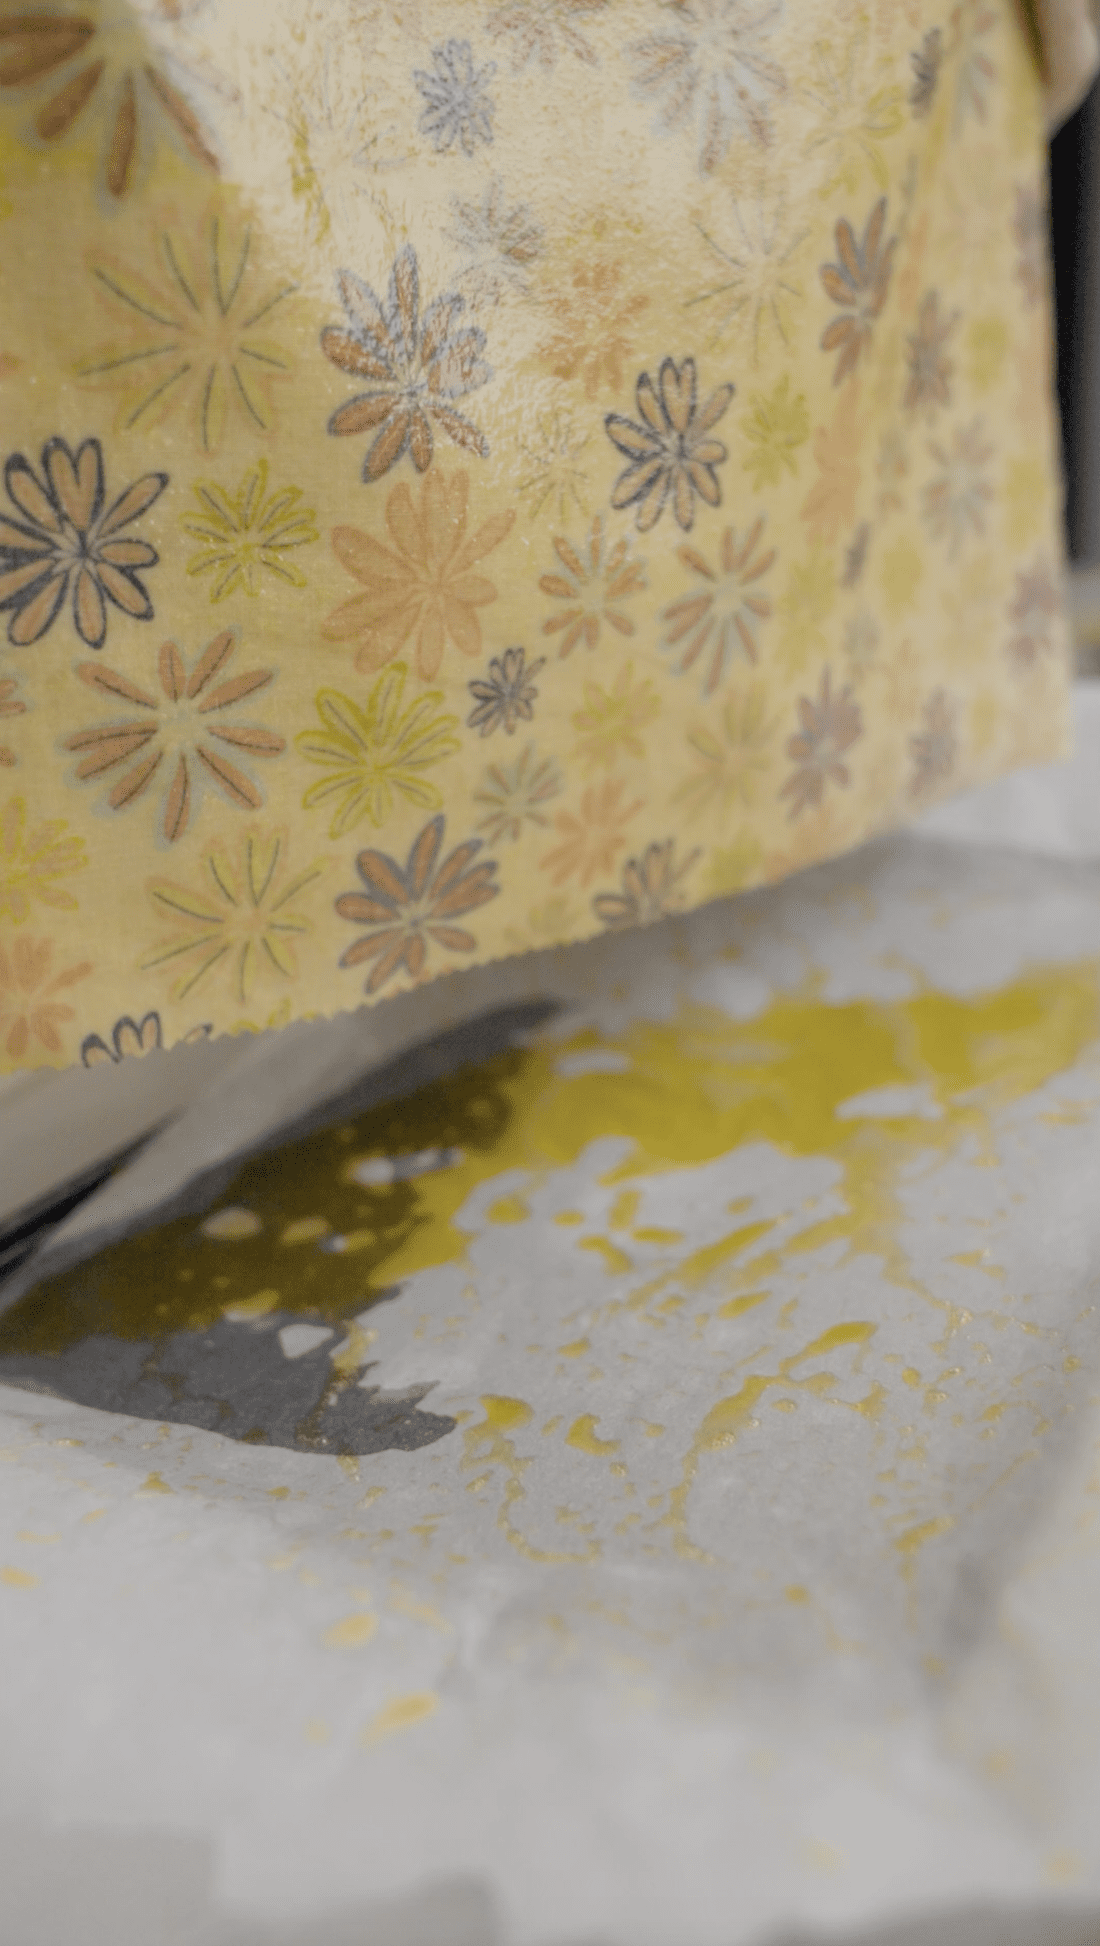
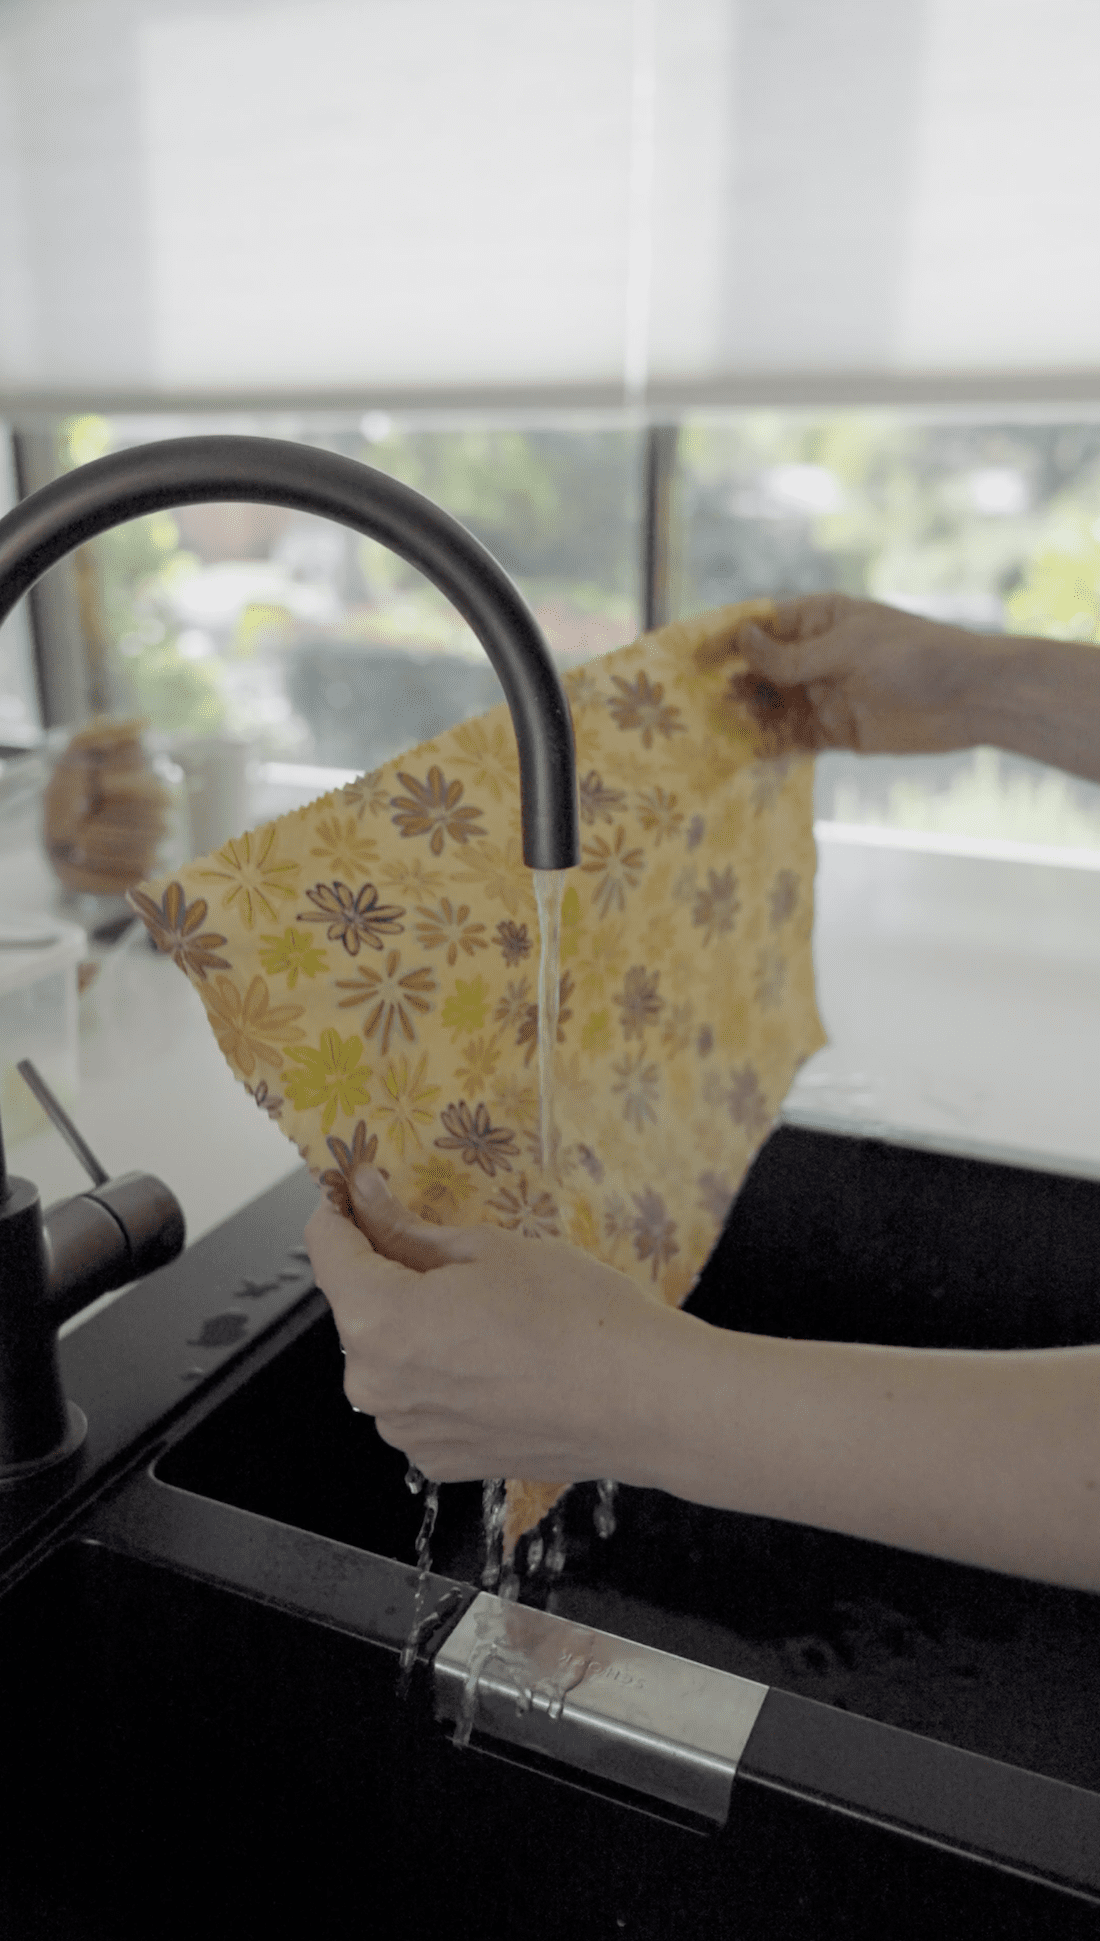
8. Finally, gently wash the wrap under cold running water and pat dry.
Tip: if you spot any ‘dry’ spots on the fabric when you remove it from the oven, you may need to repeat Step 6.
9. Continue painting, baking and rinsing your pieces of fabric until you have used all of the mixture. Because the mixture can solidify, work quickly to paint all of your fabric. And be careful to clean up any mess as you go as it’s very difficult to remove once dry.
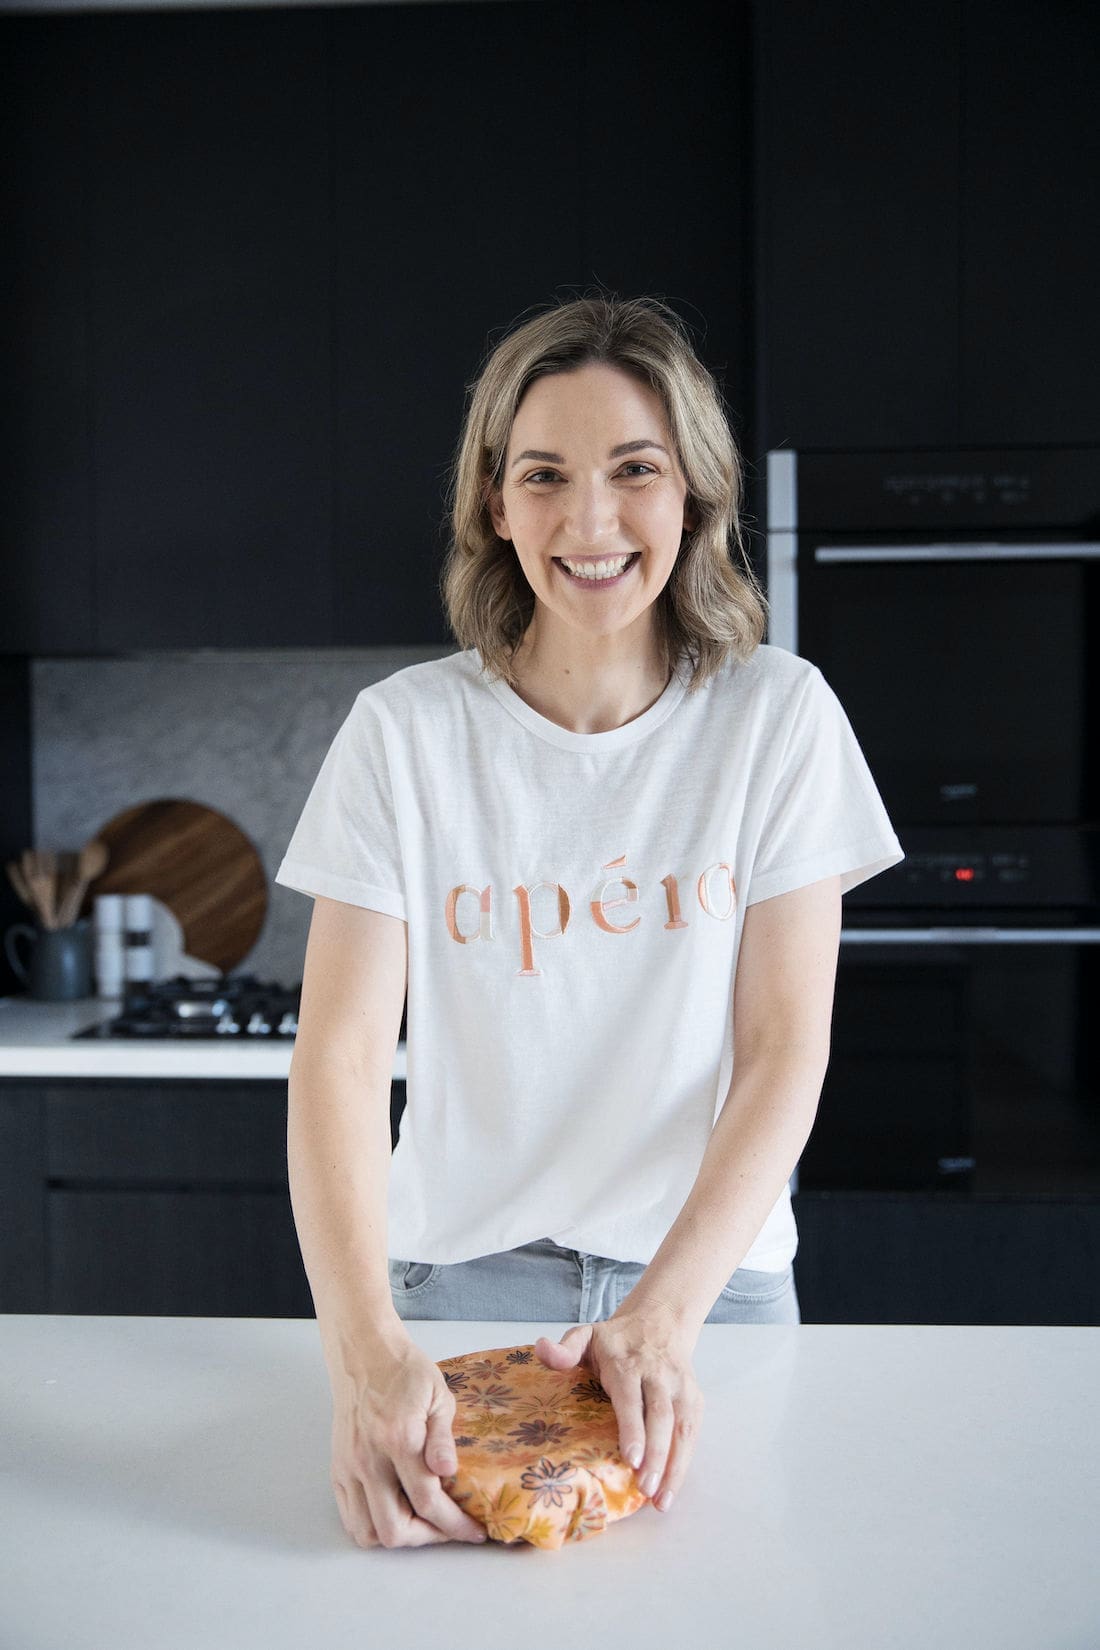
Your DIY beeswax wraps are now ready to use! You can reuse these again and again, simply washing with gentle detergent in between uses. So with proper care, you can reuse your homemade beeswax wraps for a year or more!
If you think this DIY beeswax wraps tutorial is the bees knees, let us know — we love hearing from you! Drop a comment below, find us on Instagram or email us at hello@stylecurator.com.au.
More DIY ideas
Disclaimer: This post was first published in June 2021 and continues to be updated ahead of Plastic Free July.

