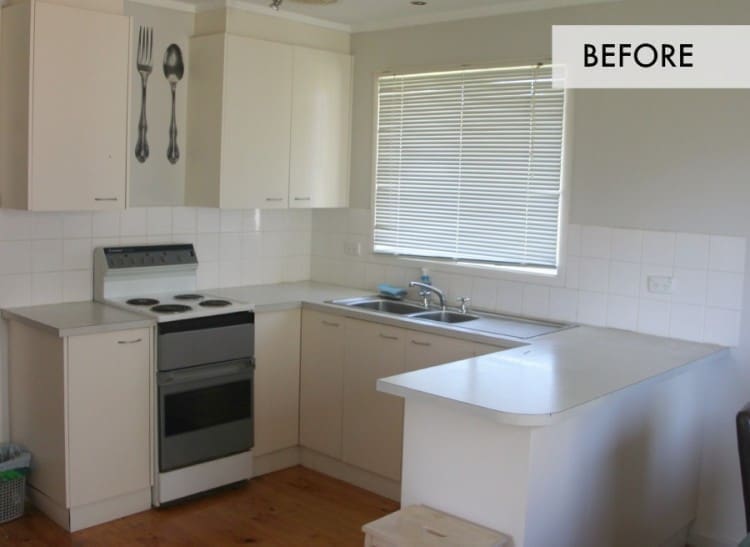
Many people are stuck with an outdated kitchen because it’s just suuuuuuuccchhhh an expensive space to redo! While an entirely new kitchen may be out of reach, there are some affordable jobs you can do yourself to give your kitchen a new look.
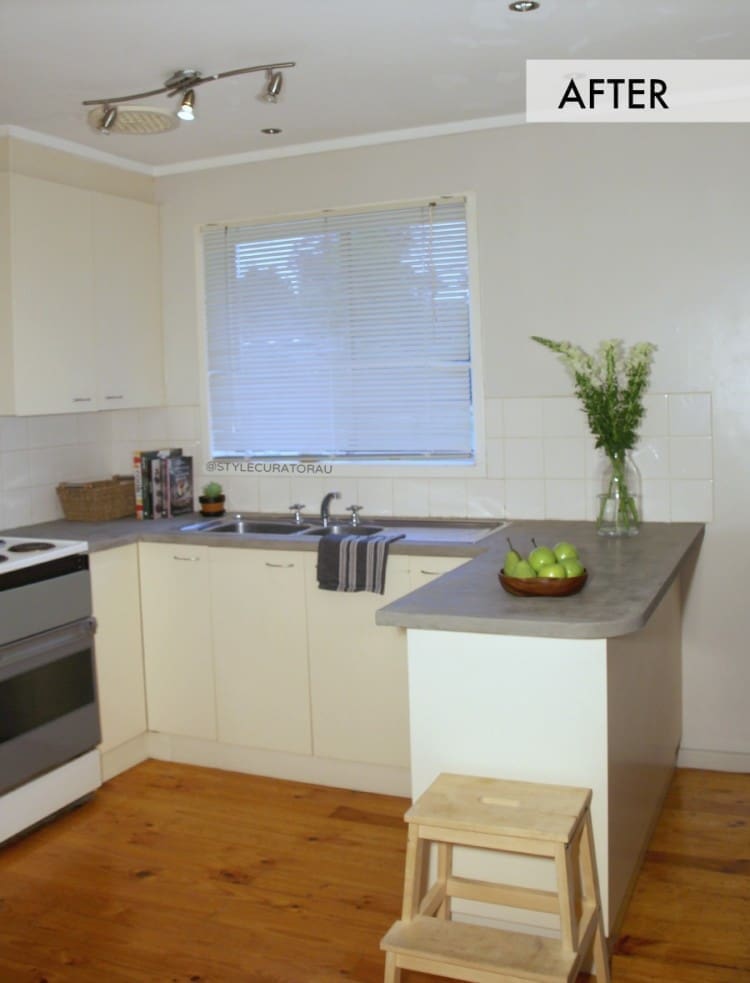
Today we’re sharing a clever, cost-effective DIY that can see you turn that bland laminate countertop into an on-trend and durable concrete benchtop. This is a great option if you can’t afford to splurge on stone or if you’re saving up for that ultimate kitchen but want a change NOW. The best part is, you can do this DIY concrete countertop project over a weekend.
Related article: Caesarstone’s outdoor quartz surface range is here: You can now have the stylish look of engineered stone in your outdoor spaces
Related article: Before and after: Kitchen transformation adding style and function
Items you will need:
- Primer (we suggest ECO Prim Grip)
- One bag Ardex Feather Finish
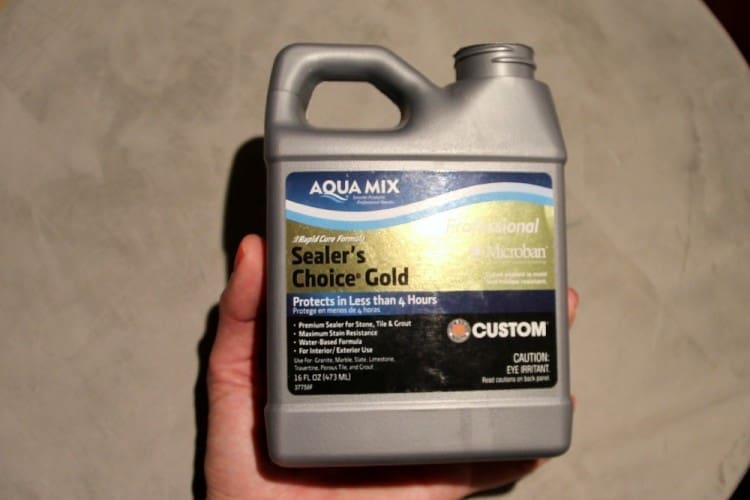
- Sealer
- Leveller
- Bucket and stirrer
- Sandpaper
- Sponge
Steps:
1. Firstly, give your countertop a clean and good sanding to prepare the surface. Apply masking tape around your sink (or remove the sink if you can) and anywhere that your kitchen joins with another surface that you don’t want to cover (e.g oven cooktop). We also suggest applying a primer, such as ECO Prim Grip, to help the Feather Finish adhere to the bench. Although we didn’t do this in our kitchen and the counter is still looking great 3 years on but it’s recommended and something we’ve been doing in later Feather Finish DIYs.
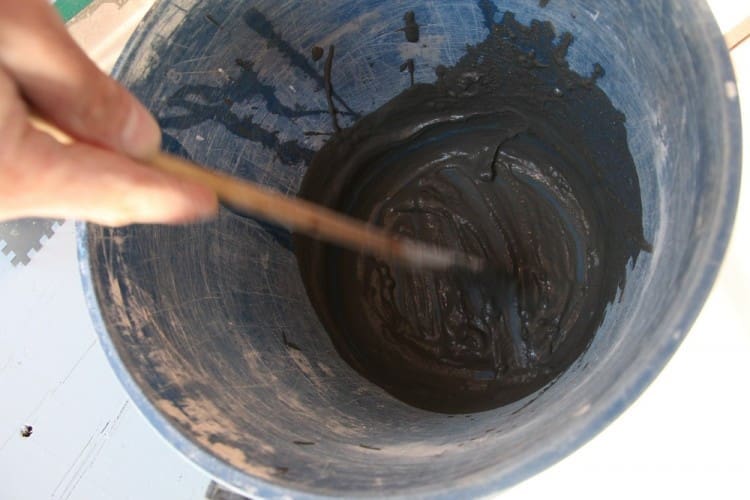
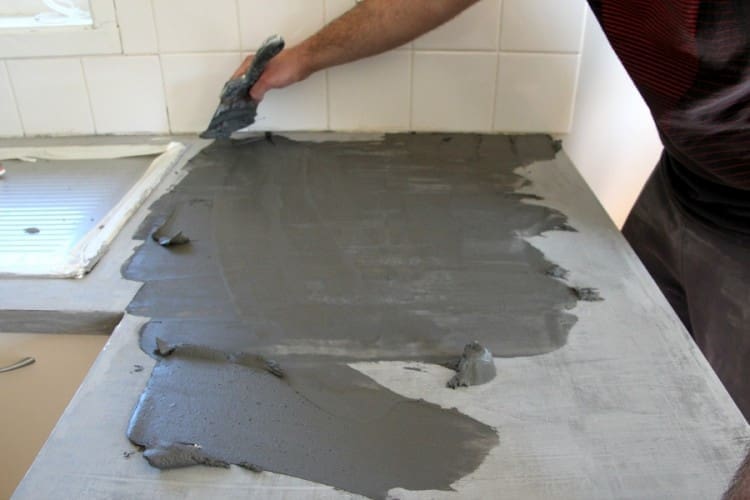
2. Mix up a small batch of Feather Finish — around one cup and slowly add water while stirring. You want to keep stirring until you have the consistency of cake batter (not too thick that it won’t spread easily but not too thin that it won’t grip to the surface).
3. Next, work quickly to spread the mixture over your countertop (the mixture starts drying after five minutes). You want to create a thin, smooth layer. Don’t be concerned if after your first coat you can still see patches of the old countertop underneath — you will apply at least three coats of this mixture.
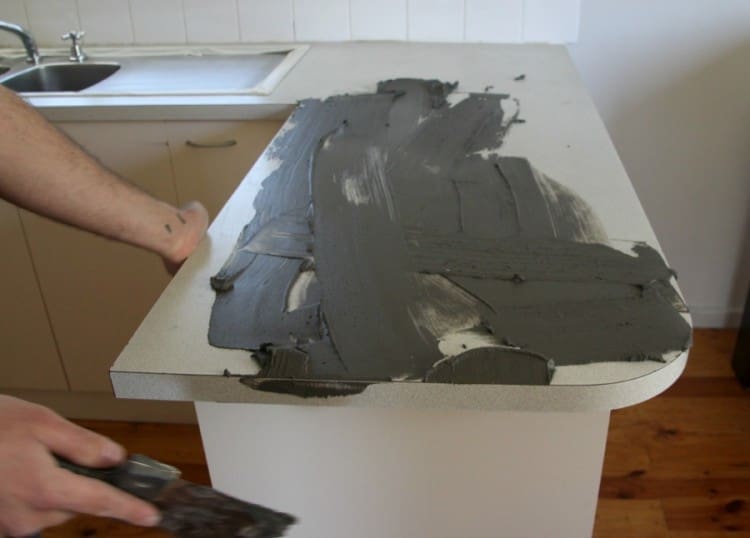
4. Wait until the first coat is completely dry (it will become light grey) before lightly sanding it. Smooth out rough edges and imperfections.
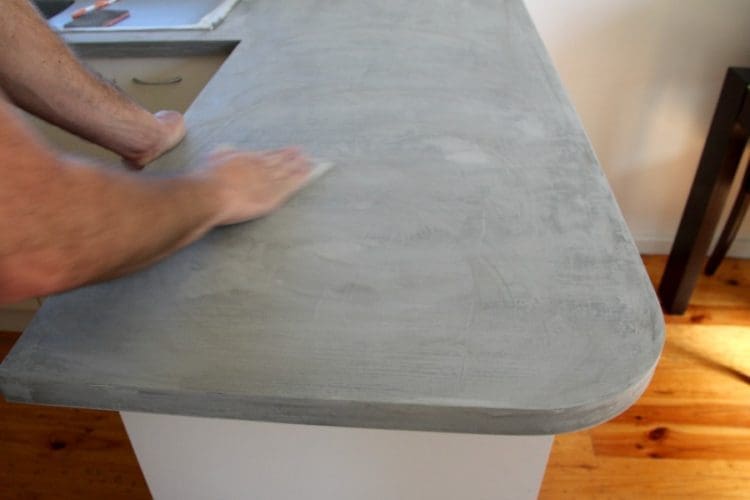
5. Next, apply a second thin coat and allow it to completely dry before sanding. (At this stage you may be looking at your countertop thinking ‘What have I done?!’. We were laughing hysterically at the hot mess we had created but don’t worry, it will come together and look awesome!)
6. Apply a third thin coat and allow it to completely dry before sanding it smooth. (By now you should be thinking ‘Damn I’m good!’. Your countertop might be ready to seal after this step or you may need to do one or two more thin coats depending on the colour of your countertop and the coverage you were able to get.)
7. Once you have perfectly sanded your final coat of Feather Finish, apply two generous coats of matt finish sealer with a sponge to seal your countertop and keep the moisture out.
Hot tips:
- Carefully apply thin layers (think crepe thickness!)
- Clean up your mess while you work. If you get any mixture on the splashback or cabinetry, it will be easier to remove this with a damp sponge while it’s still wet
- Allow each layer to completely dry before sanding or you will lift off all your hard work
- Give each layer a good sanding as it will leave you with a super smooth and hard finish
- Also get the right tools. We had to use our fingers to apply the mixture on the sides of the countertop as we didn’t have a small enough leveller — it was messy and took longer
- Reapply sealer at least once a year to keep your countertop protected
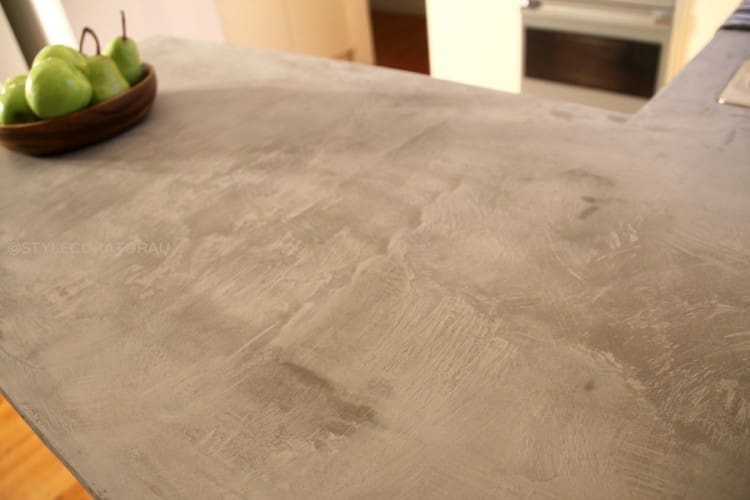
We love how this product completely mimics concrete — a natural pattern and mottled texture. You can apply this product onto any shape kitchen bench so you can come up with your own custom modern concrete design!
Tip: consider adding oxide into your concrete mix to change the colour of your concrete benchtop. For example, Gina added white render to make her luxe outdoor dining table and you could do the same to make a white concrete benchtop for your kitchen.
If you want to take on a DIY concrete countertop project, why not ‘pin’ our tutorial to your Pinterest account or share it on Facebook so you can return to it when you need it? Do you have any questions about creating your own concrete bench tops? Leave a comment below and we’ll get back to you asap!
More home DIYs

Reader DIY concrete countertop
We love seeing your DIY projects and Alison recently shared how she used our tutorial to create this fabulous outdoor BBQ area! The combination of concrete and timber is always a winning combo and we love that arch doggy door. Thanks for sharing!

This article was first published in October 2014 and has been updated for accuracy and relevance.