
If like me you’ve been lusting after pillar leg furniture but can’t find a piece that just right — or it’s well out of budget — keep scrolling to see how I hacked my own outdoor dining table with tiled pillar legs. This is a DIY I’ve wanted to create for well over a year and I finally pieced together in my mind how to pull it off. I’m by no means an advanced DIYer… In fact, up until this DIY I’d never used a jigsaw, tiled… or made any furniture for that matter!
Here’s how I made my very own DIY outdoor dining table with tiled legs. I’d love to know what you think of it 😉
Related article: From drab to fab: The easy budget alfresco makeover DIY that will transform your outdoor living space
Related article: 5 easy ways to achieve a Hamptons outdoor space
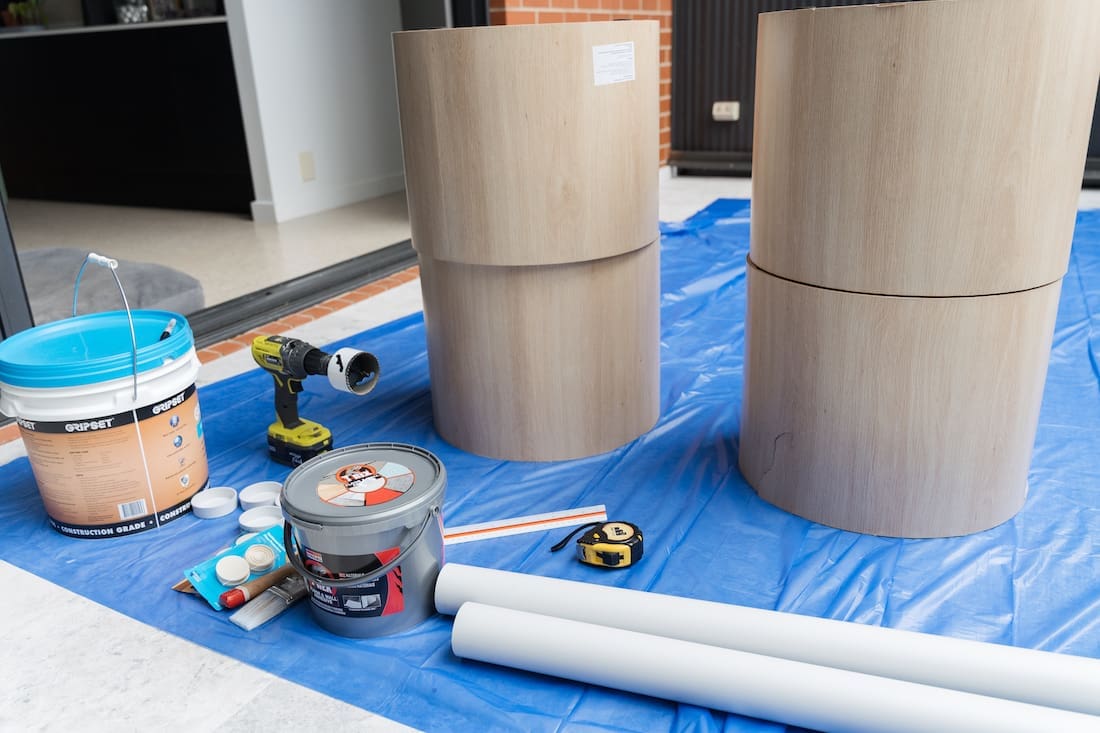
Items you’ll need:
- 4 x Kmart oak look side tables (sold as a set of 2 — I’ll be using the smaller table size for another DIY table)
- MDF board 2400mm long x 1200mm wide
- White kitkat mosaics
- 2 x 1000mm PVC pipe and end caps (used to give the side tables extra sturdiness)
- Cushioned rubber floor protectors (to lift the table off the ground)
- T-Rex glue
- Waterproof (I used Gripset Fast Cure)
- White grout (and measuring jug, bucket and stirrer to mix)
- Feather finish
- White oxide
- Sealer (I used Stain-Stop by Lithofin)
- Jigsaw
- Drill and hole drill bit (large enough for the PVC pipe)
- Sander
- Trowel
- Tile float
- Paint brush
- Measuring tape
- Pencil
Steps:
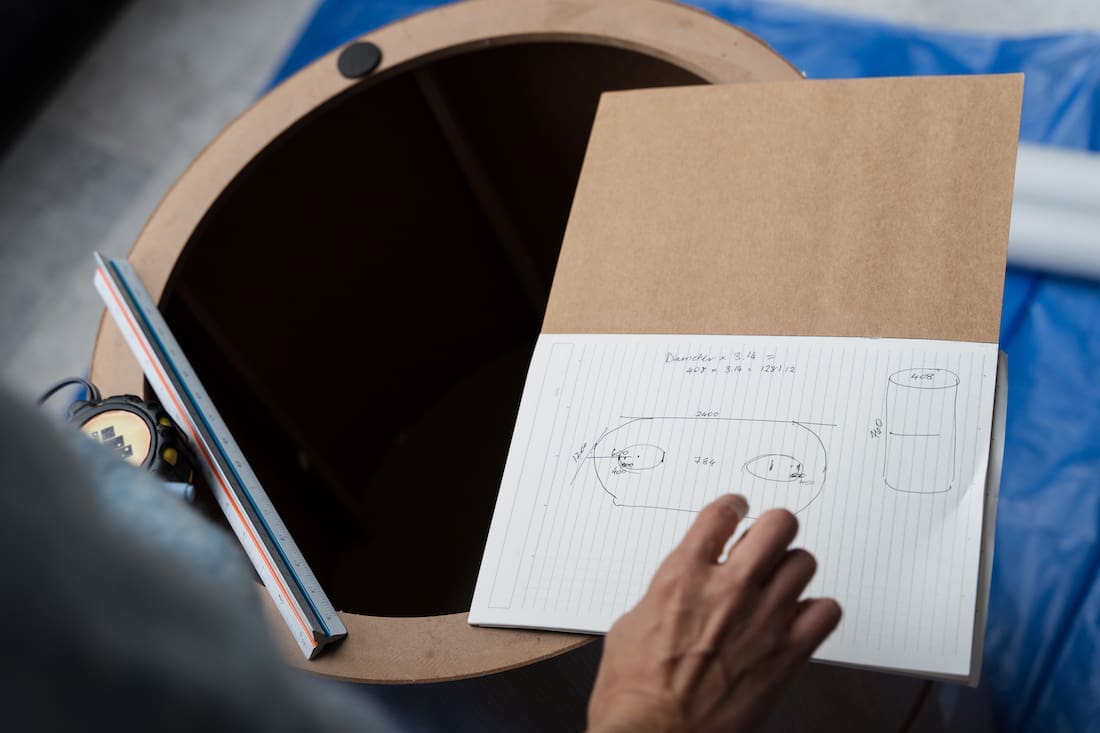
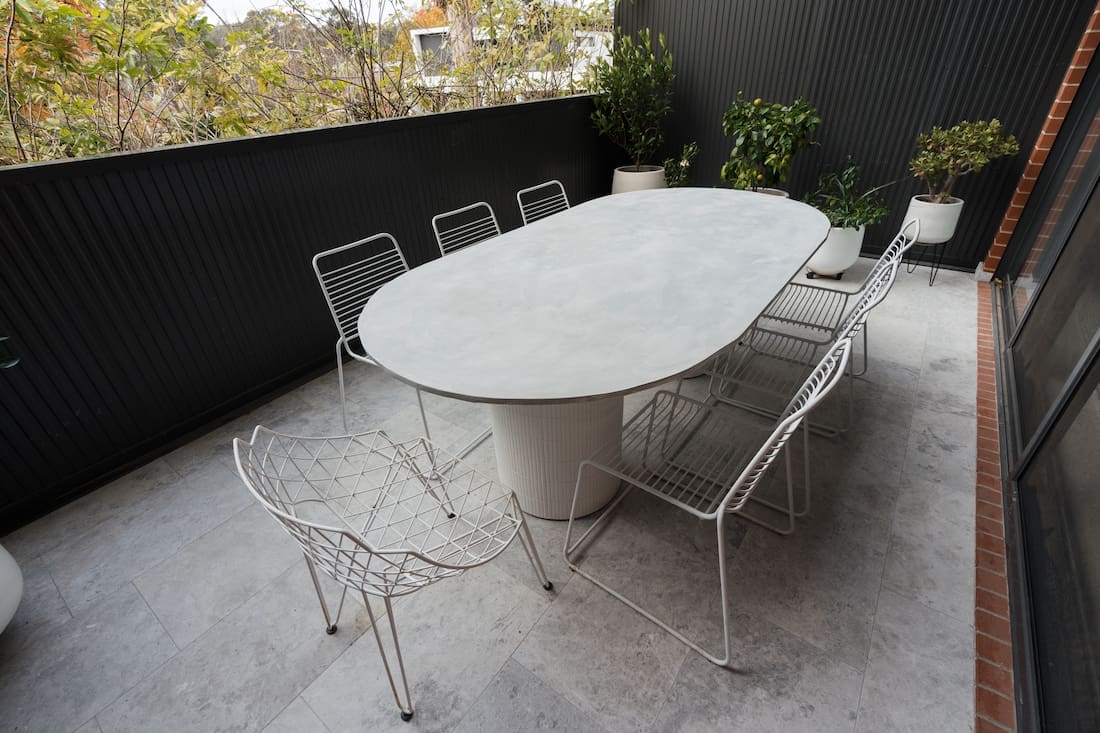
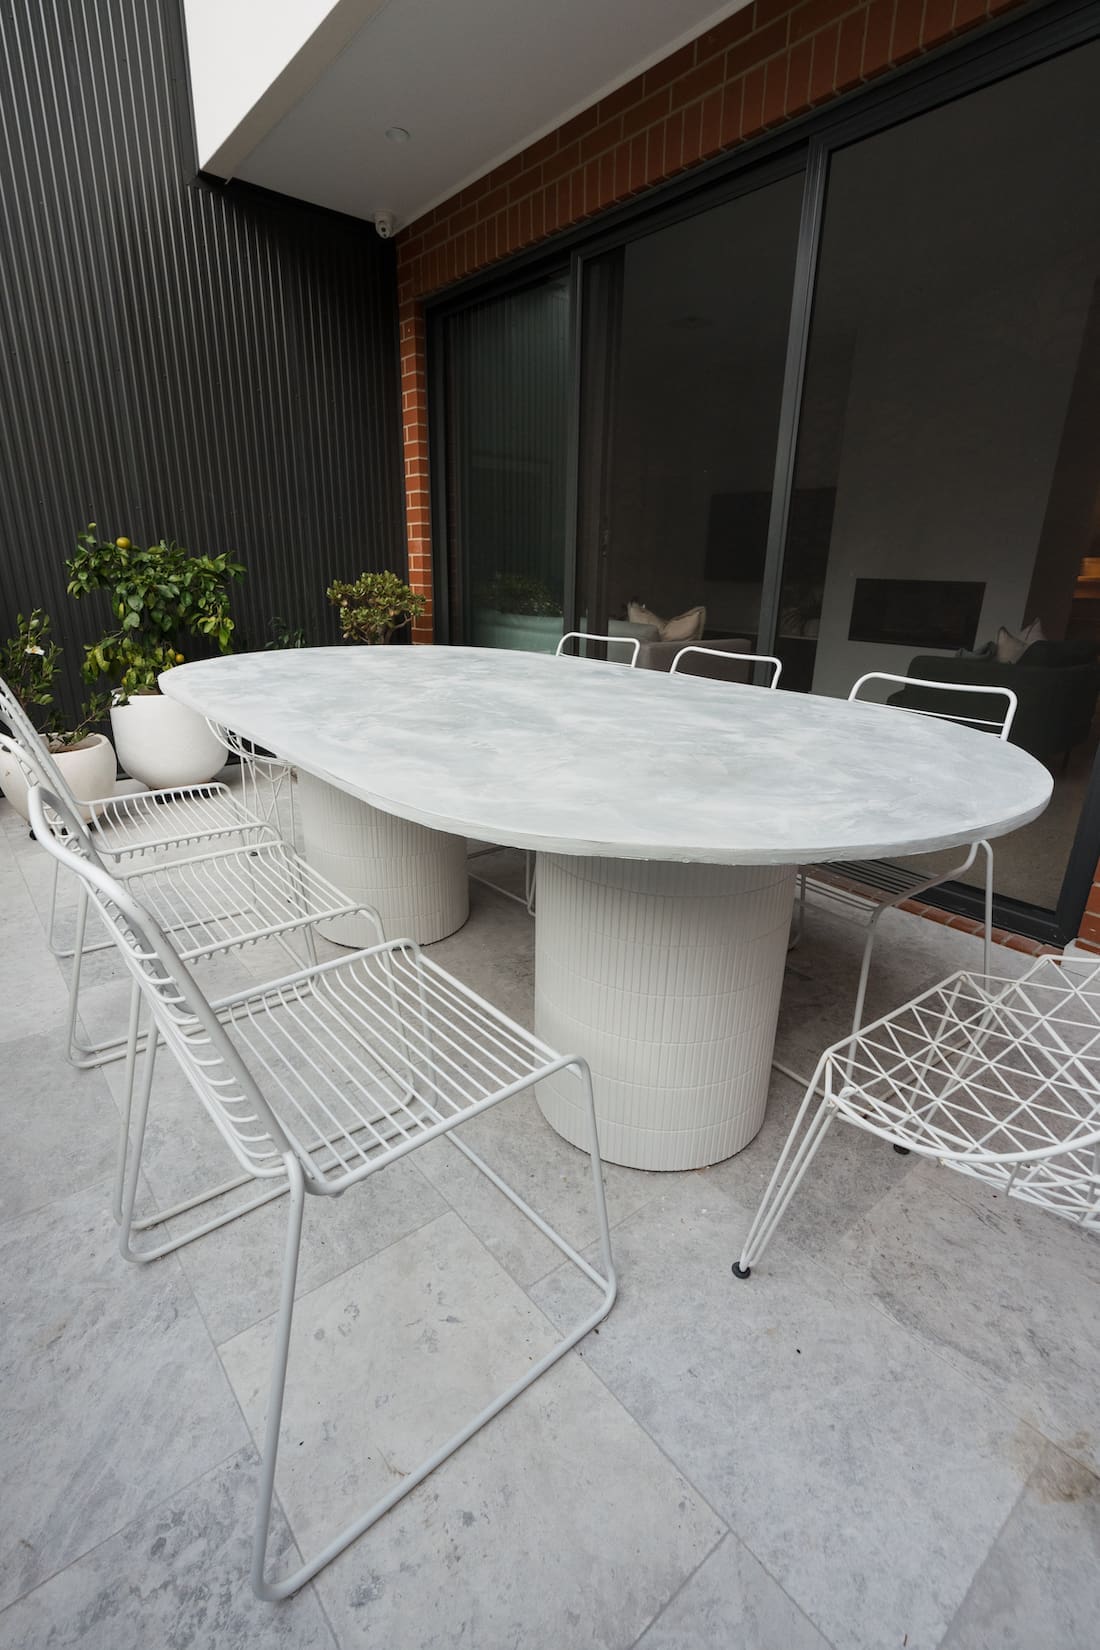
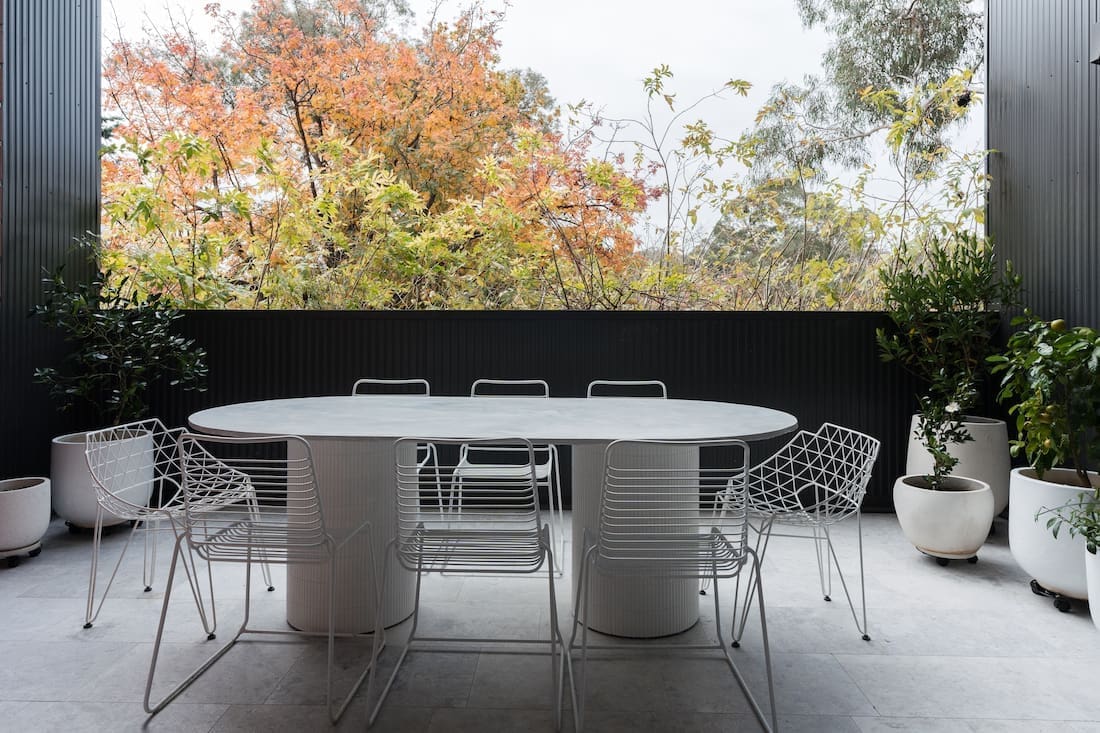
1. Come up with a design for your table. I designed a pill-shaped outdoor dining table with two large tiled pillar legs inspired by a similar ripple curved outdoor dining table I’d seen. You can get as creative as you like, designing a shape to suit your space.
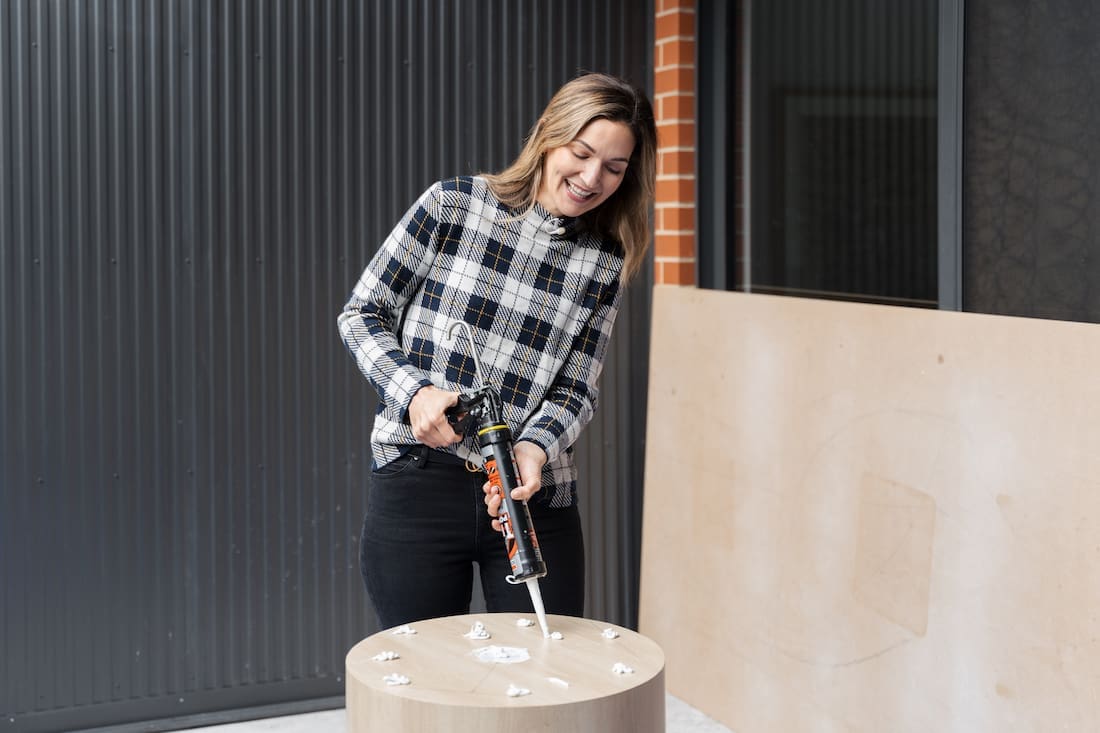
2. I started by making the pillar legs. To do this, I found the centre point in each of the 4 side tables and cut out a hole large enough to feed through my PVC pipe. This is because these side tables are not designed to hold a large weight and I wanted to give the table more sturdiness by reinforcing the centre with pipe.
Then I glued 2 side tables on top of each other, fed through the pipe that I cut to size and glued it all in place. I repeated these steps for the second pillar leg.
I also added rubber furniture protectors to the base of the 2 pillar legs to lift the table off the ground.
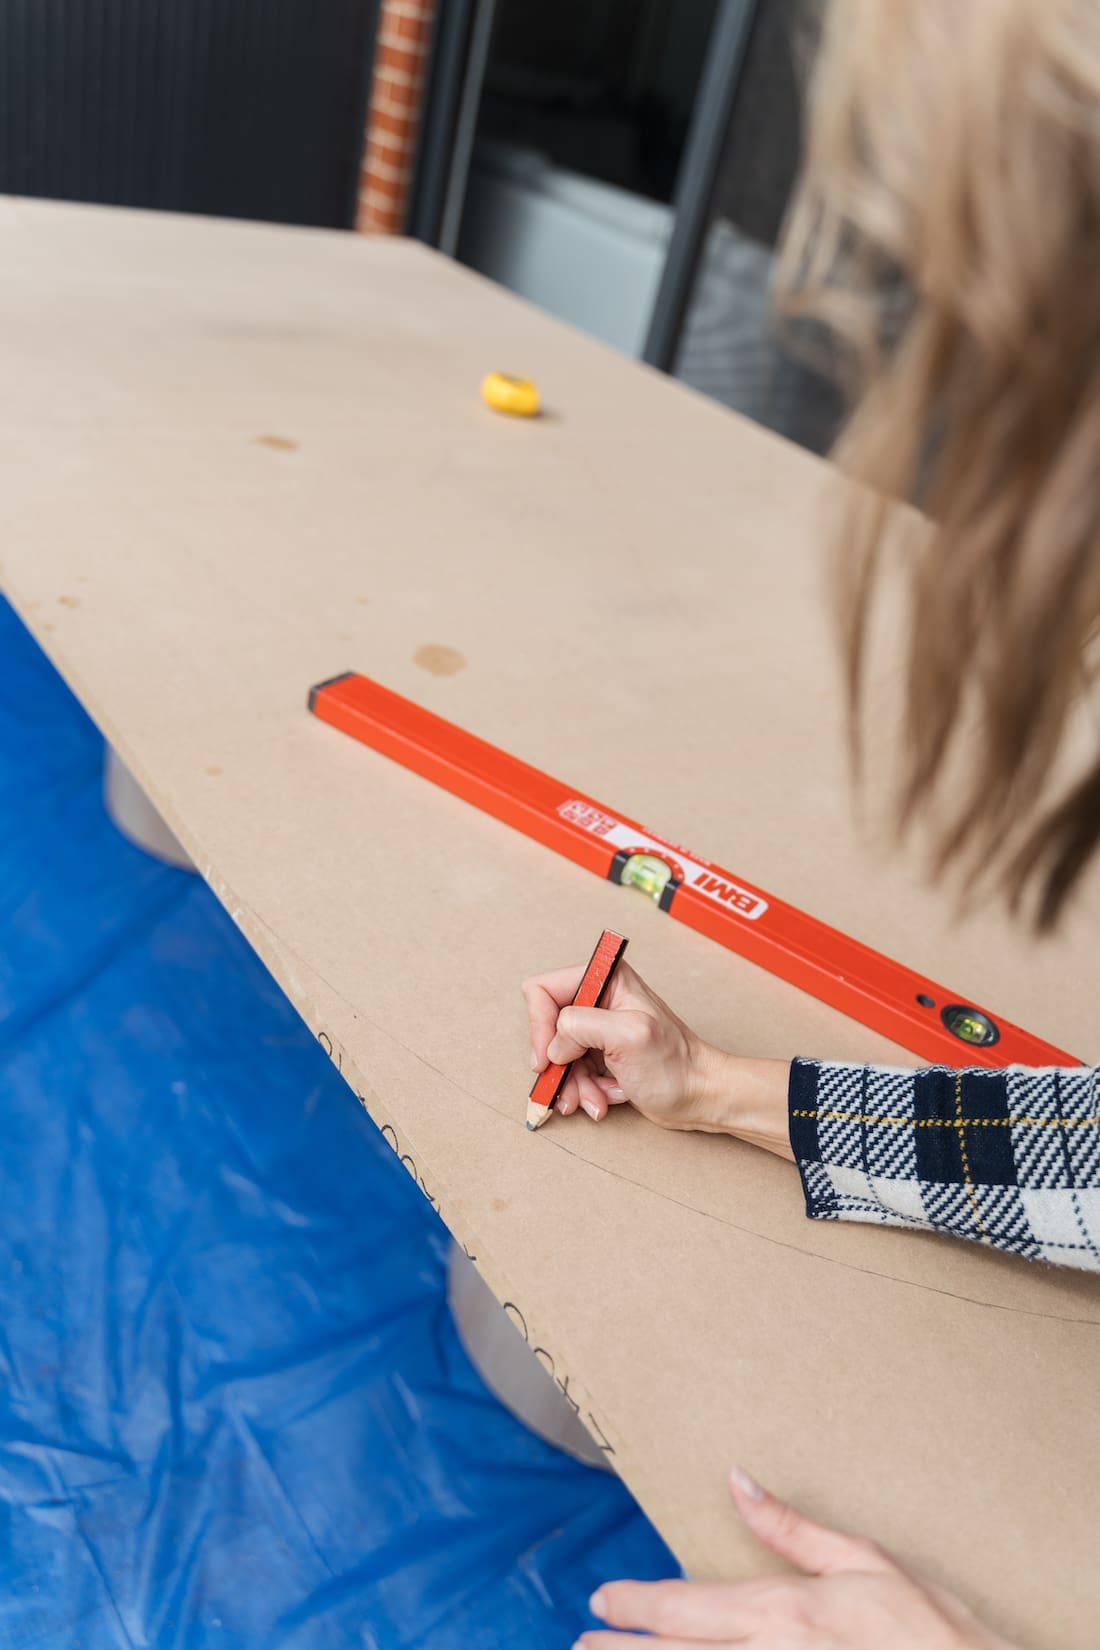
3. Then I glued my MDF board on top. Take your time to get the position right. You want your pillar legs to be in the centre and equal distance apart.
Next I drew out the curved edges. To do this, I found the centre point in the board and used a level as a guide (much like a giant ruler) to draw the curves.
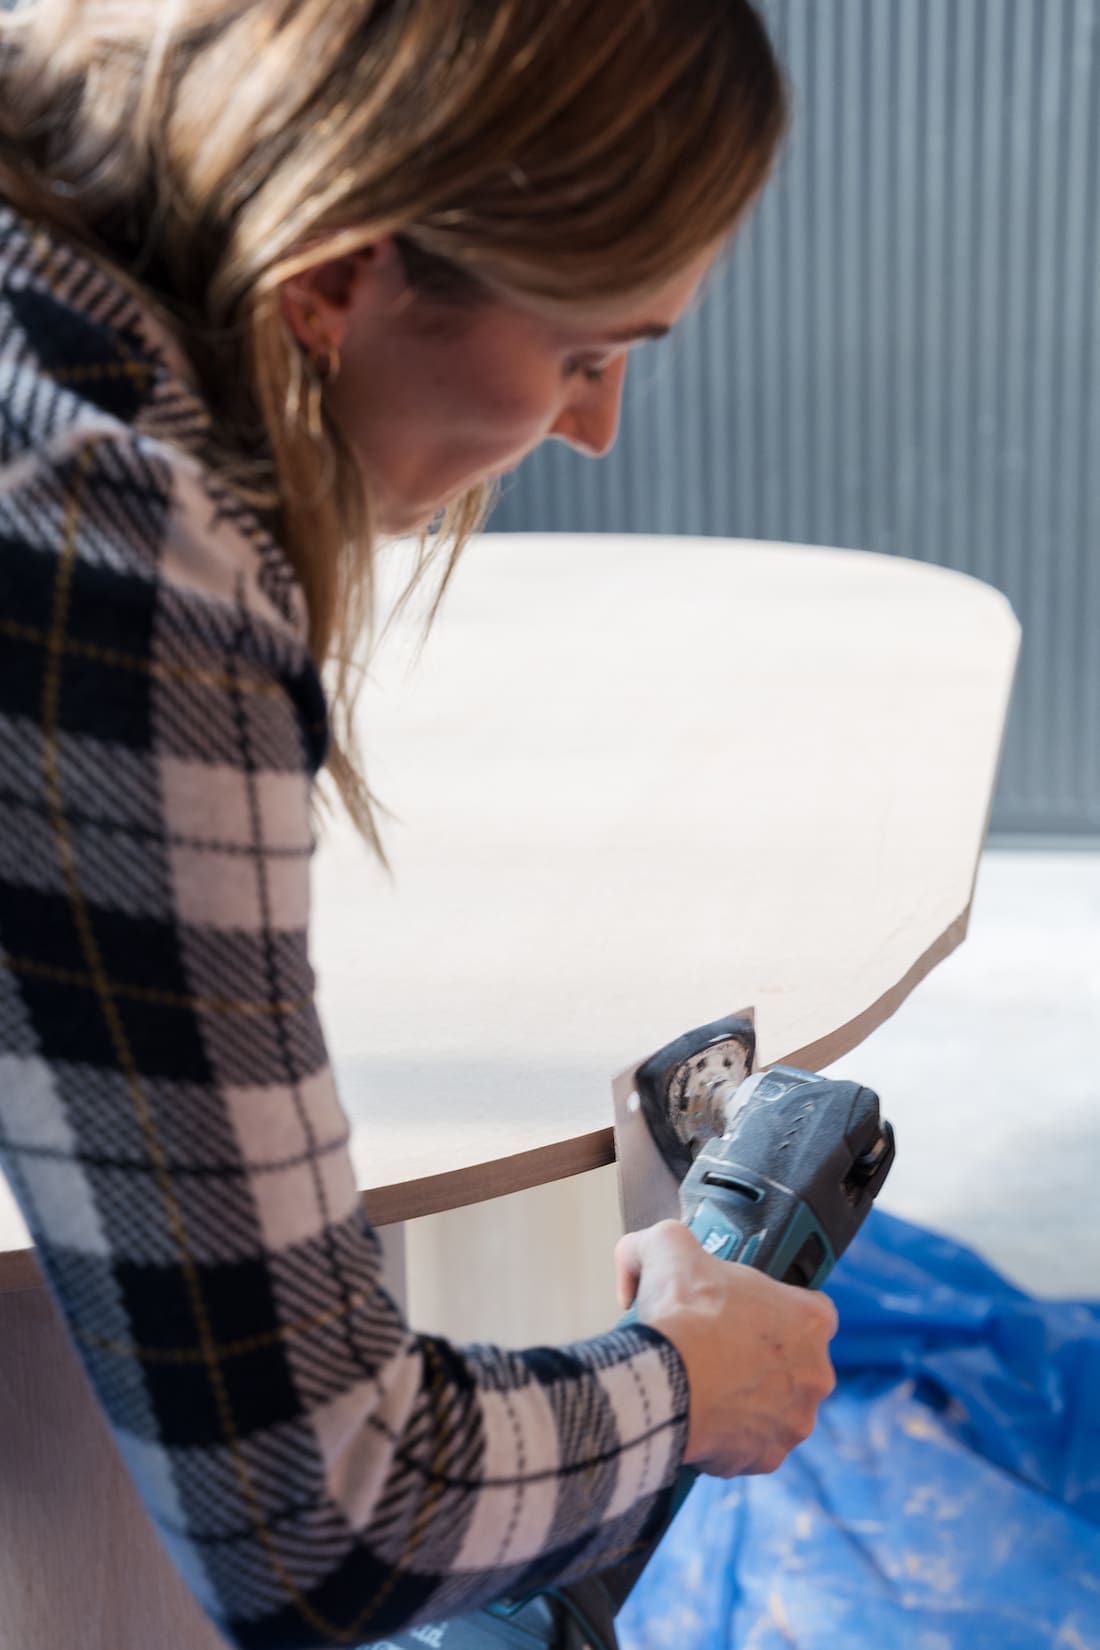
Use a jigsaw to cut out your pill shape tabletop.
4. Then I sanded the edges to smooth out my cuts. This was my first time using a jigsaw so my lines were a bit bumpy.
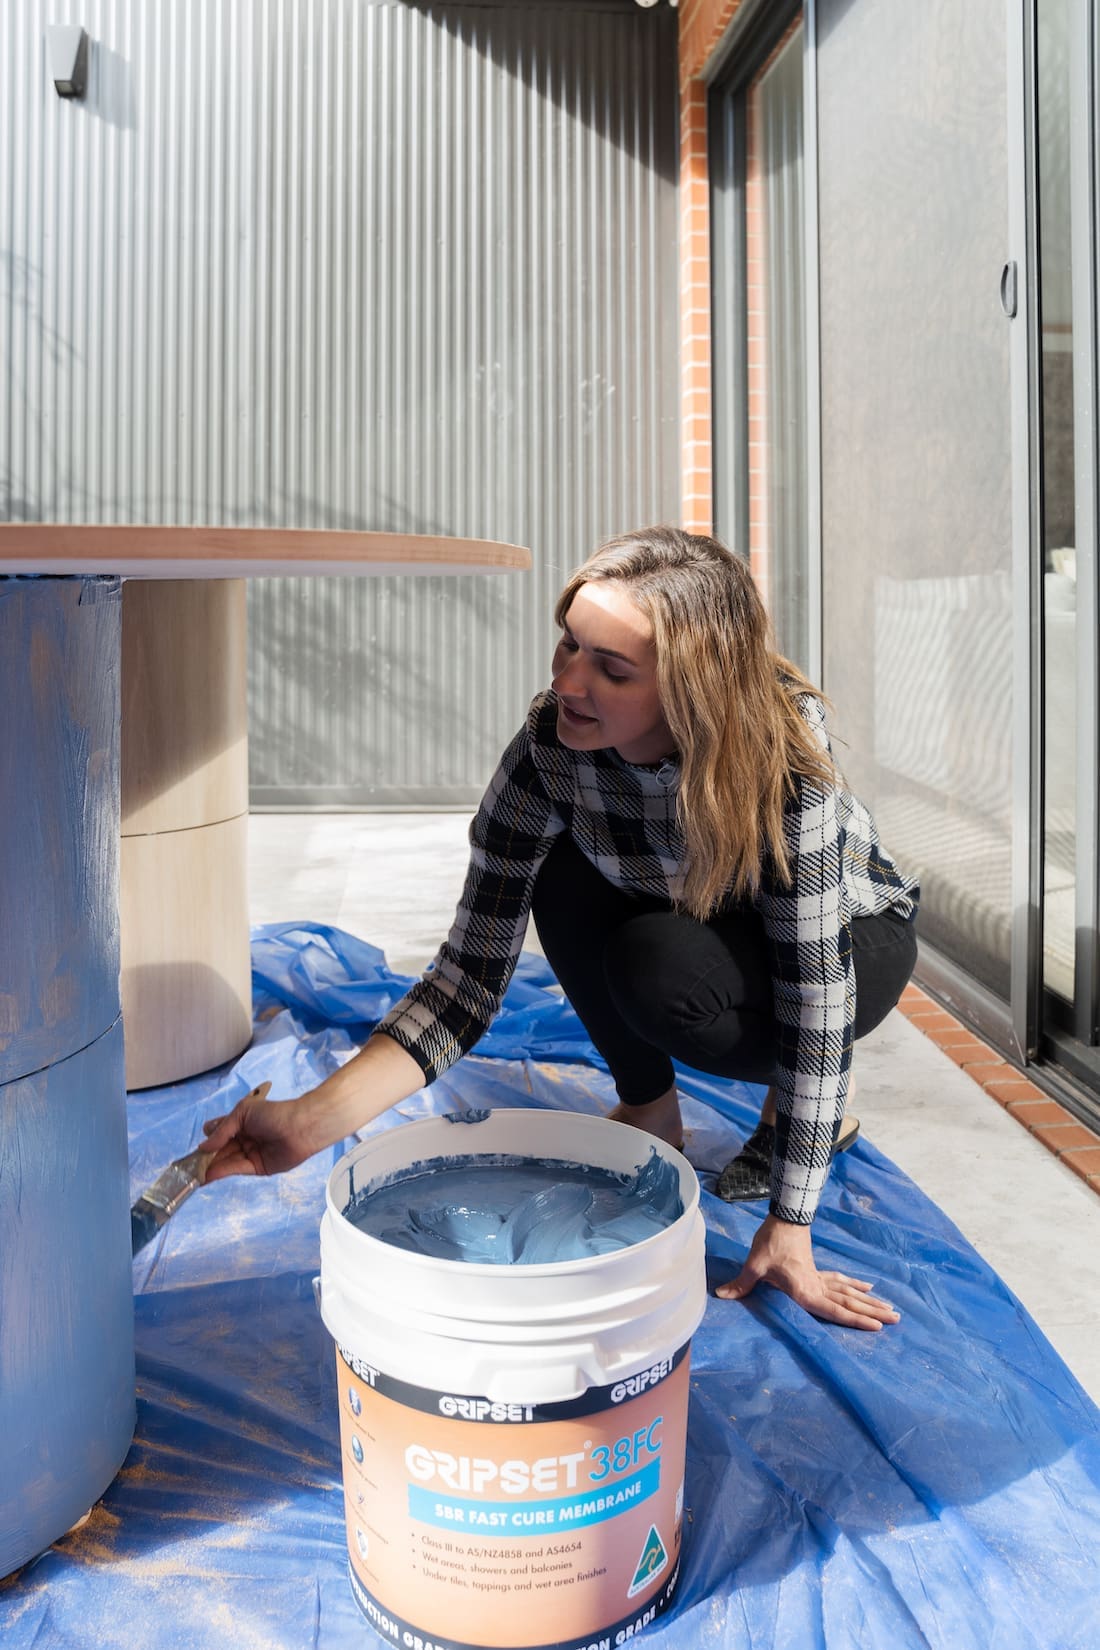
5. I cleaned the table and then used a paint brush to apply waterproof all over (tabletop and legs). You won’t need to do this if your table is indoors. But this one is semi-exposed in an alfresco area.
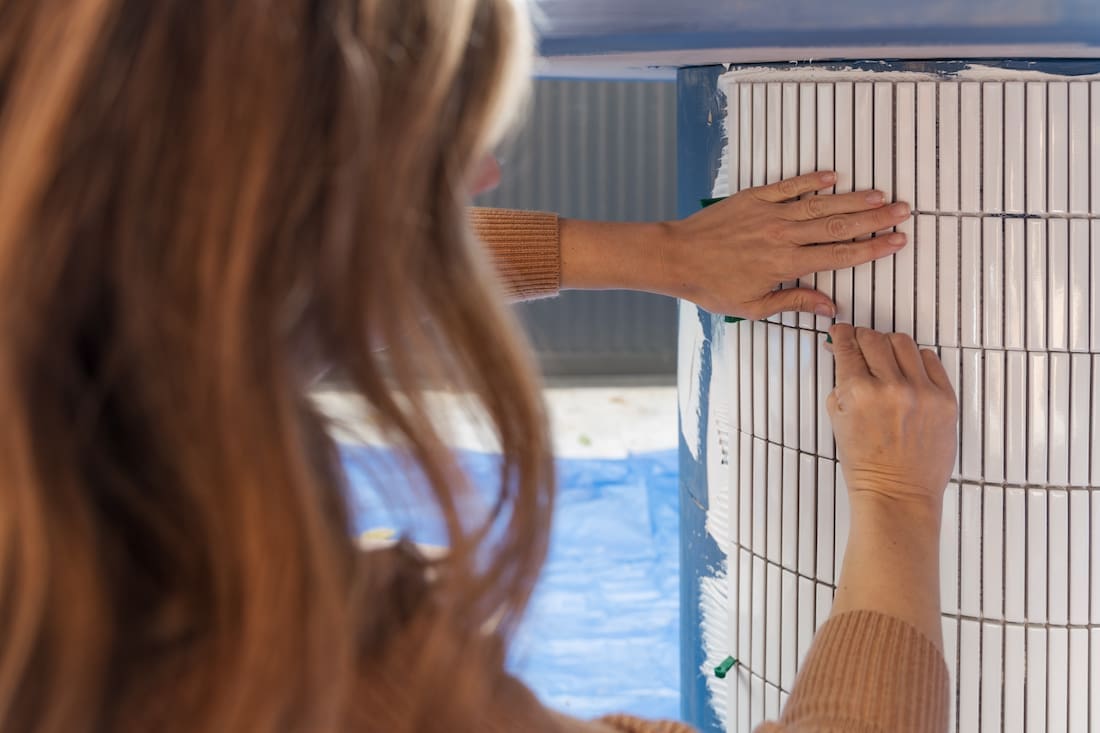
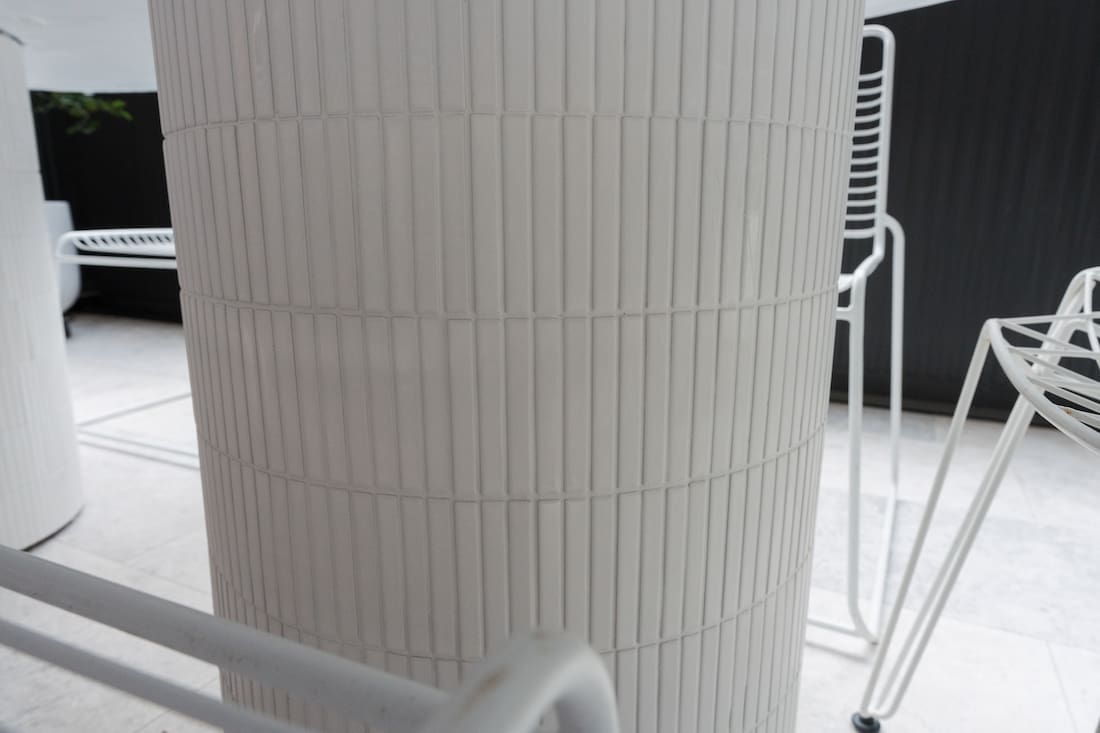
6. Then I tiled the pillar legs. To do this, I applied T-Rex glue using a trowel and placed the kitkat mosaic tiles on top. I used 1mm tile spacers to get an equal distance between the mosaic sheets.
You can find kitkat tiles (also called finger tiles) in many sizes, colours and finishes, including natural stone, so you could get really creative!
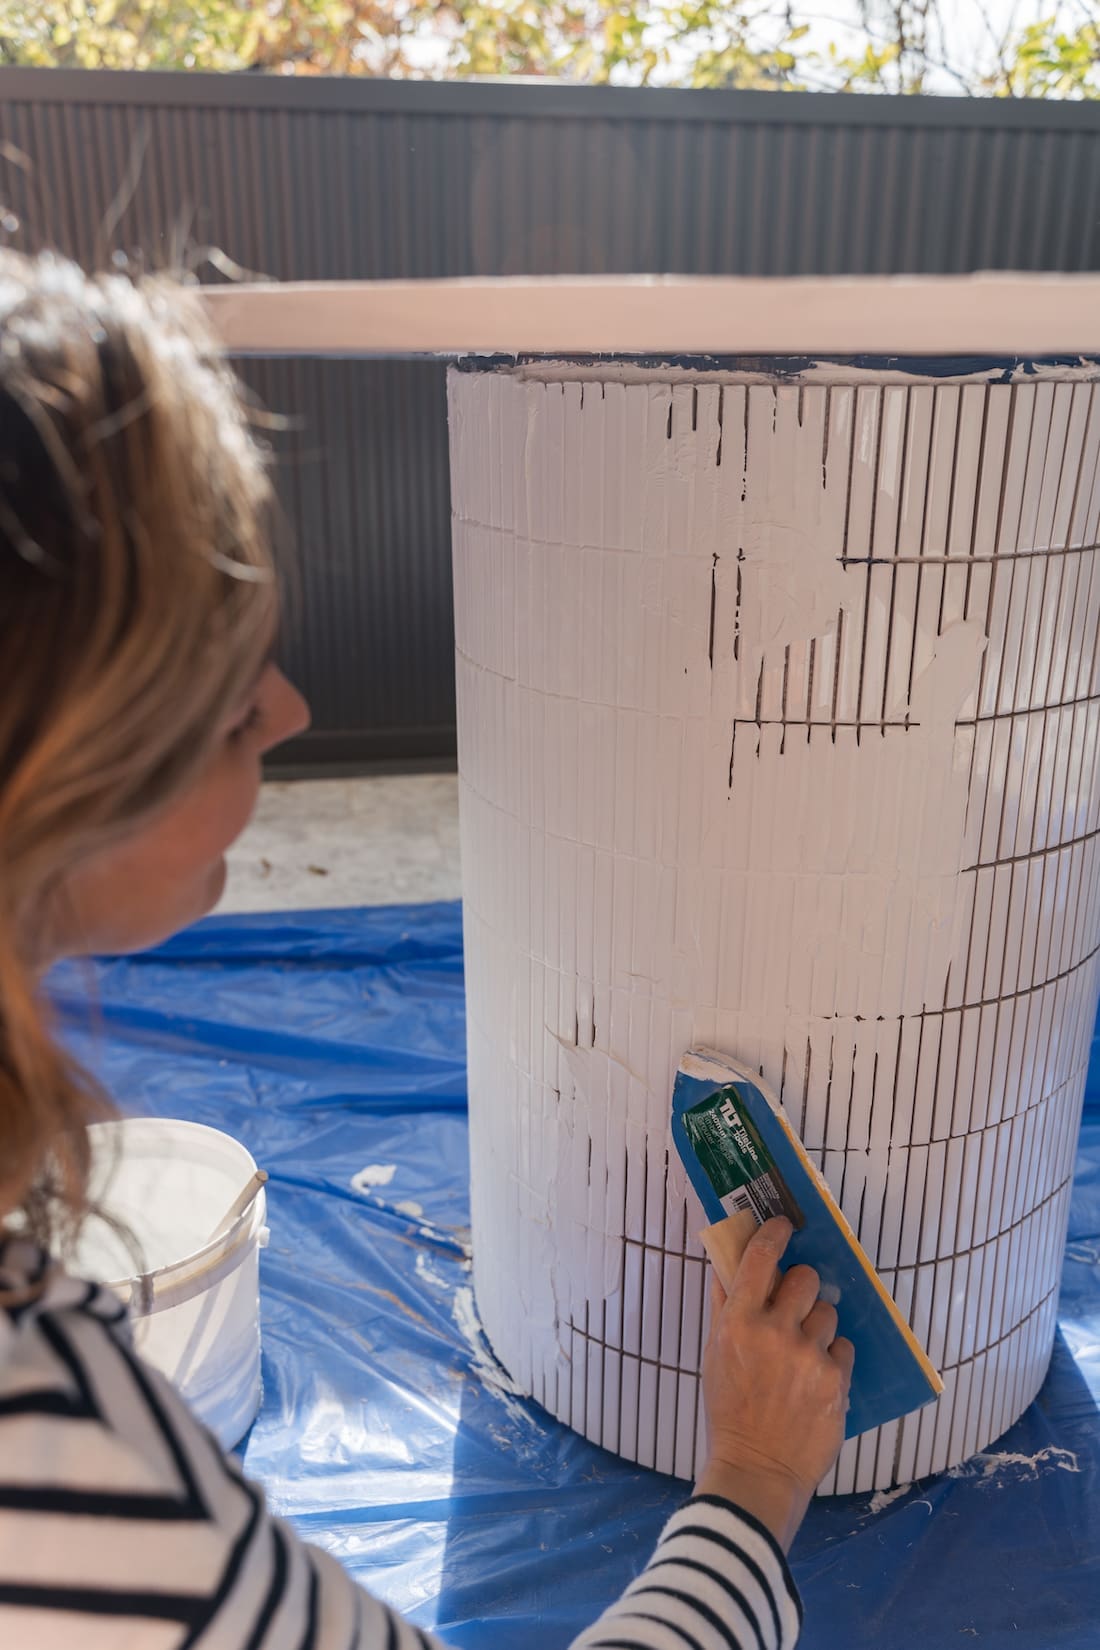
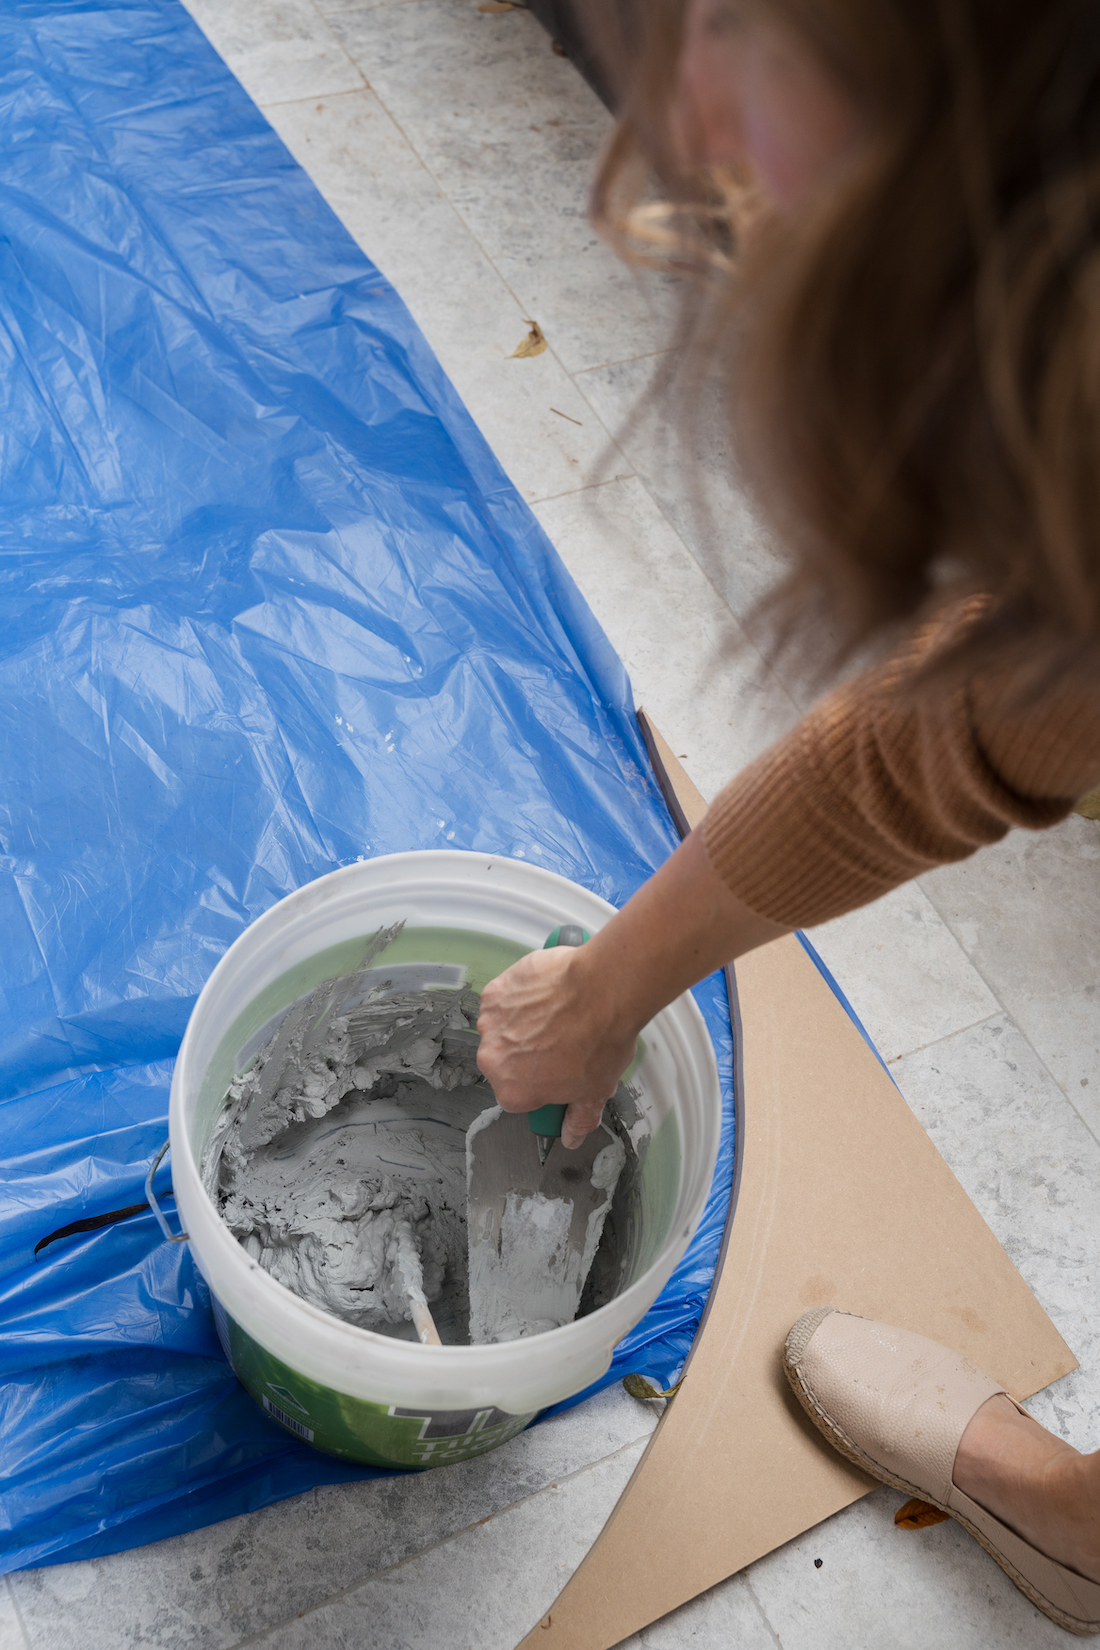
7. The next day, once the glue was dry, I grouted the pillar legs. You could use a different coloured grout to emphasise the tile shape but my tiling job isn’t perfect so I chose white grout. Mix up the grout following the instructions on the packet and use a tile float to get it in between all the tiles. Sponge off excess grout using a damp sponge.
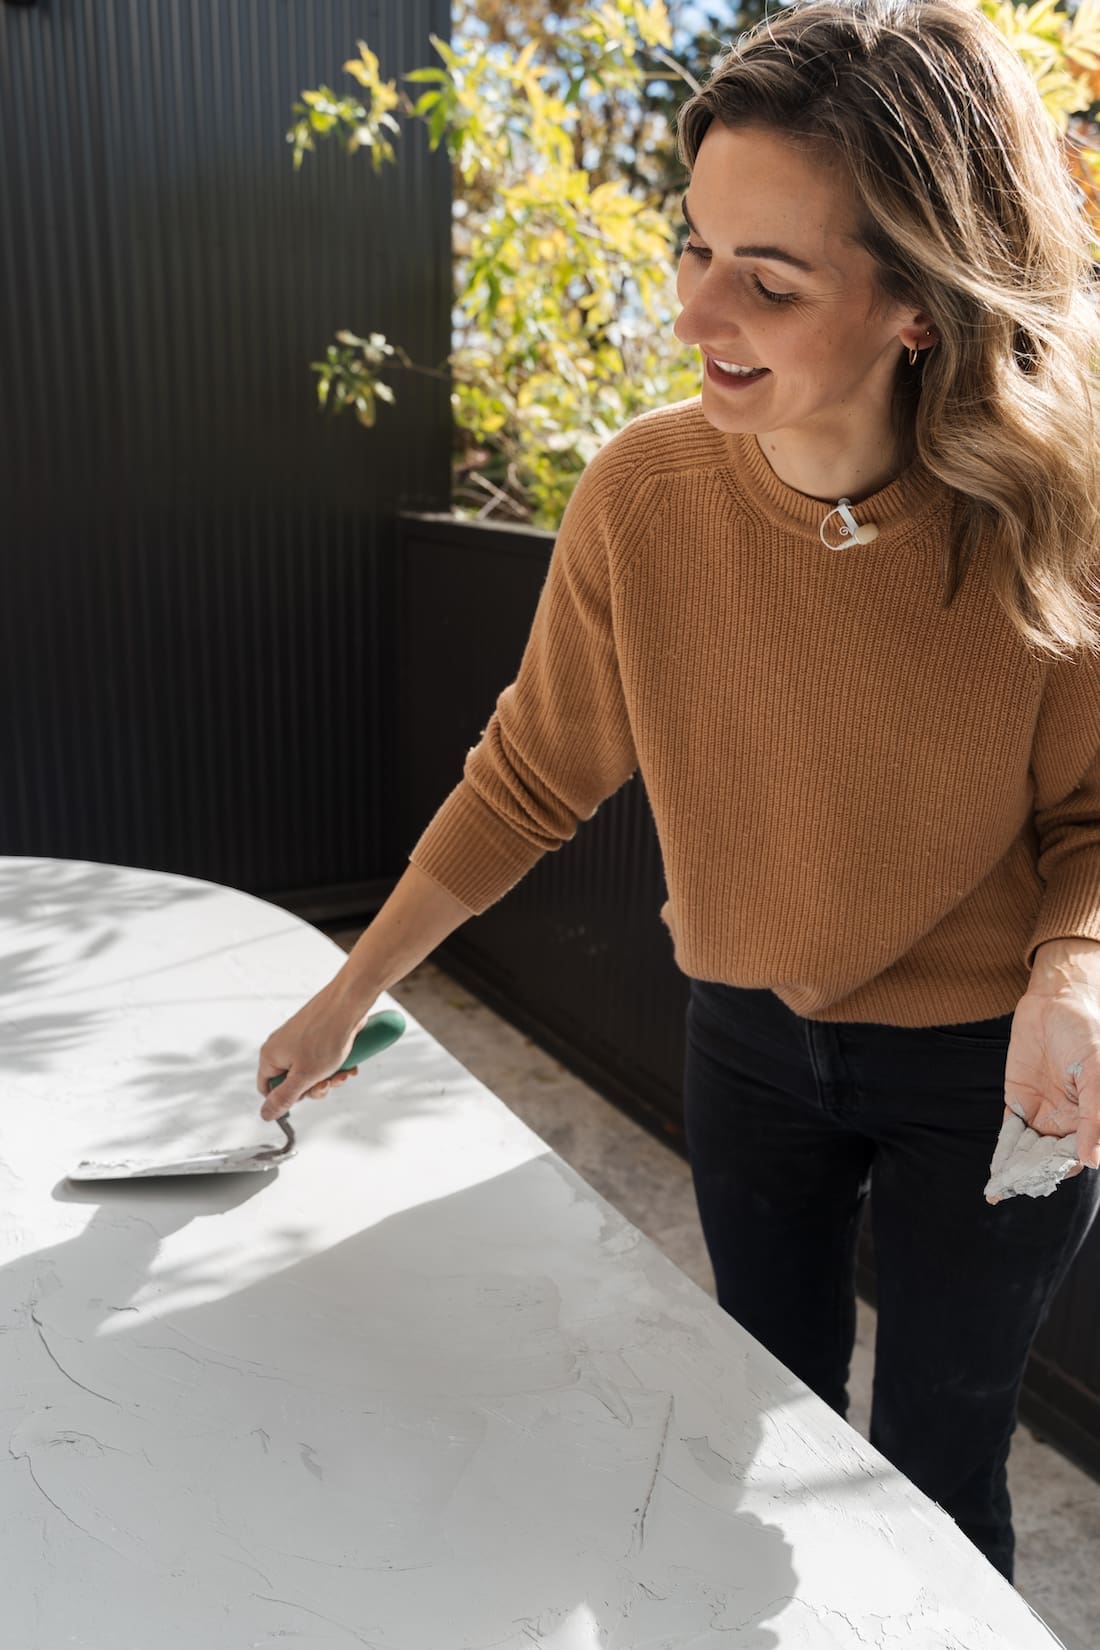
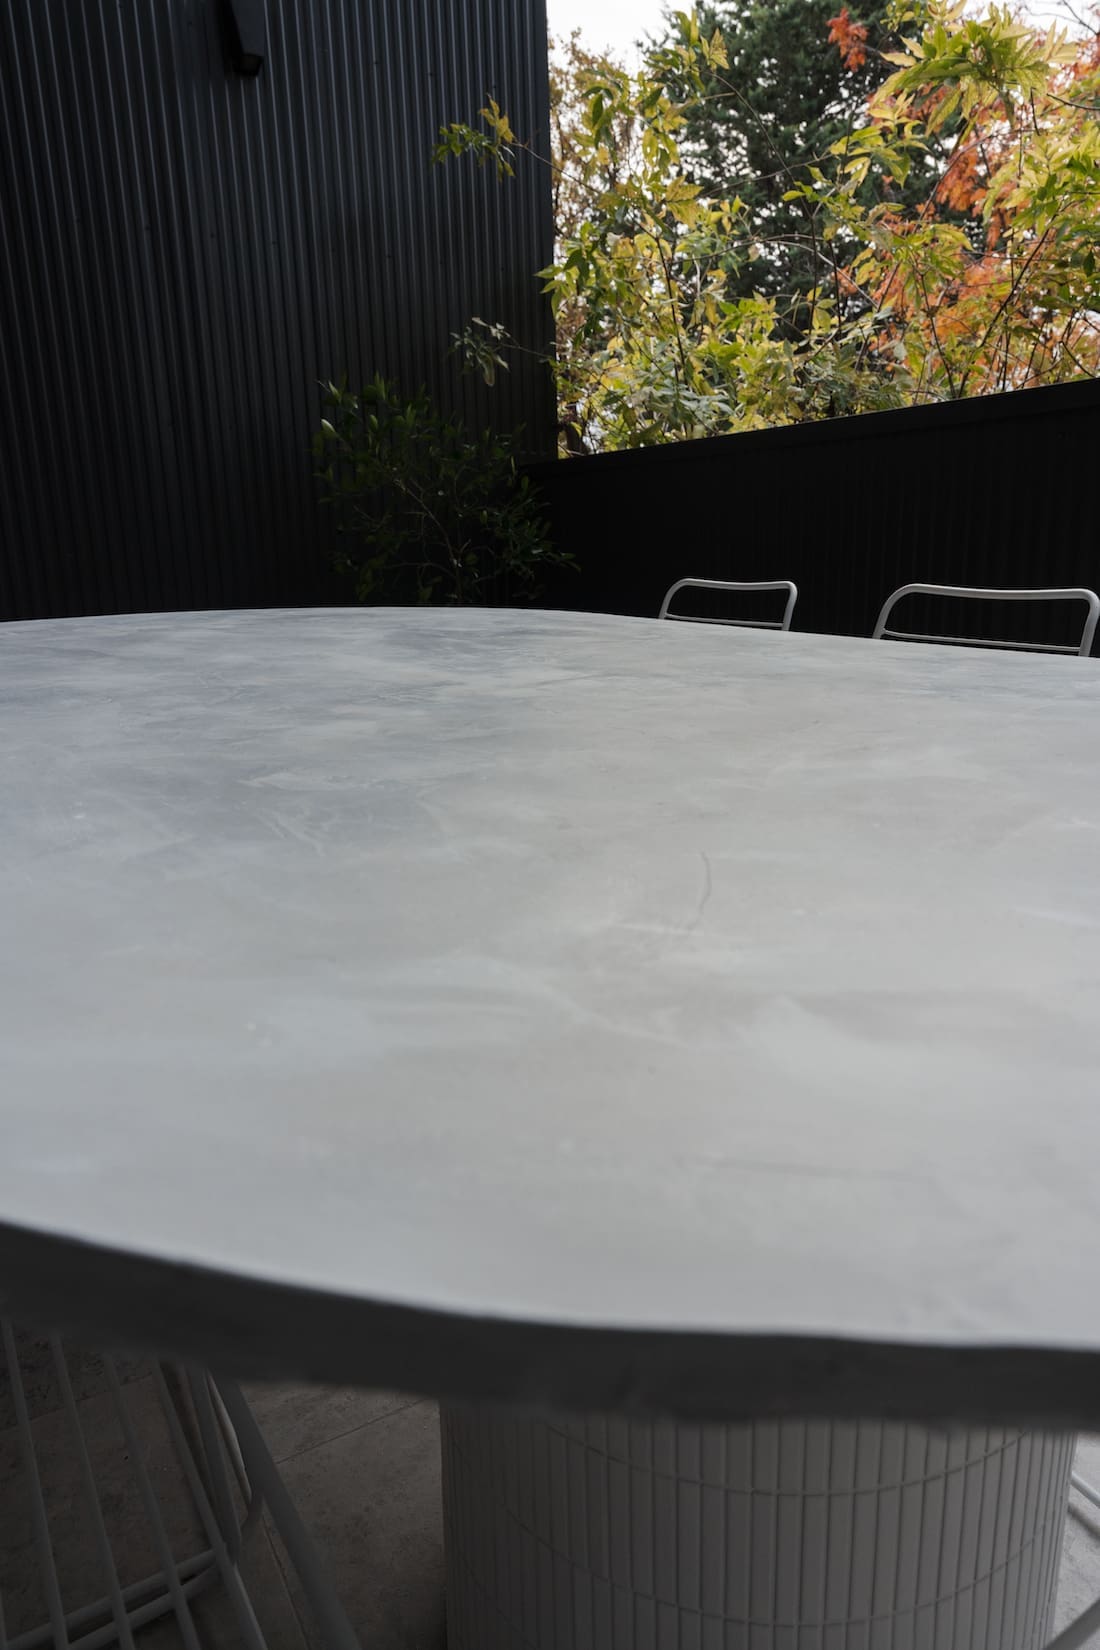
8. Then I worked on the table top. I wanted to give this table a stone look top so I used Feather Finish (concrete render) and mixed in white oxide. I used a ratio of about 85% feather finish and 15% white oxide.
Once I mixed it well with water, I used a trowel to apply it evenly over the table top. You want to achieve a ‘cake batter consistency’ so it’s easy to apply but not runny. As you can see in the pics, I also used my hands to apply it onto the sides of the table.

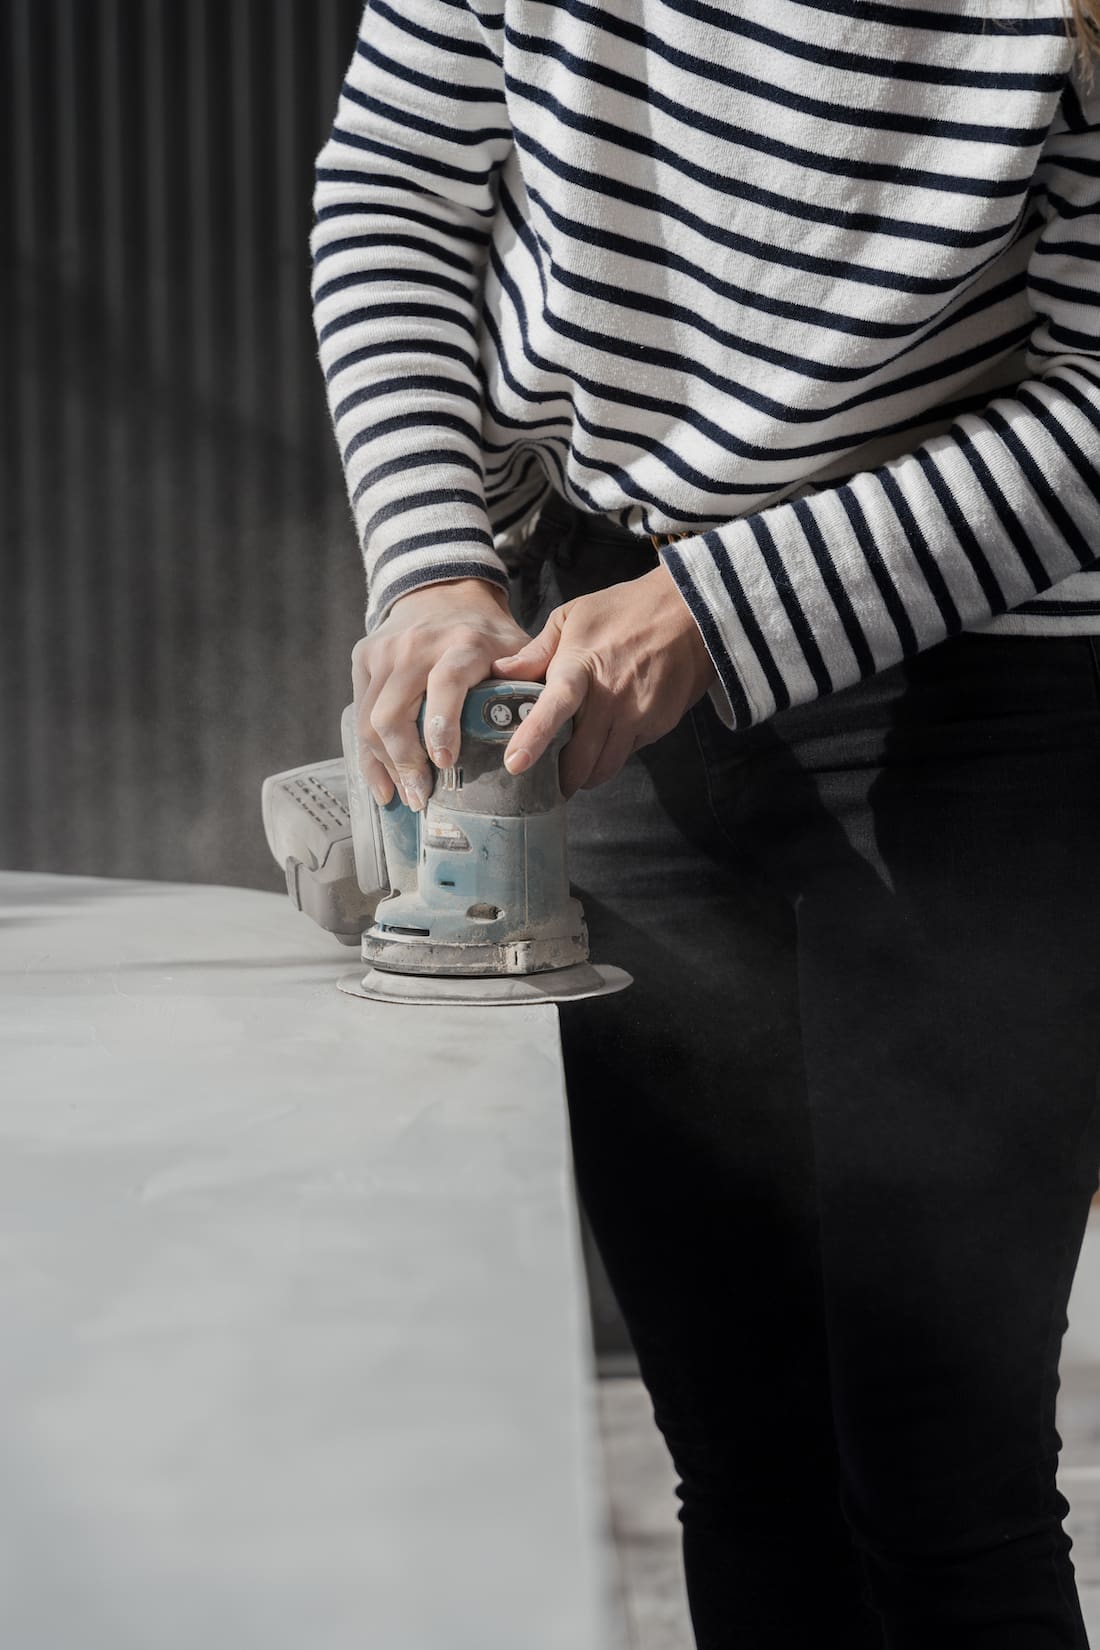
9. Allow the table top to dry fully before using a sander to smooth it out. Depending on the coverage you achieved with the feather finish mix, you may need to repeat step 8 and apply a second coat.
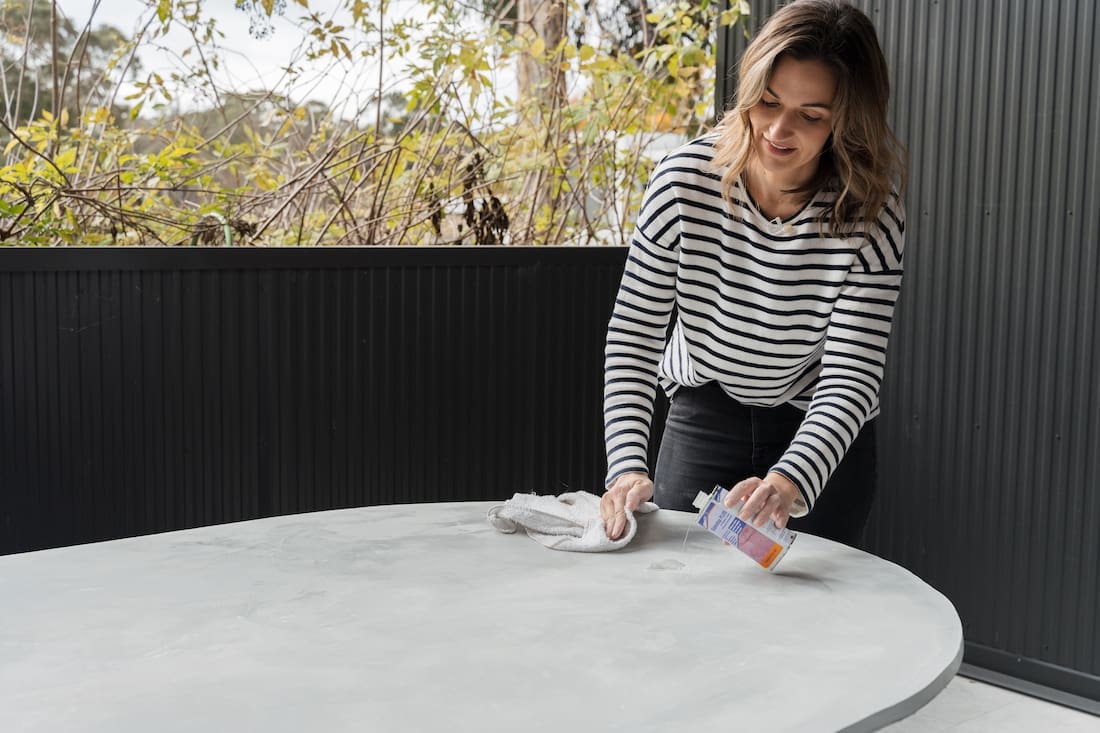
10. Finally, I cleaned the table and applied one coat of sealer with an old rag. I did this by pouring the sealer directly onto the table and using the rag to rub it in using quick circular motions.
I won’t lie, this is one of the most complex DIYs I’ve made. But as someone with zero woodwork or tiling skills, I was able to make this table by myself and am thrilled with the results. My biggest tip would be to have patience, as you need to allow for a lot of drying time!
Do you have any questions about this DIY? Pop it in the comments below and I’ll get back to you asap. Or have you been inspired to make your own DIY outdoor dining table? I’d love to know what you decide to create!
More DIYs for the home

This article was first published in May 2022


Comments are closed.