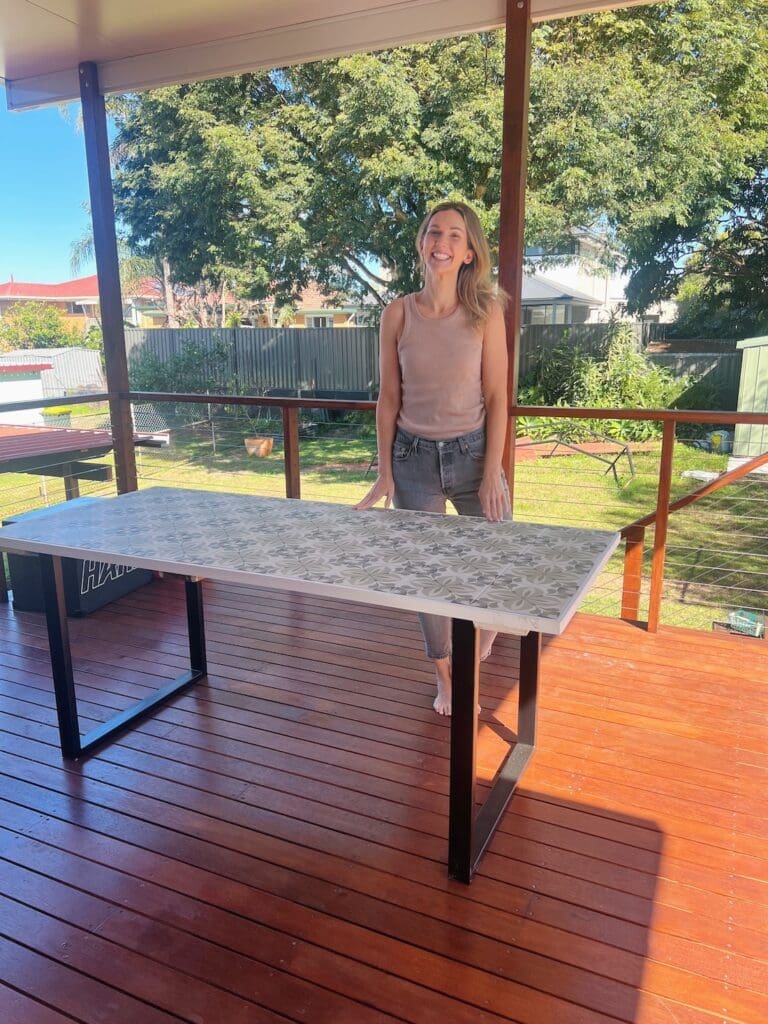
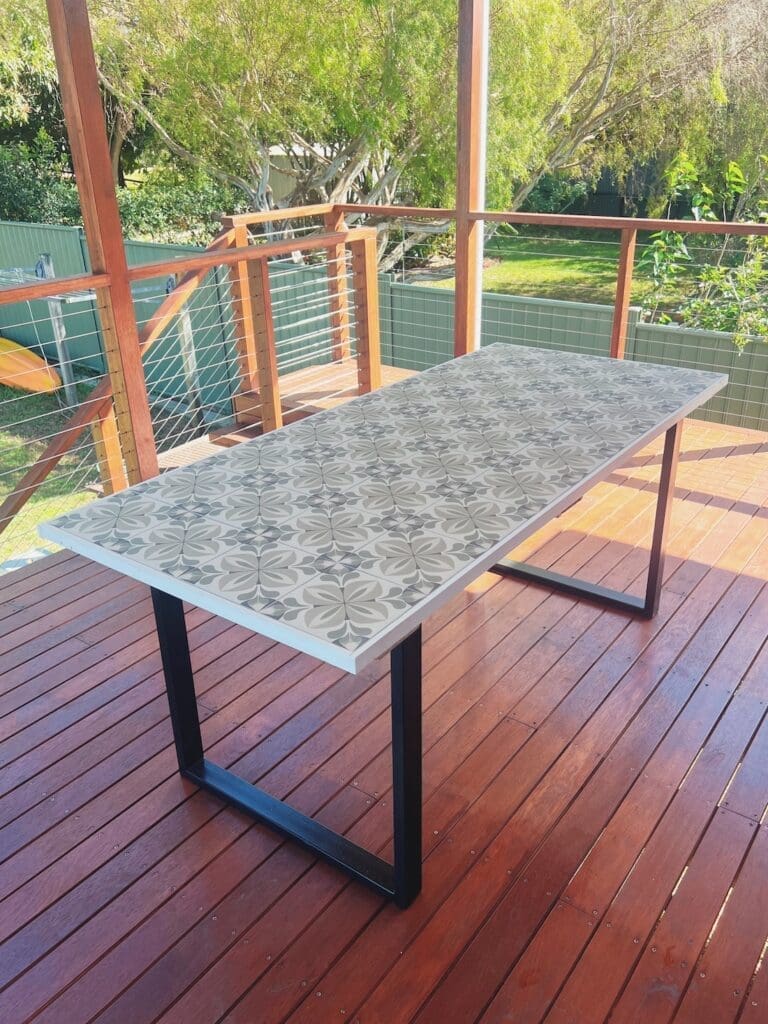
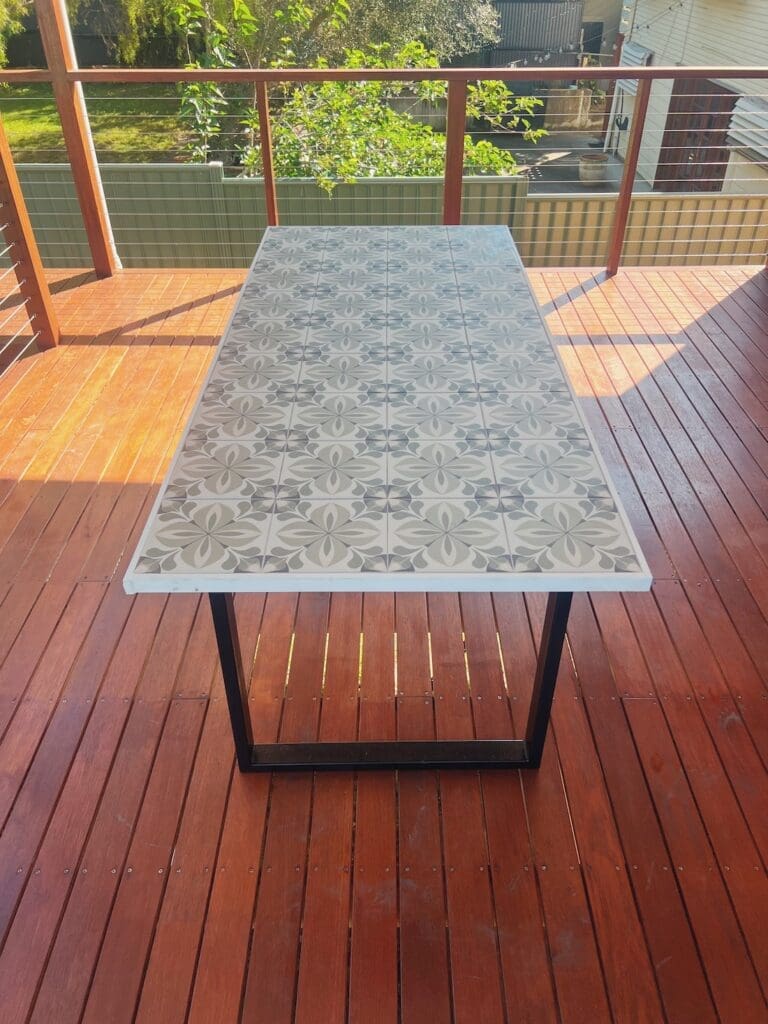
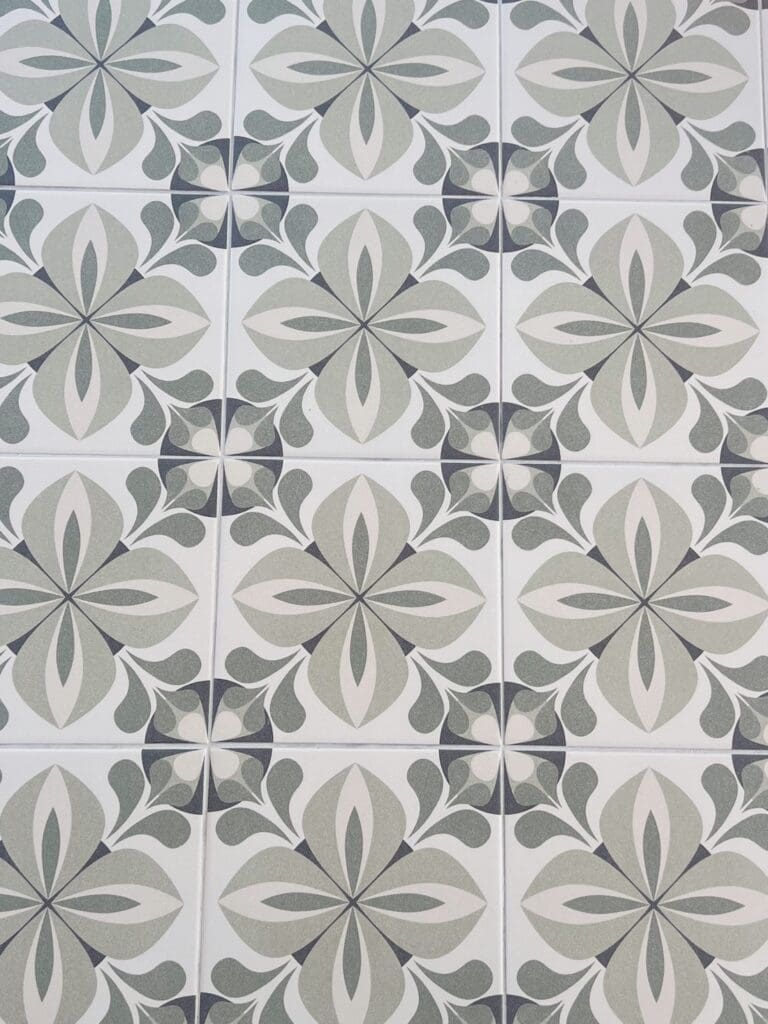
If you’ve been following along for a while, you’ll know I’ve become a tad addicted to making tiled tables… and yes, I’ve gone and made another one 🤭 This time, I couldn’t resist using the gorgeous Bali Muaya tile from National Tiles — its patterned design and gorgeous green colourway is perfect for outdoor entertaining.
To keep this project budget-friendly, we bought an old door and some metal table legs from Facebook Marketplace (that had well and truly seen better days!) and gave them a whole new lease on life. Here’s how we turned them into a patterned tiled showstopper!
Related article: DIY terrazzo side table: Make your own luxe stone side table
Related article: DIY travertine table
Materials you’ll need:
- Old tabletop (we used an old door) + sturdy legs
- Tiles of your choice (we used Bali Muaya from National Tiles)
- Timber trim for edging
- Spray paint suitable for metal and outdoor use
- Eco Prim Grip (or similar primer for surfaces before tiling)
- Mapei tile adhesive
- Tile spacers
- Grout
- Bucket and float
- Trowel and sponge
Steps to create your DIY patterned tile table:
1. Prep your base
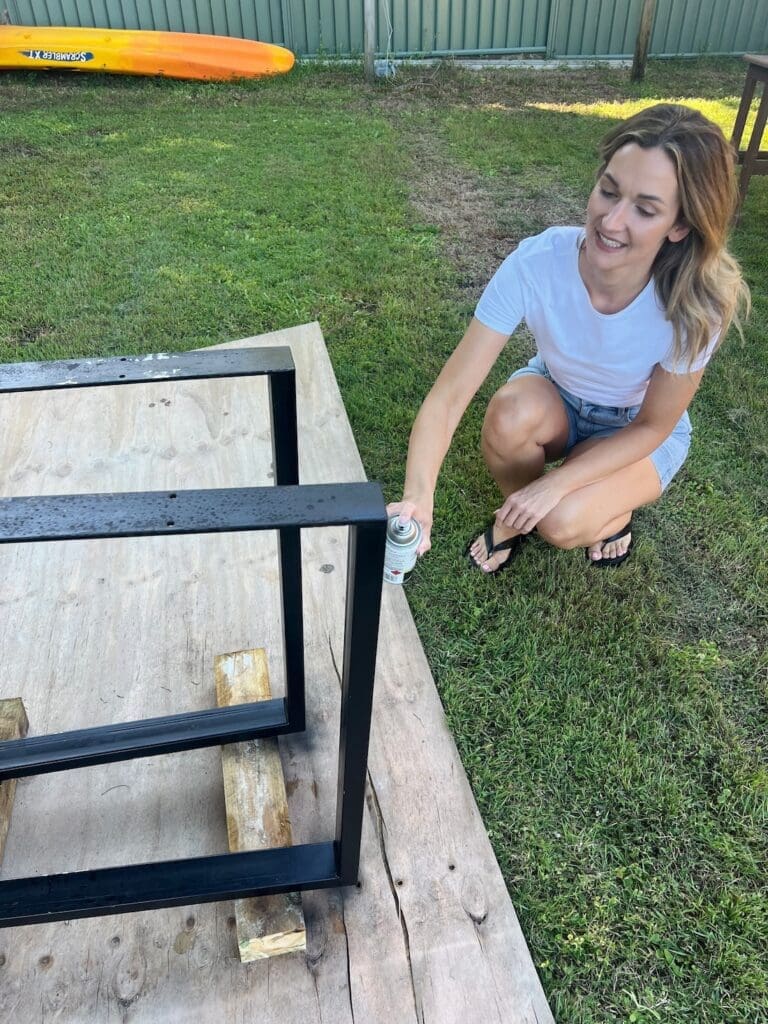
Give your table legs and top a good clean. Sand back any rough edges. We cut the old door down to the exact size we wanted for the tabletop (remember to factor in grout joints when measuring). The tile legs were also a bit rusty, so I gave them a good clean using WD-40 Ez-Reach and a metal bristle brush.
2. Freshen up the legs
Spray paint the legs in your preferred colour, making sure to use a paint suitable for metal and outdoor use. This instantly updates the base and protects it from the elements.
3. Prime the tabletop
Apply a coat of Eco Prim Grip to the tabletop so the tiles will adhere properly. This is especially important if your table is smooth (like glass) or like ours, lifting a bit in areas. Allow it to dry as per the product instructions.
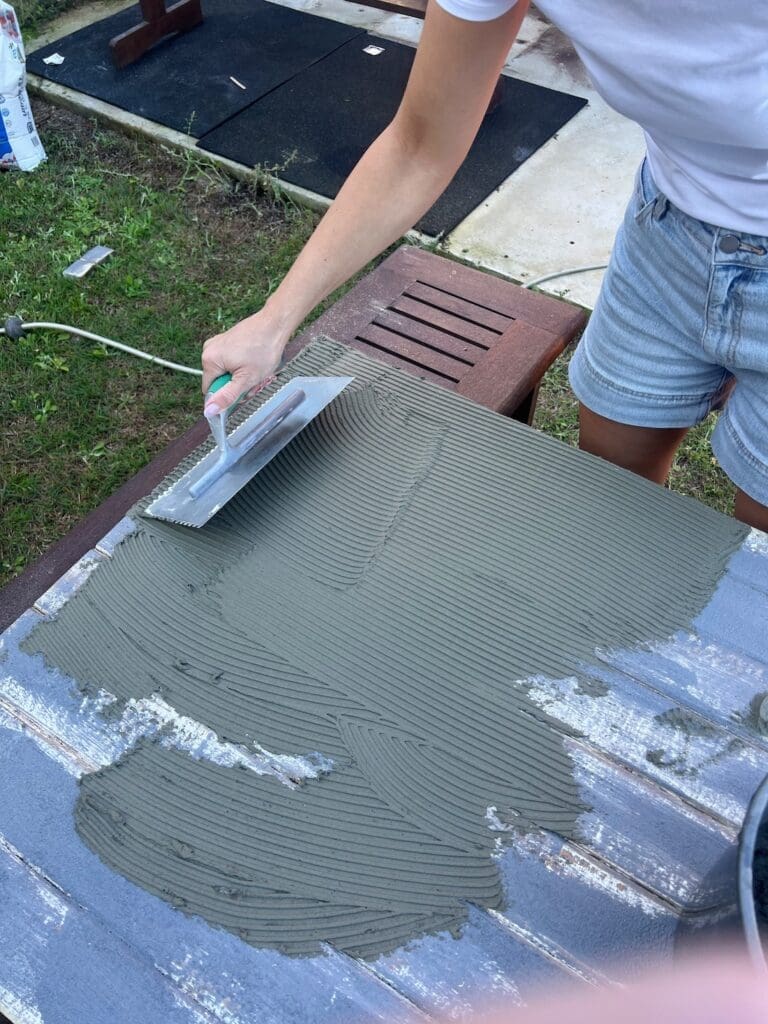
4. Lay the tiles
Mix up your Mapei tile glue and use a notched trowel to spread it evenly across the tabletop. Carefully lay down the tiles, using spacers to keep your grout lines even. It’s best to work in small areas at a time as the glue dries very quickly!
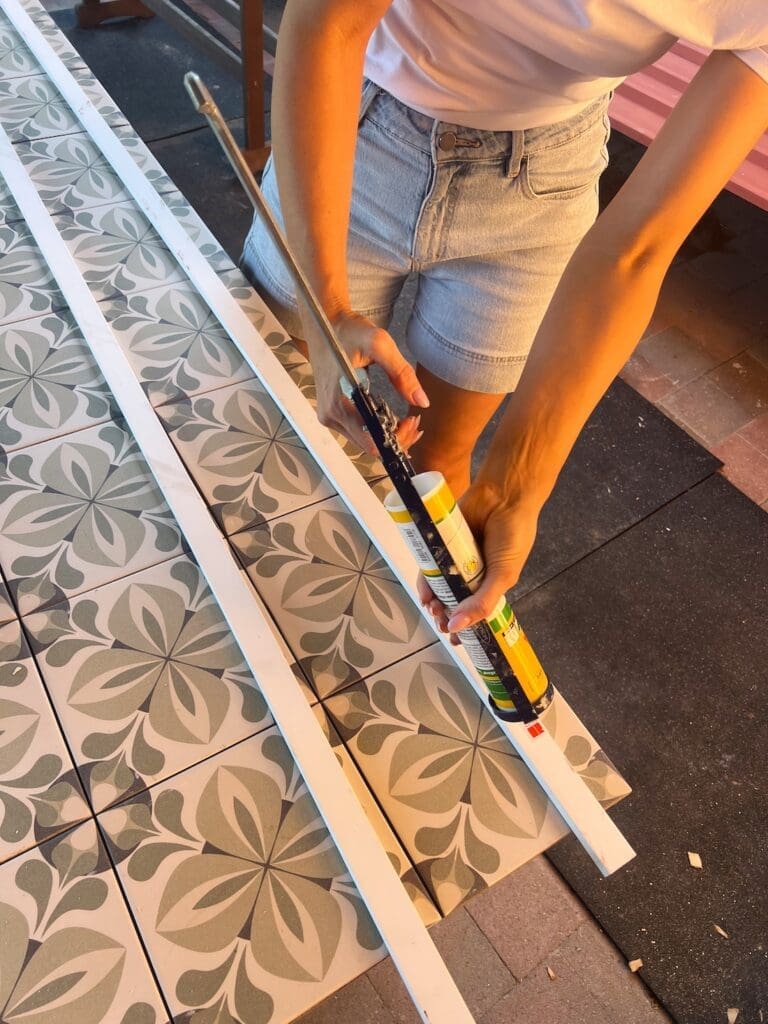
5. Add a timber border
To give the table a professional, clean finish, we added a timber border around the edges. This also provides a smoother edge than if we left the tiles exposed. For a perfect finish, cut the corners at a 45 degree angle and use gap filler to cover the joins.
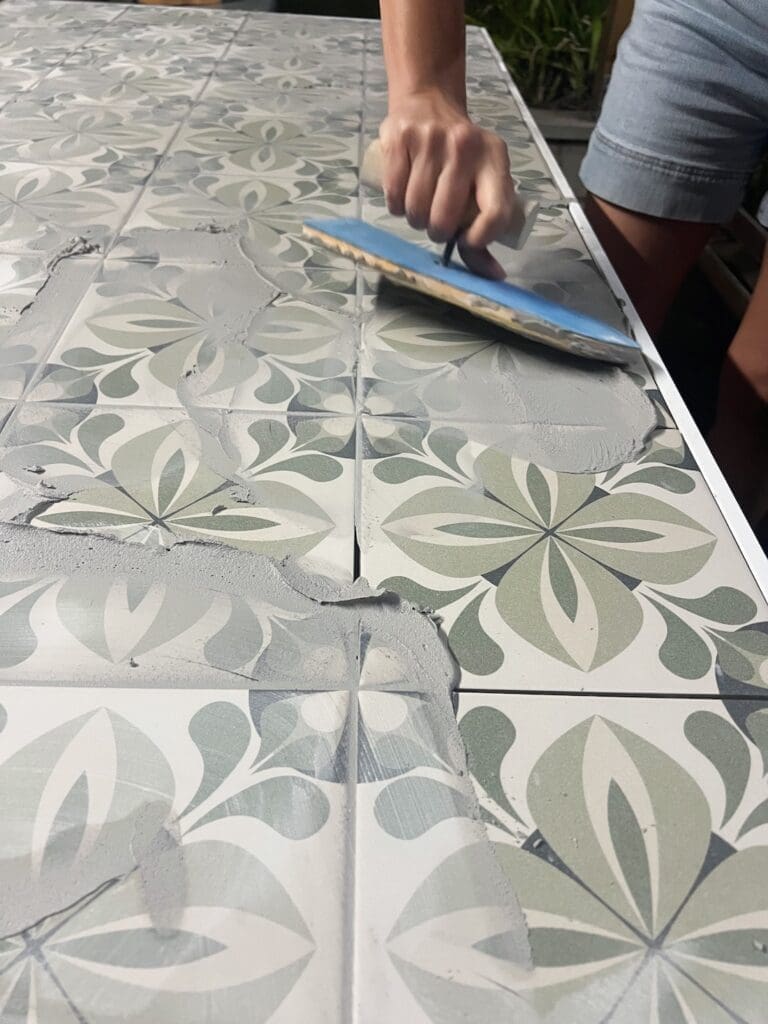
6. Grout and finish
Once the adhesive has set, apply grout across the surface, working it into all the joints. Again, it’s best to work in small areas as the grout also dries very quickly. While the grout is still wet, wipe away the excess with a damp sponge and let it cure.
And that’s it! This gorgeous patterned tile outdoor table is perfect for summer entertaining. We love how the Bali Muaya tile brings so much character and turns this into a statement piece.
Not only is this DIY a great way to upcycle old furniture, but it’s also a budget-friendly way to create a custom outdoor table you simply can’t buy in stores.
Would you give this project a try? Let me know if you do, I’d love to see your creations! You can find more of our tiled table projects here. Each one is a little different, and I’m clearly not done experimenting yet!
More outdoor DIYs