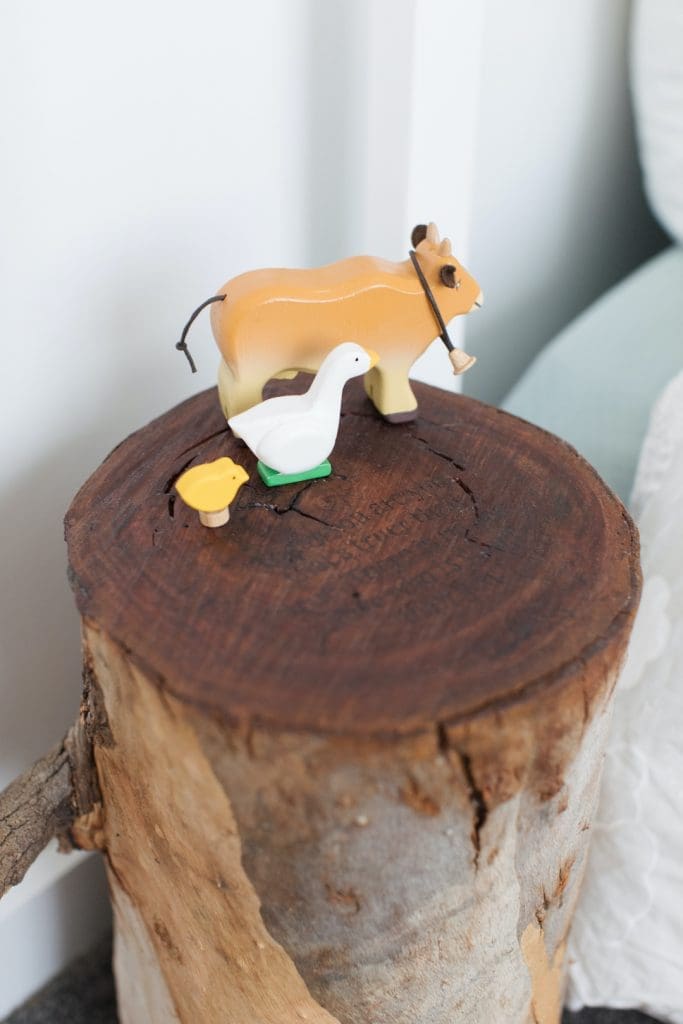
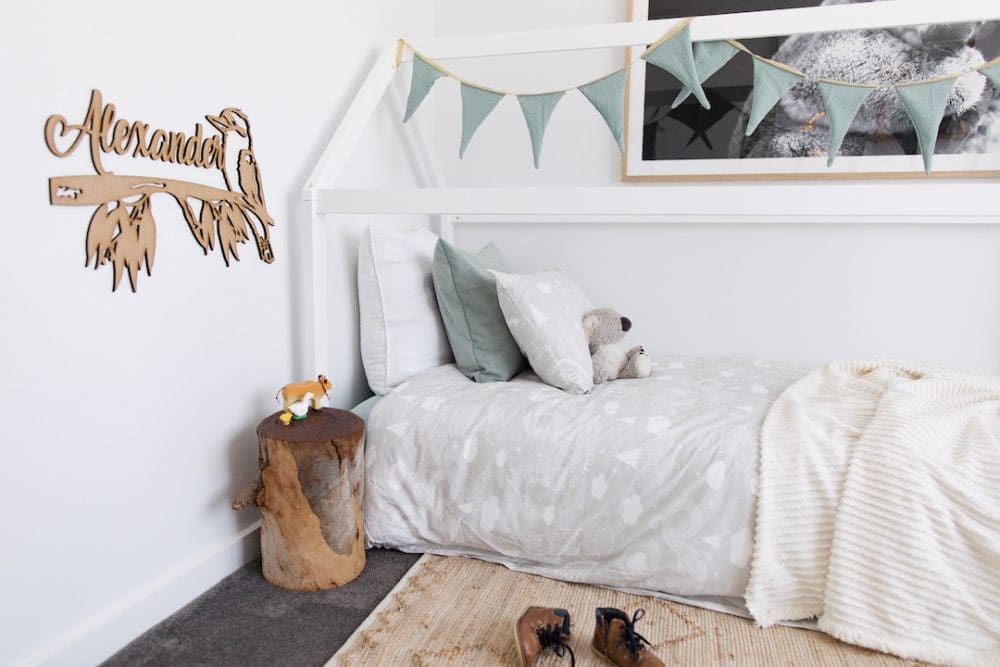
A DIY I’ve been wanting to make for the longest time is a stump side table. Years ago, I got the perfect tree stump from our farm and it’s been drying out in our garage. I put off making it because in our contemporary style home, a rustic stump side table all of a sudden felt quite out of place… until it was time to create Alexander’s big boy bedroom.
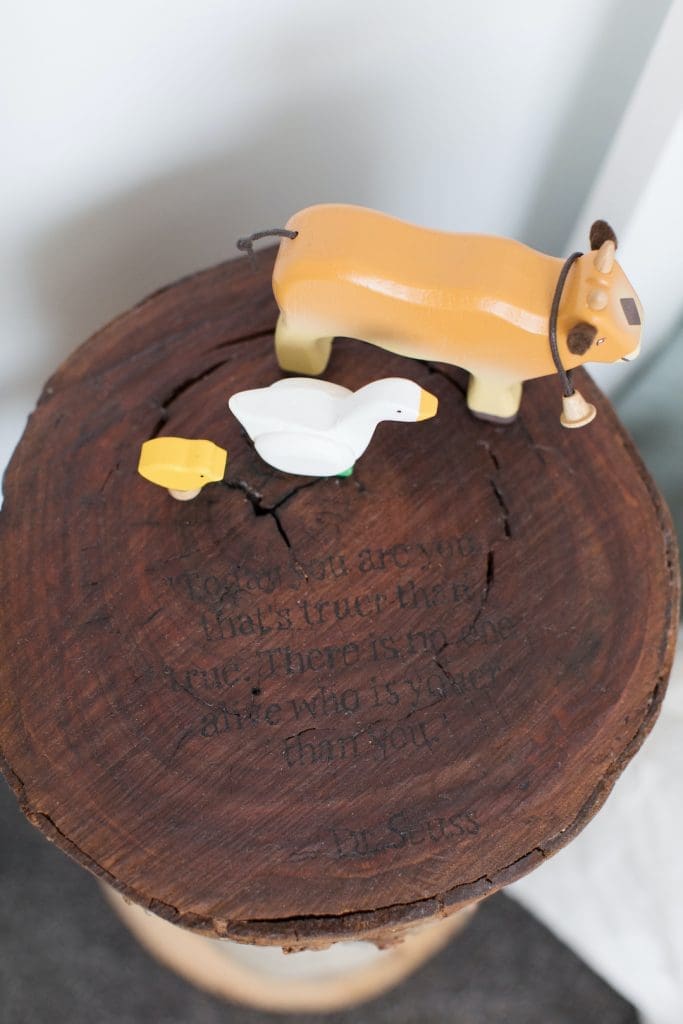
You’ve never met a child more obsessed with nature, being outdoors, and most of all, spending time at the farm than Alexander. I knew the stump side table would be perfect in his room and decided to personalise it with a message on top.
Here’s how to make a sweet personalised stump side table…
Related article: Alexander’s Australian themed boys room
Related article: DIY ply bear shelf
Items you will need:
- Stump
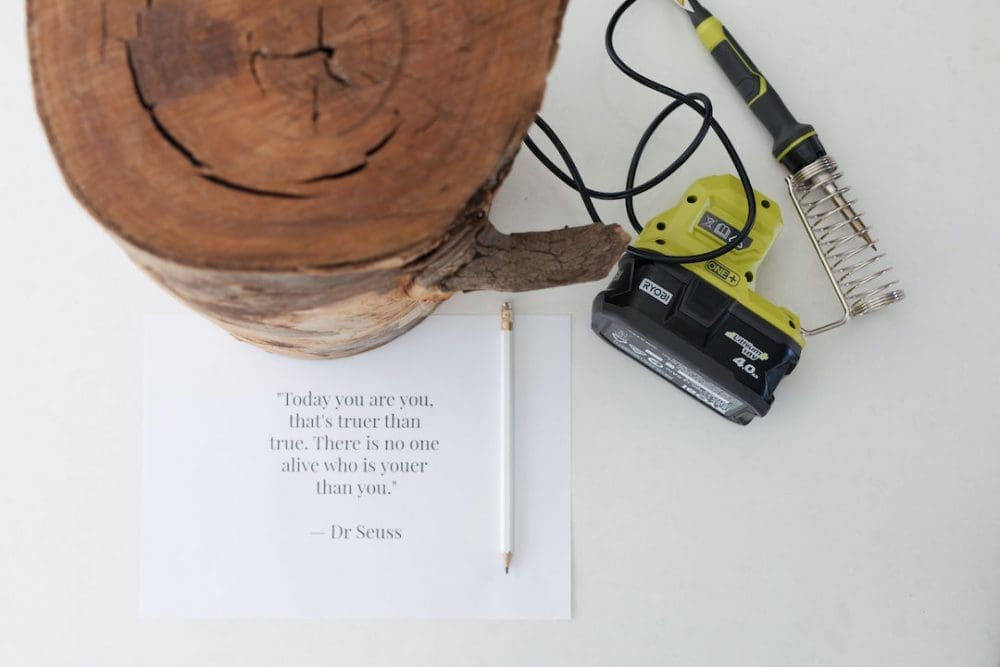
- Soldering iron
- Print out of your quote or message
- Pencil
- Timber wax and old cloth
Steps:
1. Clean up your stump until you’re happy. If it isn’t level or has a rough top, you may need to sand it back. Mine just needed a good wipe down with sugar soap and water.
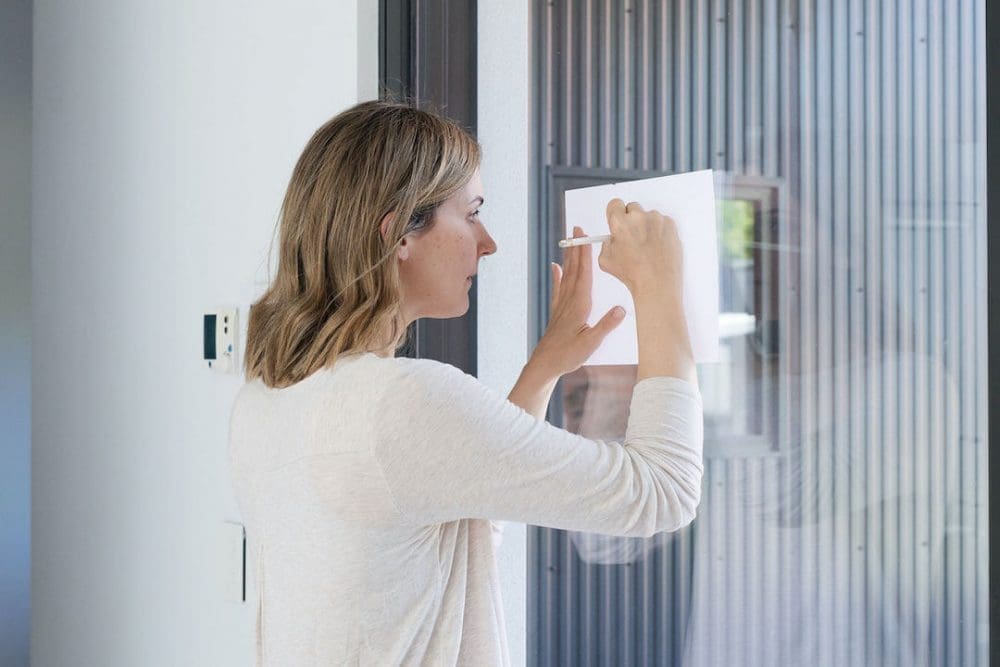
2. Use the trick of placing your paper with quote or message against a window to trace the letters onto the reverse side with pencil.
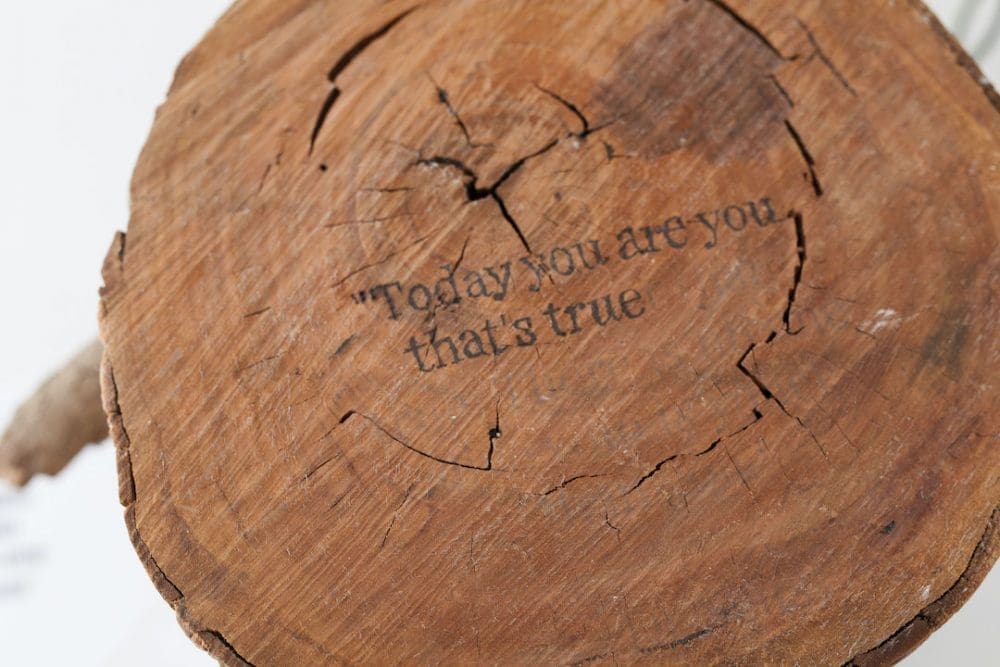
3. Now place your paper onto the stump in the desired spot and use a pencil to scratch over the whole message. This will leave a faint impression of the words on the stump that you can then write over with the soldering iron.

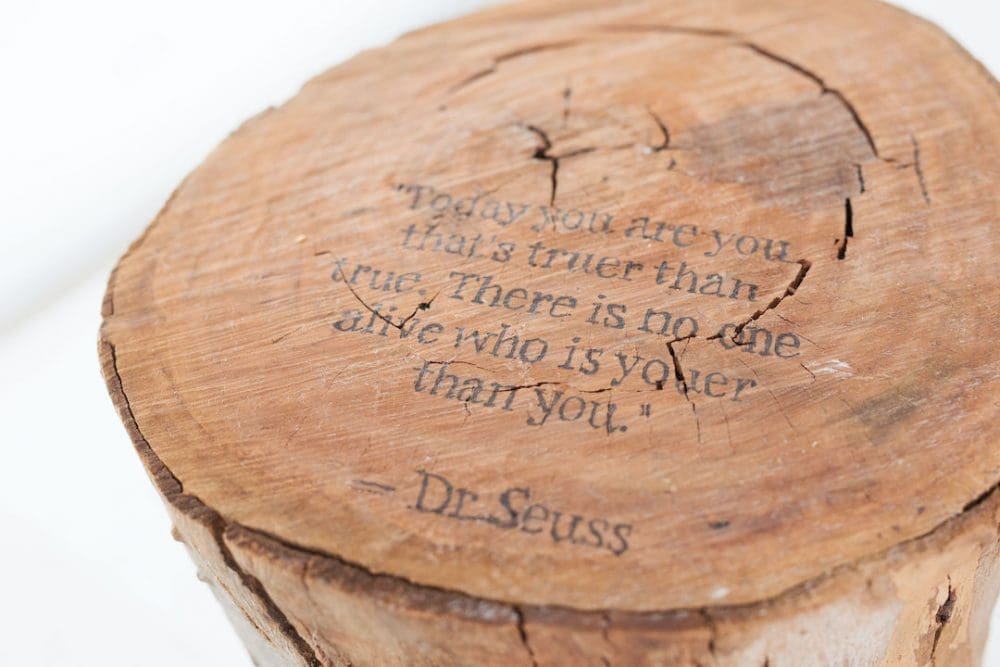
4. Use your soldering iron to carefully burn the message onto your stump. This was my first time using a soldering iron and I was pretty impressed with how easy it was to use.
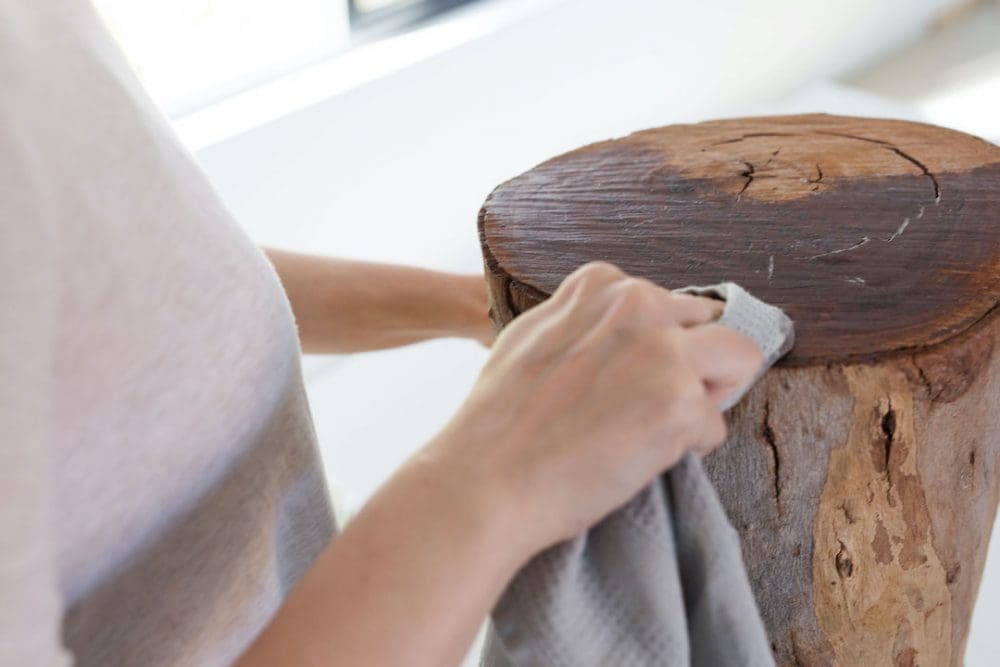
5. The last step is adding a protective coat of wax or varnish to the side table.
What do you think of this personalised stump side table? Has it sparked any DIY ideas of your own? I’d love to hear in the comments below!
More DIY ideas here