On a mission to decorate my rental bedroom without spending a lot of money, I set myself a goal to make a luxe upholstered bedhead for under $150. Then I found out the cost of foam! Even discount supply stores charge a fortune for foam so I knew I had to find a different solution — cue the pool noodle! Costing just $2 each, they’re an affordable alternative to foam and offer so much versatility. To make them stretch further (literally and cost-wise), I cut the noodles in half lengthwise.
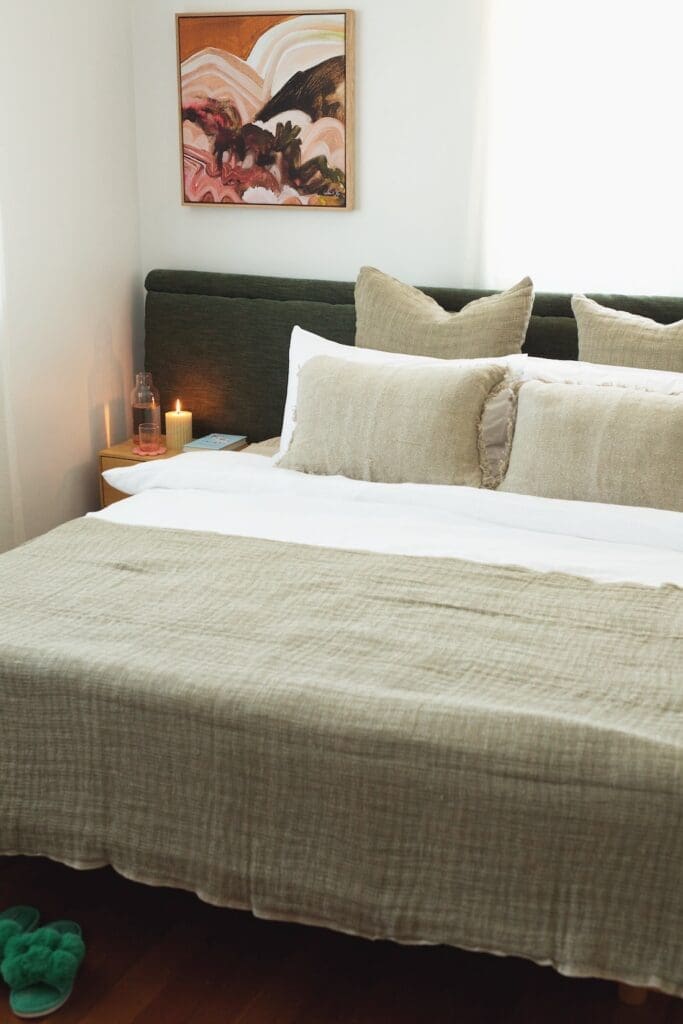
I’m so thrilled with how this oversized bedhead turned out! It’s sturdy, comfortable, and renter-friendly — even though my DIY methods are far from traditional. If you’re keen to make one too, here’s how I did it.
Related article: Bedroom textile design trends for 2026
Related article: How to create a square panel feature wall

Materials you’ll need:
- 10 x 900mm lengths of framing timber (adjust the quantity for your bed size)
- Timber board to cover the front (I used salvaged villaboard)
- 12 x pool noodles (I needed 16 but recycled cardboard to cover the shortfall)
- 3m polyester wadding (purchased from Spotlight)
- 3m upholstery fabric
- Liquid nails and caulking gun
- Metal brackets
- Drill and timber screws
- Staple gun
- Stanley knife
- Measuring tape
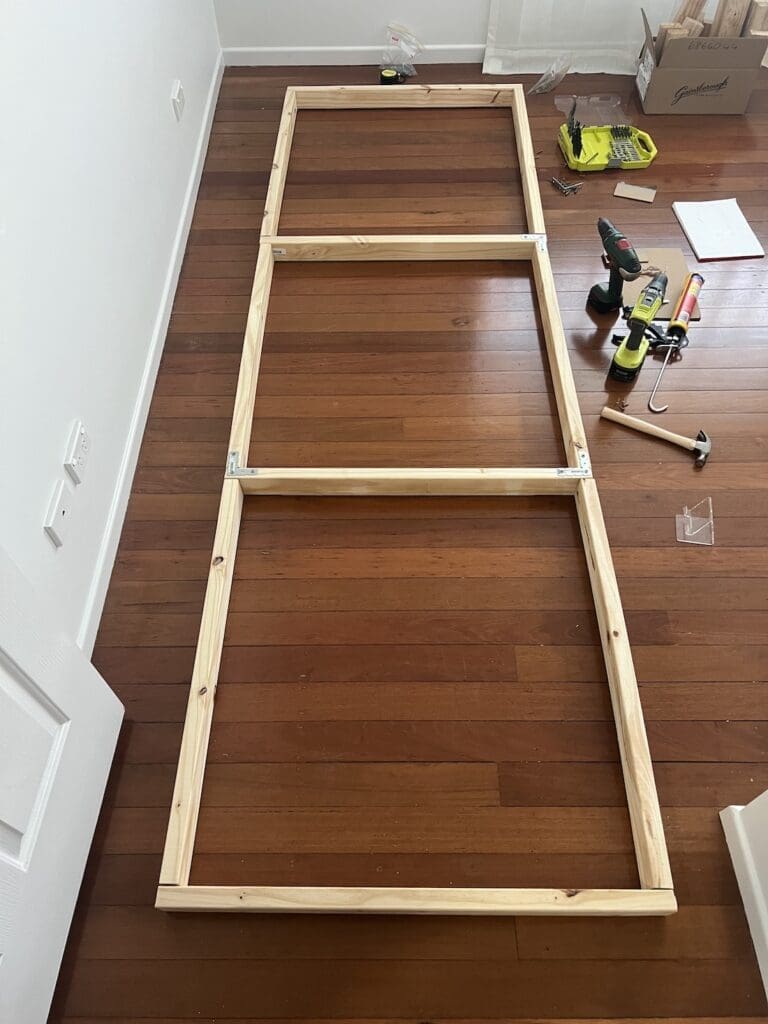
Step 1: Build your timber frame
To start I placed the timber planks into position and added metal brackets in all the corners to secure the frame. If you’re confident with a drill, you could directly drill the planks together. Otherwise, you can use brackets for simplicity like I did.
Step 2: Cover the frame in board
Next, I needed a surface to glue the pool noodles onto. You could use a range of materials here, like thin MDF board, but I used savaged villaboard because it was free. I drilled these strips into place. Don’t worry if it looks scrappy, it will all be covered — it just needs to be secure.

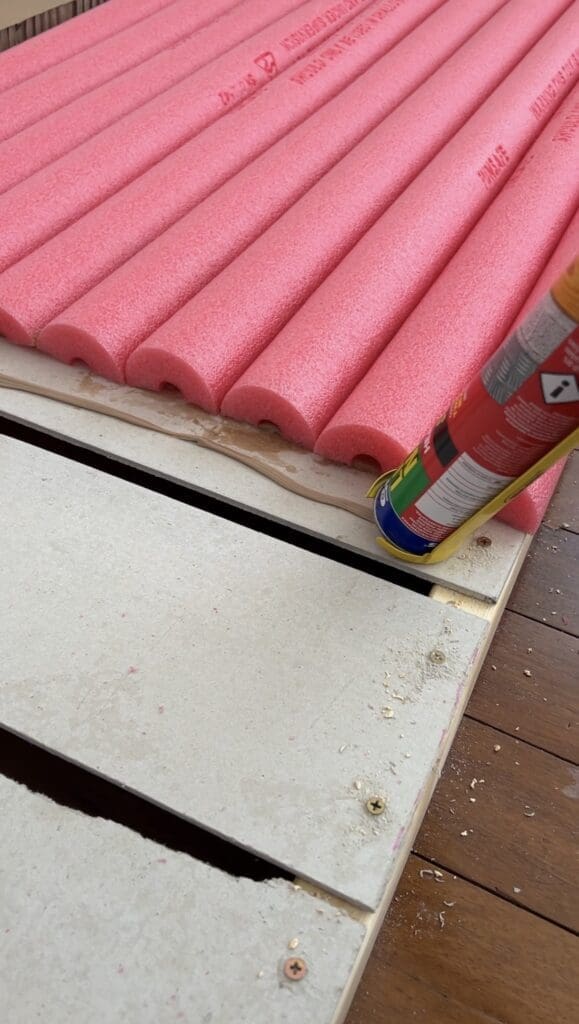
Step 3: Cut your pool noodles and glue down
To double the area the pool noodles would cover — and keep costs down — I cut the pool noodles in half lengthwise. This also helped to minimise the spherical shape of the pool noodles, creating a more contemporary, subtle curve.
Once you’ve cut all the pool noodles in half, glue them down using liquid nails. If you run out like I did, you can recycle other materials to achieve the same height in the lower section. I had left over cardboard packing material that did the trick!
Step 4: Cover in wadding and fabric
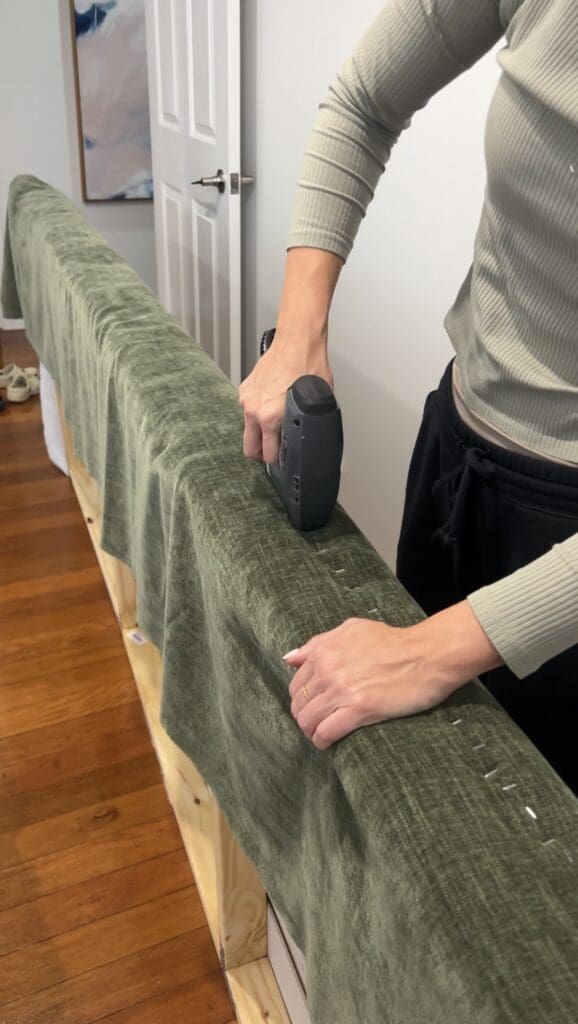
Next, cover the bedhead in your wadding and upholstery fabric. I decided to only use wadding on the upper half of the bedhead for maximum cushioning (because the lower half of the bedhead will sit below the bed frame). Using a staple gun, I secured the wadding in place.
Then I covered the whole bed head in the green upholstery fabric, leaving the additional fabric width at the top of the bedhead so I could use it to wrap the top pool noodles (next step). In my opinion, there’s no such thing as too many staples so pull the fabric tight and staple away!
Step 5: Add the top pool noodle
For an added design detail, I added two whole pool noodles at top of the bedhead. To do this, wrap the full pool noodles in the excess fabric and staple behind them across the top of the bedhead. This creates a stylish, cushioned roll-edge finish.
Step 6: Add timber blocks behind for shelf (optional)
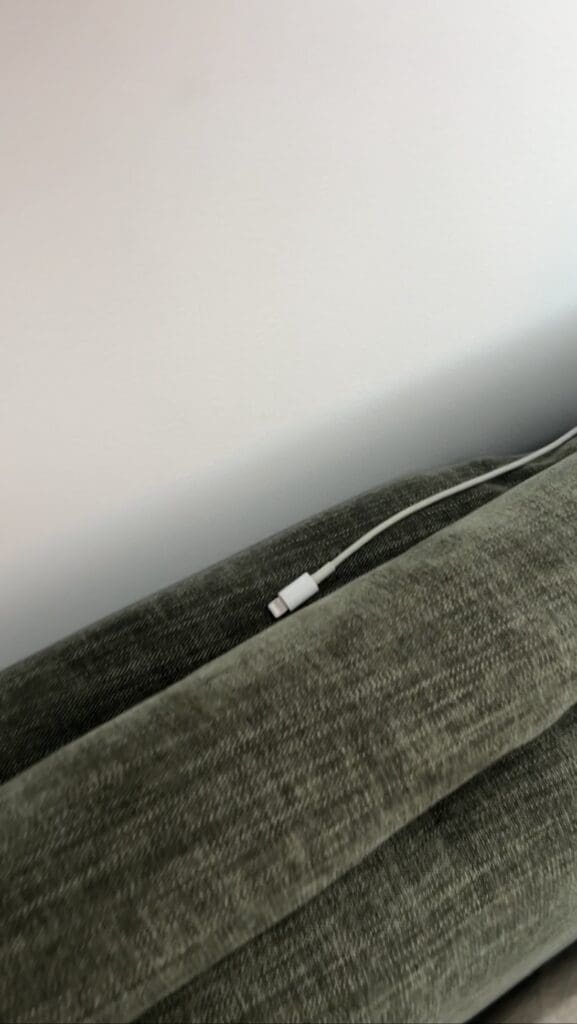
Finally, to allow for curtain clearance and to add a hidden charging shelf, I screwed small timber blocks to the back of the bedhead. The placement of these will depend on your wall as you’ll want to avoid obstructions like powerpoint switches, windows and skirting boards.
I hope this bedhead tutorial inspires you to make your own! If you do, I’d love to see photos — email them to us hello@stylecurator.com.au or send us a DM on Instagram!
More DIYs for the bedroom