

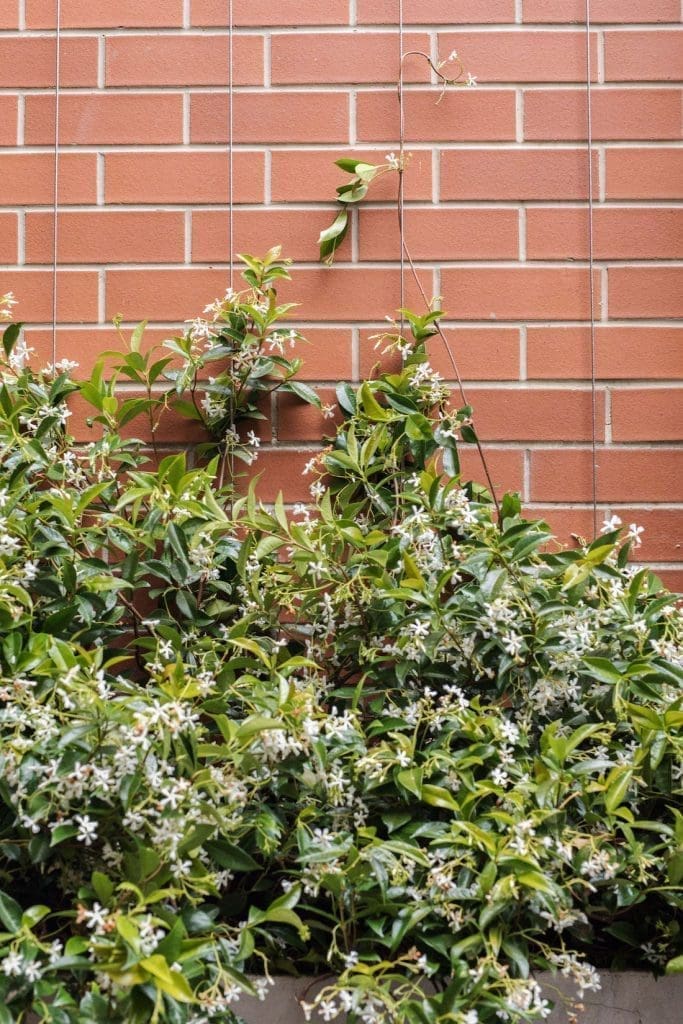
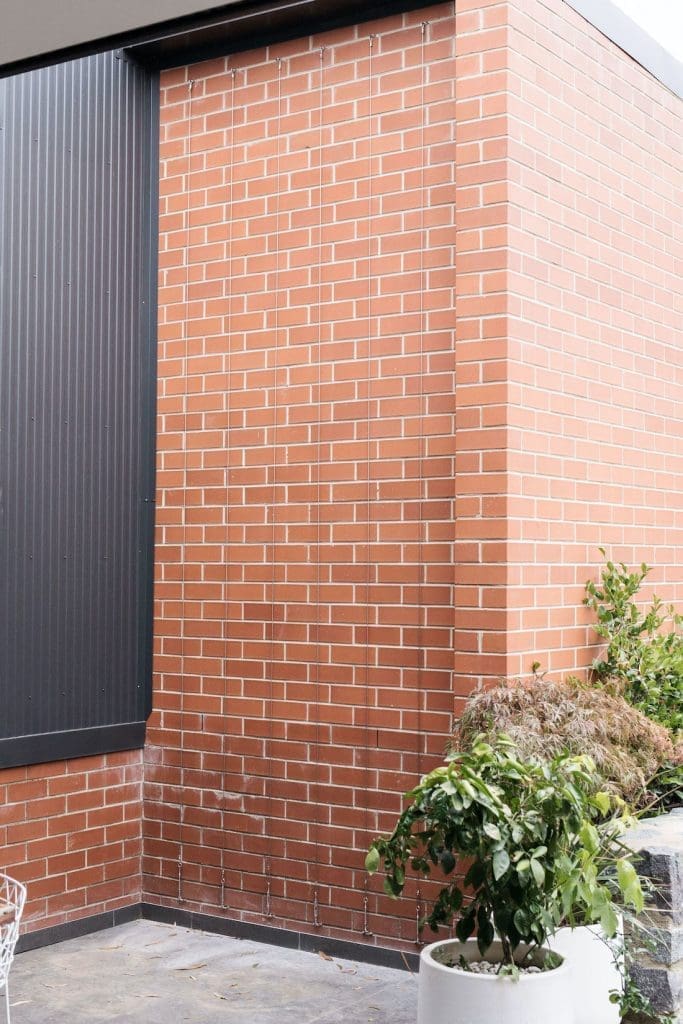
For years I’ve been looking for a way to soften the red brick outlook from my kitchen. When we first built our home, I dreamed of a large circular vertical garden… But these are frightfully expensive. So for years, I settled with a Kmart beehive shelf garden that I hacked. Truth be told, it couldn’t support much greenery and it was time to do something better. Introducing this modern climbing star jasmine green wall.
Keep reading for all the steps on how I created a vertical green wall and you can too!
Related article: Decorating a rental outdoor space or balcony
Related article: Before and after makeover: Quick, simple and stylish outdoor entertaining space on a budget
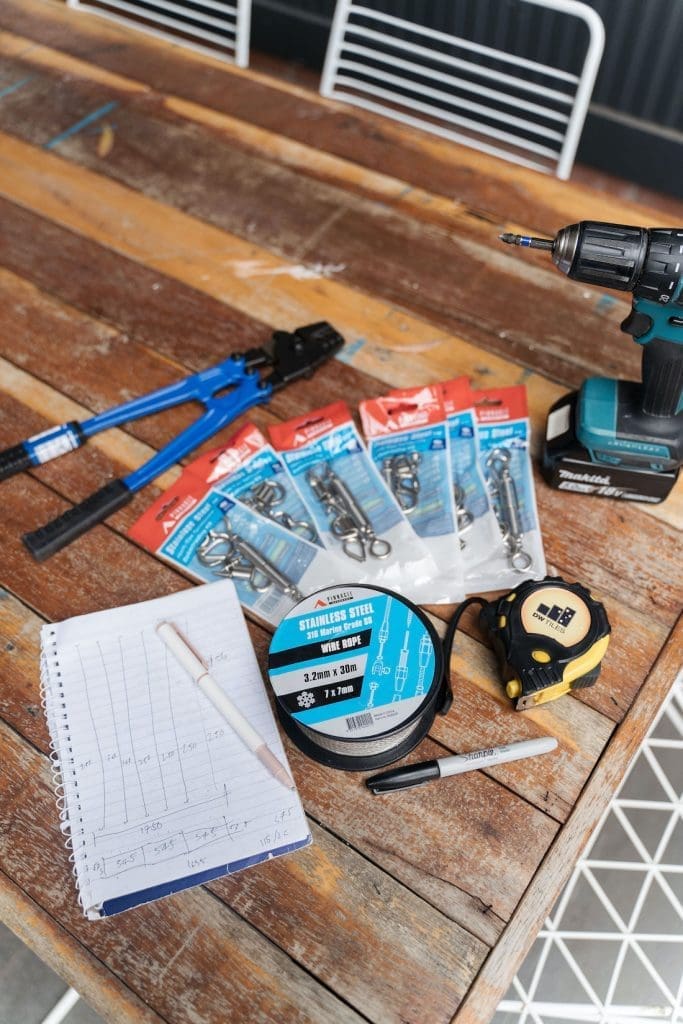
Items you will need:
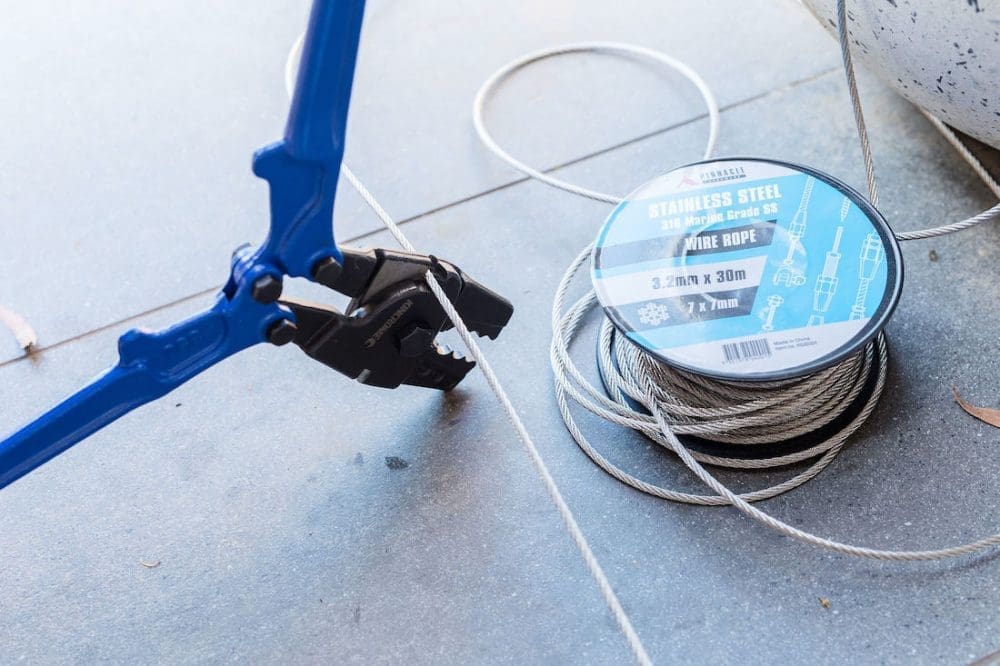
- Balustrade wire (I used 3.2mm wire from Pinnacle Hardware)
- Balustrade kit fixings (you’ll need one kit for each wire, I used 6 kits)
- Drill
- Swaging tool
- Measuring tape
- Sharpie or other Texta
Steps:
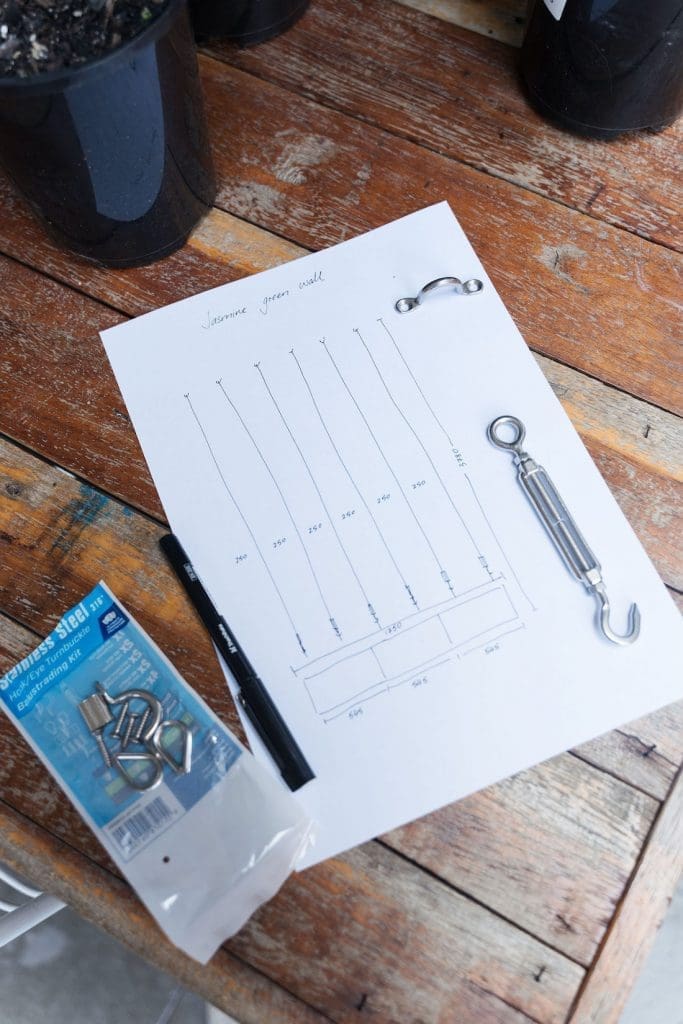
1. Begin with measuring your wall and deciding on an equal distance to space your wires. I decided on 6 wires that are spaced 250mm apart.
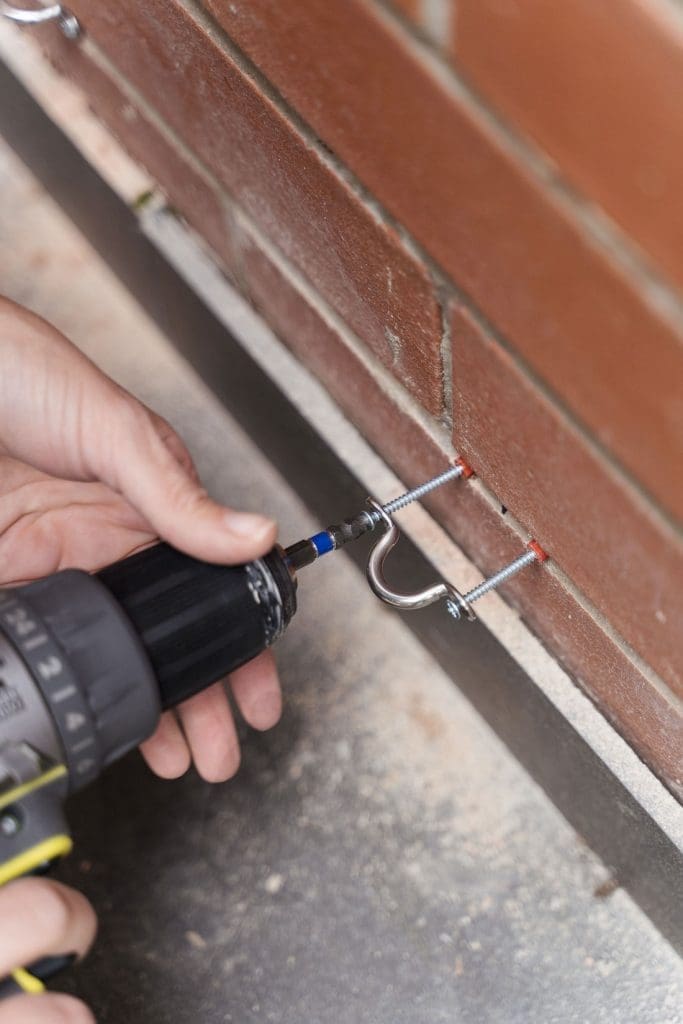
2. Then, mark out and drill holes for your brackets along the top and bottom. Use a drill bit to drill a pilot hole first.
Because I drilled into mortar, I used red plugs but if you’re drilling directly into timber, you won’t need these.
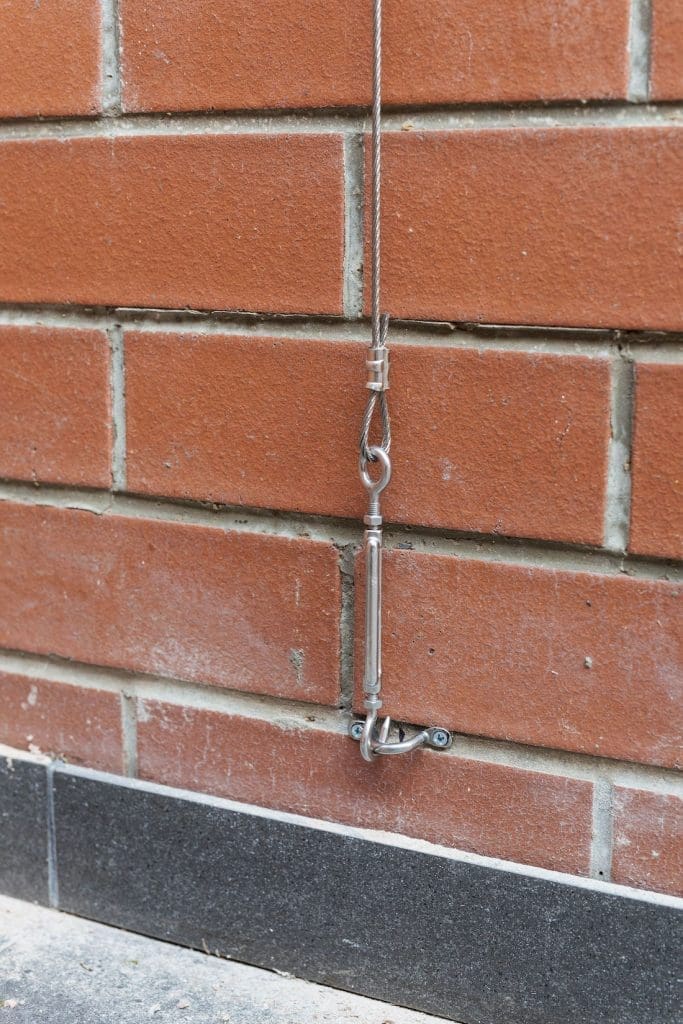
Fully drill in the brackets along the bottom of the wall. But along the top, just slightly screw them in so they hold. This is because you will need to remove these brackets to slip one end of the wire in (see steps 4 and 5).
3. Measure and cut your wire to length. Be sure to add an extra 20cm so you have enough wire to attach the balustrade fixings at each end. Your swaging tool should be able to cut the wire (pictured below).
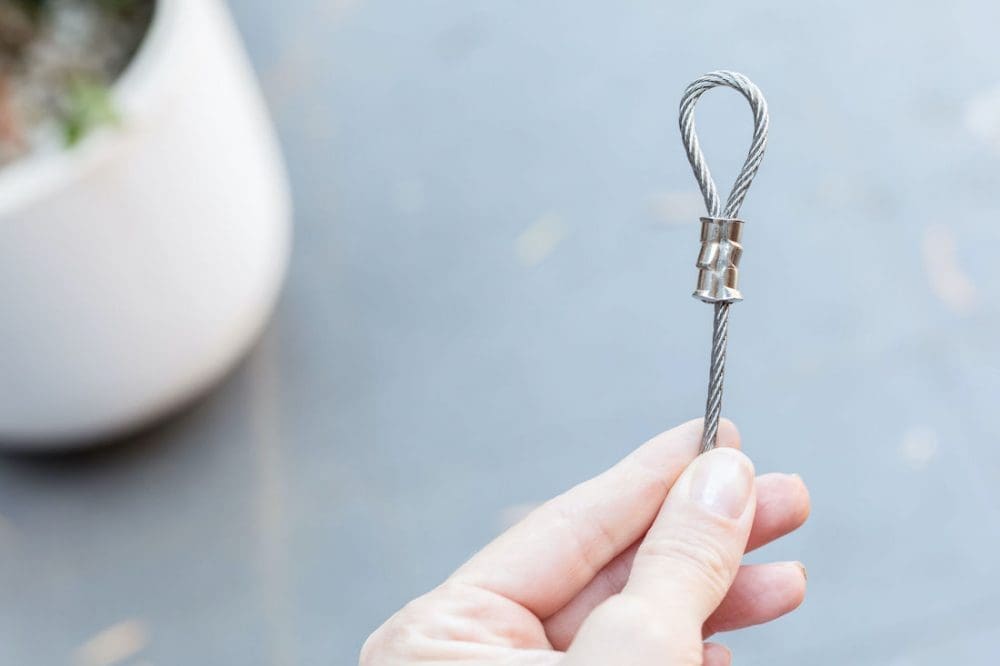
4. On one end of your wire, create a loop using the eye piece of hardware in the balustrade kit. And on the other end, attach the balustrade hook.
You’ll need a swaging tool to clamp the wire on each end. Do 3 clamps — top, middle, and centre — to secure the wire. Since you are clamping thick wire, you will need a bit of strength! I called in my husband to help with this step.
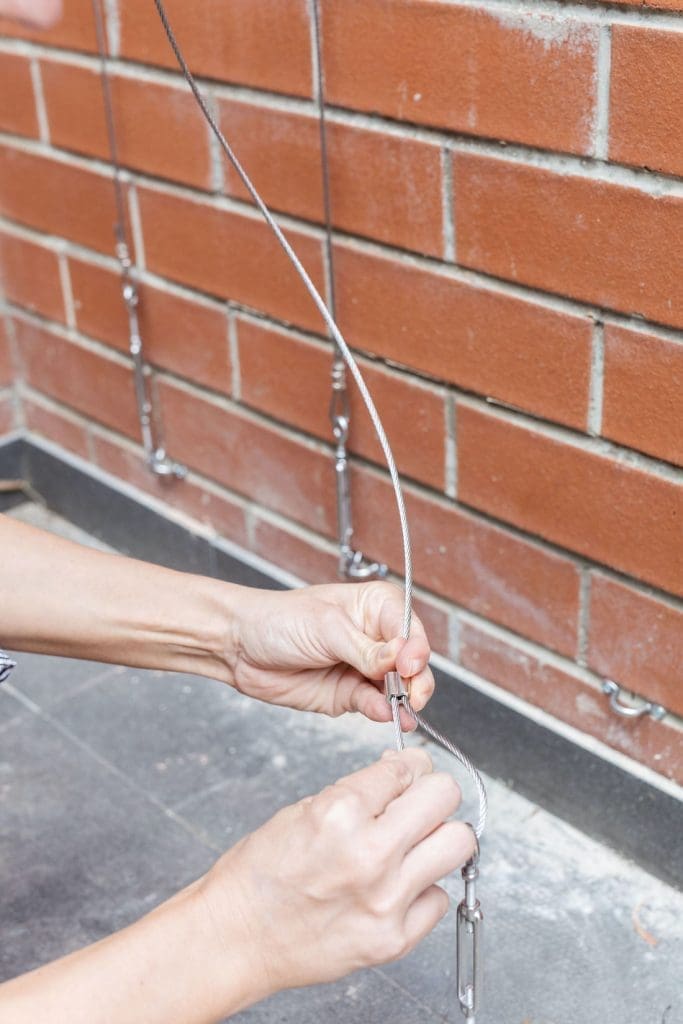
5. Then, fix the wire to your wall. I looped the eye through the top bracket (this is why we didn’t fully screw in the bracket) and attached the hook at ground level to make it easiest to adjust.
6. Repeat these steps until all your wires are in place.
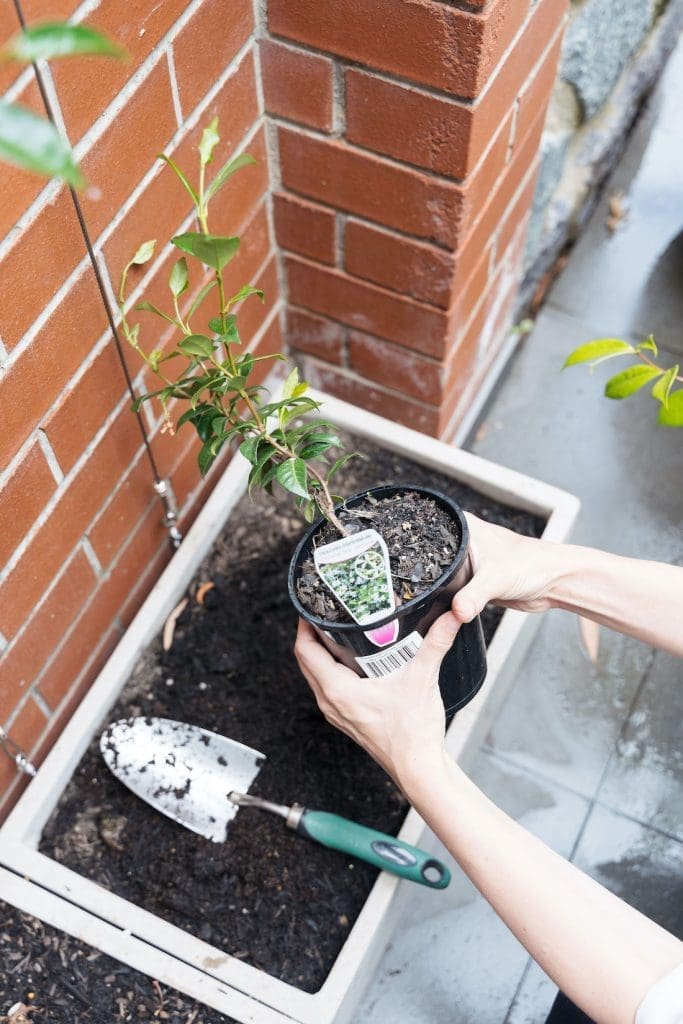
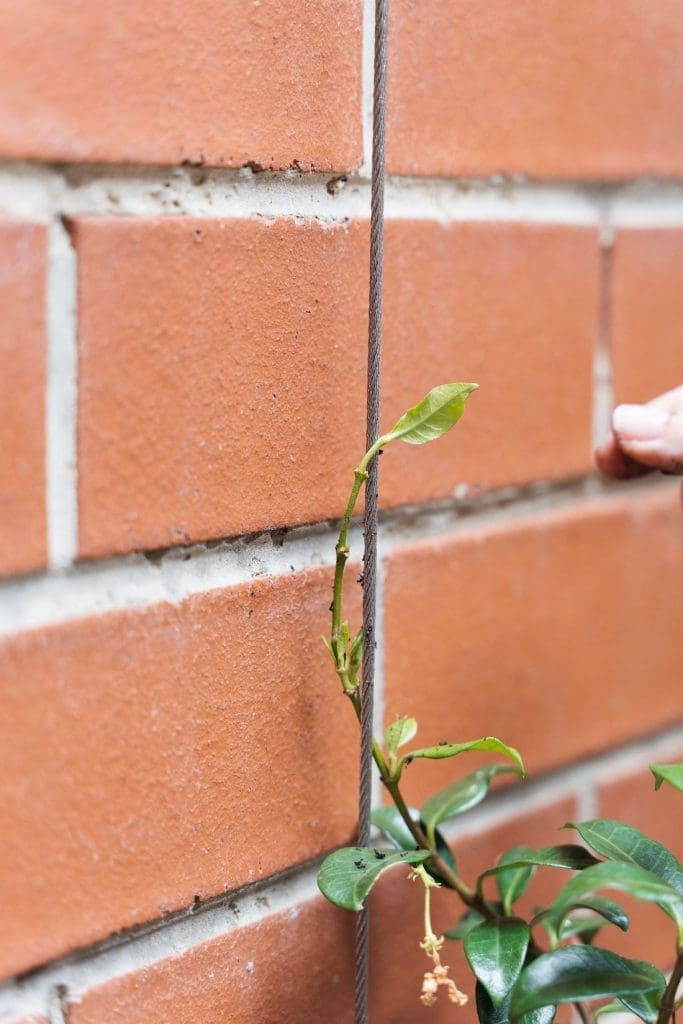
7. Finally, plant your jasmine. To help it get started, I gently wrapped some of the longer vines around the wire.

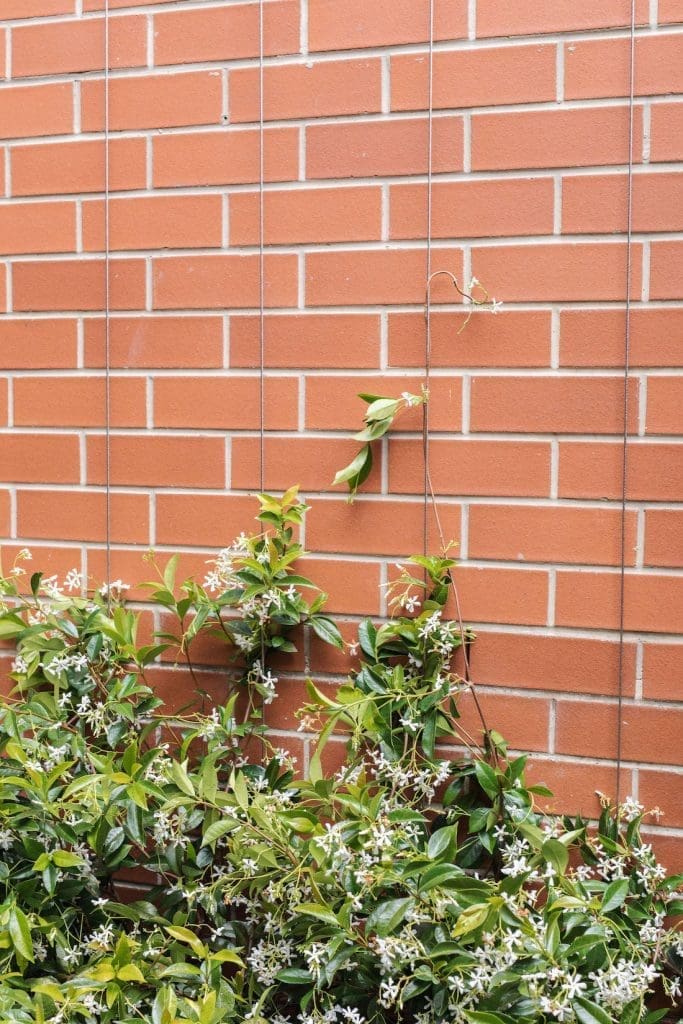
That’s it! Eventually the jasmine will grow and transform this red brick wall into a lush, flowering vertical green wall.
I hope this DIY climbing star jasmine green wall inspired you. Will you be giving it a go? If you have any questions, pop them in the comments below and I’ll get back to you asap.
More outdoor inspo


I love this look! Do you have any updated photos since you planted in 2022?
Hi Jennifer, thanks for your lovely comment. Unfortunately I’ve moved house and don’t have any other photos. It grew pretty well but if I were to do it again, I would allow 10-15cm between the brick wall and wire. This spot got a lot of sun throughout the day and the brick got super hot so some of the plant did brown/burn. Hope this helps 🙂