

Christmas is near and this weekend many of you will be pulling your Christmas trees out of storage or going shopping to buy a new tree… Or this year you could go for something a little different and have a Christmas tree that’s not actually a tree?
We can’t get enough of the minimalist, Scandi-inspired look at the moment and have created a DIY Christmas tree tutorial in this design style. Using a wood pallet and a few other materials, we love the end result. So whether you’re looking for a more sustainable Christmas tree idea, or a Christmas tree that won’t take up loads of storage after the festive season, or you’re looking for a cheap Christmas tree alternative, this tutorial ticks all the right boxes!
Related article: 17 space saving Christmas trees: Alternative Christmas tree ideas
Related article: Adorable concrete Santa decor Christmas DIY
Items you will need
- One pallet
- One piece of wood as the trunk (ours is 160cm long)
- Electric saw or for the pallet to be cut down to size
- Drill
- Screws
- Paint (we used Haymes Minimalist 1)
- Paint brush
- Texta
Steps:
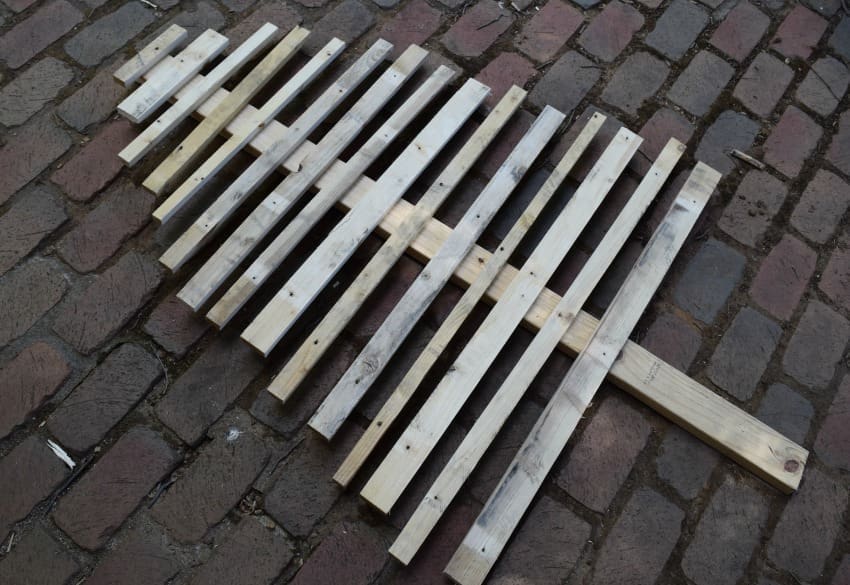
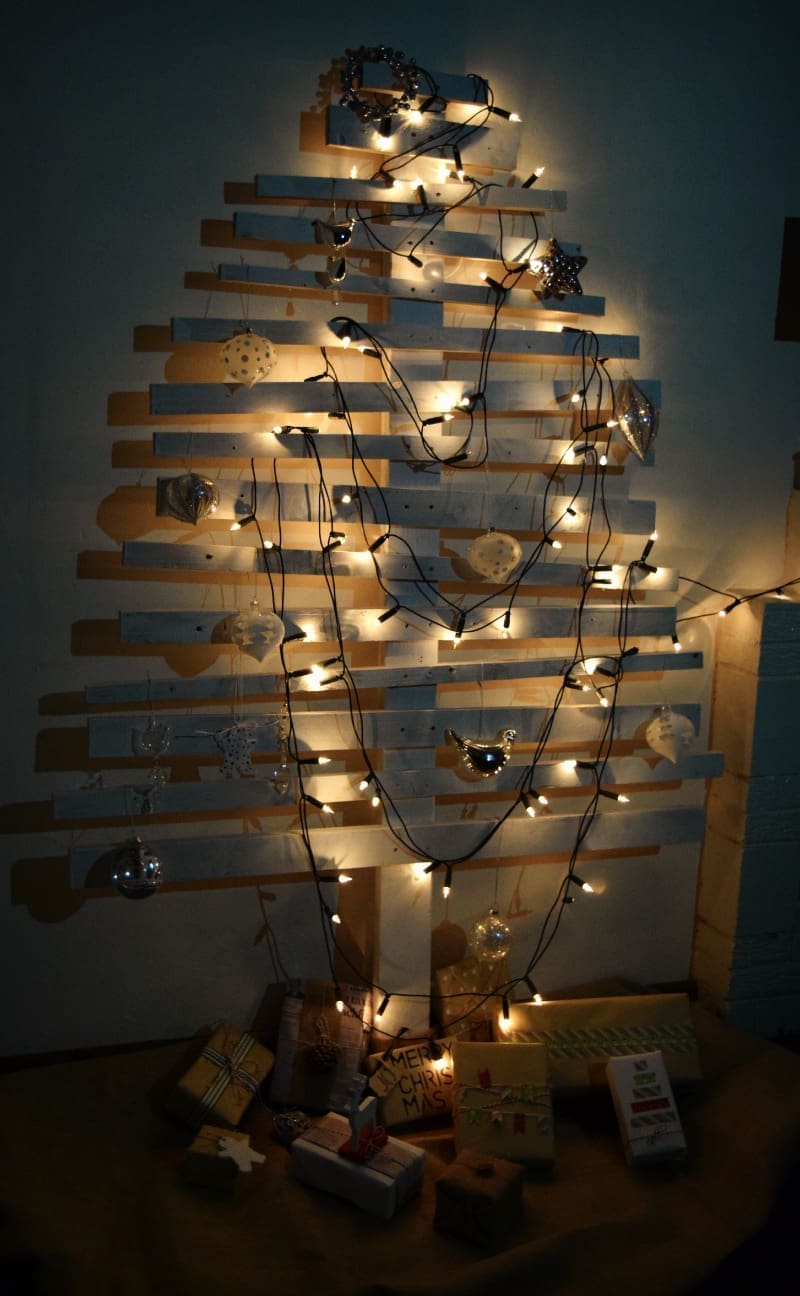
1. Cut the pallet down to size. We cut the wood pallet pieces along the width in half and in thirds to create different ‘branch’ thicknesses. To avoid the pallets splitting, you will need an electric saw for this step.
2. Lay out the ‘branches’ along the ‘trunk’ to see how far you want to space them out and how you want to angle them (we like for every second or third branch to be slightly angled). Using a texta or pencil mark the length of each branch. We trimmed 10mm to 30mm off the length of each branch as we went higher up the tree.
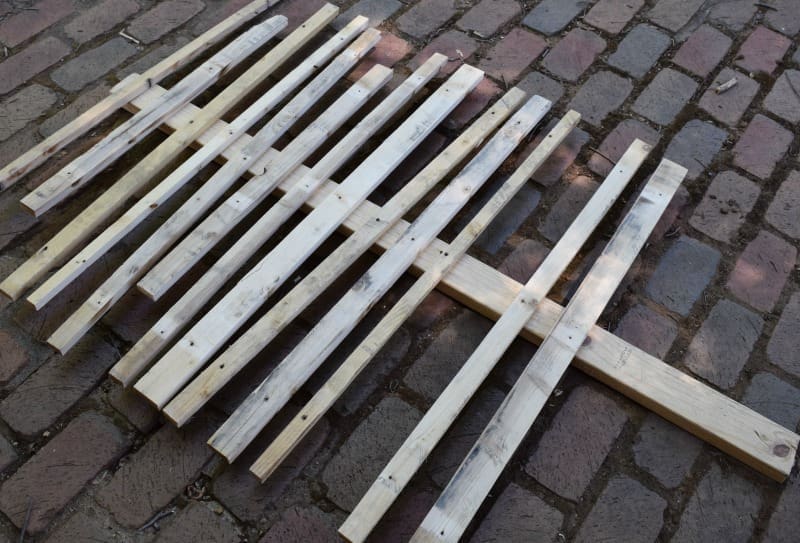
3. Using an electric or hand saw, trim each branch down to size. To avoid confusion, cut one branch at a time and lay them back in place as you work.
4. Drill each branch in place. We used two screws per branch to prevent them moving once the decorations are hung.
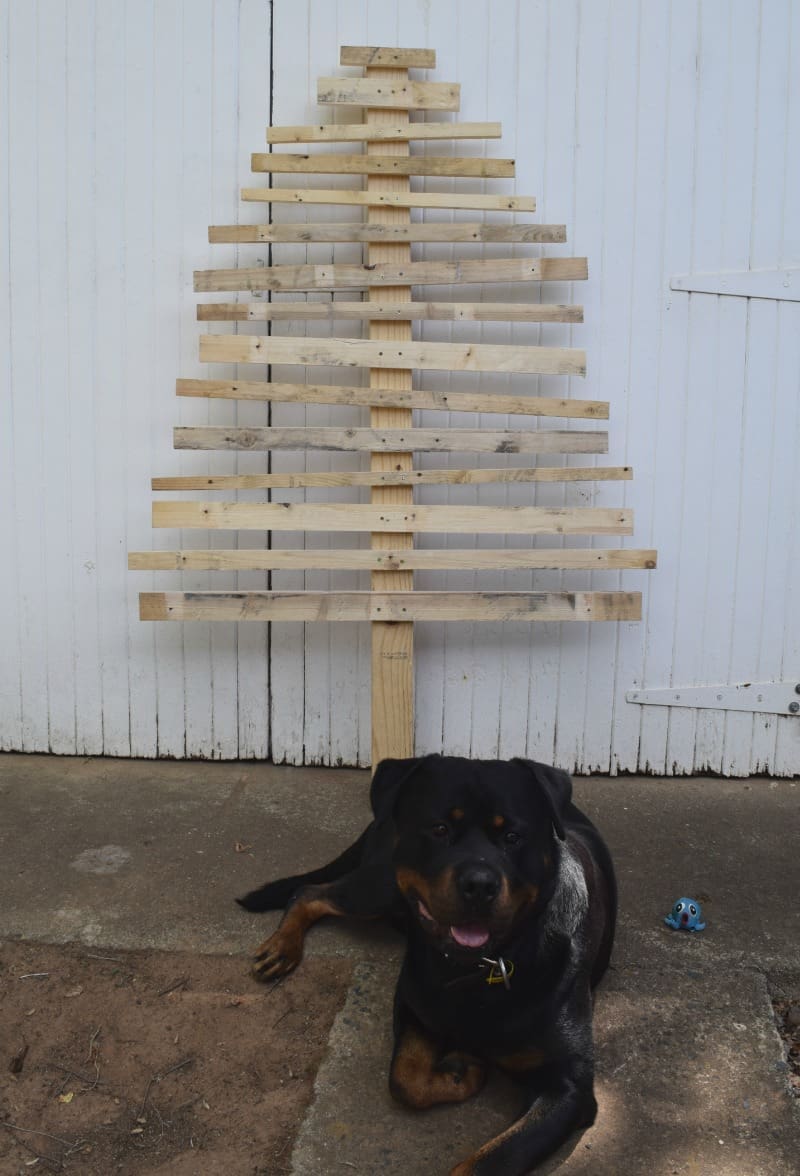
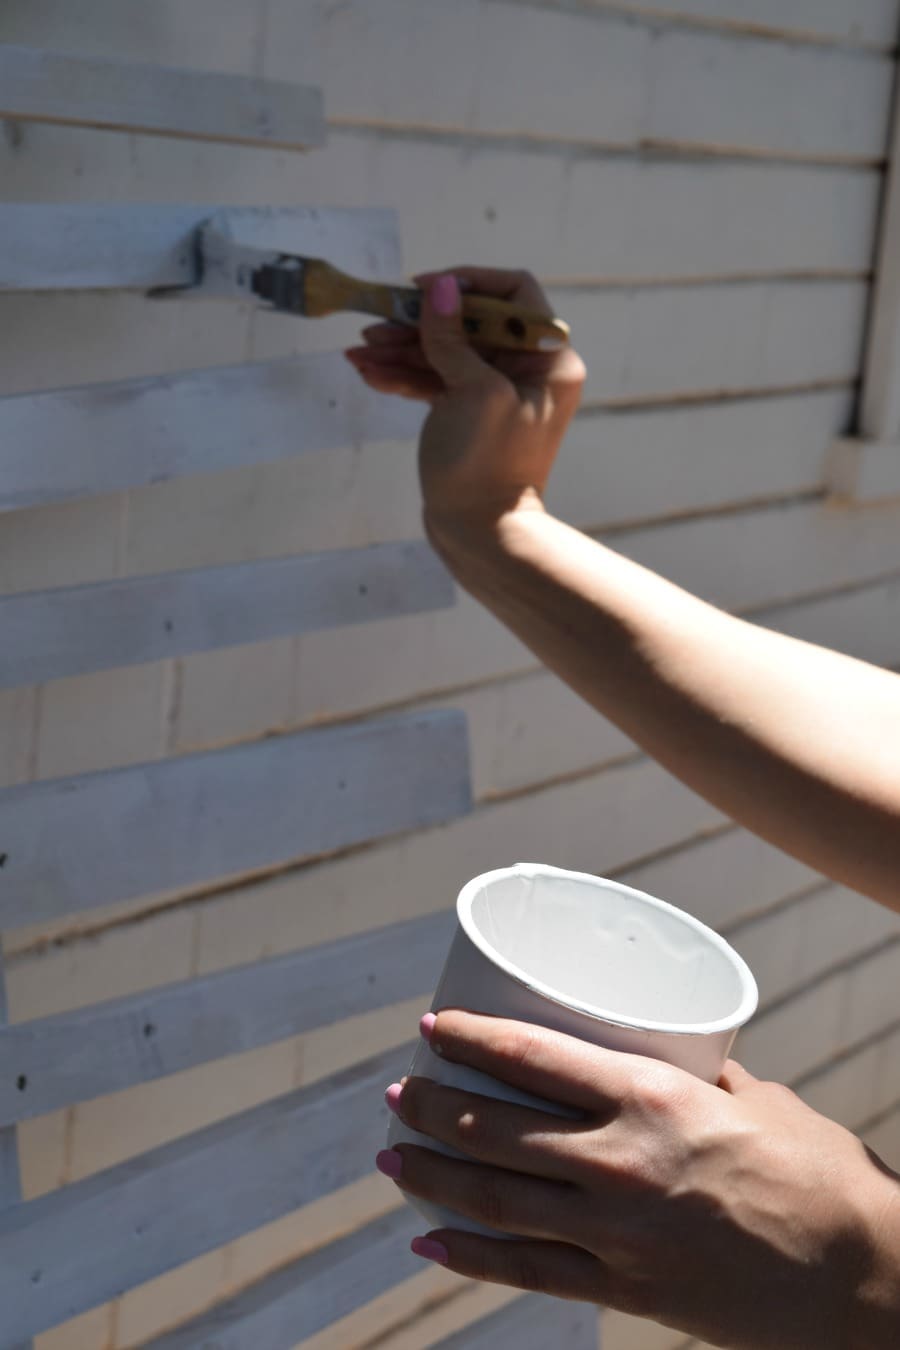
5. Paint the tree with one coat of white paint. There’s something about the grain in wood we absolutely love so wanted to create a white ‘wash’ rather than completely painting the wood. To create the wash, we diluted the two thirds paint with one third water and only applied one coat.
6. Once your tree is dry, decorate however you like!

Pin this ↓ image ↓ to your Pinterest account so you can find the instructions to make this pallet Christmas tree when you need them!

Will you attempt this DIY Christmas tree? We’d love to see pics if you do!


The palett tree looks fantastic and would save a lot of space.
Thanks Julia, we’re so happy with how it turned out. If you’re really tight on space, you could even create a mini version and sit it on top of your sideboard 🙂