According to this month’s Pinterest stats, there’s been an 80% increase in the search for ‘driftwood wall art’. And today, that’s exactly what our Insta friend Andrea of @my.green.sofa is sharing with us!
We spied her DIY drift wood wall hanging a couple of weeks ago and knew it would make for a fabulous tutorial — and she kindly agreed! Get ready to get crafting, here’s how you can make your own drift wood wall art.
Related article: The intricate wood mosaic art from Studio Sarai
Related article: Fun and affordable felt: DIY ideas to make with felt
By Andrea Lovett
Items you will need:
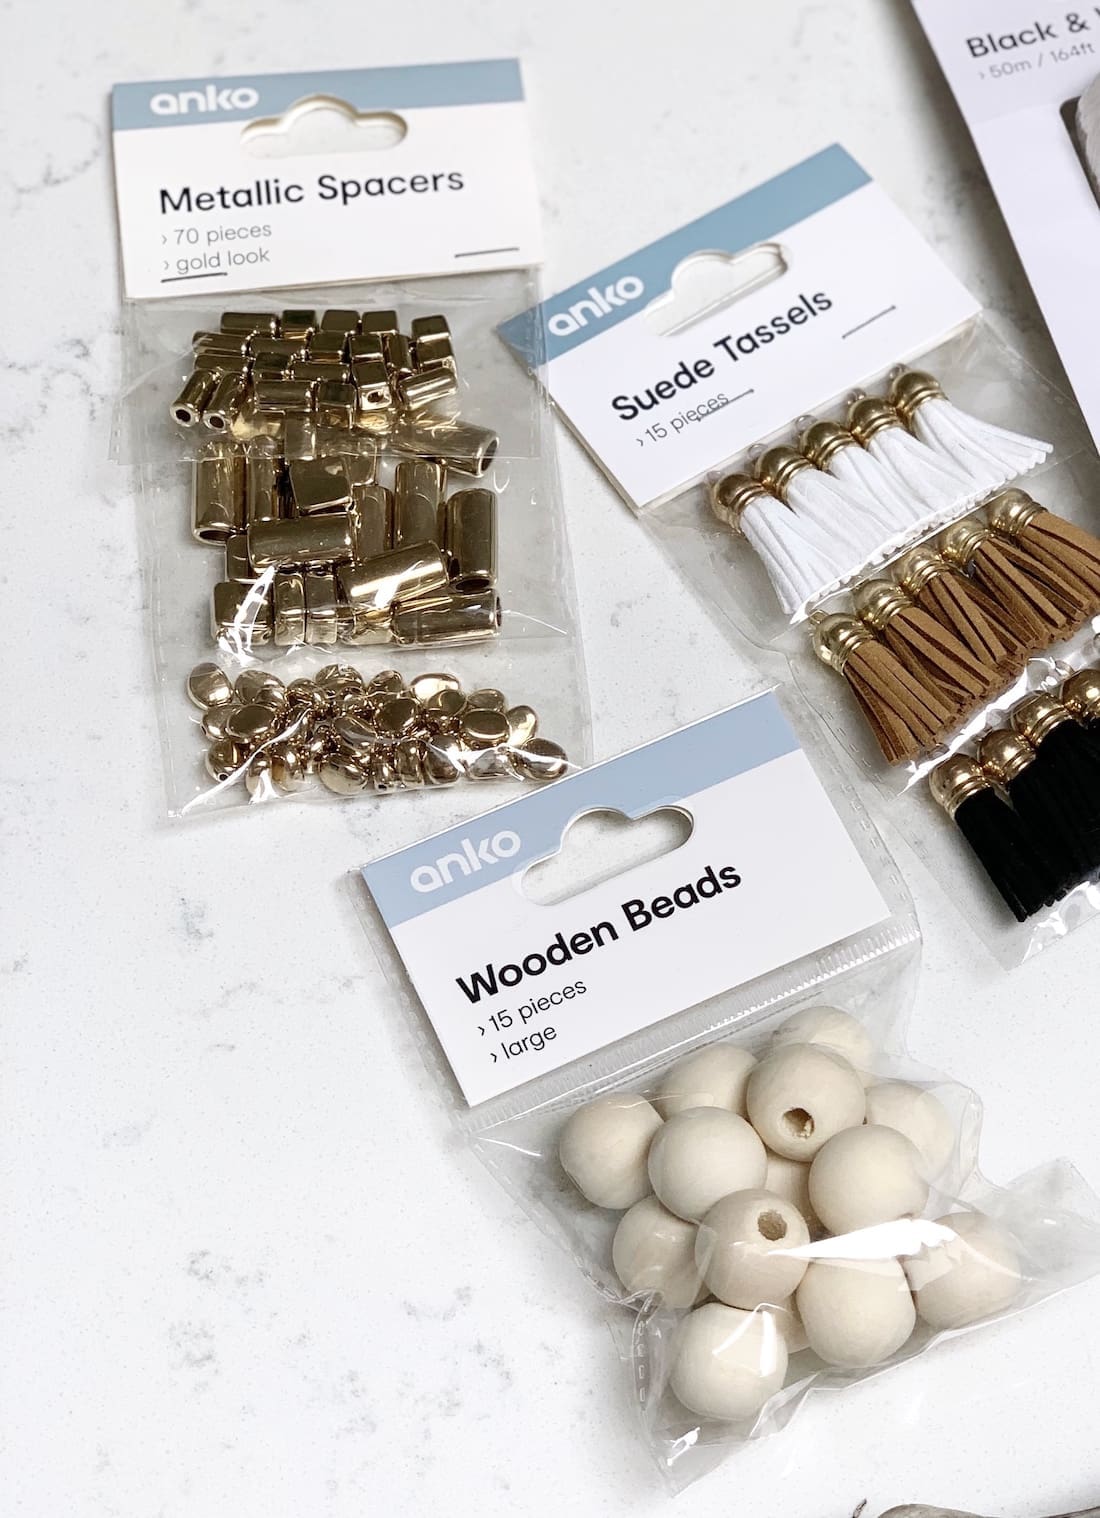
- A piece of driftwood
- Air dry clay (I’ve used the Staedtler FIMO Air in flesh colour available from Officeworks)
- Beading wire
- Wooden / gold tone beads (available from Kmart)
- Tassels (available from Kmart)
- Crimp beads
- Cookie cutters
- Baking paper
- Rolling pin
- A toothpick
- Seed beads (optional)
- Flat nose pliers
Steps:
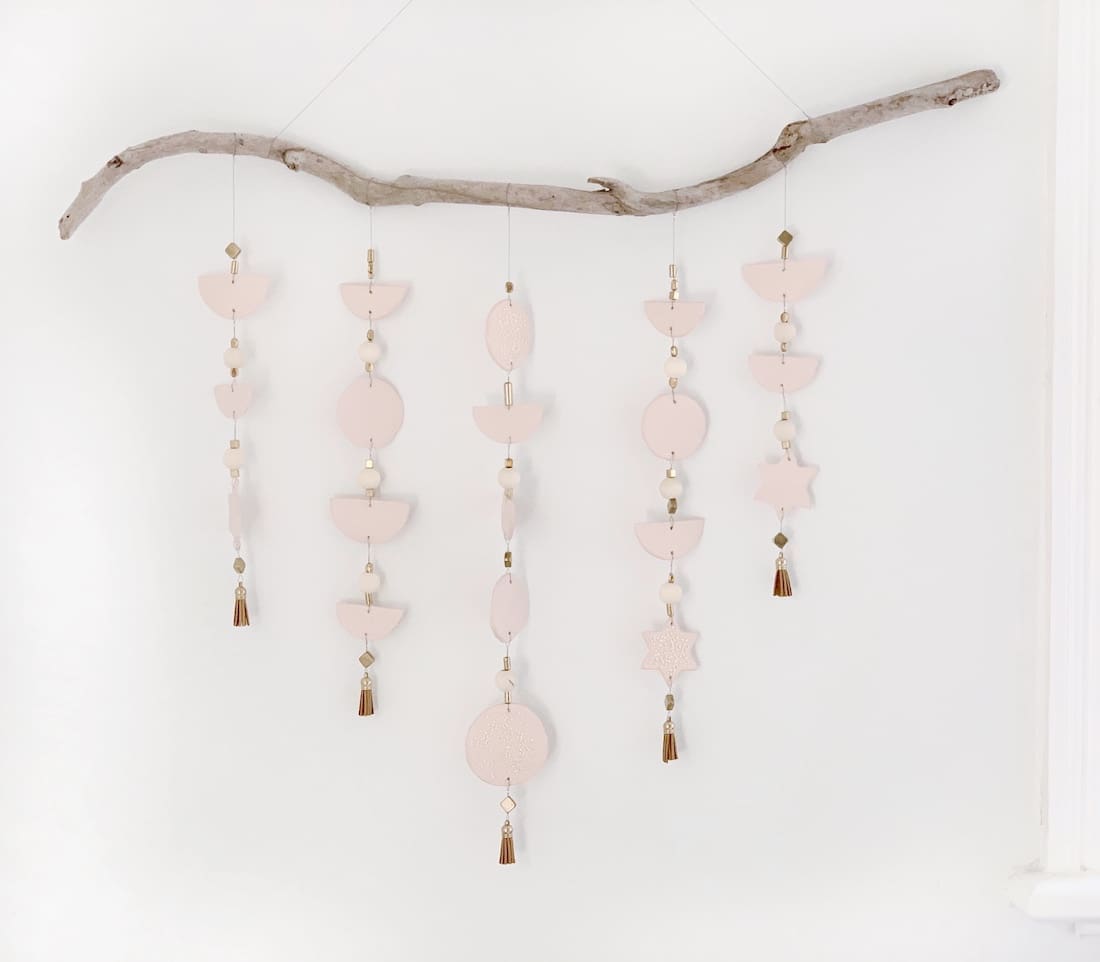
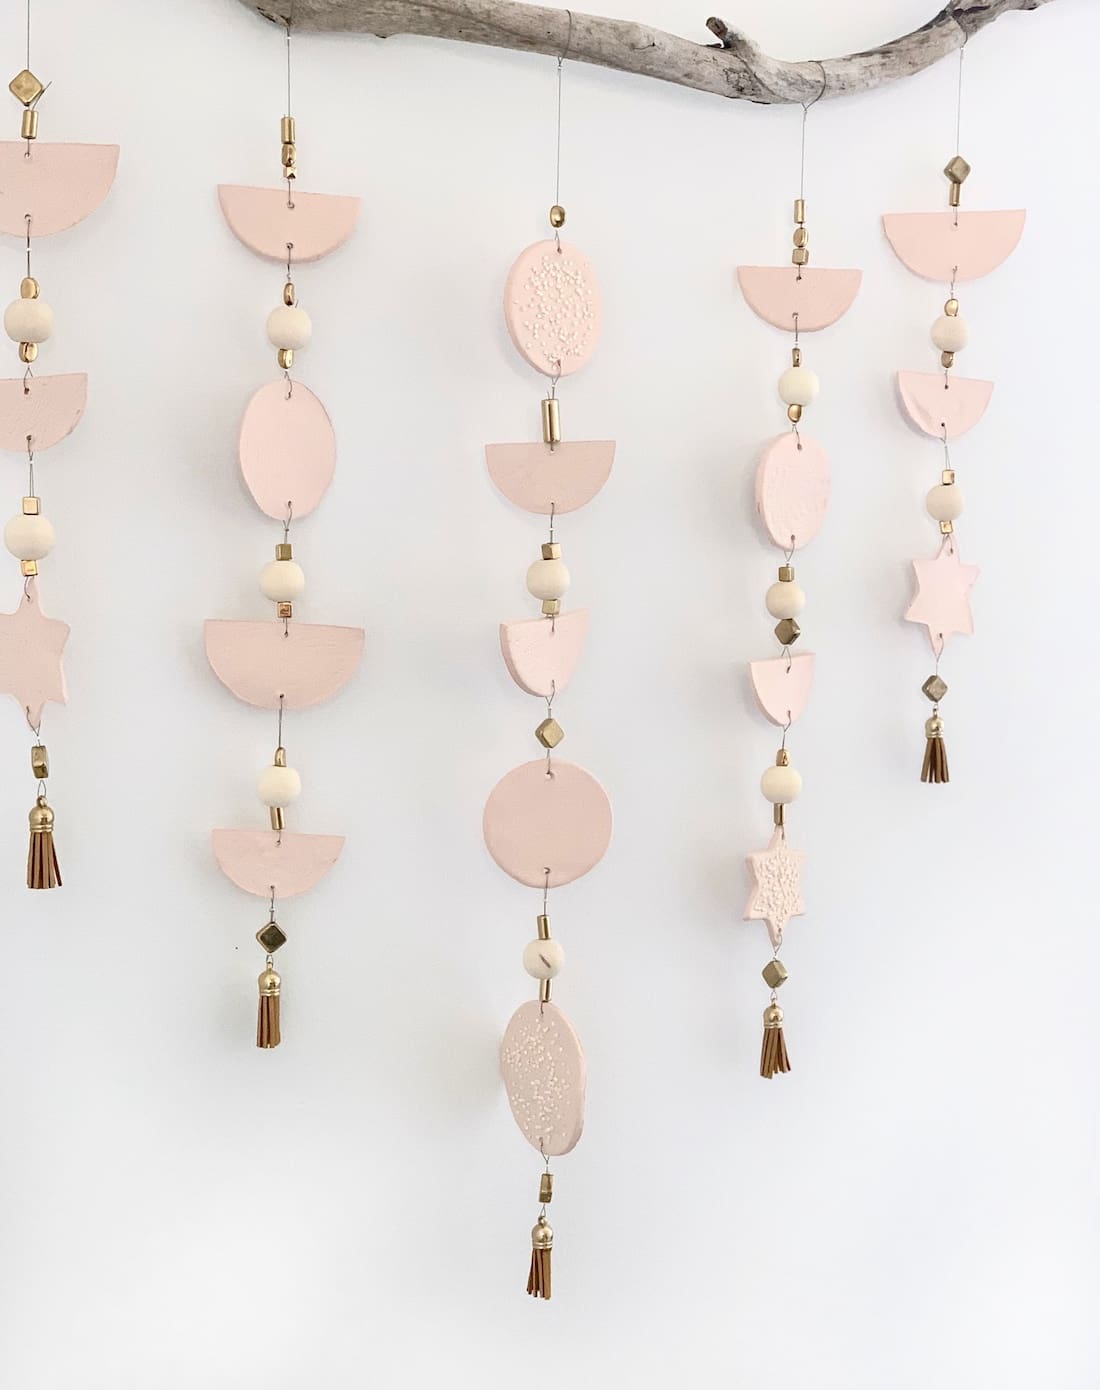
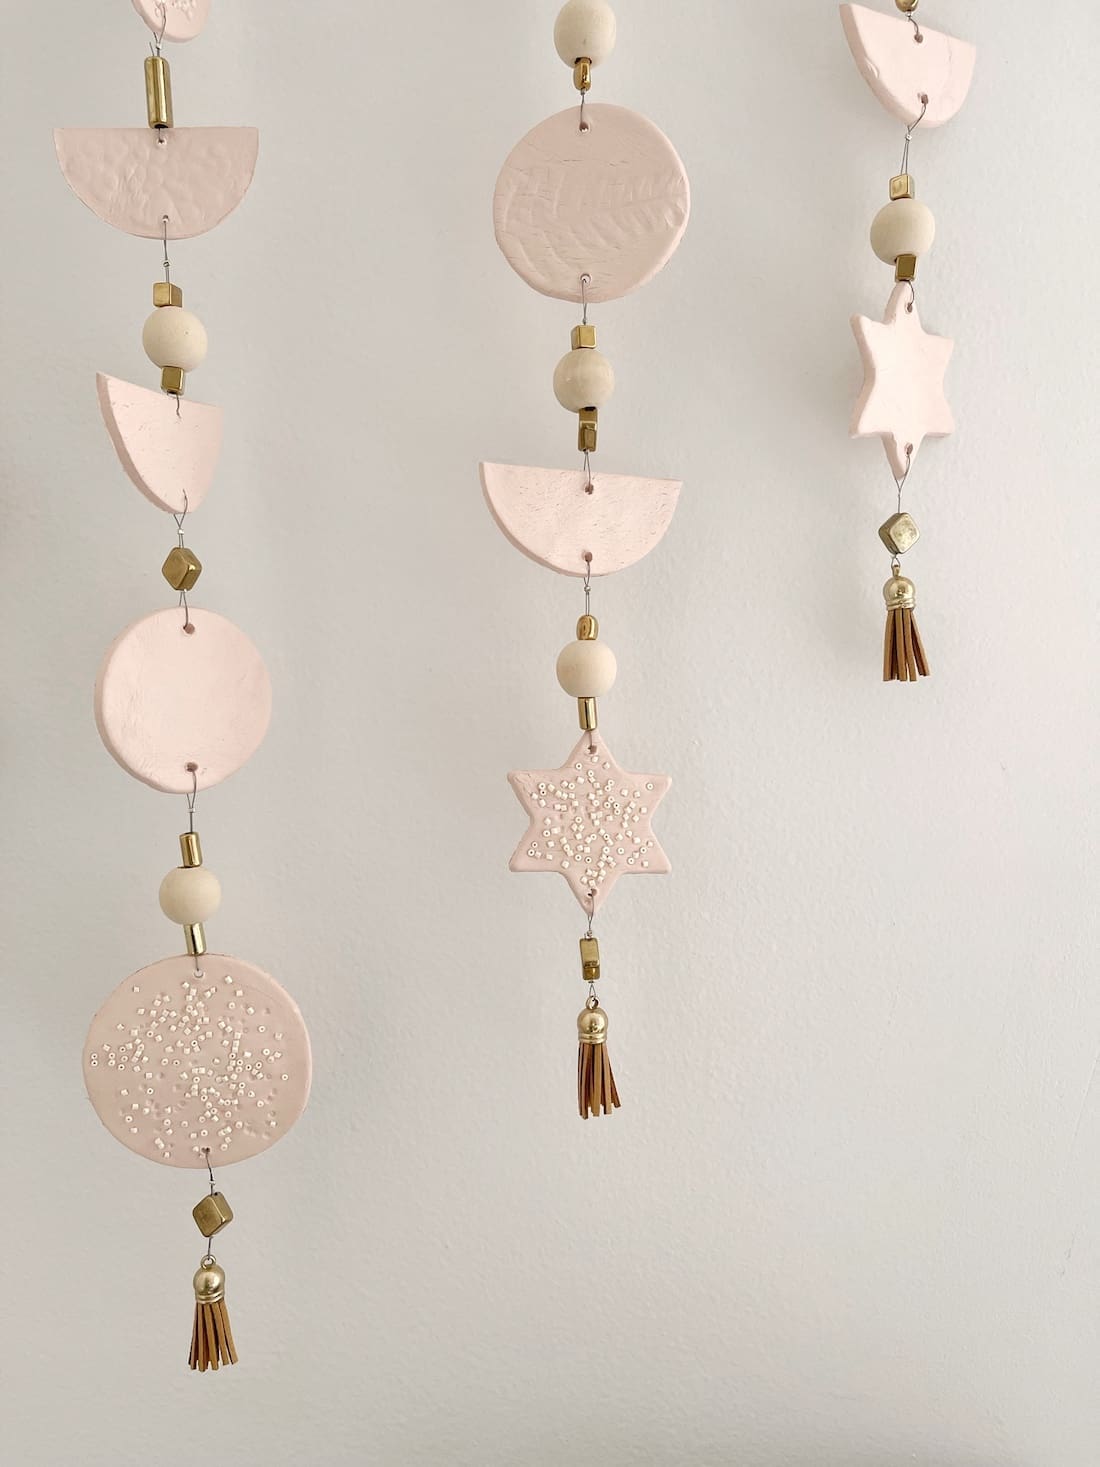
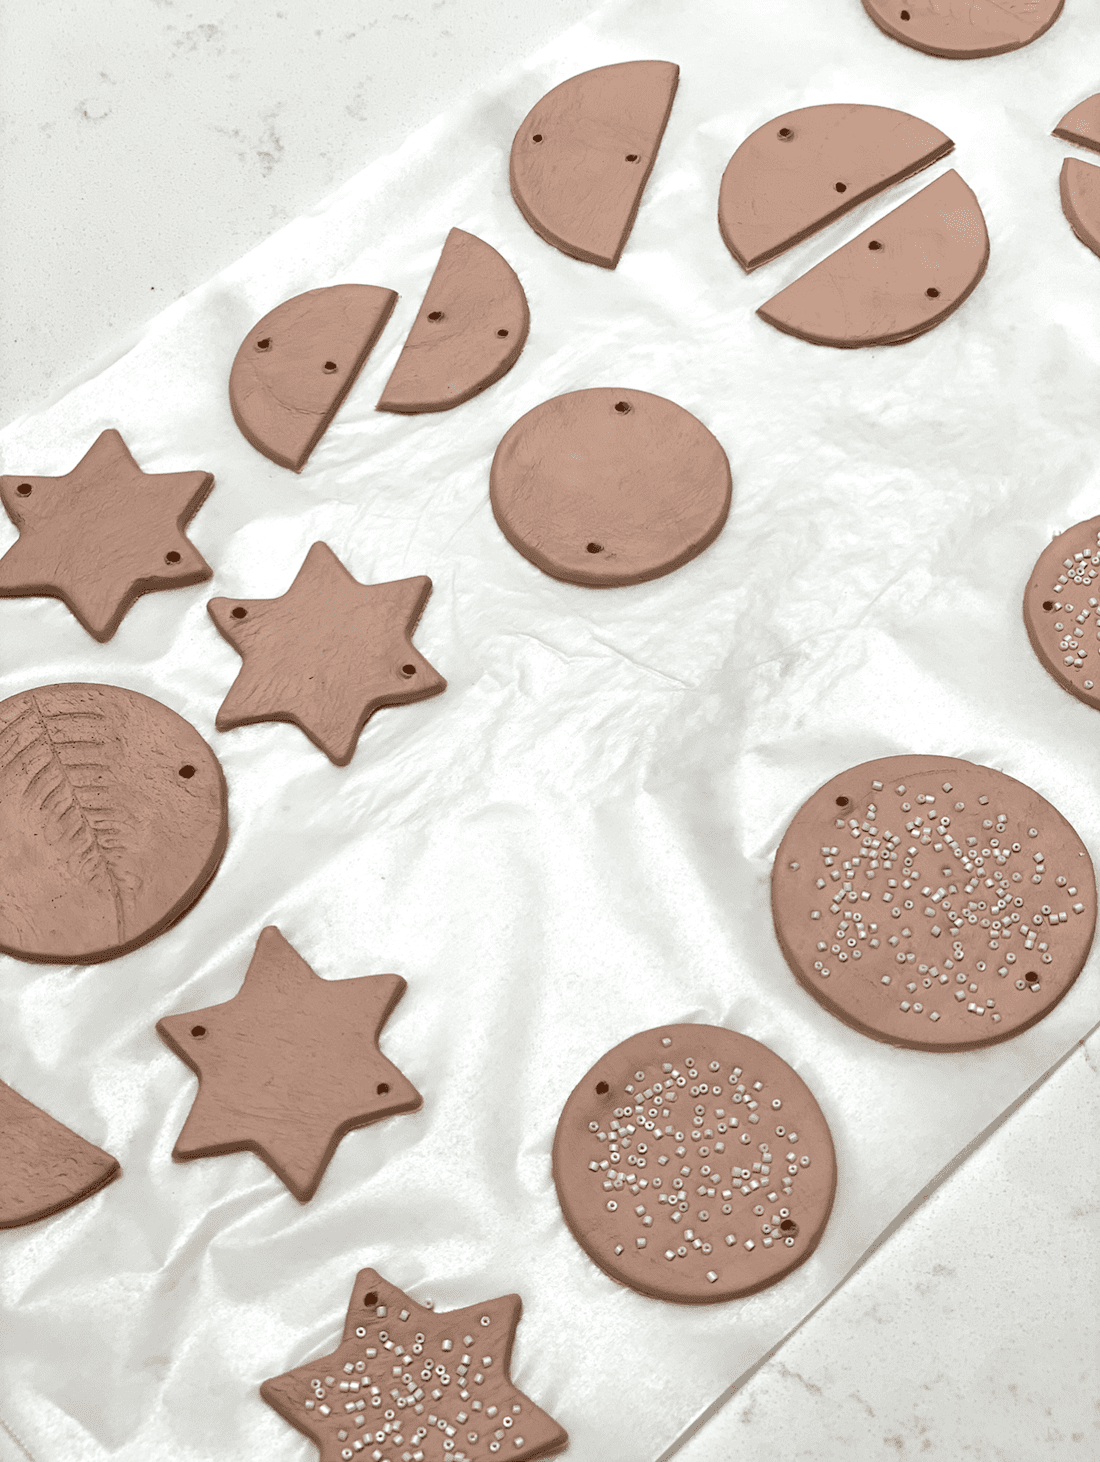
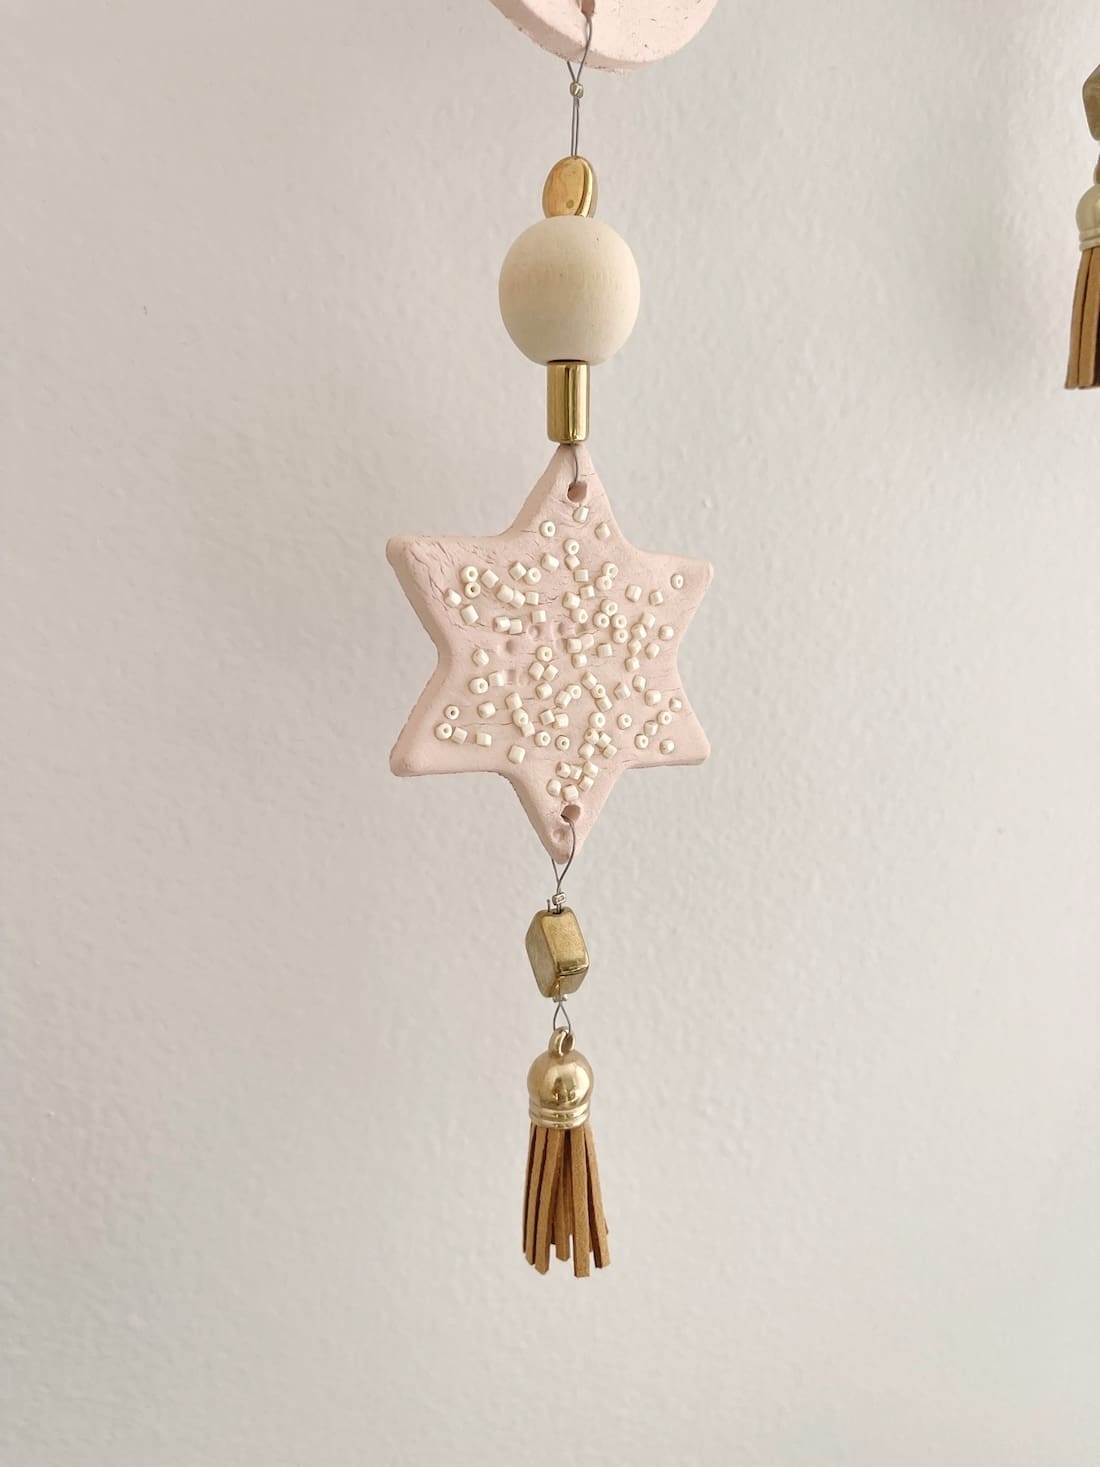
1. Roll out your airdry clay on a sheet of baking paper so that it’s a consistent thickness (around 3-4mm thickness is good). Then use your cookie cutters to create some shapes. I used a 60mm and 75mm circle and cut some of these in half using a ruler to create semi circles. I also incorporated a 60mm star shape.
Once you’ve stamped out some shapes you can remove any excess clay and re-roll to repeat the process and avoid waste.
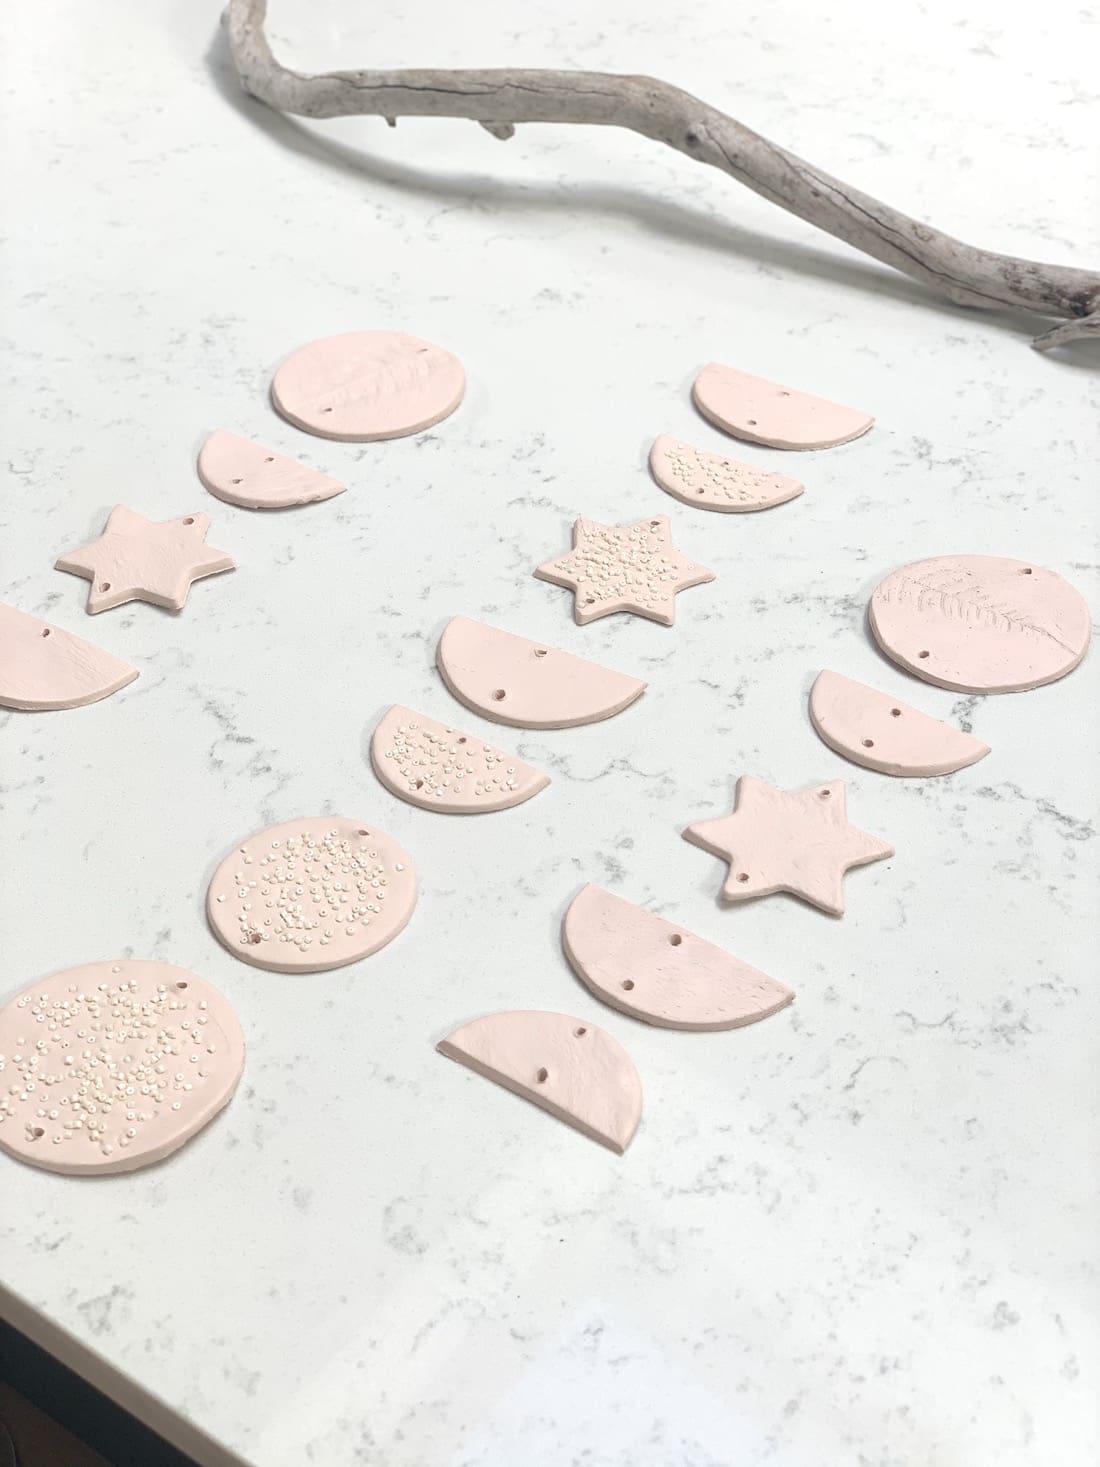
Use a toothpick and create a small hole at the top and base of each shape, considering how the shape will sit when threaded for hanging. As an option, you can also gently press some seed beads into some or all of your shapes to add texture. Using your fingertips, gently smooth the sides of your shapes so it dries with a nice clean finish. Leave to dry for 24 hours.
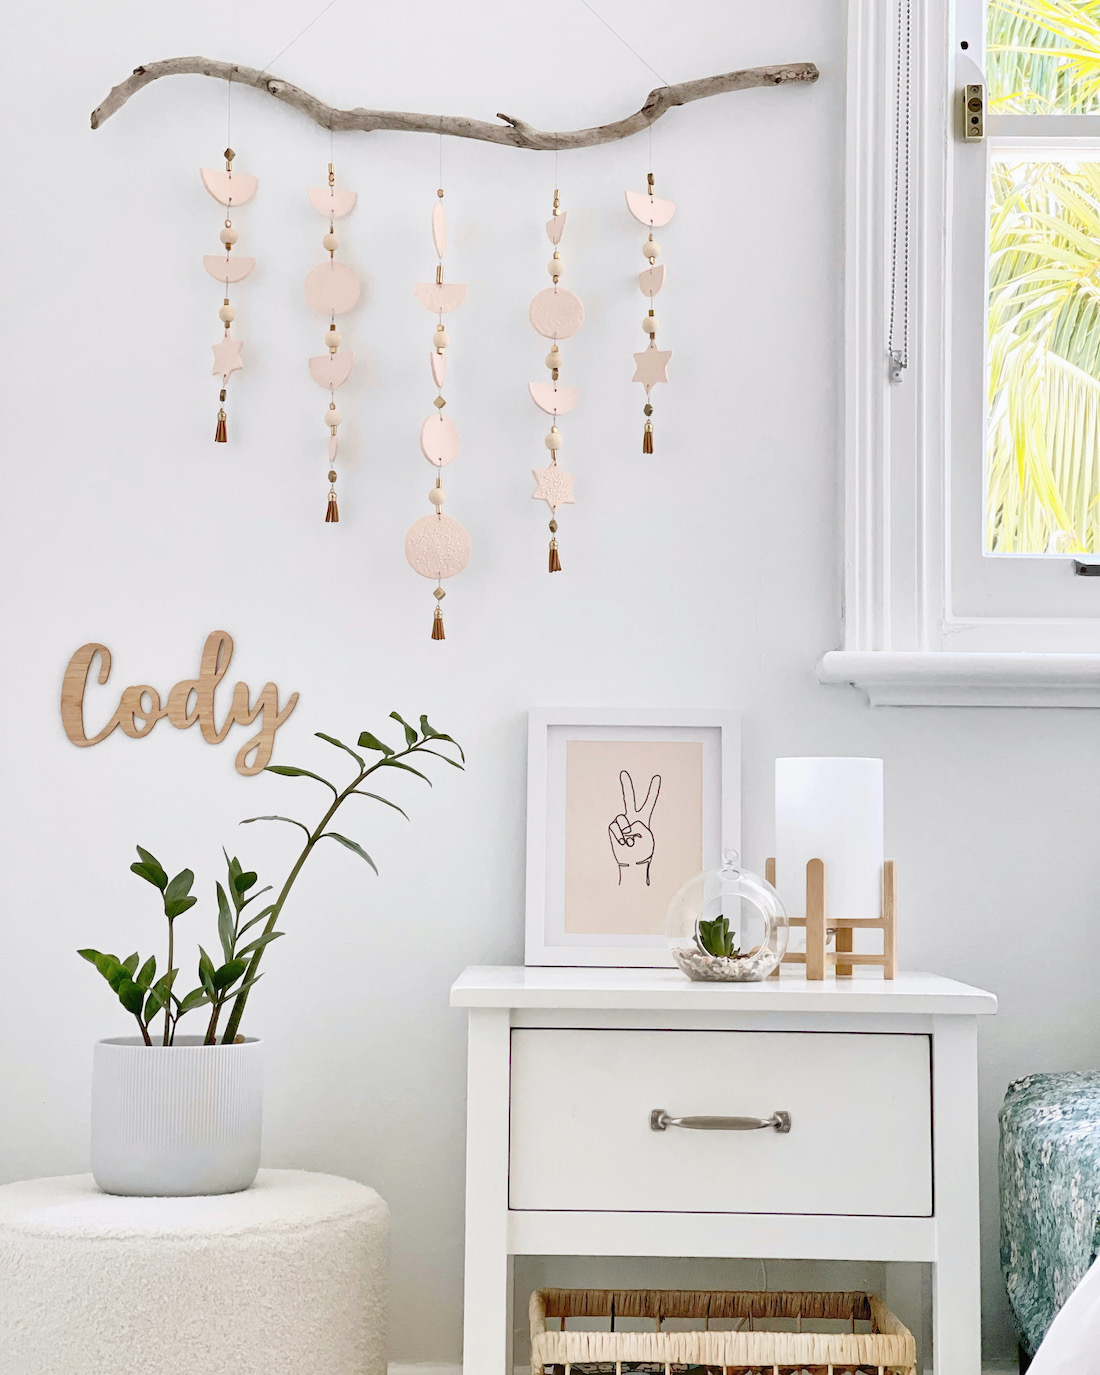
2. Once your shapes are dry, take your piece of driftwood and place on a large surface area to create your design. Lay out the shapes in your desired pattern, opting for the longest strand to sit in the middle. I had a long piece of driftwood so my design features 5 strands with only the two outermost stands being symmetrical.
Once you’re happy and you feel that your design is balanced, snap a photo for reference.
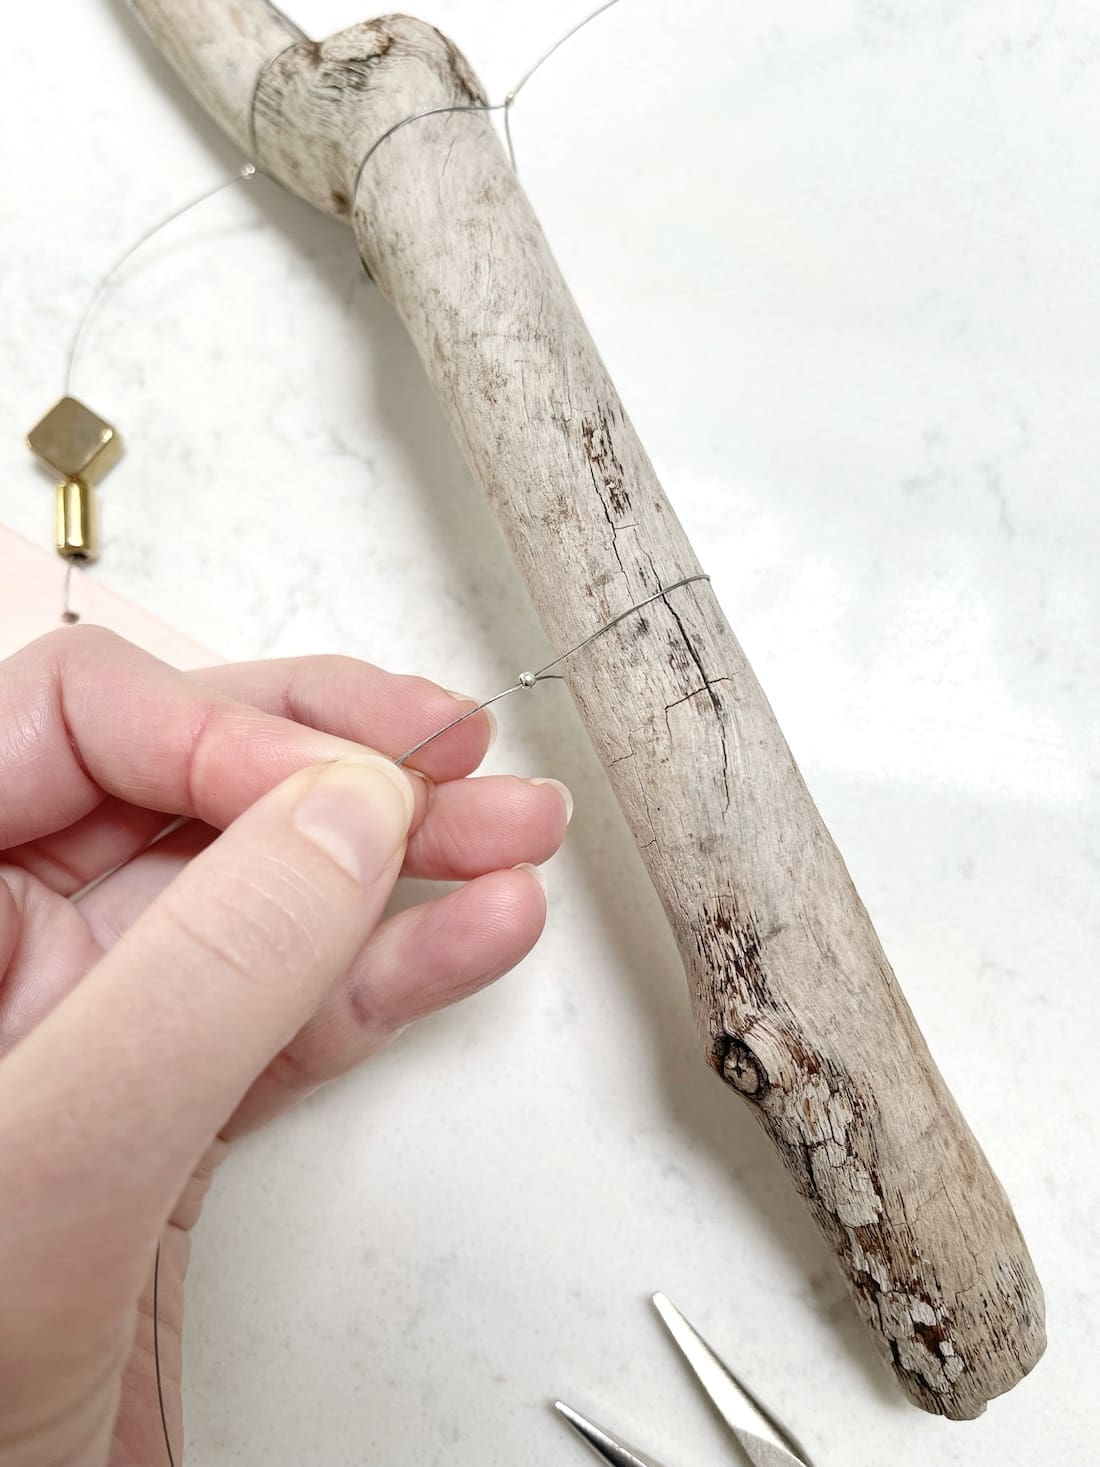
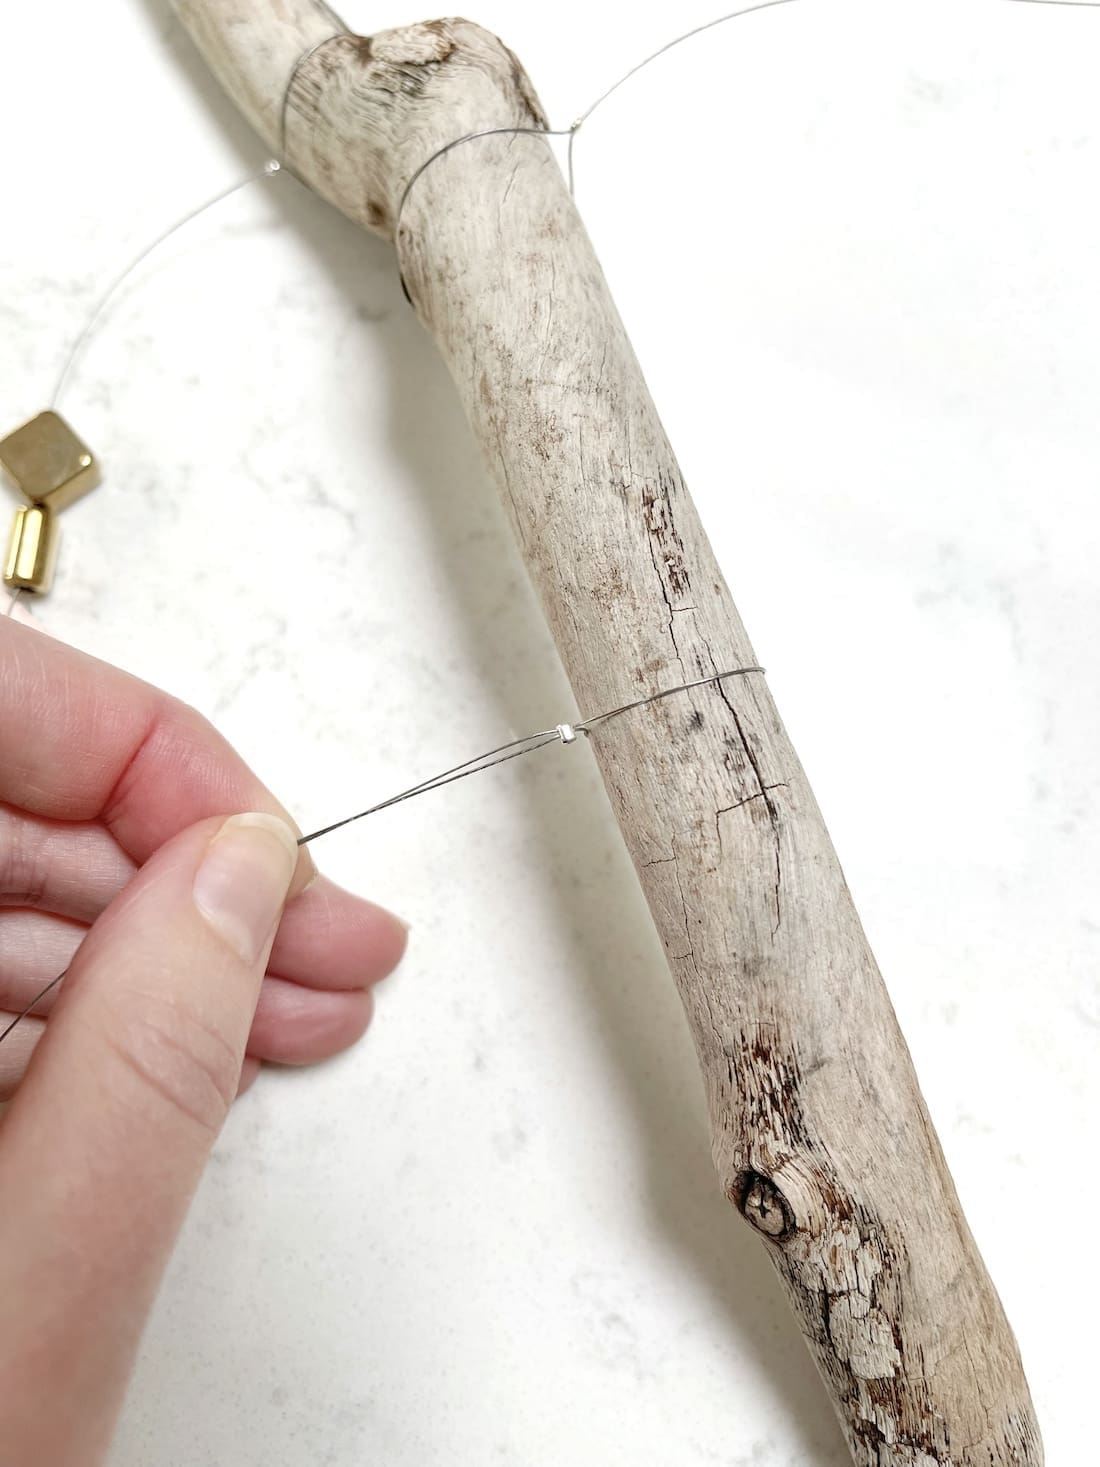
3. Time to rock and roll! Using your beading wire, cut a length to secure your first shape, starting with the middle strand. Loop the wire around the middle of the driftwood and back through a crimp bead, then use your flat nose pliers to squeeze the crimp bead as close to the top of the driftwood as possible. This ensures the strand will be safe, secure and won’t move around.
Now you can add some beads, a crimp bead and then thread your wire through the first clay shape and back up through the crimp bead. Again, use your flat nose pliers to secure these so that you have the first section of your strand ready. You will continue this process to secure the remaining shapes until you reach the end.
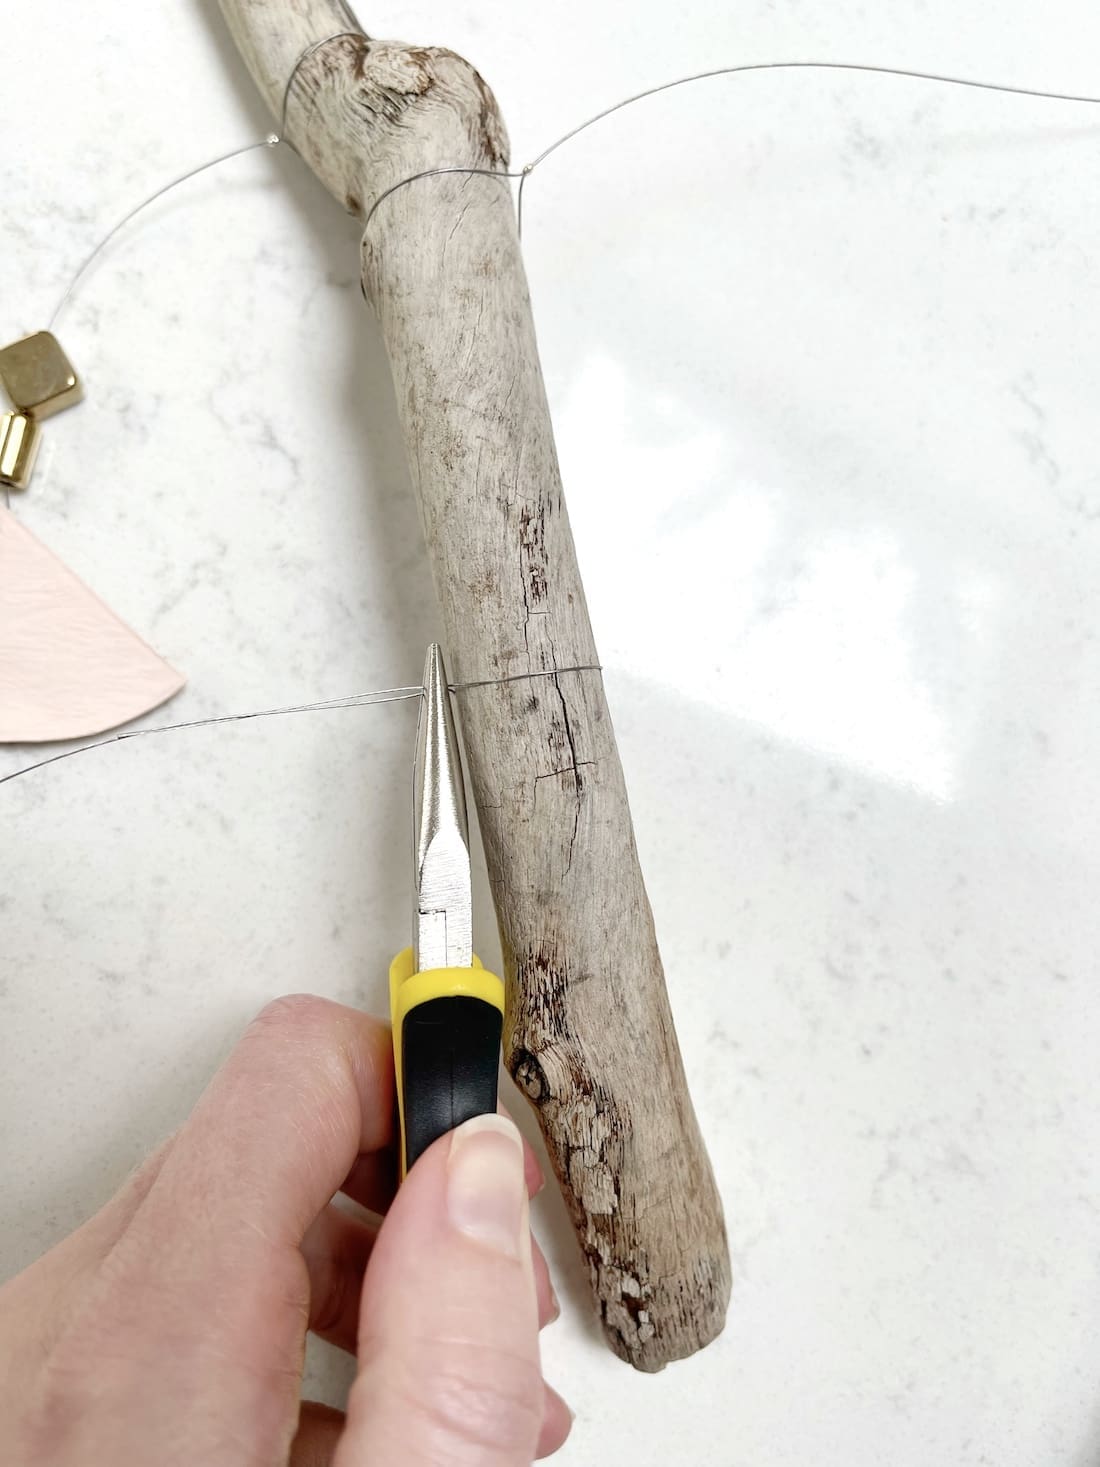
4. Repeat step three with each of the strands, then trim any excess wire so you have a neat and tidy finish. I also like to finish each strand with a tassel.
5. Finally, to hang the driftwood wall art I used a long piece of beading wire and crimps. Trim the wire to your desired length depending on how high or low you’d like your wall hanging to sit.
Thank you so much Andrea for sharing this detailed tutorial on how to create driftwood wall art. We hope it inspires you to also make one of your own. How will you put your spin on it? Different shapes, colours or materials? Be sure to tag us when you share it socials or email a photo to us!
More DIYs for the home
About the author

Andrea Lovett has over 15 years experience working in the interiors industry and has a love for photography. She shares home styling tips, DIY projects and more from her period style terrace in Sydney. Follow Andrea on Instagram at @my.green.sofa to be inspired and take delight in the pretty spaces she captures.
Instagram: @my.green.sofa
This article was first published in September 2021.