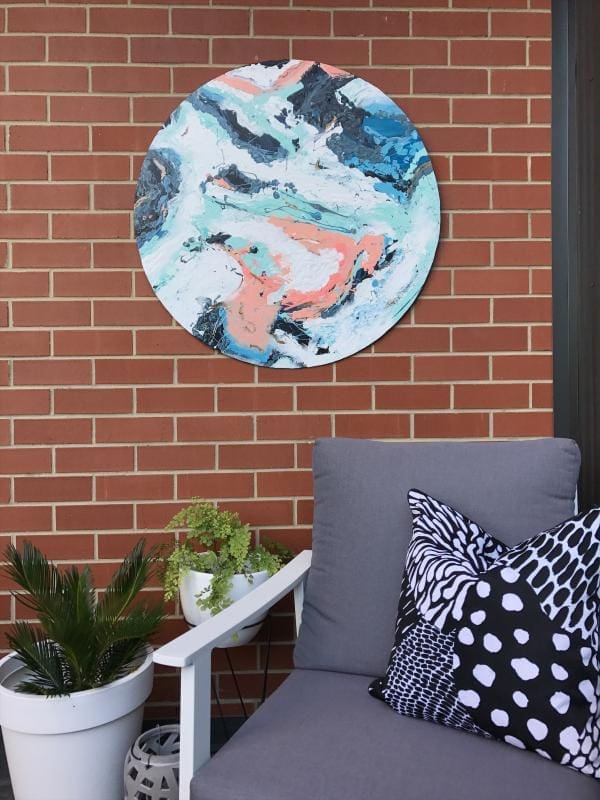
In case you hadn’t noticed, outdoor spaces have been on my mind lately — particularly how to create stylish outdoor spaces for less.
An idea I love is outdoor wall art — adding a big punch of colour and interest to an outdoor space buuuut if you’ve looked into the cost of outdoor wall art, you’d probably know it’s not that affordable (needing to use higher quality materials to withstand the outdoor environment).
It got me thinking about DIY outdoor wall art and how I could create my own for a fraction of the cost. That’s when I got this idea to create a round outdoor painting on Corflute. Keep reading for all steps to make this circle wall decor tutorial and make your own customised outdoor wall decor!
Related article: Modern DIY vertical garden: How I created a climbing star jasmine green wall
Related article: Artist spotlight: Lucy Catherine Art

Items you will need:
- 1 piece Corflute
- Paints (we used a range of Haymes colours including Pale Ivy, Ocean’s Runway, Evans Delight, Greyology 1, Coral Serenade, Impact and Gold)
- Measuring tape
- Hanging wire
- Glue gun
- Stanley knife
- Paint brush
- Sticky tape
- Pencil
- Sponge
Steps:
1. Measure and draw a large round circle on your Corflute using the measuring tape and pencil. Ours is 90cm in diameter. This will be the base for your DIY outdoor wall art.
2. With a confident and steady hand, use a Stanley knife to carefully cut out the circle.
3. Paint a base coat of colour over the entire circle. We used Pale Ivy but you could use any colour you like, even a dark colour if you want to create a moodier piece of art.
4. Now the fun begins! Start applying your colours to the canvas. Be random and generous with the paints you use. We began with dark blues and black and allowed this dark layer to dry before introducing the lighter colours.
5. The light layer was the most fun to create and we suggest trying a few different painting techniques — using a paint brush, sponge, dribbling technique and even your fingers.
6. Once the light layer was dry, it was time for the finishing touches. We used our fingers to smudge a lot of extra white paint to create a softer transition between some colours such as the peach and blue. Also, using the edge of a sponge we added a few gold accents over the artwork.
7. Once dry, it’s time to glue a wire across the back of the artwork so you can hang it on the wall. Sticky tape a horizontal piece of wire in place and fold up the edges several times so the glue has plenty of wire to hold on to. Apply a generous amount of glue and allow it to dry fully before hanging your art.
There you have the steps to create this abstract DIY outdoor wall art. You can use any colour combination you like to make modern outdoor wall art to suit your space. Do you think you’ll give this DIY a go? Be sure to tag me @stylecuratorau if you do!
More DIY ideas


What a cool DIY idea. It looks just like resin but loads cheaper and easier 🙂
Thanks Sarah, that’s exactly the look we were going for!