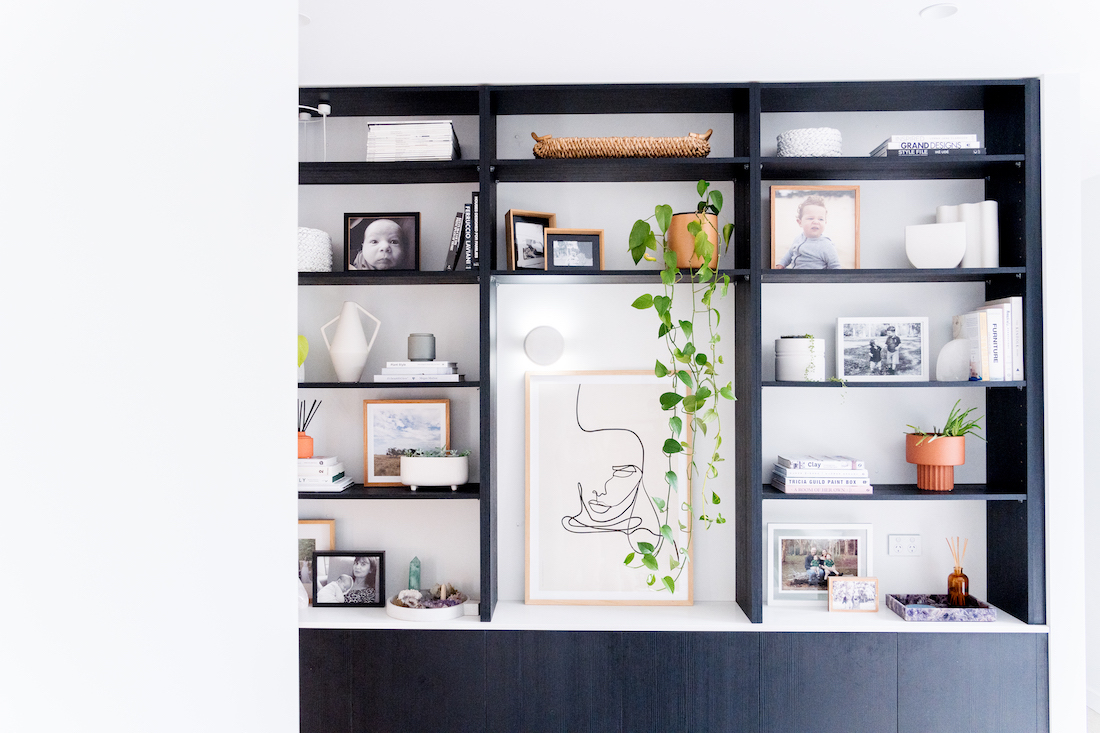
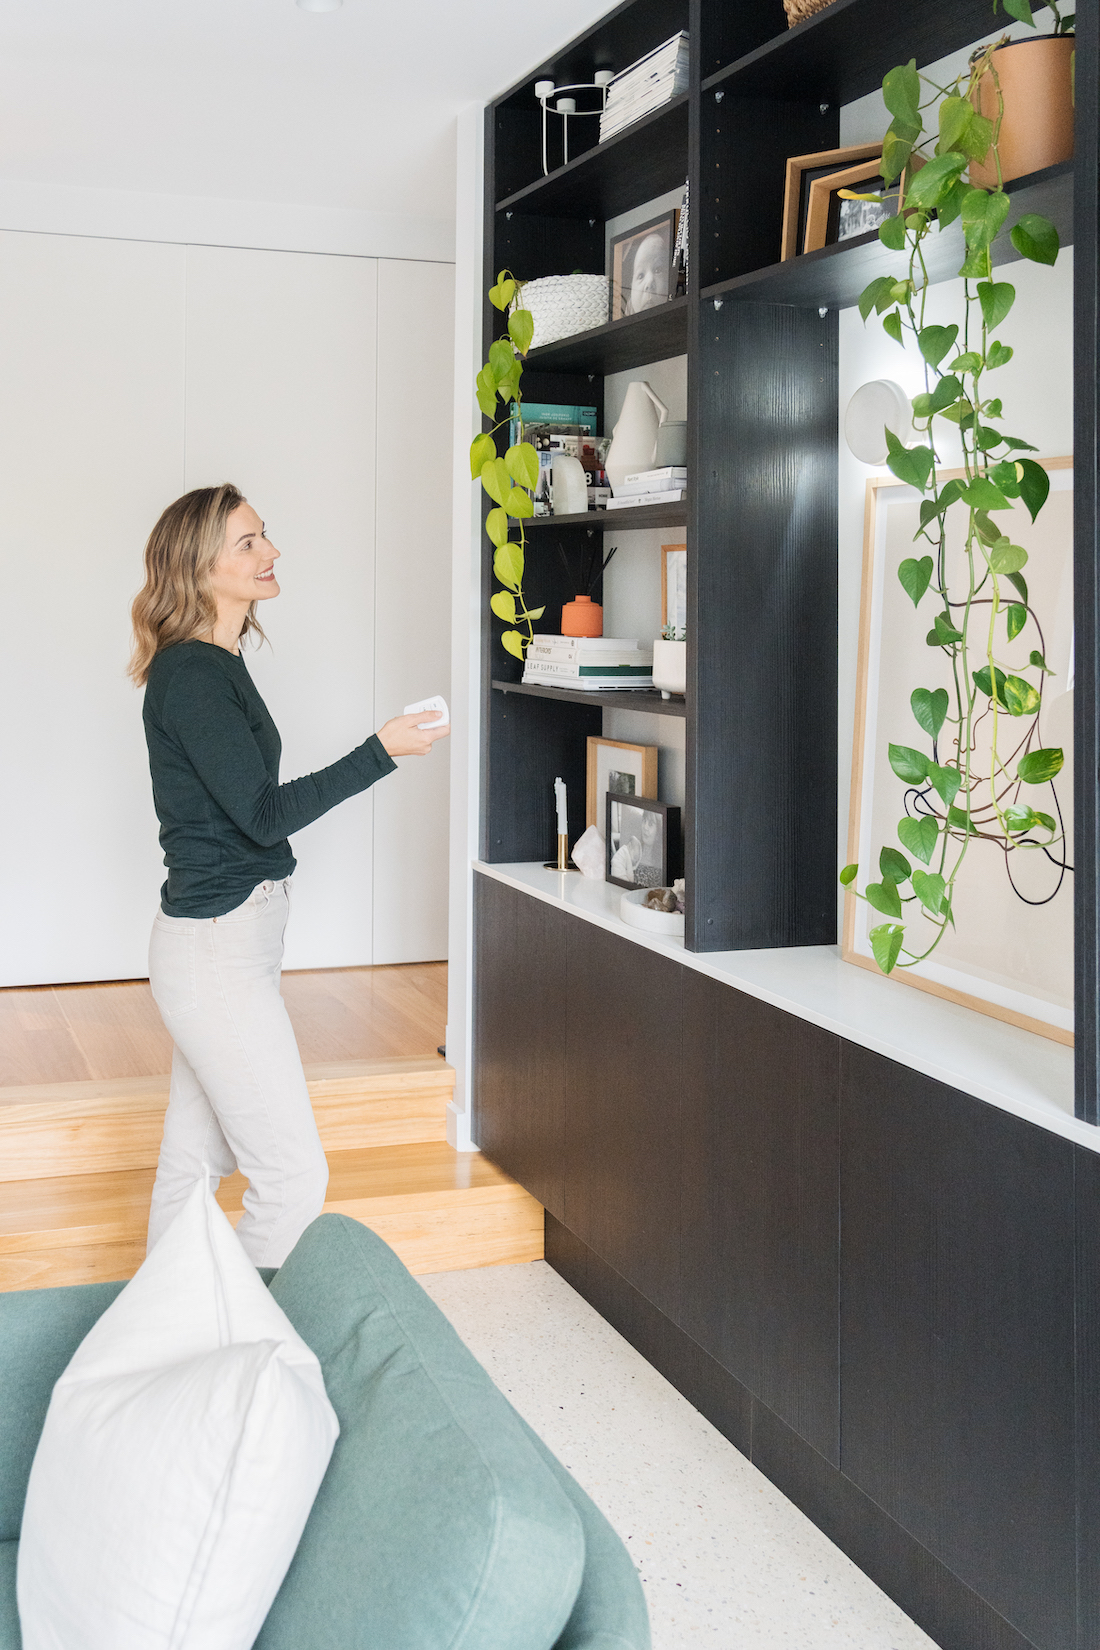
Round wall lights are seriously trending in interiors. But if you’re renting or not sure it’s a look you want to commit to, you may not want to go to the expense of calling in an electrician to wire in wall lights. Introducing our latest home improvement hack — easy, affordable and temporary DIY wall lights 😉
Keep on reading or watch the quick video below to see how I created this stylish concrete wall sconce without damaging my walls!
Related article: 20 of the best concrete home decor DIYs
Related article: How to design a lighting plan for your home
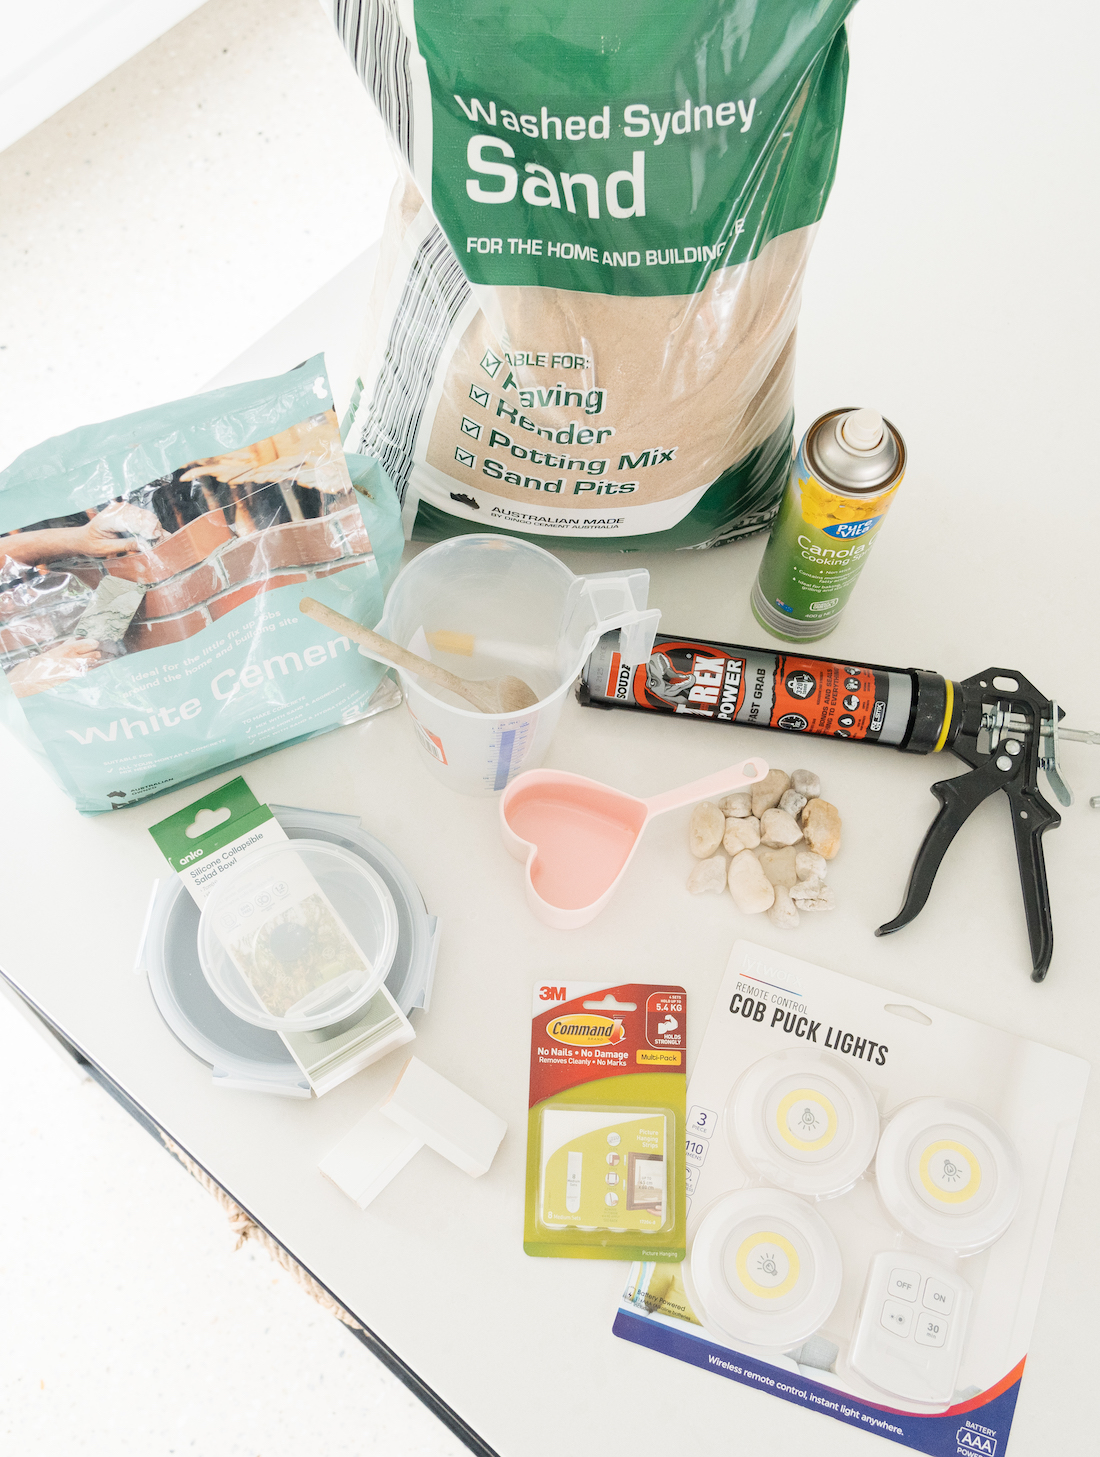
Items you will need:
- Cement (I used white cement)
- Sand
- Silicone bowl or other round mould (available at Kmart)
- Small plastic container (to create an indent behind the light)
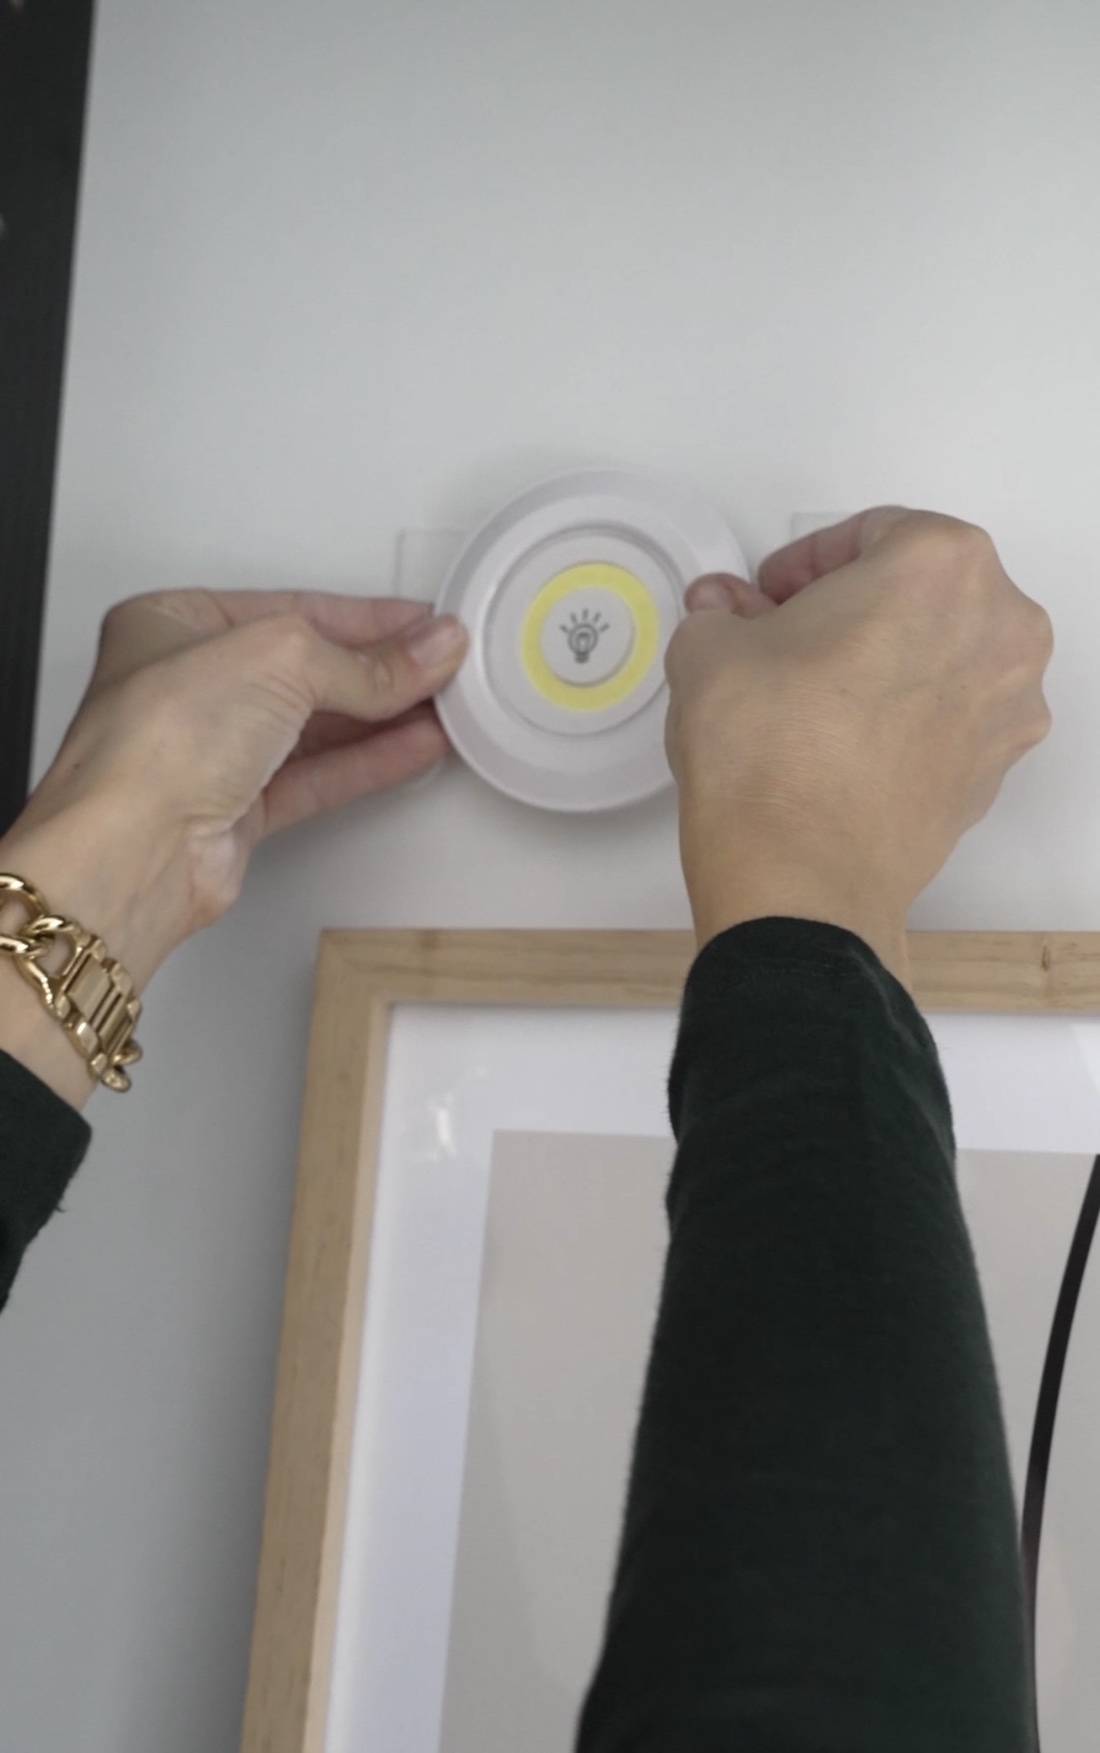
- Puck lights (available at Bunnings)
- 3M Command picture hanging strips (also available at Bunnings or Kmart)
- 2 x small pieces of timber
- Handful of pebbles (to weigh down the plastic container)
- Glue
- Measuring cup
- Mixing bowl
- Stirrer
Steps:
1. Mix up a small batch of cement following the instructions on the packet. I used 1 cup of white cement, 2 1/2 cups of sand and 1 cup of water. Stir until it’s the consistency of cake batter.

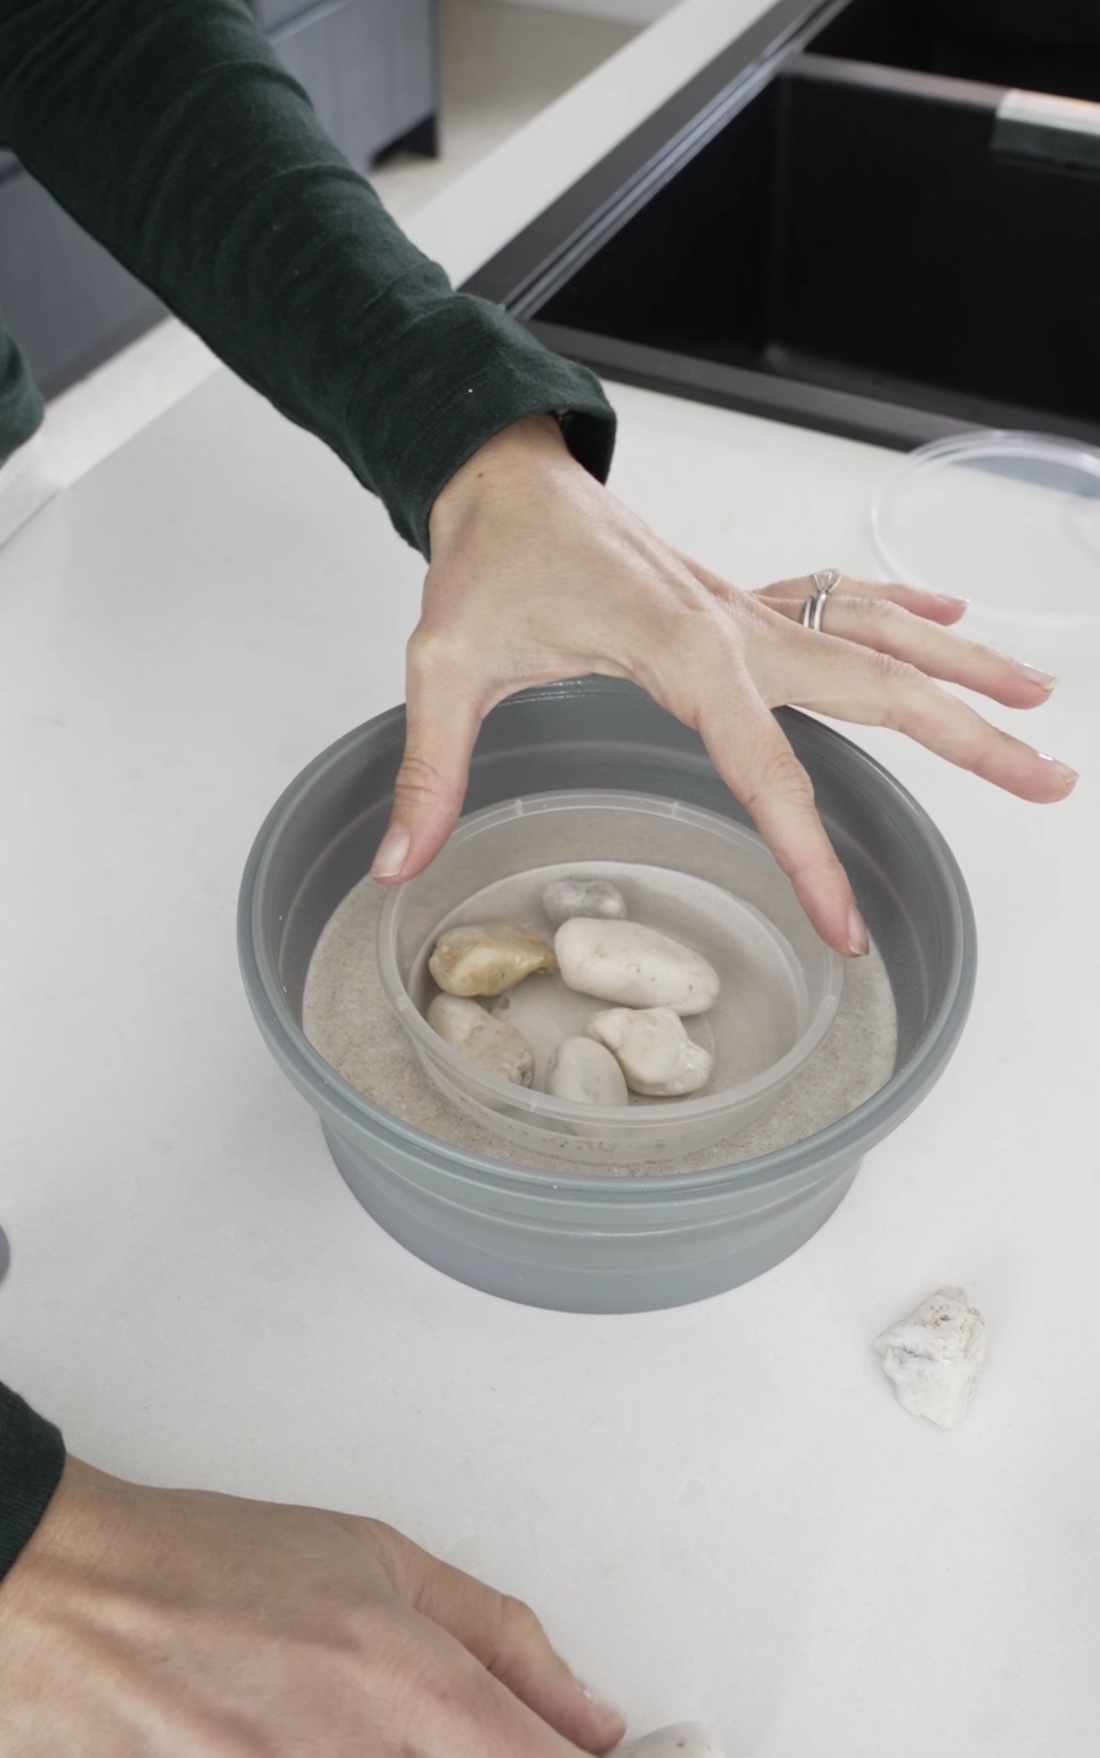
2. Pour cement into your silicone mould until it is 3cm deep. Tip: you may like to lightly spray your mould with oil to make it easier to remove once dry.
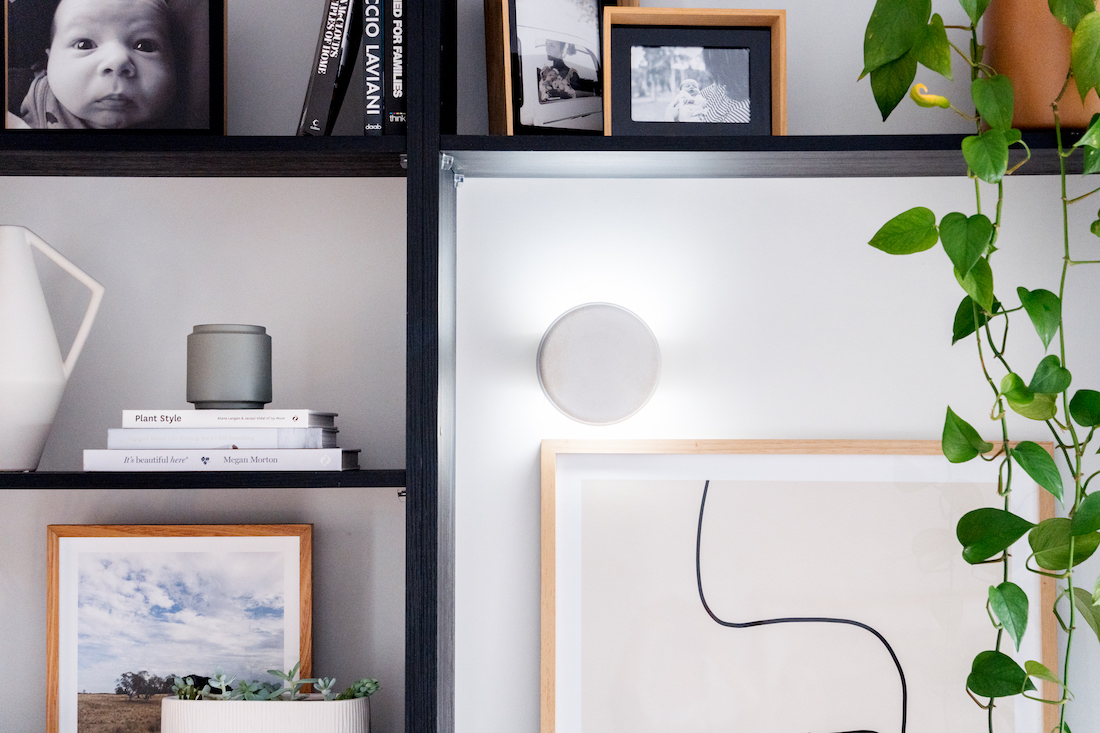
3. Gently press your plastic container into the centre until it is approximately 2cm deep. The idea is to create an indent for your puck light to wash light behind. Weigh it down using a handful of pebbles and set aside to dry for 24 hours.
4. Once dry, gently remove the cement light shade from the moulds.
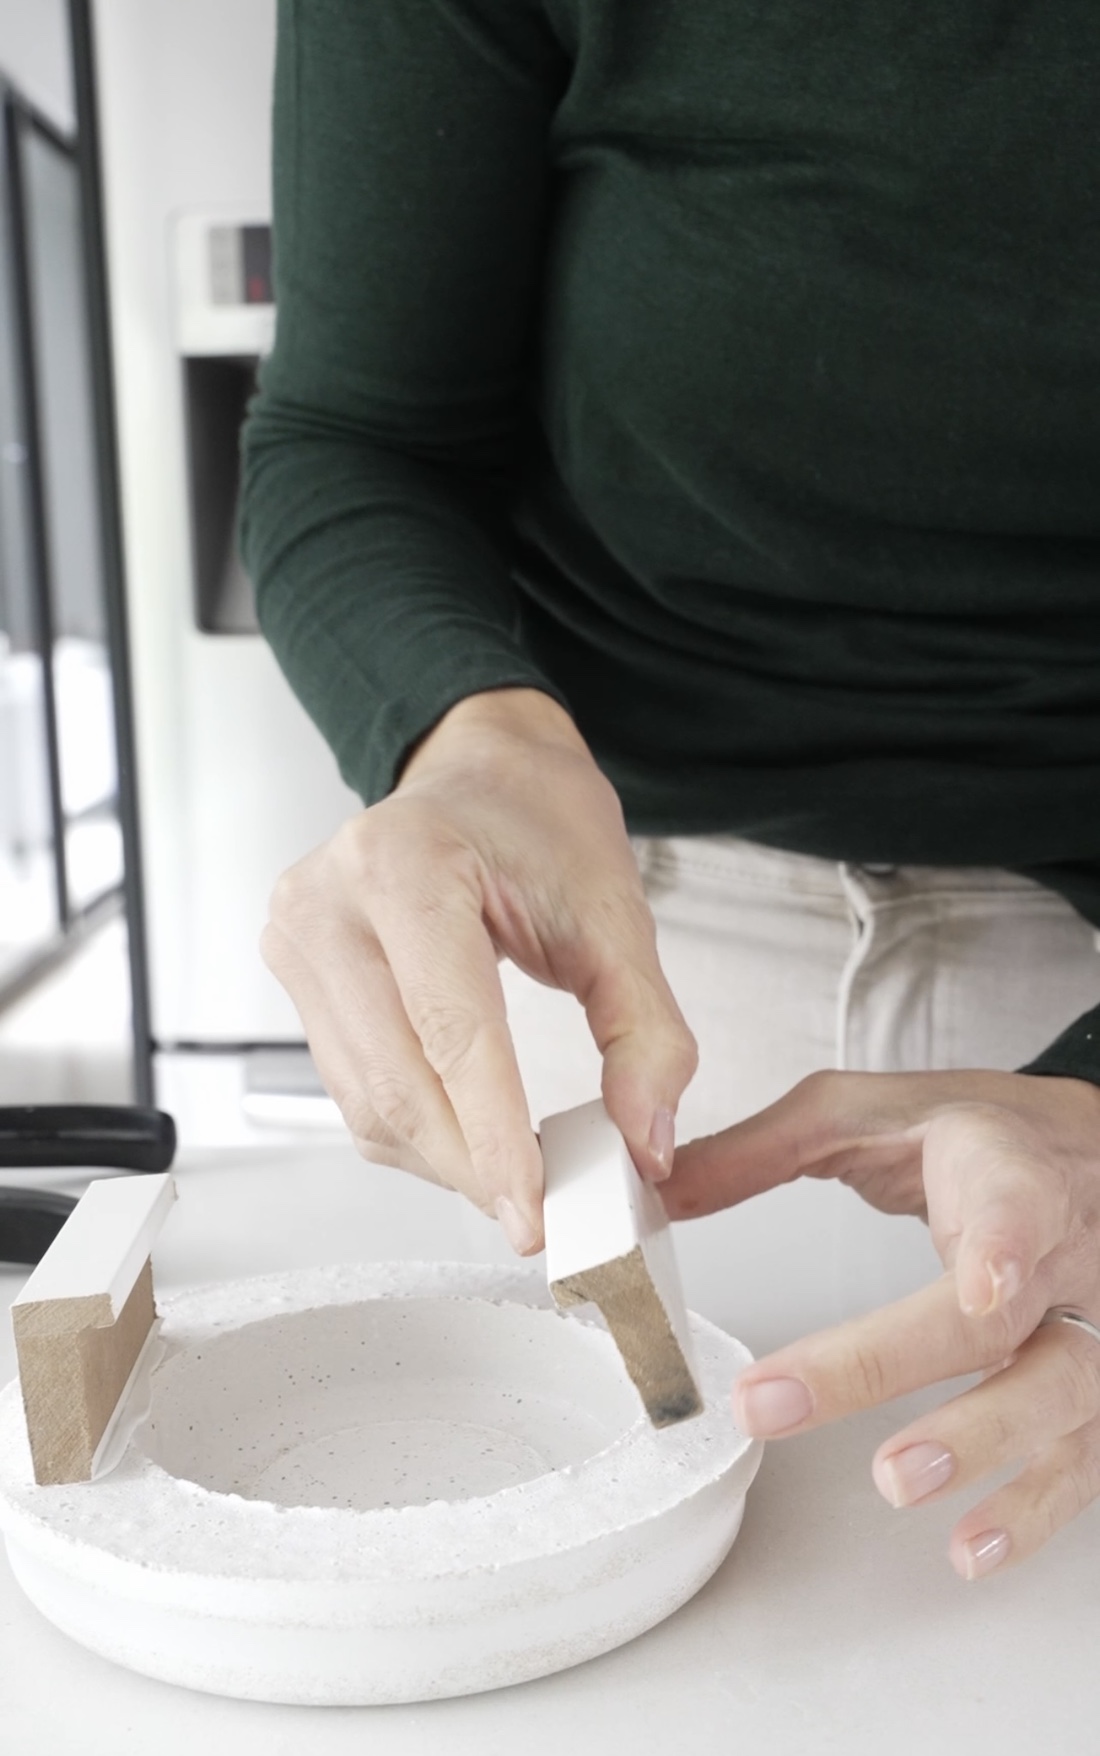
5. Glue two strips of timber onto the back of the light. This will sit the light off the wall so the light can illuminate behind. And it’s also how you will adhere the light shade to the wall using the 3M Command picture hanging strips. You could use any small piece of timber that will fit. I had a broken picture frame that I cut down to size. Ideally, the timber strips would be 1.5cm wide and approximately 5cm long.
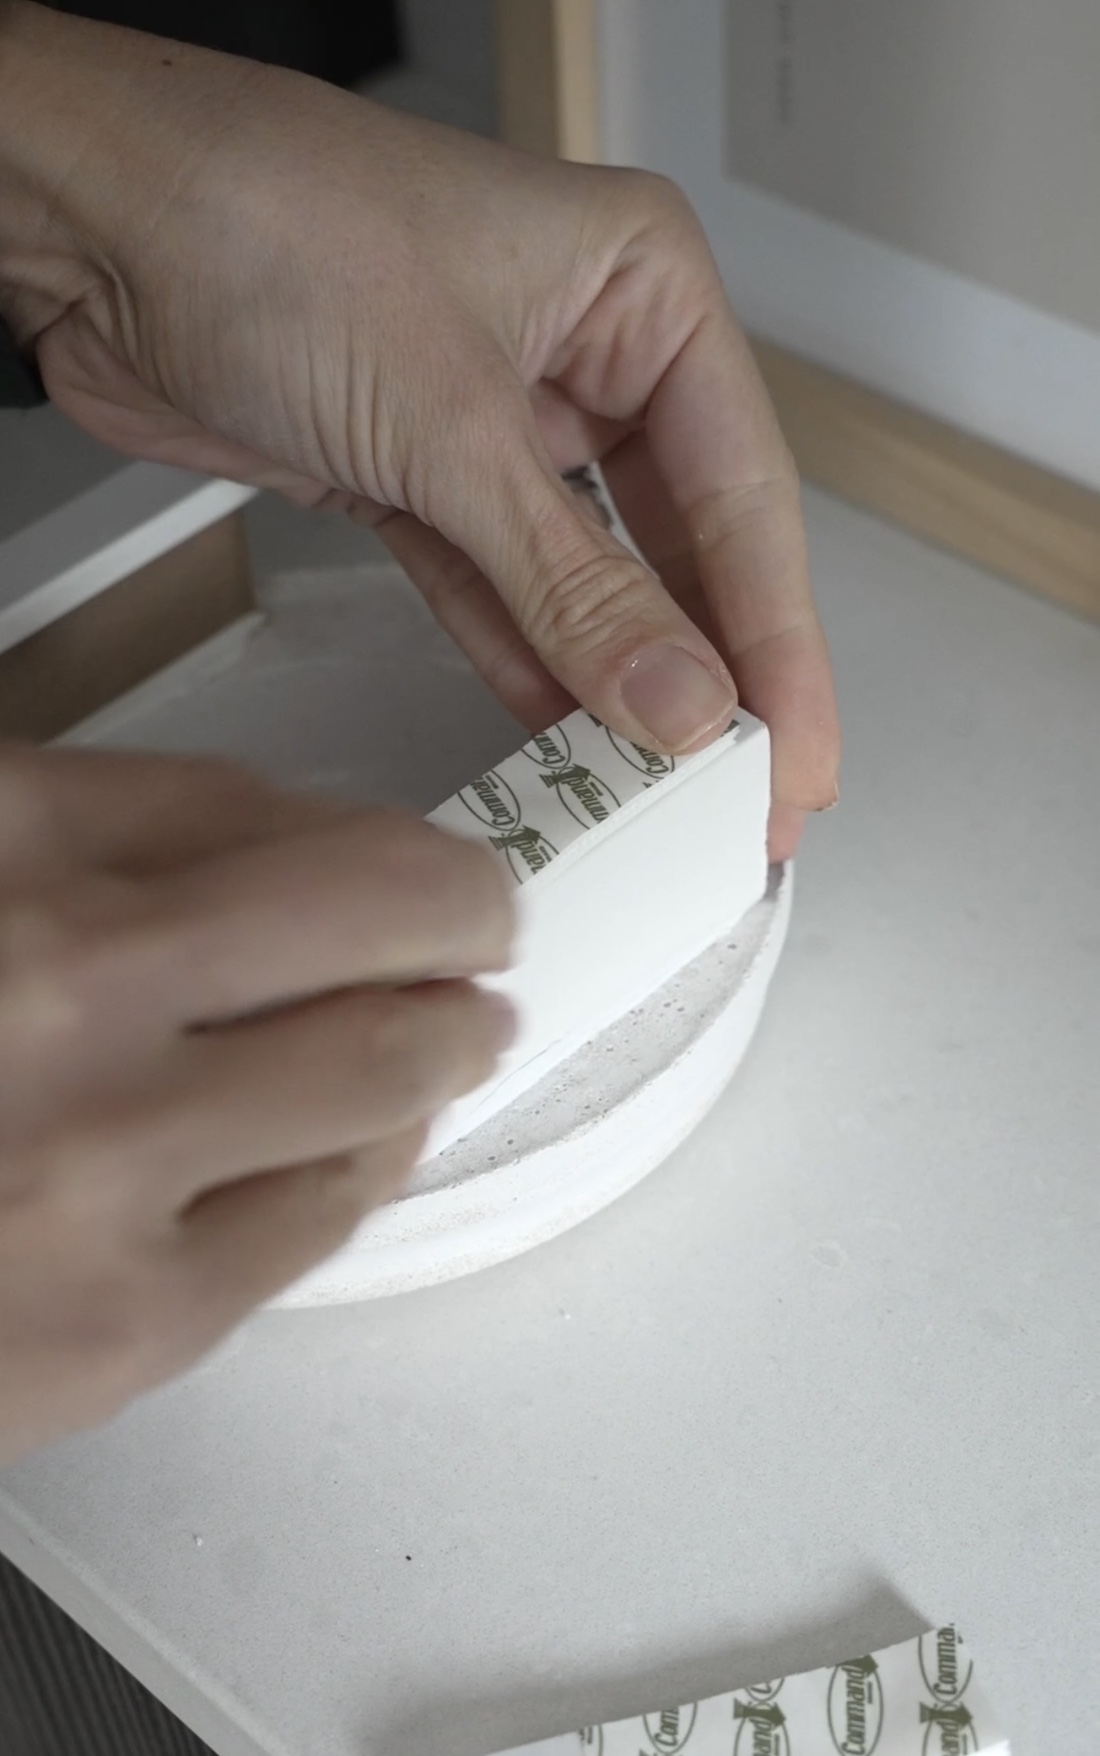
6. Finally, once the glue has dried, attach the 3M Command picture hanging strips to the timber pieces. Press the light onto the wall for 30 seconds. Then remove the light cover and press the strips down for another 30 seconds. Wait 1 hour for the adhesive to bond and then you can attach your puck light and re-attach your light cover.
Done! There’s so much scope to personalise this hack to make it your own. For example, you could add oxide to tint the cement a different colour. Or you could use a different material altogether such as timber or marble.
Has this DIY inspired you to hack your own wall light? Or will you be making a different version to suit your home decor? Let us know in the comments below!
More DIYs