
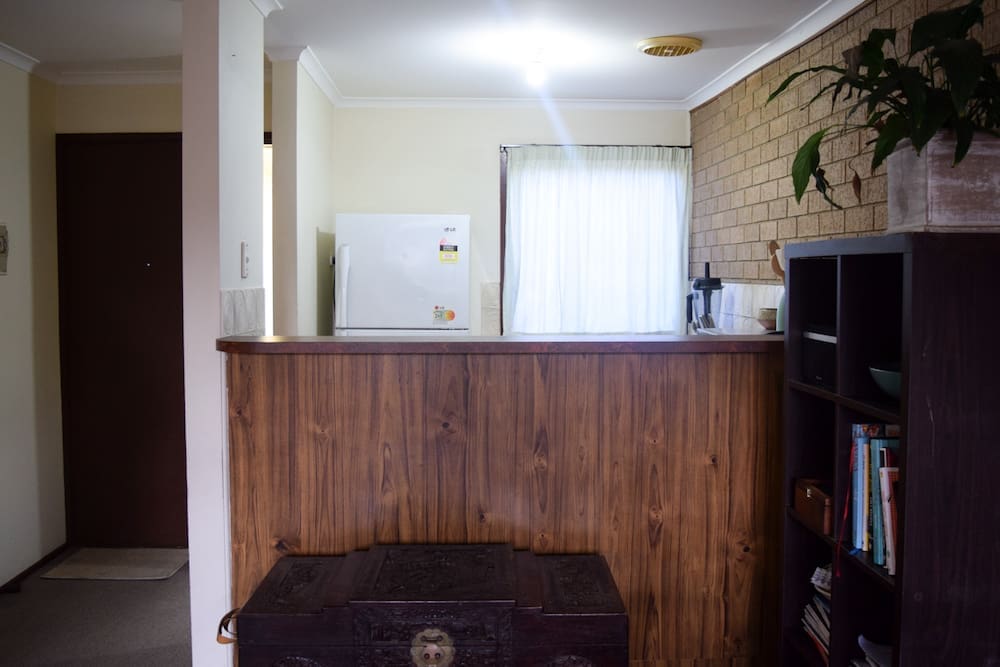
It’s been a little while since we updated you on Bonnie’s kitchen! Last time you saw it, it was looking very brown and poky, just check out the pics below!
Something Bonnie struggled with when planning her kitchen reno was getting enough info on the ‘how’ — what stages a kitchen reno should be done, what’s involved, issues that can be avoided etc — as all the renovation projects she found online were simply before and afters.
As a rooky renovator, it can be a steep learning curve so we hope this article helps other soon-to-be kitchen renovators out there!

Design
The first step in a kitchen remodel is to come up with a functional and stylish design that ticks all the boxes.
You may have already read our last blog post where we went into detail about how we designed Bonnie’s new kitchen with IKEA but if not, you can catch up here.
Demolition
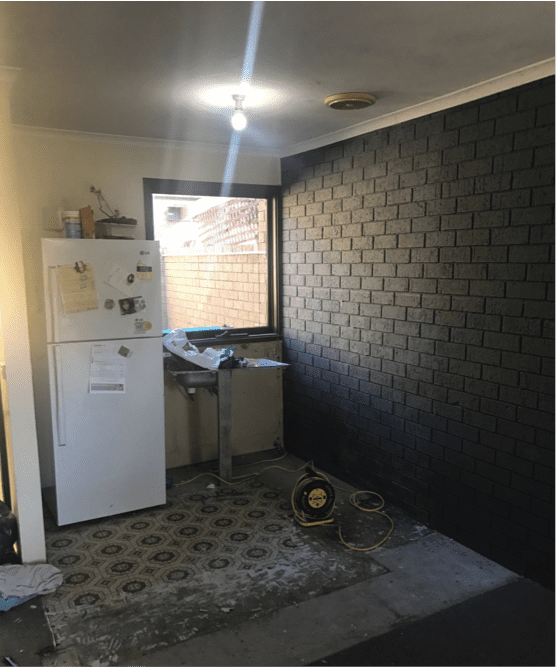
The next step is demolition. At times, it is possible to reuse existing cabinetry by simply replacing or painting cupboard doors but Bonnie’s kitchen was well past its expiry date and far too small to be functional so the entire kitchen had to go.
Kitchen renovations can become incredibly costly so an area where you can save is by doing some of the labour yourself. Bonnie and her husband demolished the old kitchen but first consulted with an electrician and builder to ensure they knew what they were doing. They also had these trades disconnect appliances and do all of the other electrical and plumbing jobs in this space.
Generally we would advise to protect your floors whenever you’re doing demolition work, but we were ripping up all of the carpet and linoleum so we didn’t have to worry about this. We do recommend covering any nearby furniture though as it can get messy.
In just a few short hours the 80s kitchen was sitting in a rubbish pile and we promptly got to work on painting the brick wall (you can see the final brick wall here).
Tip:
The most challenging part of the demolition was tackling the linoleum floor! It was glued down with industrial strength glue but eventually we found that the best way to remove it was by pouring hot water over the lino and chiselling it up with a chisel drill bit.
Rough in
The next step is calling the electrician back to ‘rough in’, which involves running the wiring to allow for all your lighting, electrical points and appliances. We also had him remove the hideous yellow ceiling fan in here too.
You might like to check out these tips on 10 electrical and lighting things to consider when building.
Plasterer
You may also need to call out a plaster – particularly if you’re adding or removing any walls or damage old walls during the reno.
We removed a small dividing wall in Bonnie’s kitchen so the plasterer patched the ceiling and also fixed up other damage.
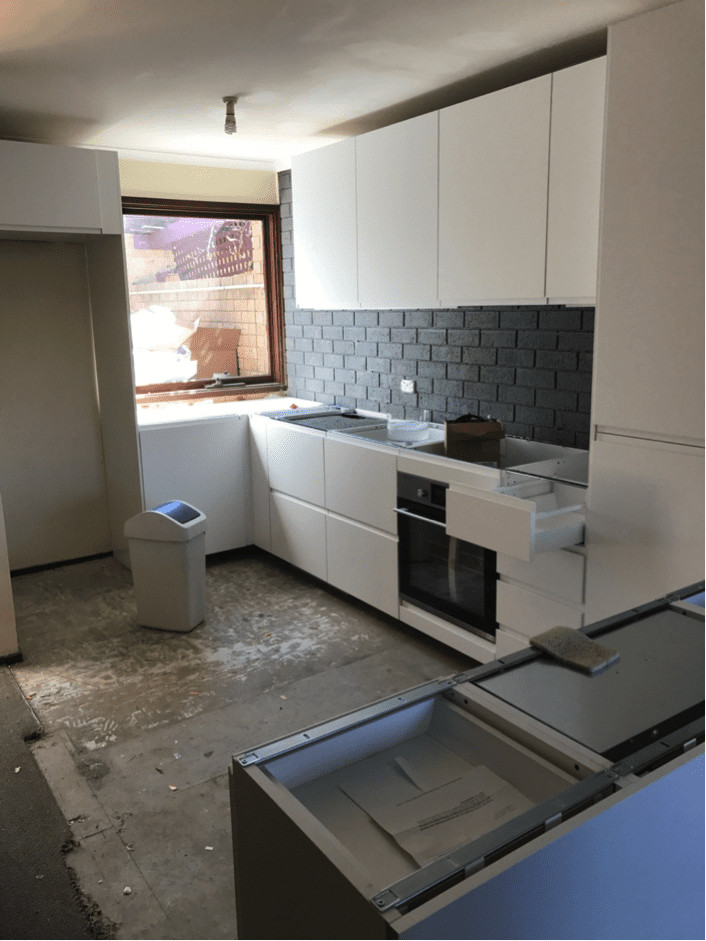
Kitchen installation
With all the prep work done, it’s time to install your new kitchen.
To make significant cost savings, you could install the kitchen yourself; provided you purchase a kitchen that can be self-assembled like those from IKEA. However, Bonnie and husband were reaching renovation fatigue by this point and loved the idea of having an IKEA installer come and do the whole job in just one weekend.
There were also going to be some difficulties bracing the cabinetry to the brick wall and they wanted the final product to be perfect. Some people are put off by IKEA kitchens because they think they have to do their own installation, but you can find a local recommended installer in your area who will do it all for you. For more information click here.
After being away for two days, Bonnie returned to the kitchen installed, ready for the stone benchtop final measurement to be done (this has to be done once the kitchen is in, so factor this into your timing).
Bench tops and splashbacks
Next on the kitchen reno checklist is to install your bench tops and splashback.
There are loads of options on the market but Bonnie selected stone bench tops and a clear panel of glass as the splashback so the grey brick is still visible behind.
Stay tuned for the next and final blog post in Bonnie’s kitchen reno series where we reveal the finished kitchen with the bench tops and splashback installed.
Final fit off
The last step is to call back your electrician to fit off – putting switch plates on all your power points, connecting all your appliances and installing lights.
You’ll also need to call your plumber to connect your dishwasher, kitchen sink and possibly your fridge if you have one that’s plumbed in.
We hope this overview of what goes into remodelling a kitchen helps you and we’re beyond excited to share the final space with you soon!
*Disclaimer: we designed and installed Bonnie’s kitchen in collaboration with IKEA.

")


