DIY concrete planter

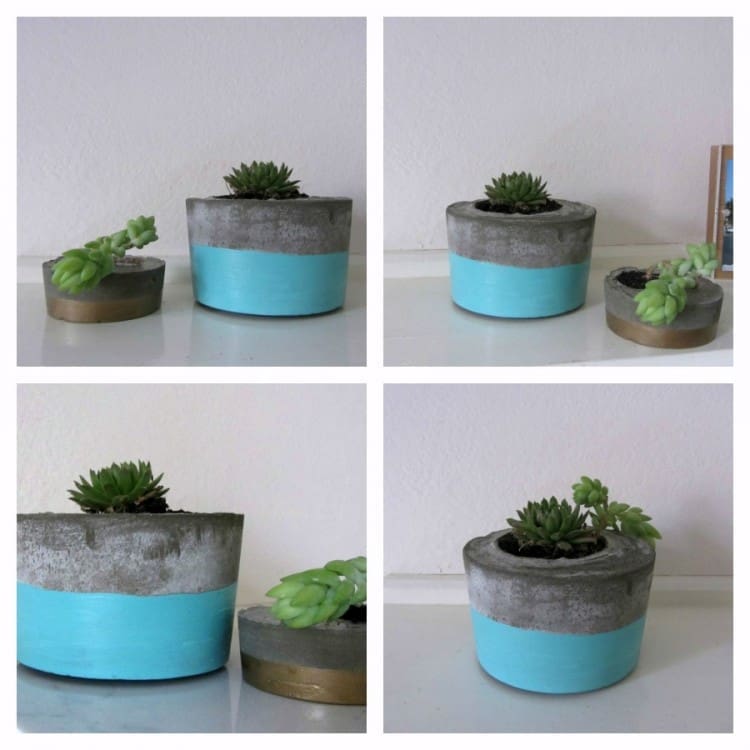
Concrete planters are all over Instagram and in boutique homeware stores. Today we’re going to show how easy it is to make these yourself at home.

Add a burst of colour to your desk or kitchen window with a DIY concrete planter!

Related article: How to grow succulents
Related article: Kmart hack: DIY concrete side table

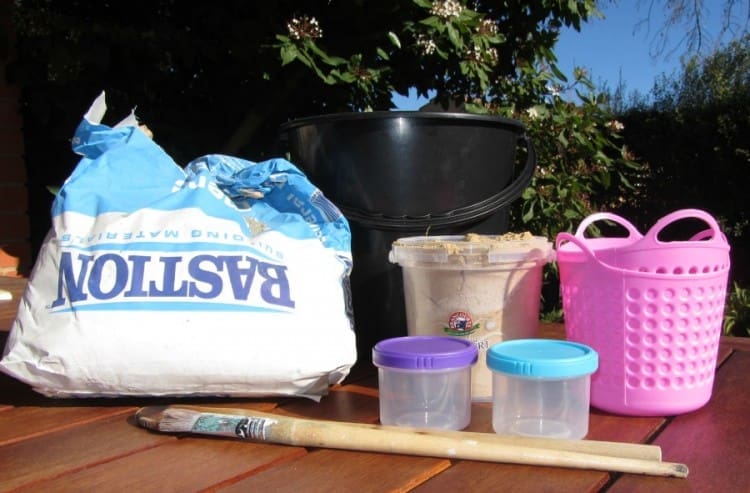
Items you will need:

  • One cup cement
  • Once cup sand
  • Quarter cup water
  • Bucket and stirrer
  • Large and a small plastic bottles/containers (try a range of shapes and sizes to see what you like best)
  • Paint to decorate (we used Haymes Evan’s Delight and Gold Dabs)
  • Paint brush
  • Succulent clippings
Items you will need to make planters
Items you will need

Steps:

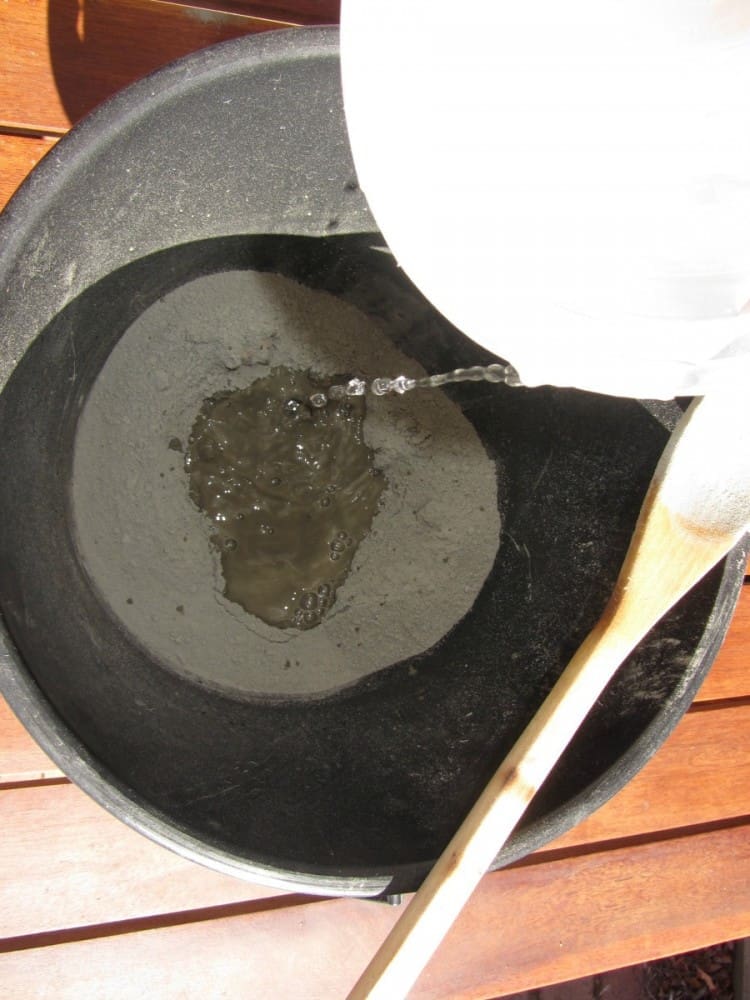
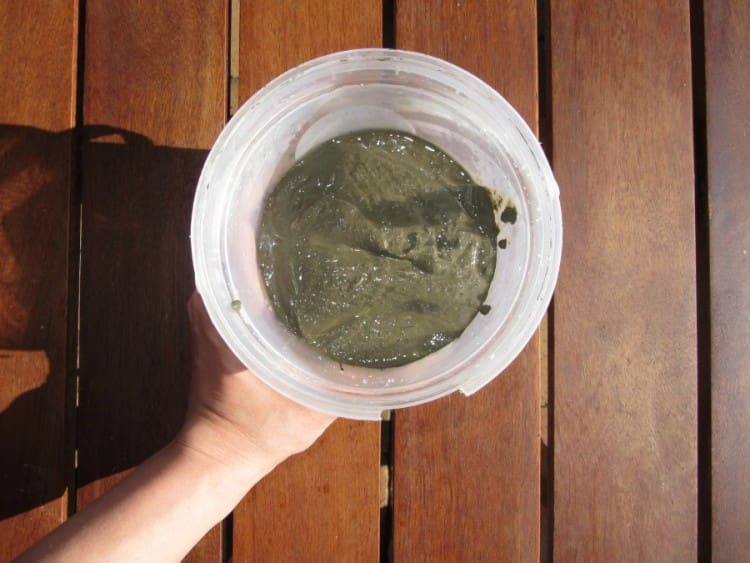
1. Mix up the concrete using one cup cement, one cup sand and quarter cup water. Stir until you have a smooth consistency (like cake batter).

Mix together your concrete
Mix the concrete

2. Pour the concrete into the larger plastic mould (we used an old yoghurt container) and then tap the bottom of the container onto a hard surface until no more bubbles appear on the surface.

Tap out the air bubbles

3. Press the smaller plastic container into the concrete but not all the way to the bottom (we like to place it off centre to add interest). You may need to weigh the smaller container down with some pebbles to stop it rising out of the concrete.

4. Wait 24 hours for the concrete to set. This is important! We got impatient and tried to take the moulds out early and they crumbled.

5. Once the concrete has set hard, carefully tap it out of the mould.

DIY concrete planter
Straight out of the moulds

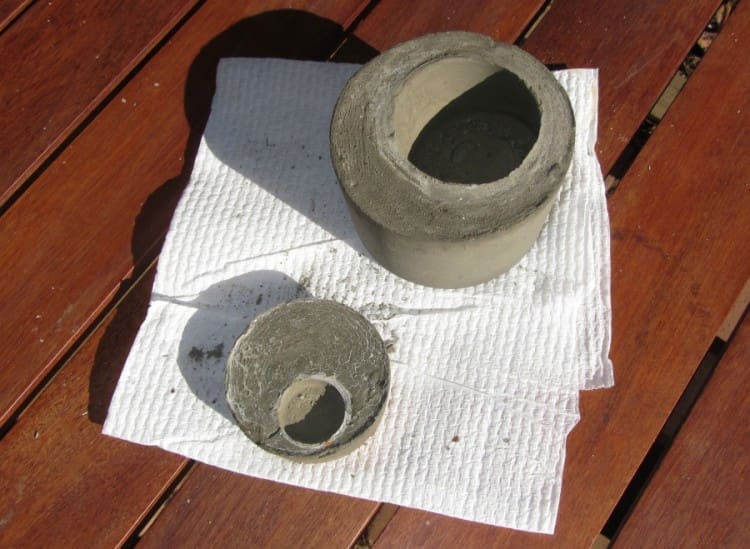
6. You can lightly sand or brush (with a dry paint brush) the pots to gently remove any imperfections.

7. Paint or decorate the pot and then fill the hole with soil and plant your favourite succulent clipping.

It’s that easy! We’d love to see photos of your concrete planters. Tag @stylecuratorau when you post them online.

PS – you may like to also check out this article about how to grow succulents!

DIY concrete planter

Check out more DIYs

Gina Beschorner Style Curator

Welcome to Style Curator, your destination for daily interiors inspiration, styling tips, reno advice, home tours and DIY projects!

We're on a mission to help you create a home you love. And with plenty of tips and tricks, tutorials and other home inspo, we give you all the tools to achieve it!

I’m Gina, Founder and Interior Designer, and you can read more about Style Curator here.

Subscribe

Get the best of the blog to your inbox each week PLUS instant access to our free downloads!

    We respect your privacy. Unsubscribe at any time.
    Interior style quiz

    Shop our fave online stores

    As seen in

    Style Curator in the media

    10 COMMENTS

      • Hi Polly, rather than drilling a hole into the dried planter, I would suggest using a straw or another cylindrical object to set into the wet concrete. This way, you’ll create a hole without having the concern of potentially cracking the planter… if you use the right drill bit and the concrete is thick enough and cured well, you could drill a hole but there’s always the risk of cracking so I would try setting the hole into the design 🙂

    1. I did a few and the bases of the pots were quite sandy – and no matter how much I brushed them sand just kept on coming out of the base of the pot. Like they were a little weak or something. – do you have any advice? I used a bag of quick dry sand/cement premix

      • Hi Amanda

        It sounds like your concrete mix might need a little tweaking. We would try again but use more cement and less sand in the mix, and allow the pot to fully dry before removing it from the mould (we say wait 24 hours but if you live in a cooler climate, you may need to wait up to 72 hours). Hope these tips help!

    2. oh my! I was planning to buy these as i thought they looked so cool! I can’t wait to try this out and get all super creative!!

    LEAVE A REPLY

    Please enter your comment!
    Please enter your name here