
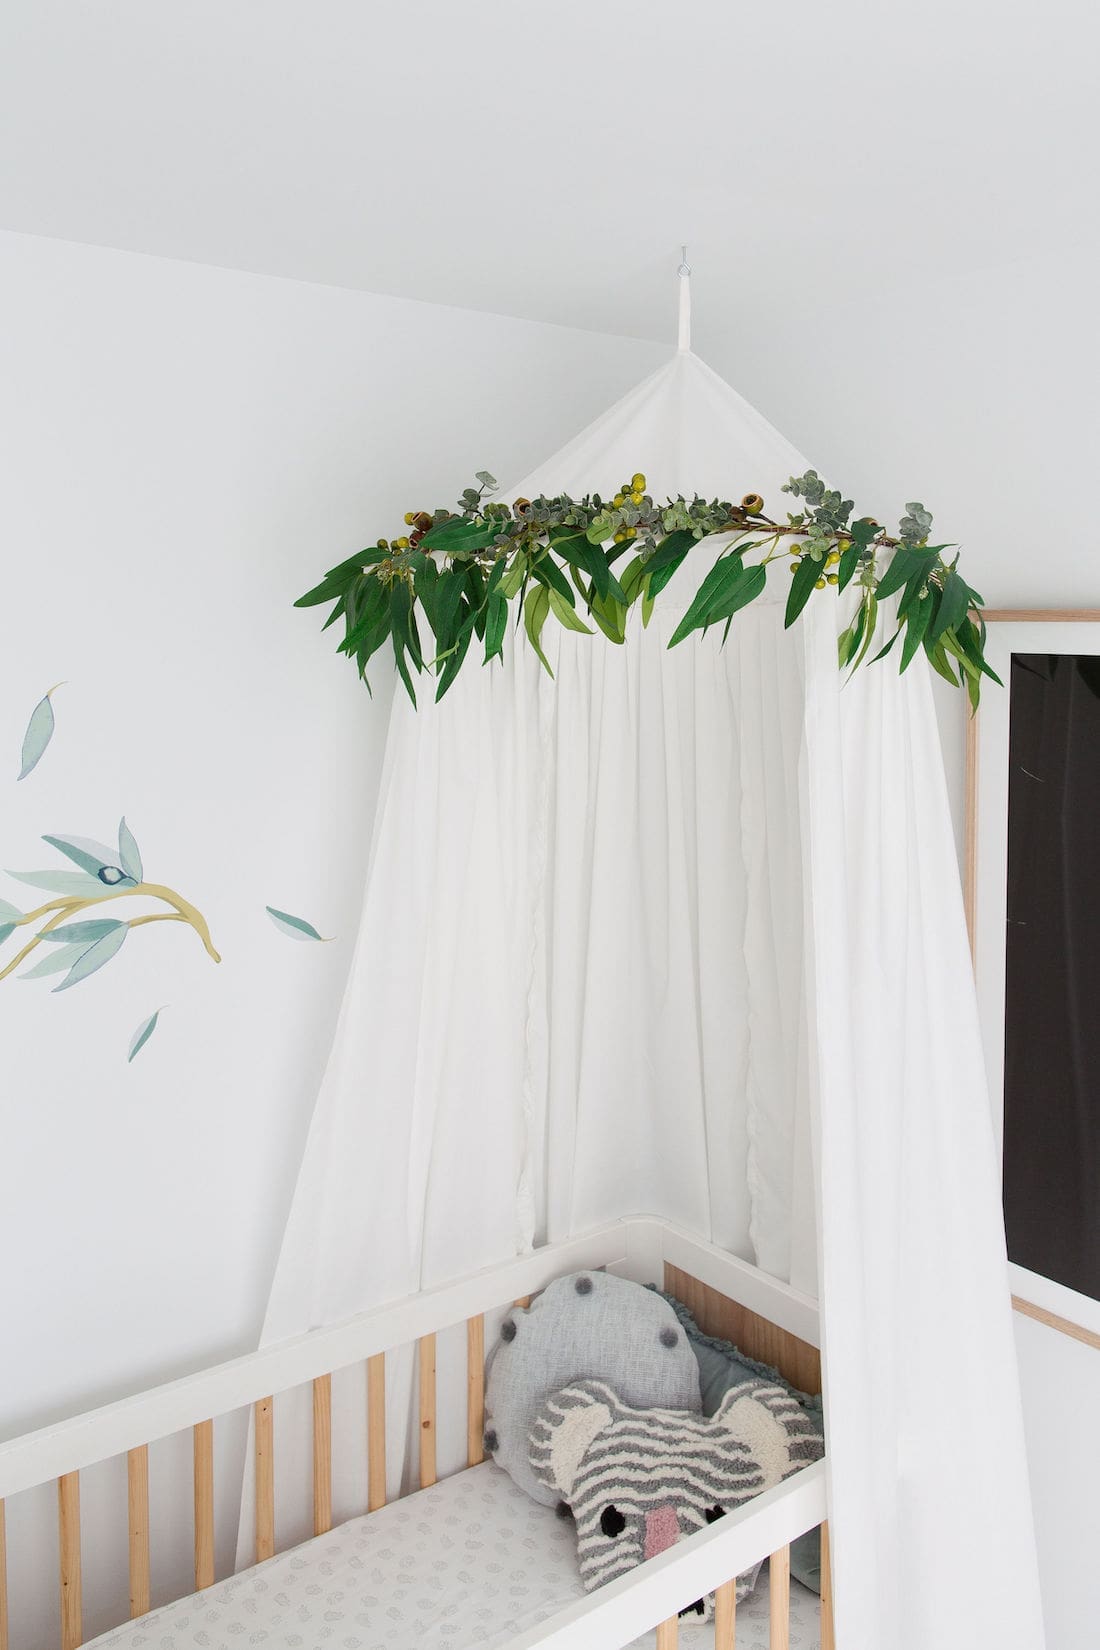
So it turns out I wasn’t having a baby girl but a baby boy instead! Now that the shock of that news has settled, it’s time I remove all the pink decor and peony flowers. Now I need to get cracking on a gender-neutral nursery for Alexander. (For those who have been asking, I’m equally happy to have had another baby boy. I was just convinced I was having a girl, ha ha.)
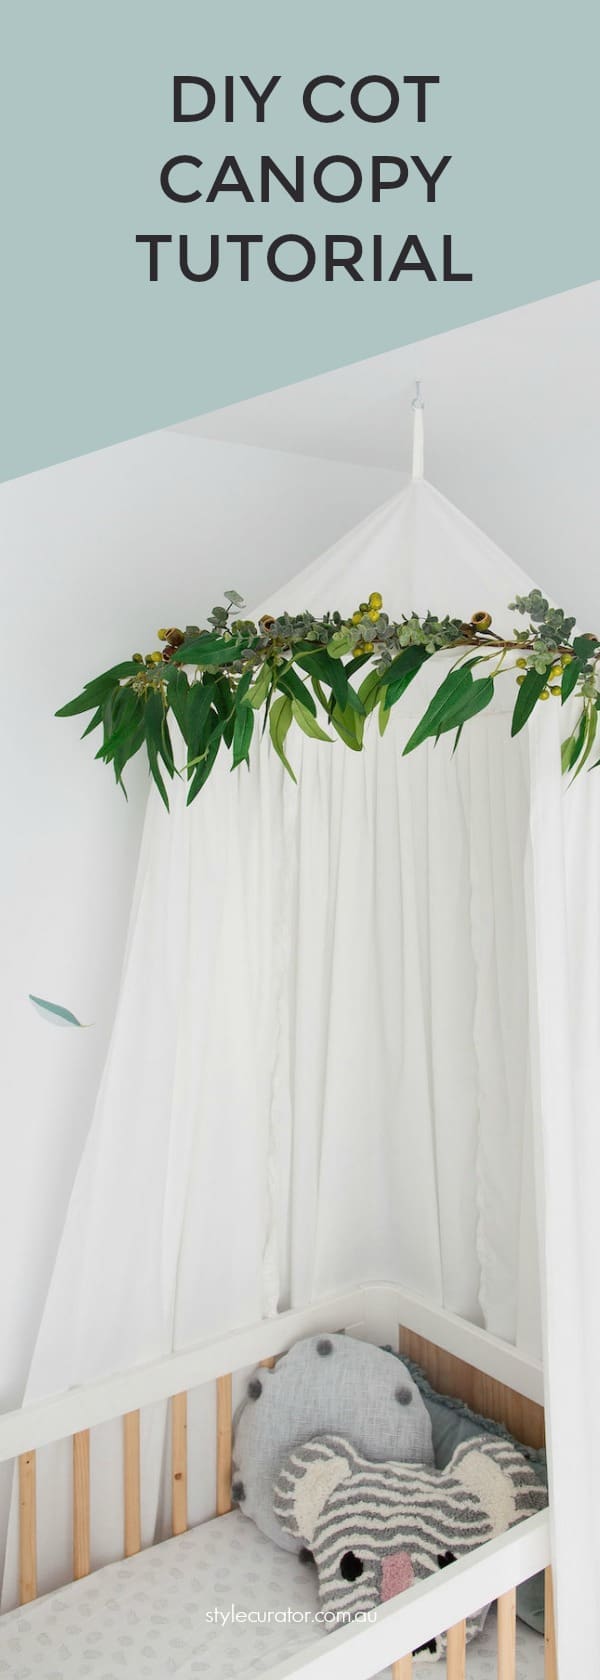
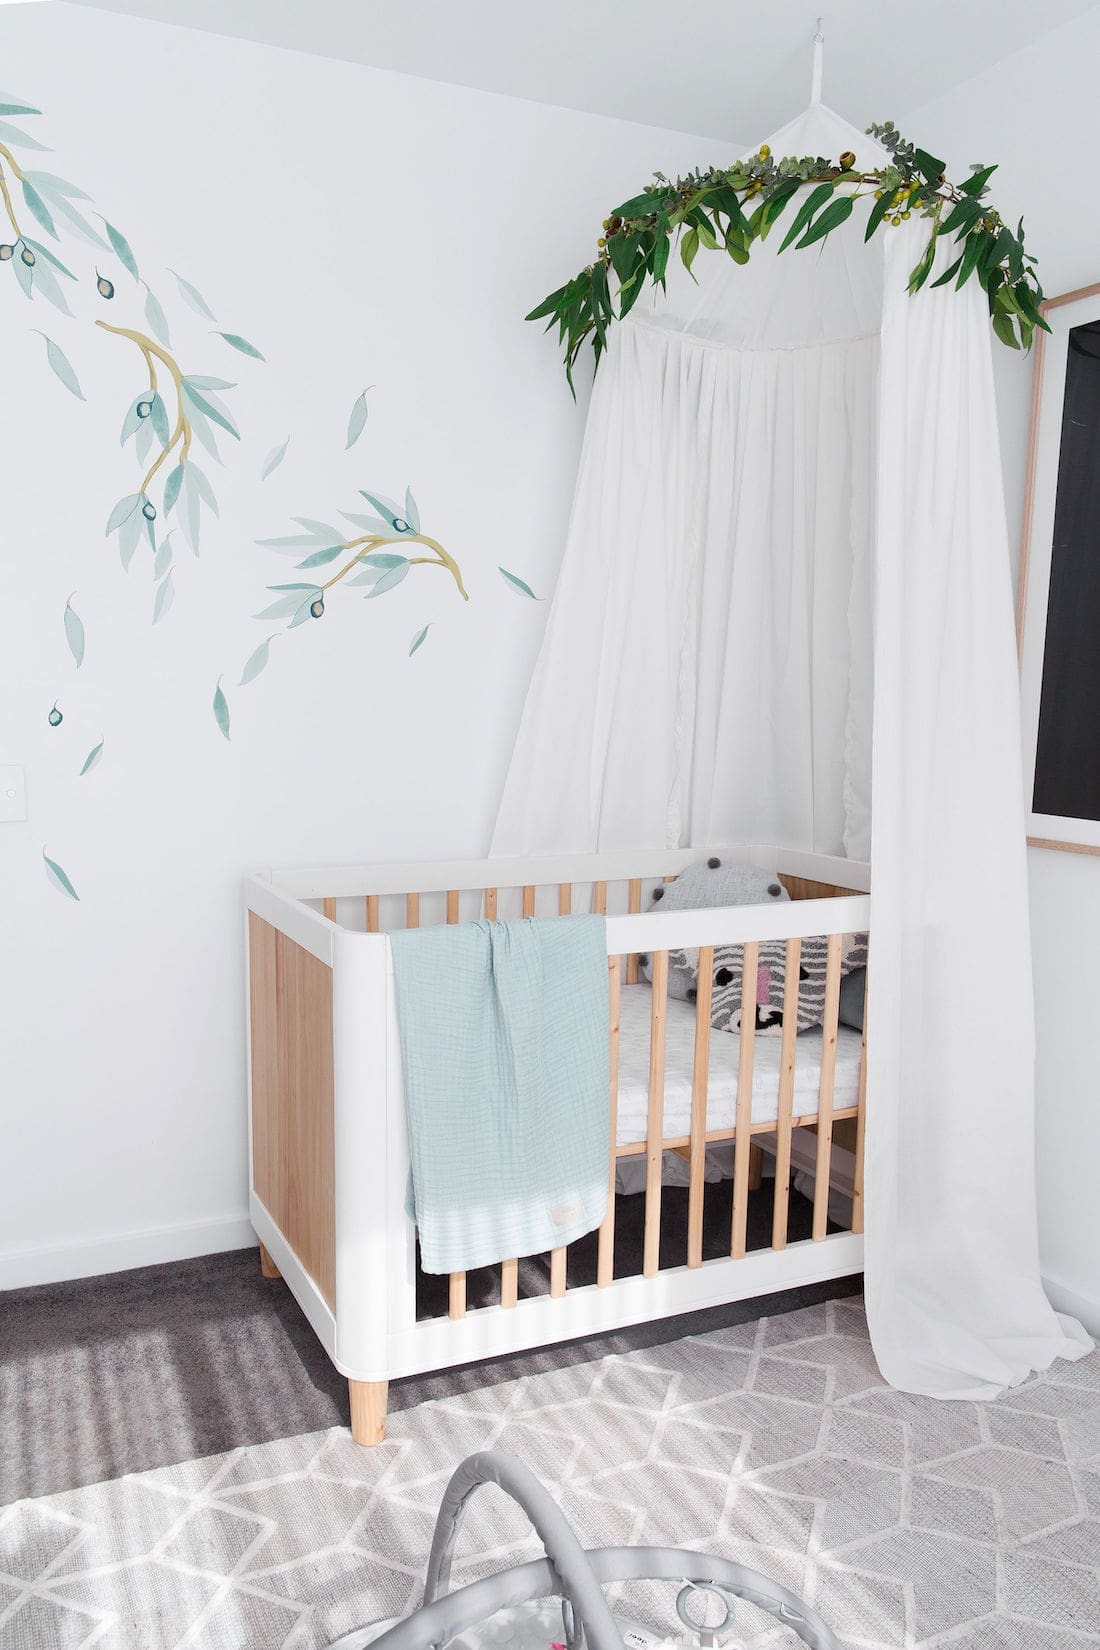
In today’s DIY I created an inexpensive, over-sized canopy for his cot that you could personalise in a range of ways to suit your child’s room or nursery.
The main items of hula hoop and white fabric cost under $30. Then I used a selection of artificial leaves from Koch & Co to decorate the top. If you were having a girl, you could use peonies or other flowers instead of leaves, if you prefer. I also considered dyeing the lower half of the canopy green to create an ombre effect but haven’t done this yet — it’s a fun idea to try for those who love colour.
You will need some basic sewing skills to create this canopy, here’s how to make it!
Related article: Alexander’s Australian inspired nursery
Related article: DIY floral monogram wall art
Items you will need:
- Hula hoop (we got ours from Big W for $5)
- 11m of white fabric (or whatever colour you like, our fabric cost around $2 per metre from Lincraft)
- Artificial leaves and/or flowers for around the canopy (ours are from Koch & Co)
- Sewing machine
- Overlocker
- Needle and thread
- White spray paint (optional if hoop is not white)
- Stanley knife (optional if you need to cut your hoop size down)
Steps:
1. Hula hoops come in a range of sizes and ideally you want a small hoop for this DIY. If you can only find a large hula hoop, undo the staples that hold the two ends together. Then cut it down to your preferred size. I removed approximately 30cm of tube to make the hoop smaller.
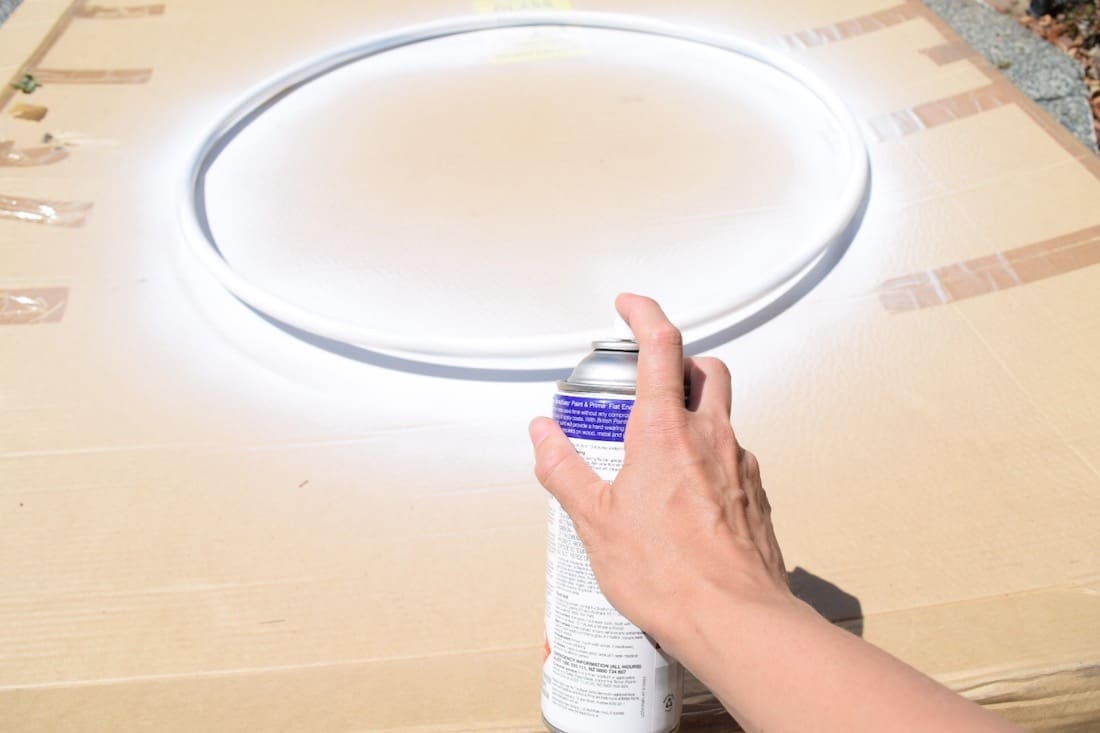
2. Spray paint the hula hoop white. This is an optional step if the pattern of the hoop is visible through the fabric. My fabric was thin and the hoop was brightly coloured, so spray painting it white prevented the pattern from showing through.
3. Now it’s time to cut your fabric. You will need:
- 4 x 2.5m lengths (my ceiling height is 2.7m so cutting the fabric at this length means it will touch the ground but if you have lower or higher ceilings, you will need to adjust the length. If you’re unsure, make the canopy a tad longer. You can always remove excess length at the end but you cannot add it!)
- 1 x 1m diameter circle.
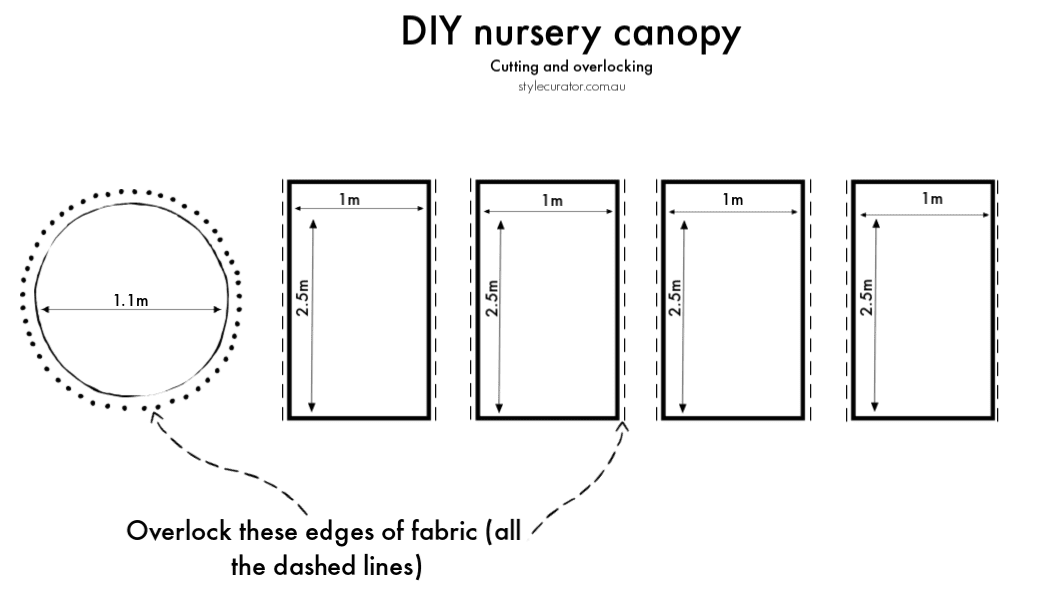
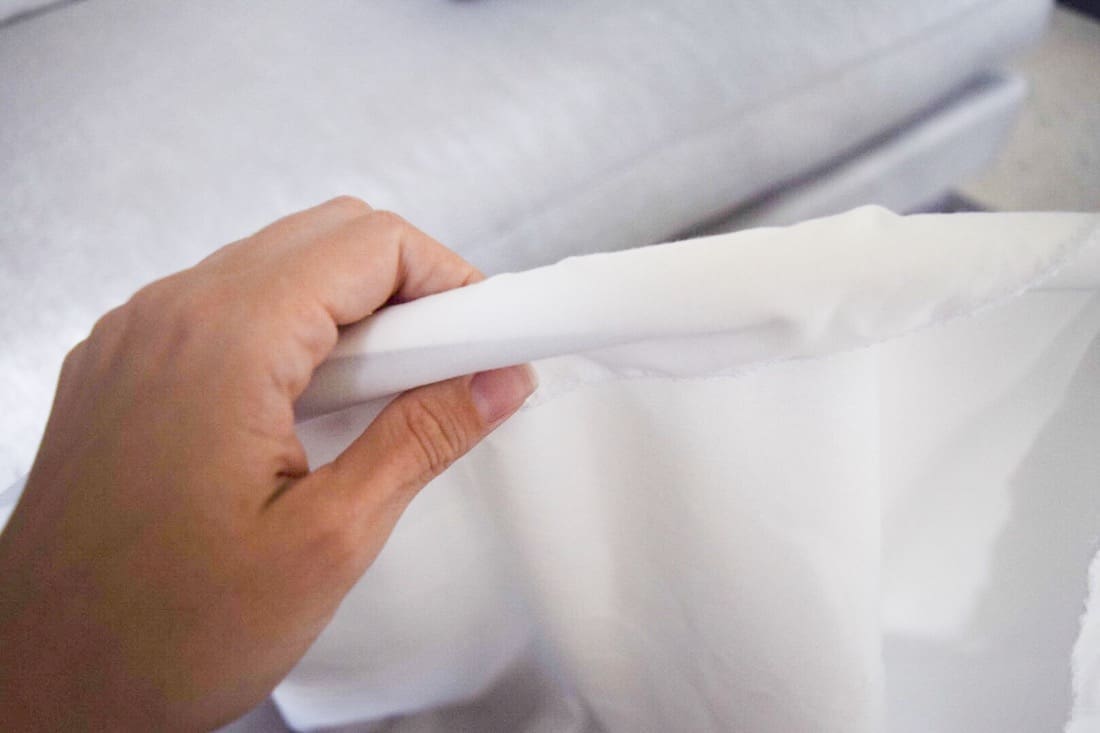
4. Overlock the edges of the fabric you just cut as shown in the diagram above i.e. around the circle and each side of the lengths you cut. If you do not have an overlocker, you could create a small seam. You can also select a fabric that doesn’t fray and just leave the edges as they are.
5. Hand sew the fabric circle around the hula hoop to create the tent on top. The circumference of the fabric is larger than the circumference of the hoop so you will need to scrunch it a little as you sew — the excess fabric is important though as it will give the pitch at the top of your canopy.
Tip: I should say that I’ve seen some DIYs where people have not put the this part of the canopy on and just used rope to attach the hoop to the ceiling. You can see an example of that in this Kmart hacks for kids round up. This is another design option you may like to consider.
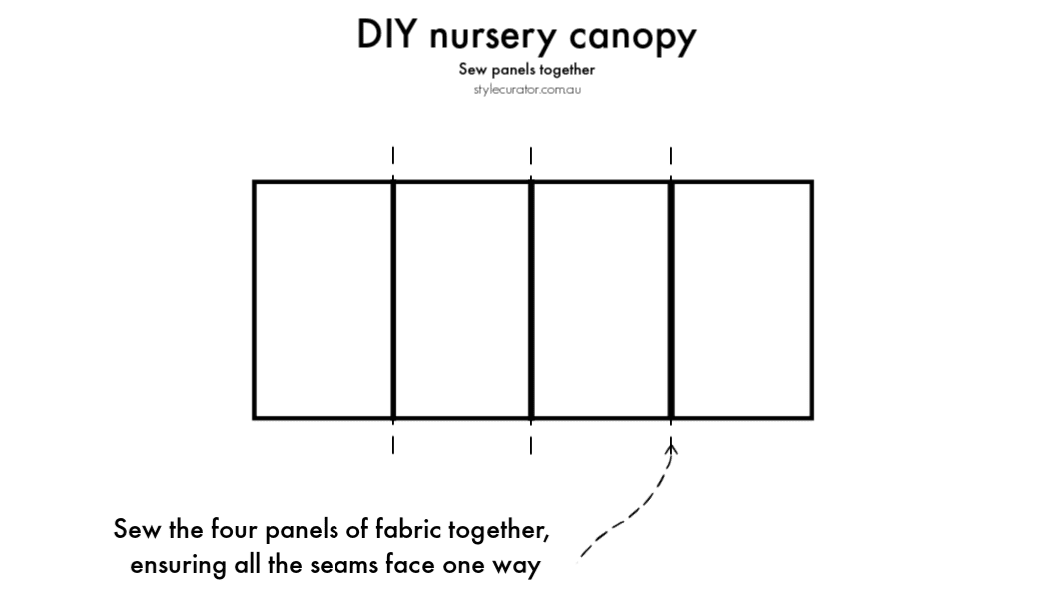
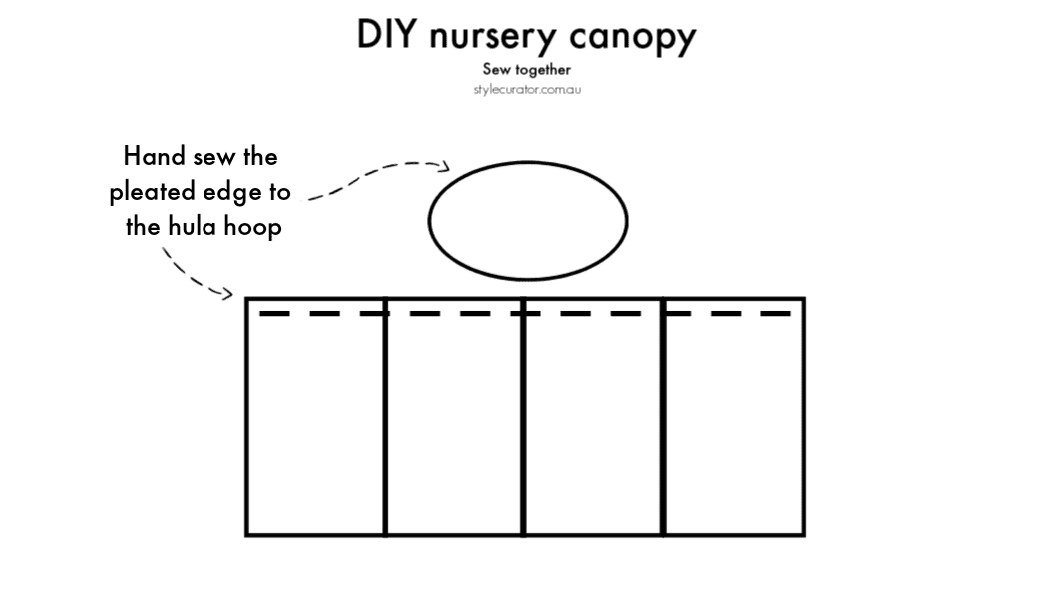
6. Use your sewing machine to sew the 4 lengths together as per the diagram below. Make sure all of the seams are facing the same way (so that when you hang the canopy all the seams will be on the inside).
7. Continue using the sewing machine to pleat the top width of the strips you just sewed together. This will make it easier to hand sew it onto your hula hoop. You don’t need to be precise here, I just folded sections and sewed them as I went but you could measure and pin the pleats if you prefer.
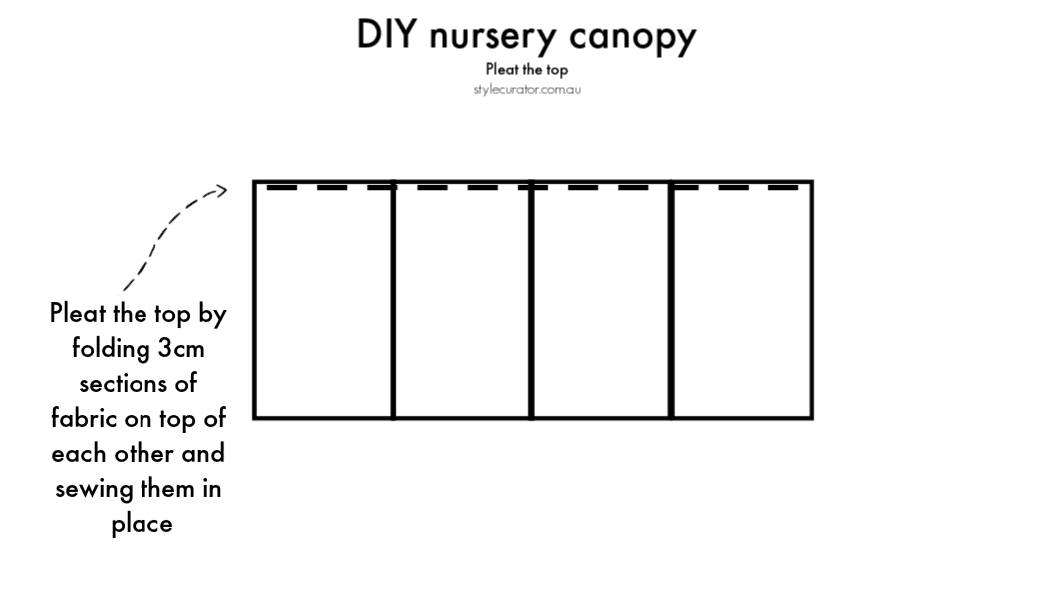

8. Hand sew this fabric around your hula hoop with the pleated section at the top and the seams facing inwards.

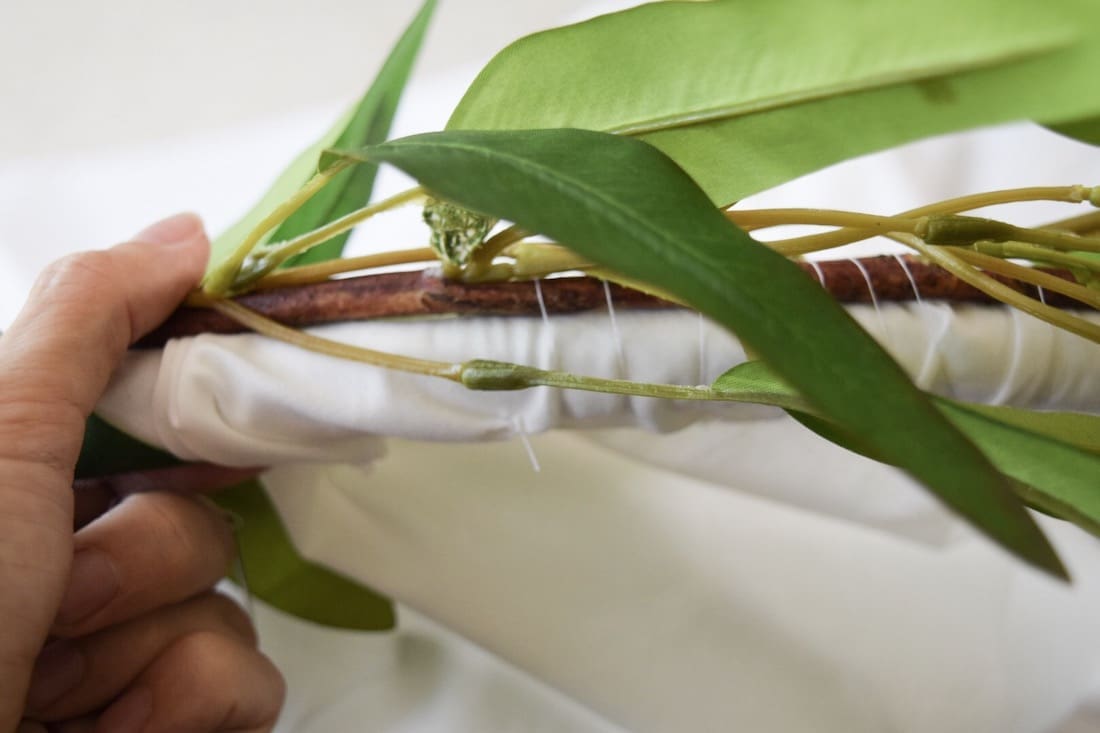
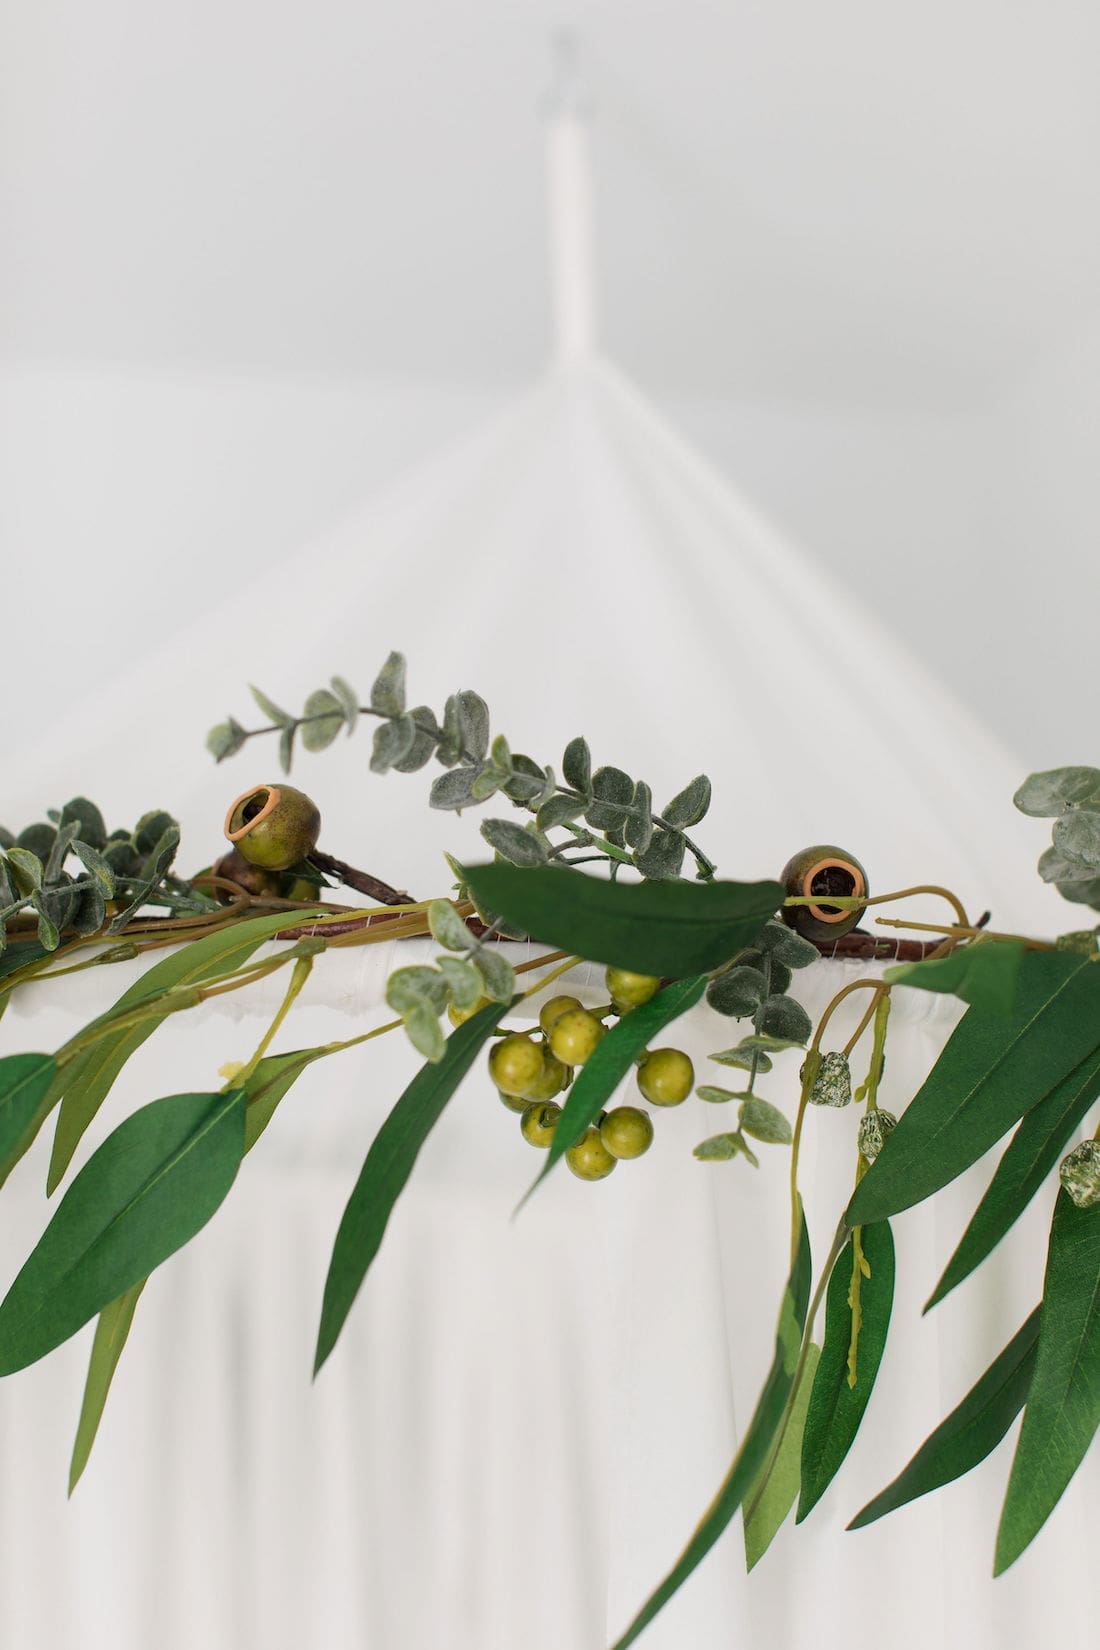
9. Now that the body of your canopy is done, it’s time to decorate. I simply hand sewed two eucalyptus garlands around the top and then added some extra gumnut stems, berry stems and eucalyptus stems around the hula hoop.
Like I mentioned above though, there are an endless number of ways you could decorate the canopy such as using artificial flowers, fairy lights, dyeing the fabric or using other decorative pieces.
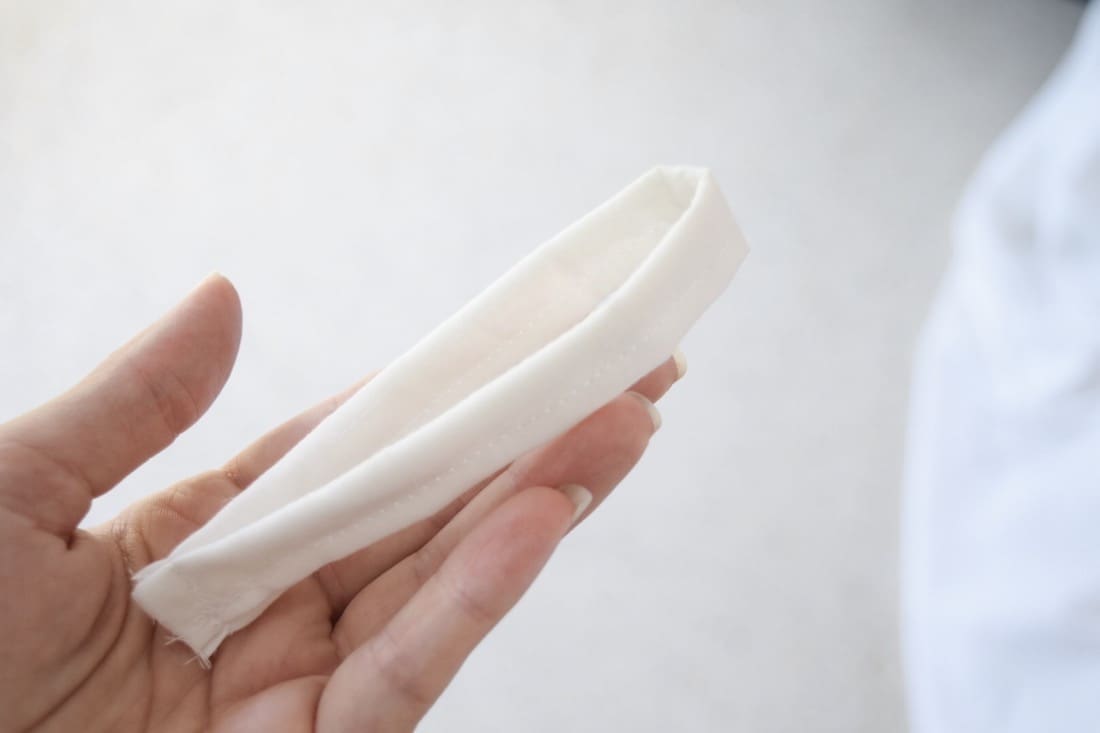
10. Once your canopy is done, it’s time to hang it. I created a loop of fabric that I sewed into the centre of the top and attached it to a hook in my ceiling.
Tip: be sure to hang your canopy in a way where there is no chance it can fall onto baby. Use a hook that can more than carry the weight of your canopy and ensure it is secured into a stud in the ceiling.
If you make this DIY nursery canopy, we’d love to see your photos! Tag @stylecuratorau when you post them on social media or email them to us at hello@stylecurator.com.au 🙂
Check out more nursery DIYs
Pin this ↓ image ↓ to your Pinterest account so you can easily find and make this DIY when you need it!
Shop this nursery look
no products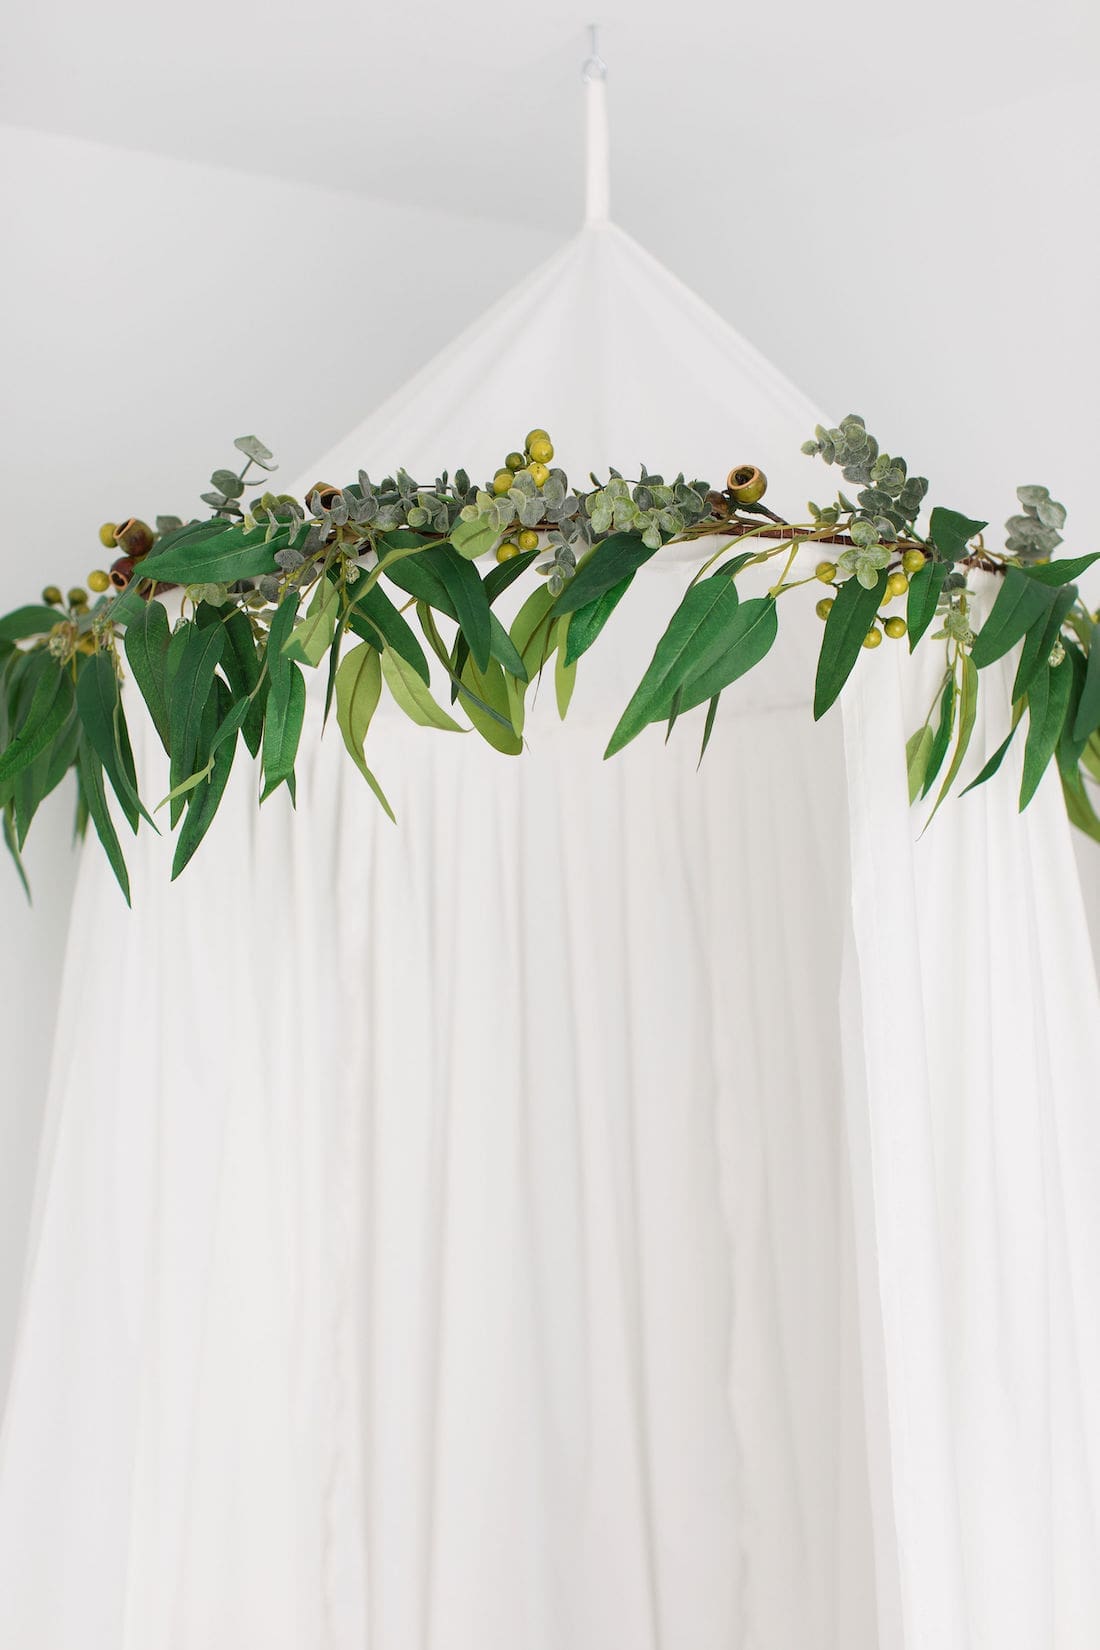


Comments are closed.