
The talented ladies at The Windsor Workshop are back with us today, sharing a special DIY watercolour floral artwork tutorial just for SC readers!
Download their free printable and pull out your paint brushes for this fun DIY that will leave you with a beautiful artwork for your home.
Related article: DIY driftwood wall art: Make your own drift wood wall hanging
Related article: DIY gold foil prints

Items you will need:
- Watercolour paper (a few sheets for your print out and a few sheets for test runs / scrap paper)
- Floral art download
- Koh-I-Noor Watercolour Discs (Micador brand) for the most brilliant colour
- Various watercolour brushes
- Glass of water
- Paper towel
Steps:
1. Prepare materials and print your PDF template on watercolour paper — we recommend printing a couple of copies so you can practice a bit.

2. Test your colours from your palette on your practice sheet so you know what you’re working with. Have a play with the watercolour and practice blending 2 colours into each other. Do this by painting a strip of each colour and using water to pull them together. Note: you will have to move quickly before the paint dries.

3. Experiment with saturation of a single colour using more or less water.

4. Start painting! Paint various coloured flowers and depths using blending and saturation — as practiced above!
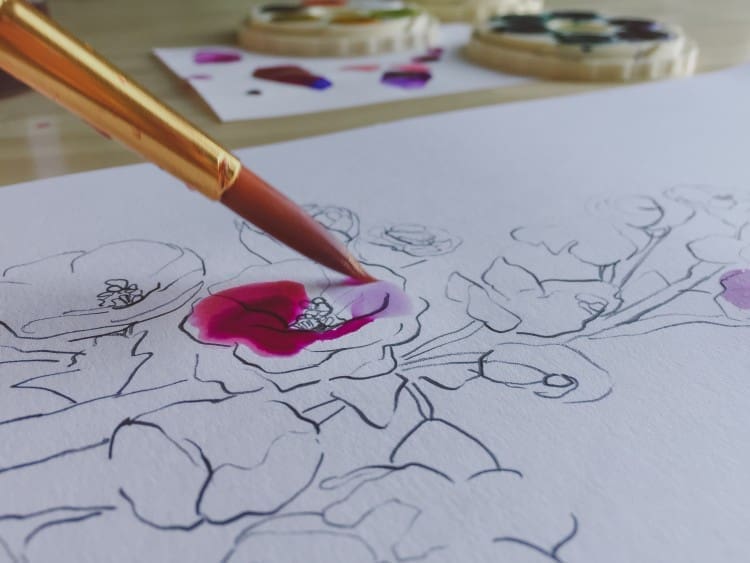
5. Make sure you vary the saturation and colour tones for visual interest. This is achieved by using more or less water.

Tip: Wait for paint to dry if you don’t want colours to bleed into each other!

Voila! You have your finished product! It’s fascinating to watch how the dried paint looks so different from when you were painting.
If you want the outline of the flowers to be a little faded, you could experiment by tracing the design onto a fresh piece of paper using the window for light.
Thanks so much ladies for sharing this fab DIY! Don’t forget, The Windsor Workshop run art, craft and design workshops throughout the year in Melbourne and you can check out their calendar of events here.
More DIY ideas
About the author
The Windsor Workshop is a creative hub for the arts / crafts / design movement in Melbourne. At The Windsor Workshop you’ll find regular workshops to unleash and explore your creativity — and most are run by local Melbourne-based artists. The space is also used for events and social gatherings.

