
Subway tiles are one of the most popular tile shapes. Possibly because it’s generally the most affordable decorative tile… or because it has the smallest grout joints. Or perhaps it’s the seemingly endless range of colours and finishes to choose from? Let’s not forget there are also plenty of ways you can lay subway tiles to create different effects.
Whatever the reason, there’s no denying subway tiles are a stylish, versatile and timeless choice. Suitable for laundry areas, kitchen splashbacks, fireplaces, and bathroom walls and/or floors (depending on type), let’s take a look at the most popular ways to lay subway tiles.
Related article: Real terrazzo vs terrazzo-look tiles, what you need to know
Related article: 10 types of blue bathroom tiles
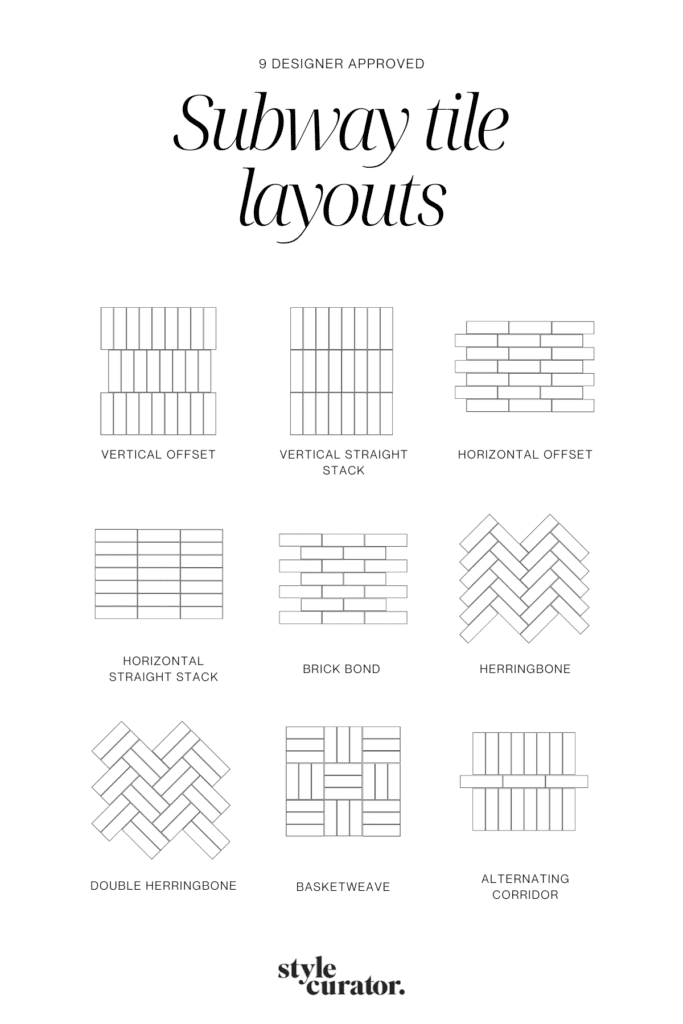
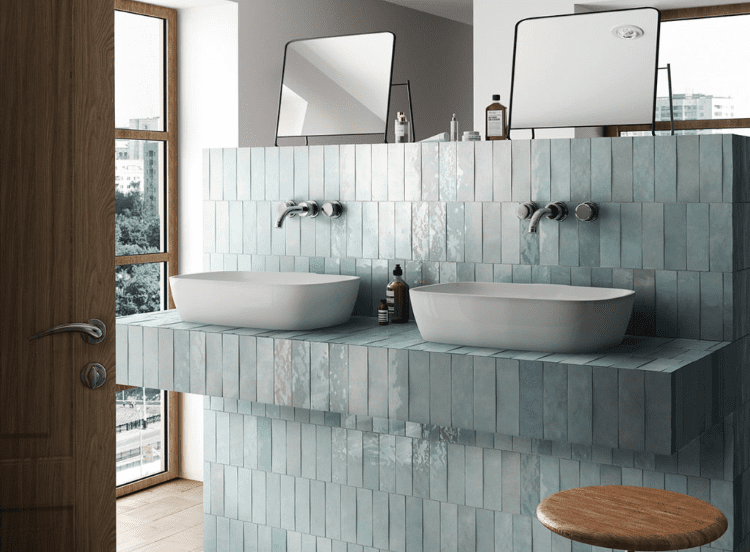
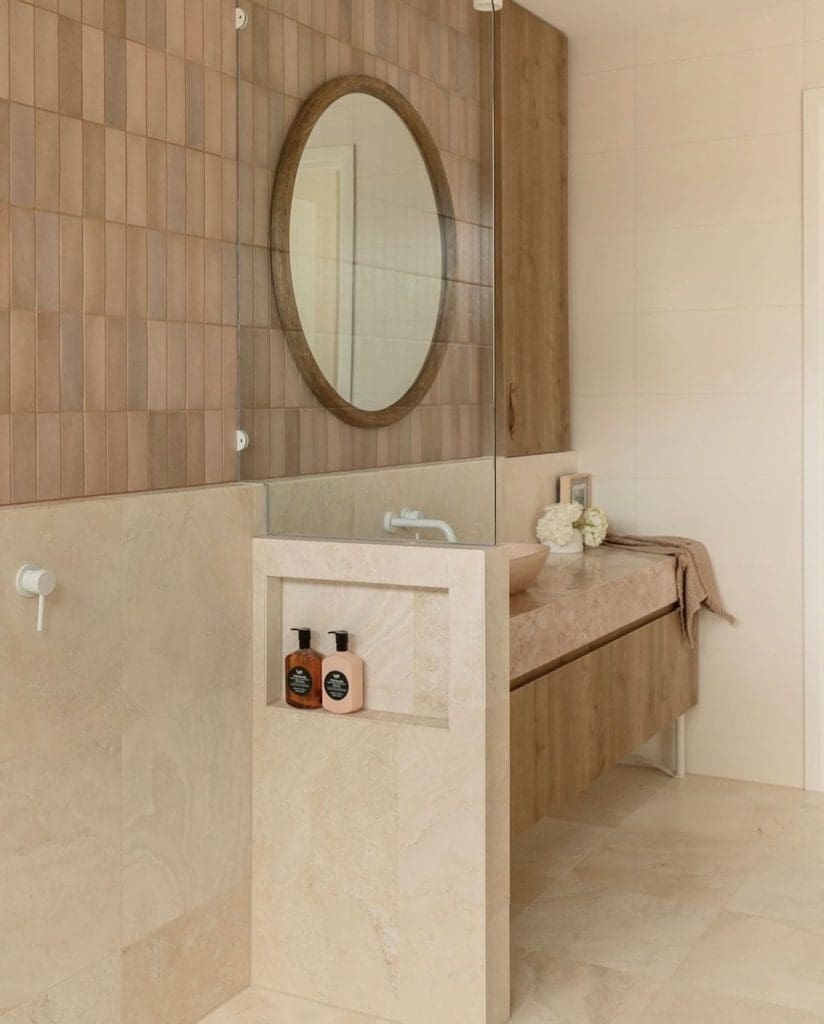
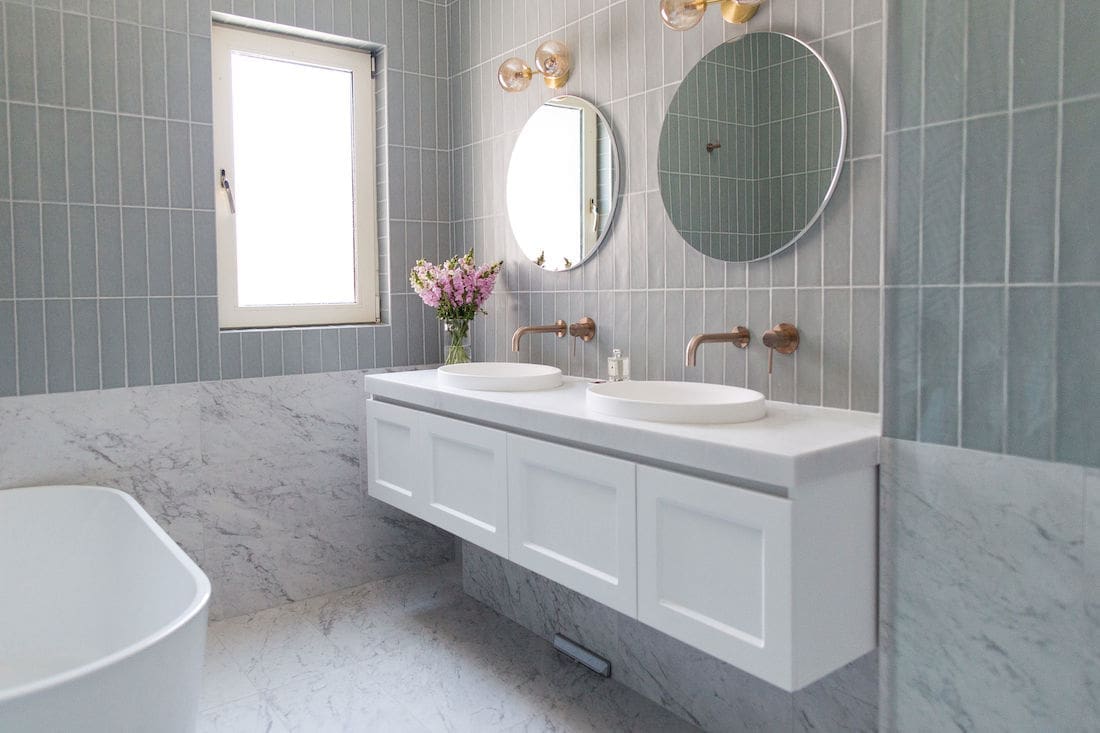
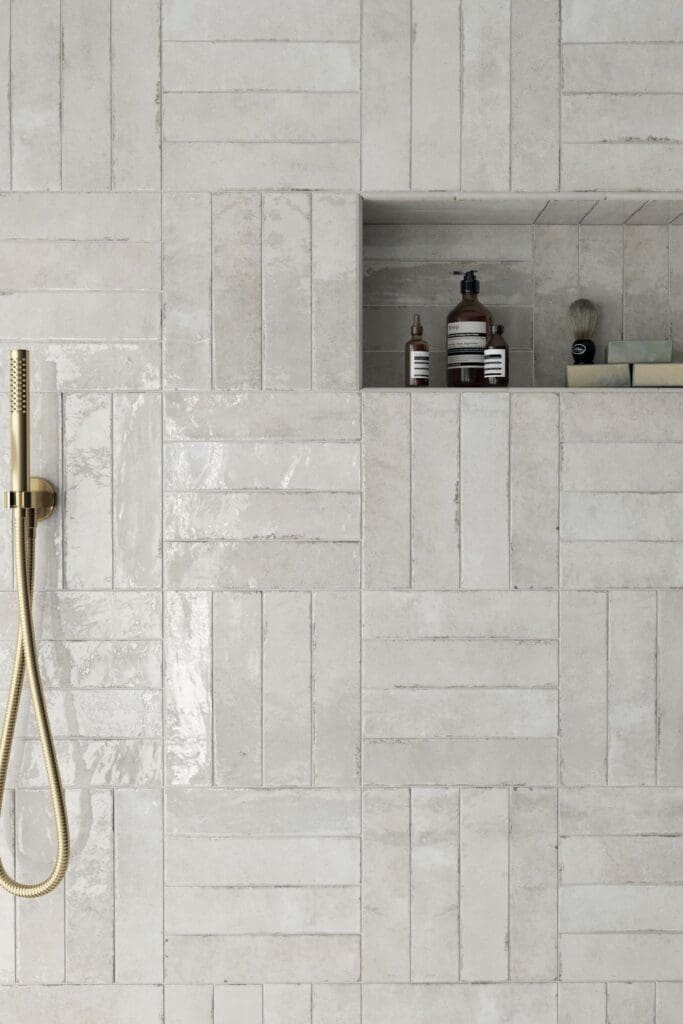
Vertical offset
Let’s start with an unexpected and modern way to lay subway tiles — vertical offset. Just as the name suggest, this is where the tiles are laid vertically and each row of tiles is slightly offset from the row below. You could also align alternating rows with the mid-point of the row above for a vertical brick layout.
We love an offset pattern as it adds more rhythm to the space and is a contemporary way to lay your subway tiles. It makes a gorgeous statement, especially when you use an undulated tile like the ones pictured below.
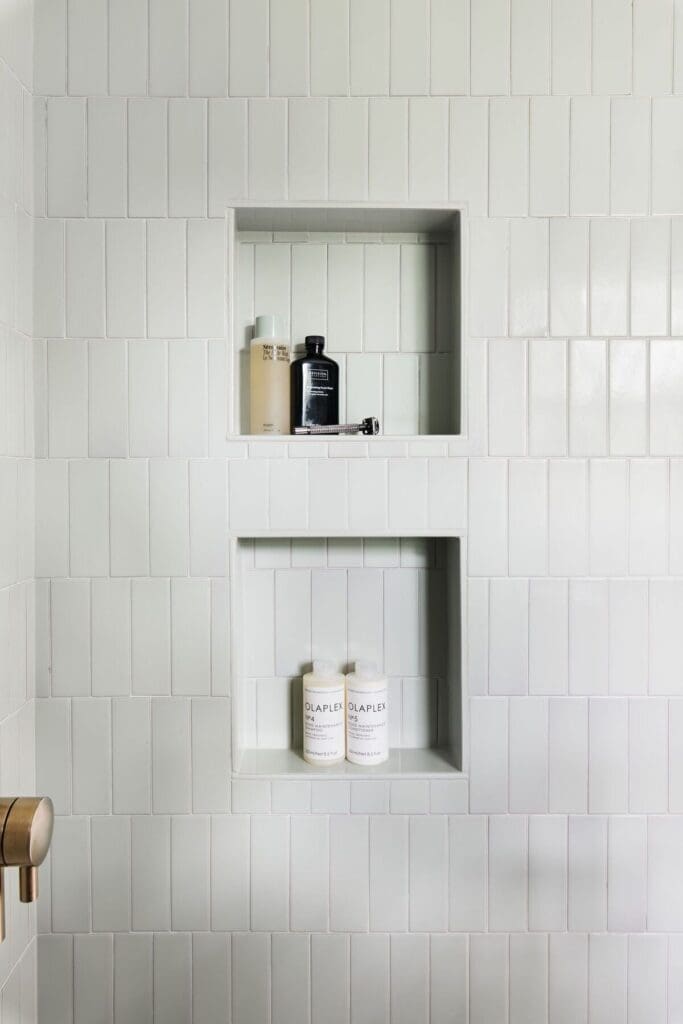
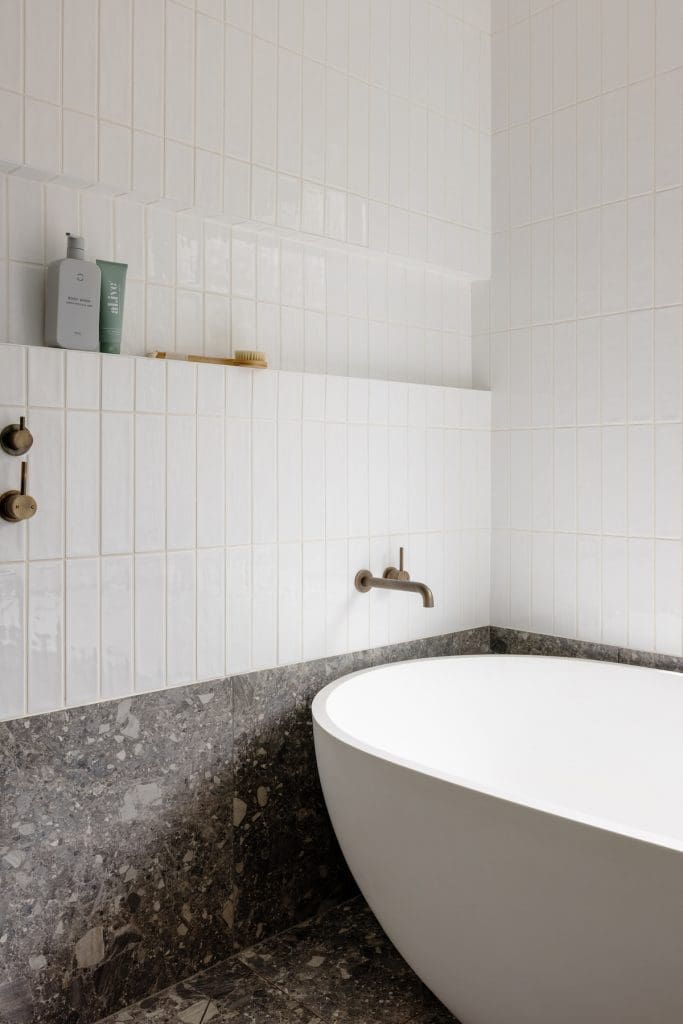
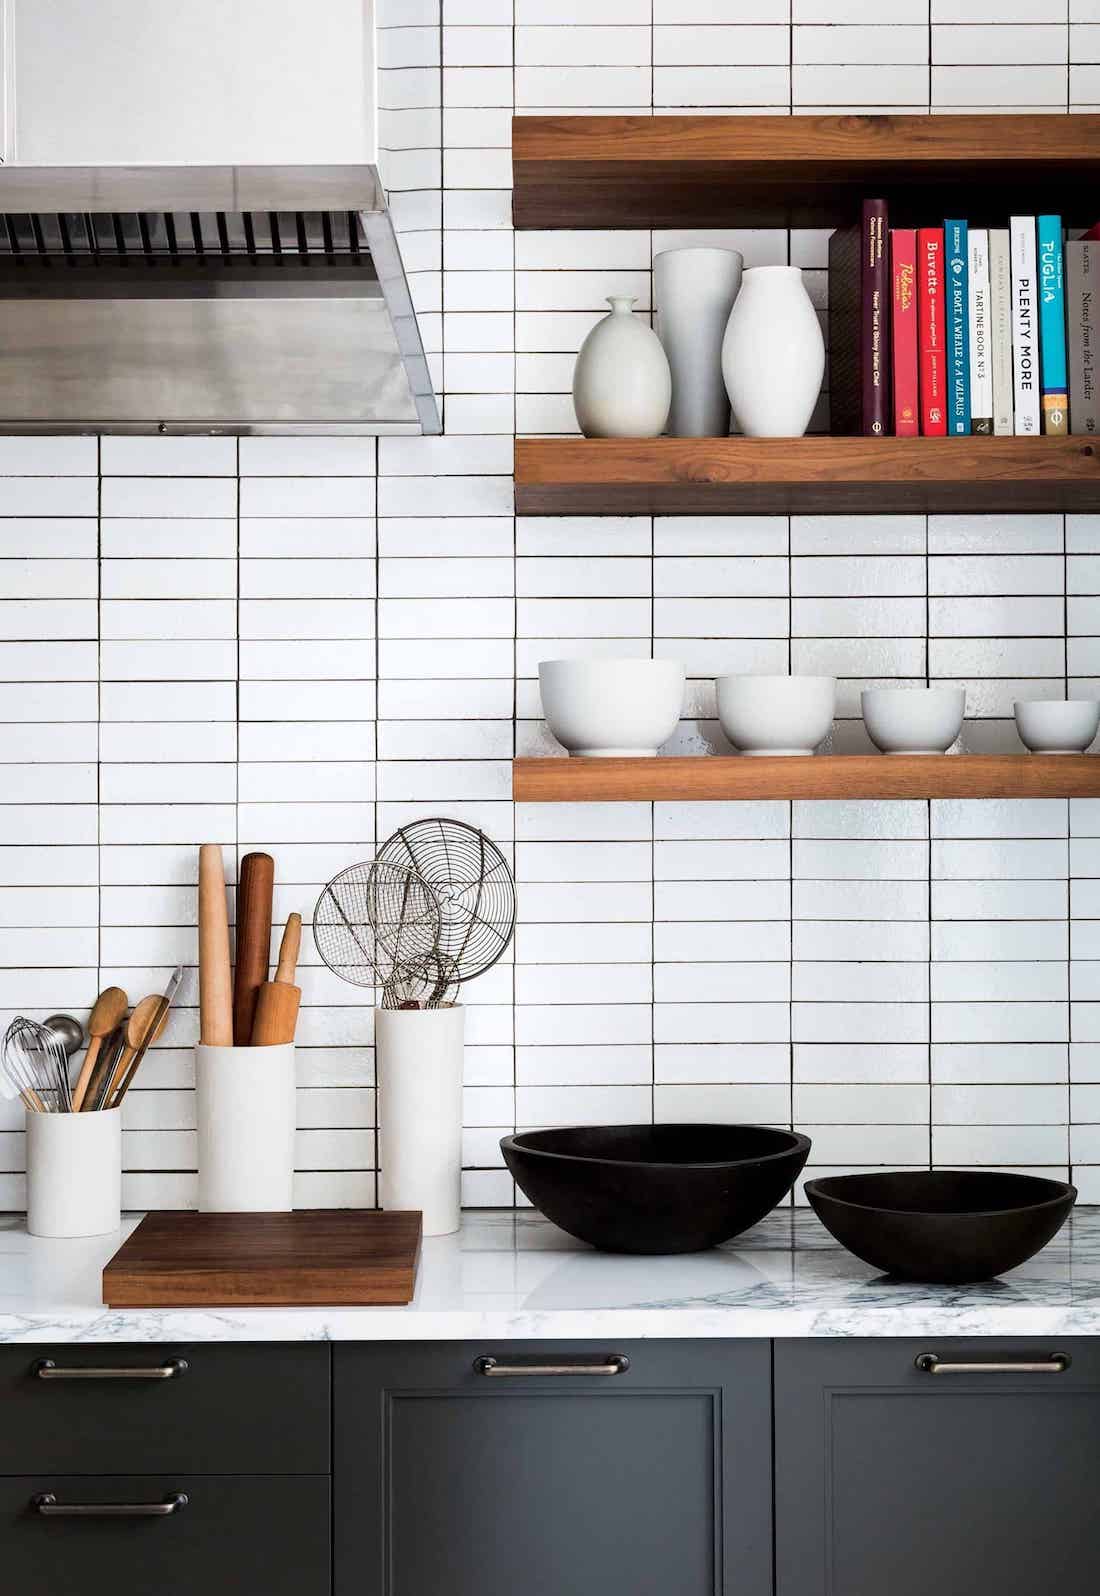
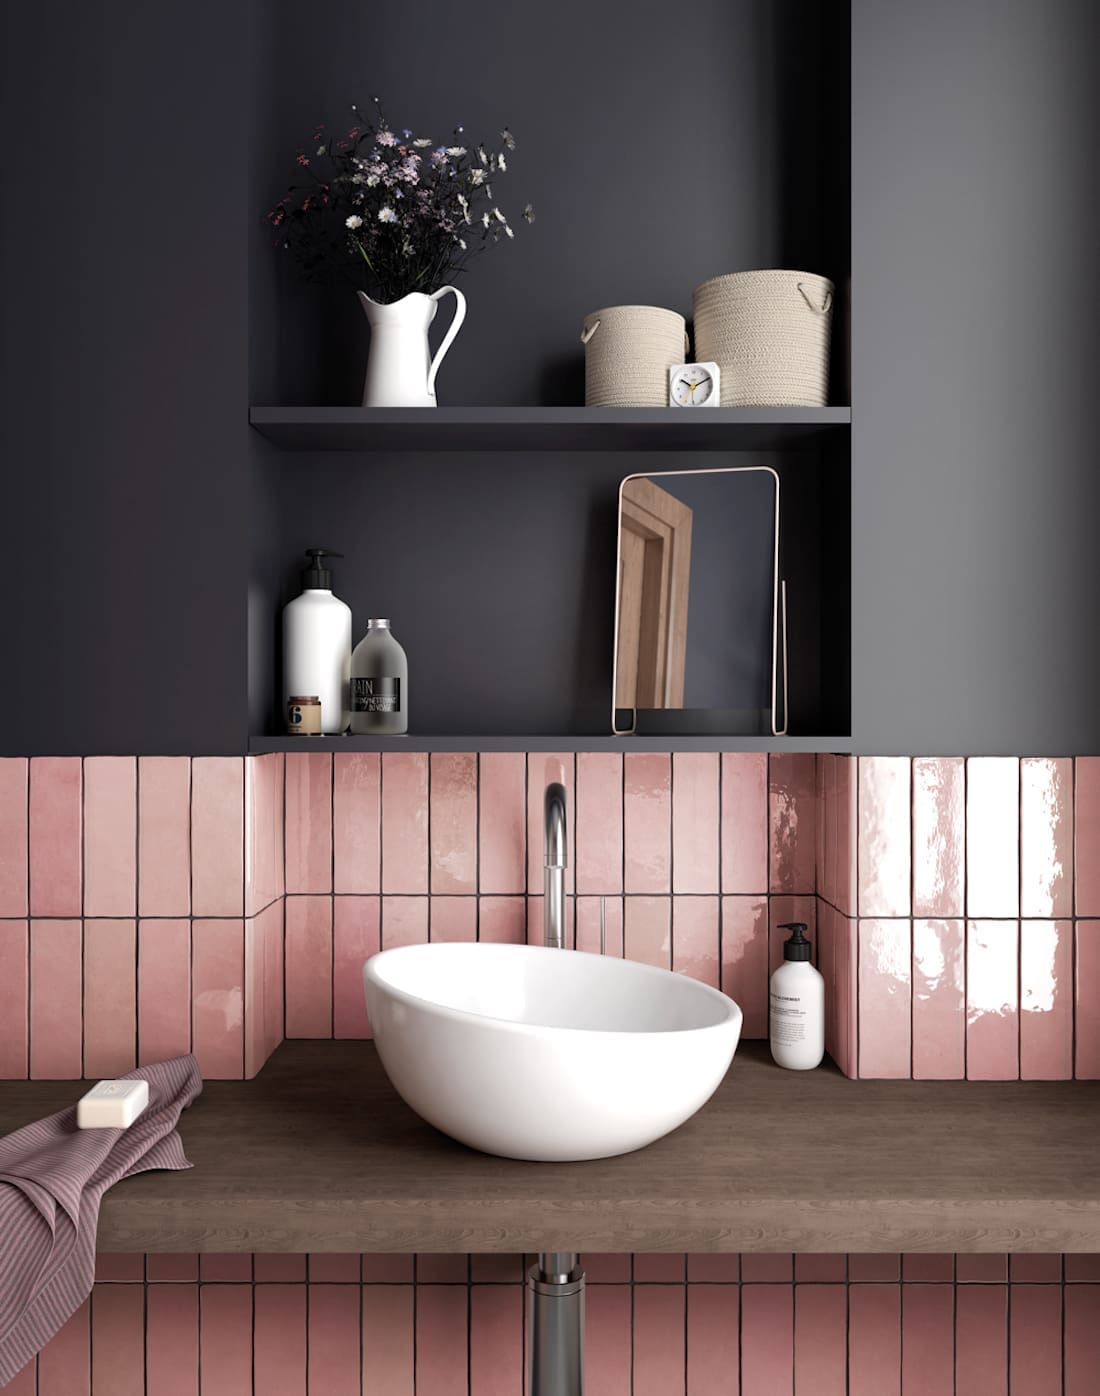
Vertical straight stack
One of the most popular ways to lay subway tiles is in a vertical straight stack layout. We see this used a lot on splashbacks — where three rows of subway tiles are generally a perfect fit — as well as on half-height bathroom walls. Of course, this layout can also be extended across full walls or even wrapped around the entire bathroom.
Depending on the style of tiles you choose and other design details, vertical straight stack subway tiles can suit almost any interior style — from earthy luxe and minimalist spaces to farmhouse interiors and modern interpretations of heritage homes.
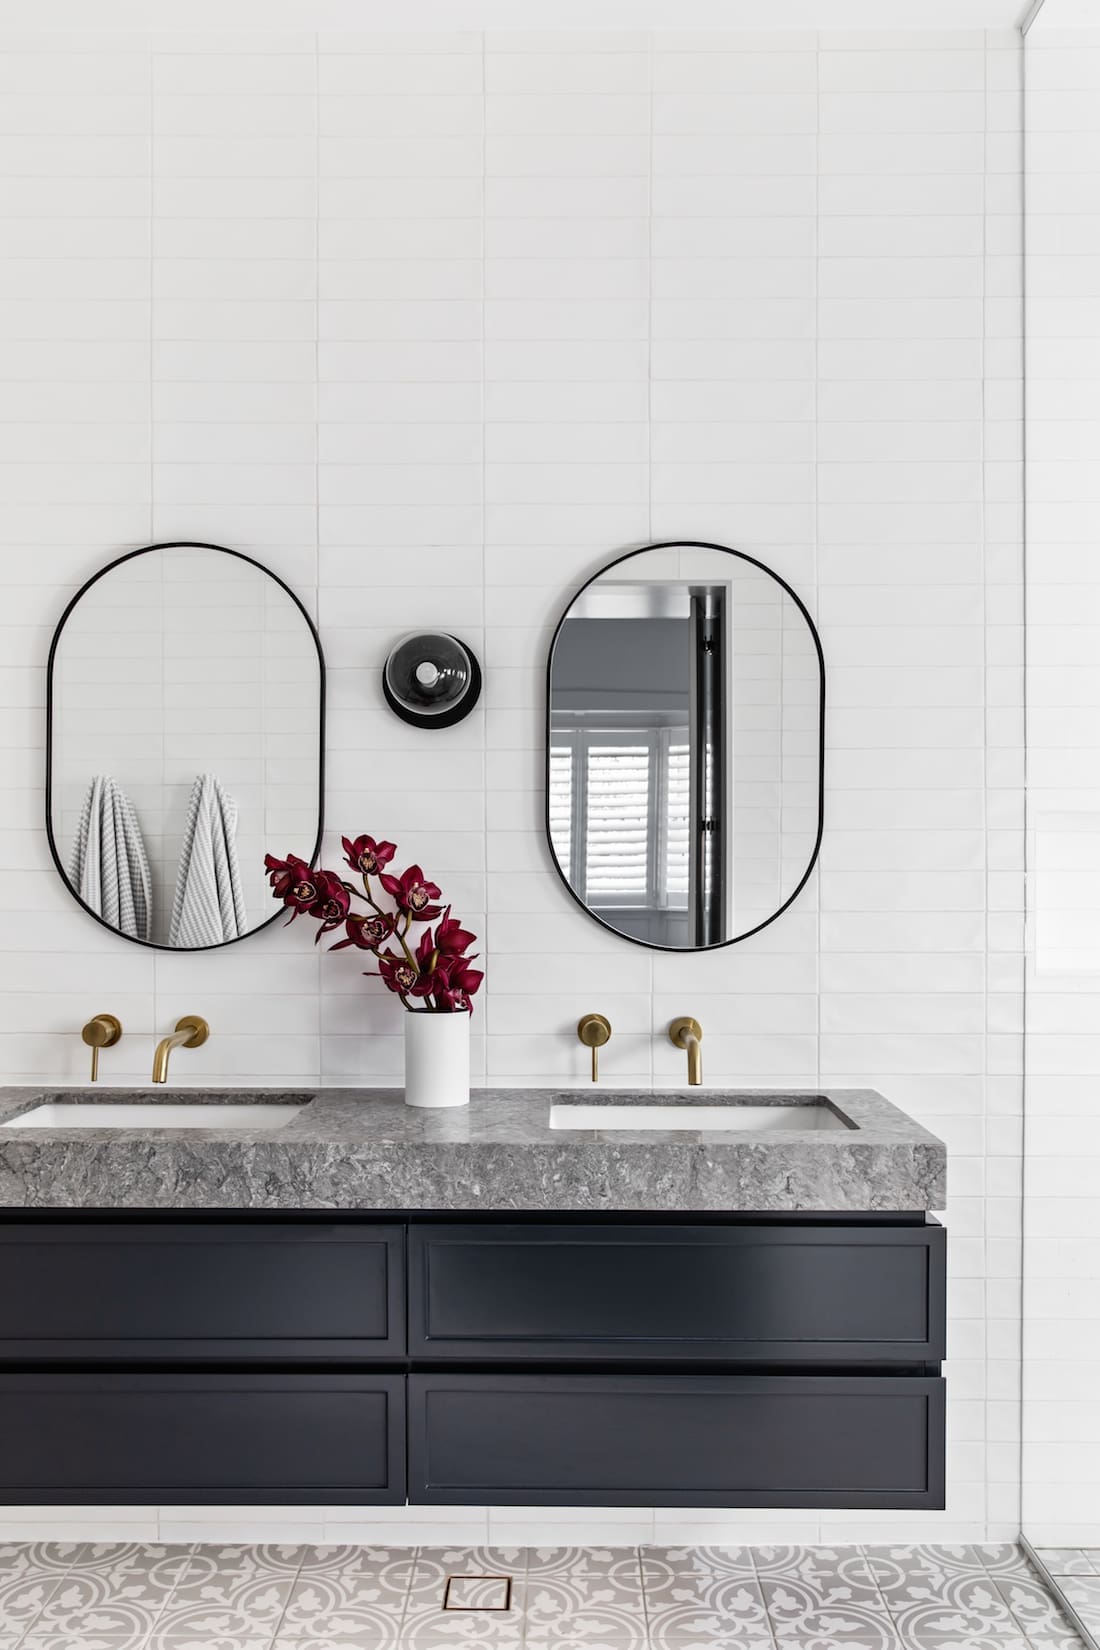
Horizontal offset
There are many ways to lay subway tiles horizontally, including brick bond (also called running bond), straight stack and offset, and we’ll cover all of these.
Generally when you hear ‘horizontal offset’ pattern in Australia, it means the rows are slightly offset by about a third of a tile like in the picture below. However, you can also offset rows of tiles to create a more linear look.
Whatever offset style you choose, this is another unexpected yet modern way to lay subway tiles.
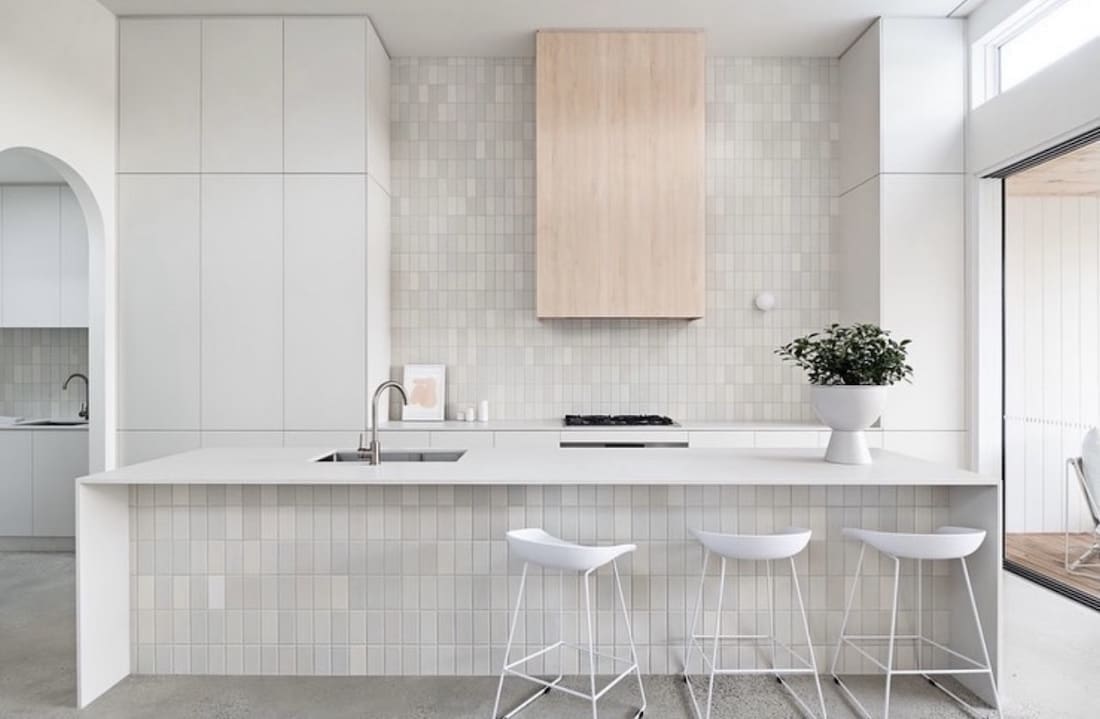
Horizontal straight stack
If you want to create an architectural look on a budget, our tip is to use a horizontal straight stack subway tile layout. Laying them horizontally works beautifully in contemporary, mid-century or Japanese-inspired interiors.
You can emphasise the layout by choosing a contrasting grout colour, like in the kitchen below, or use a complementary grout for a softer, more understated look.
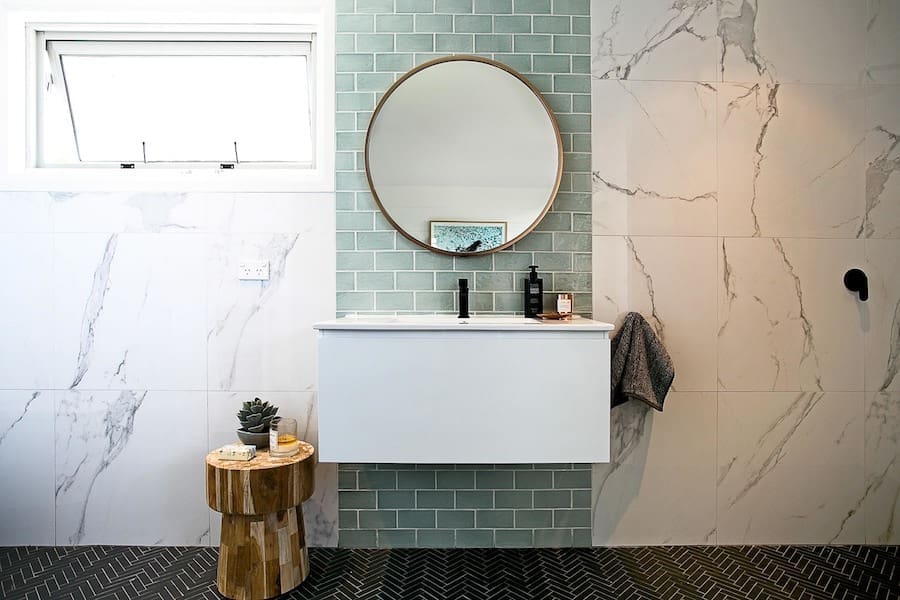
Brick bond subway tiles
Brick bond is probably the most well-known and traditional pattern for laying subway tiles and we totally understand why. A brick bond pattern is versatile and can fit almost any style of home whether it be modern, rustic, coastal, etc.
This is another subway tile layout that works well with a contrasting grout colour. For example, light subway tiles with a dark grey grout are perfect for an industrial aesthetic. Or be daring and consider using a coloured grout for something truly different.

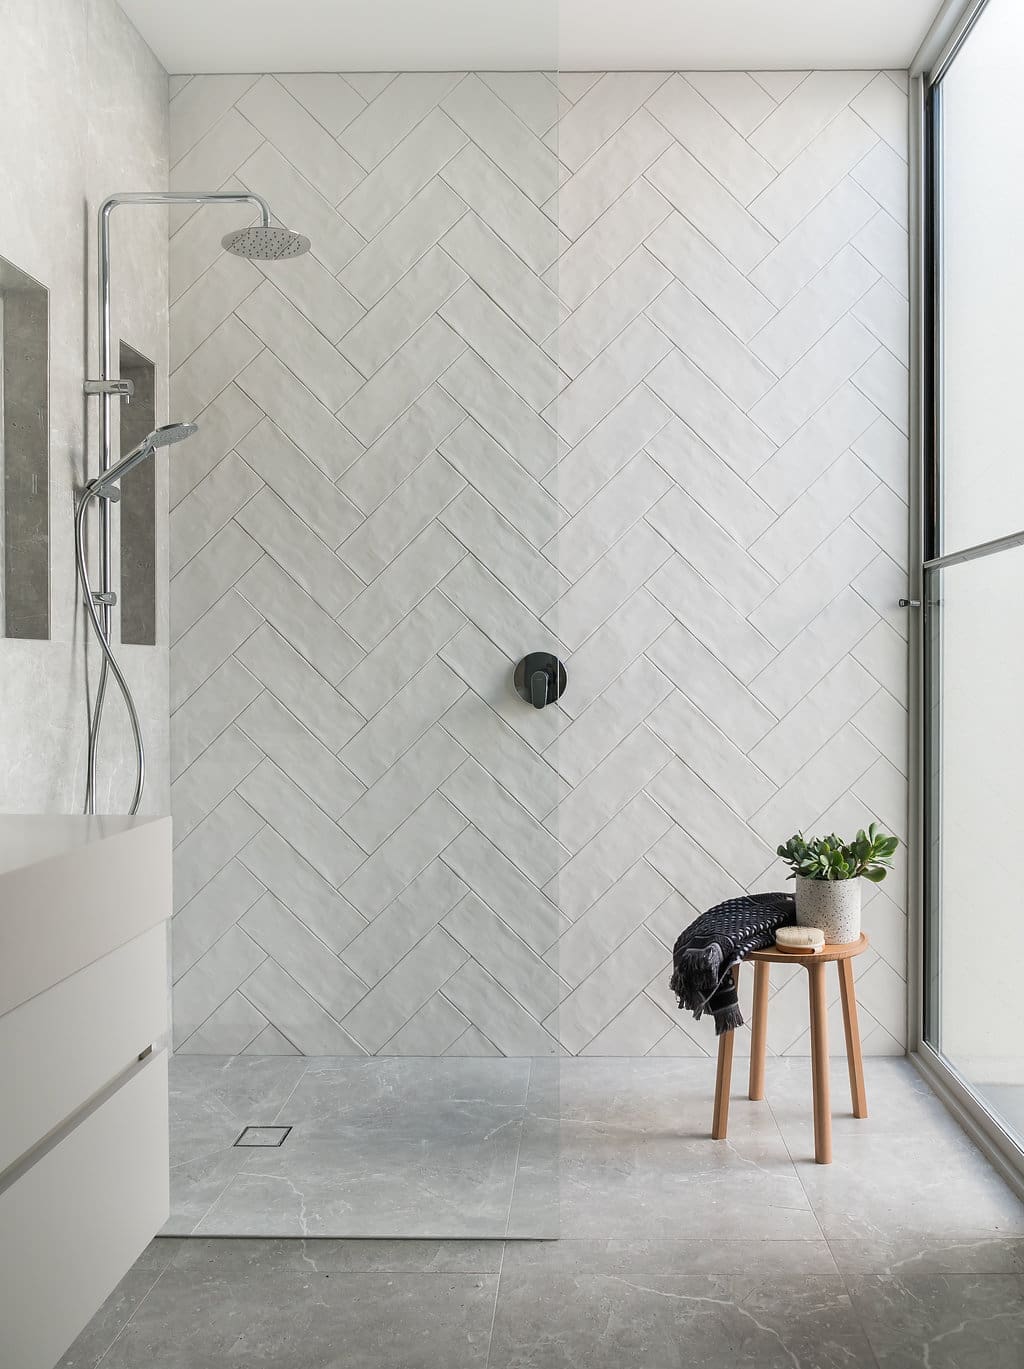
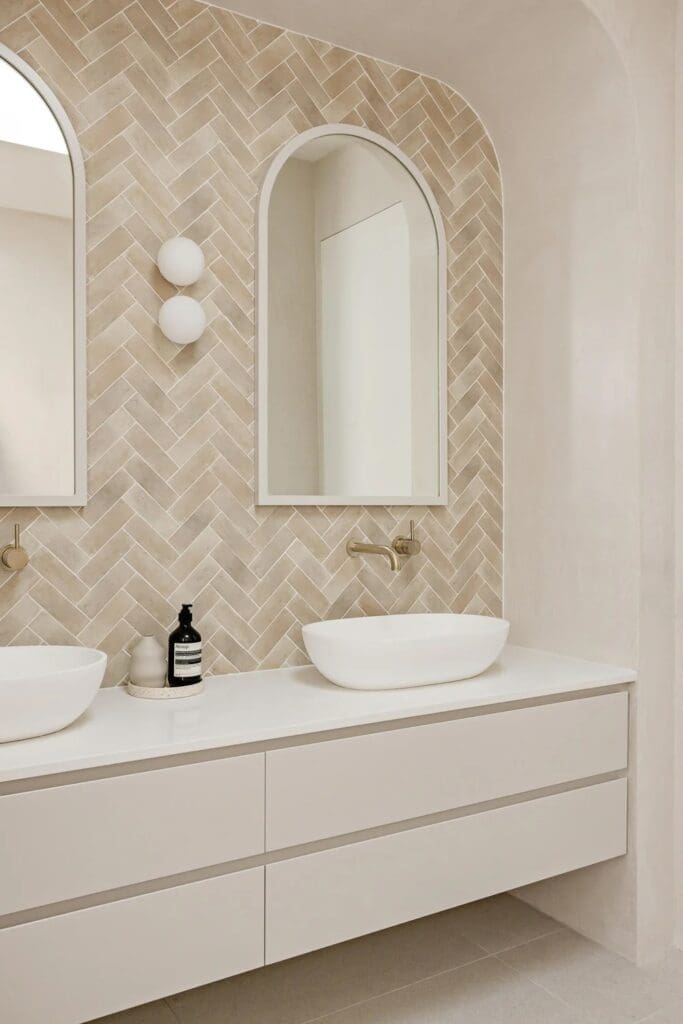
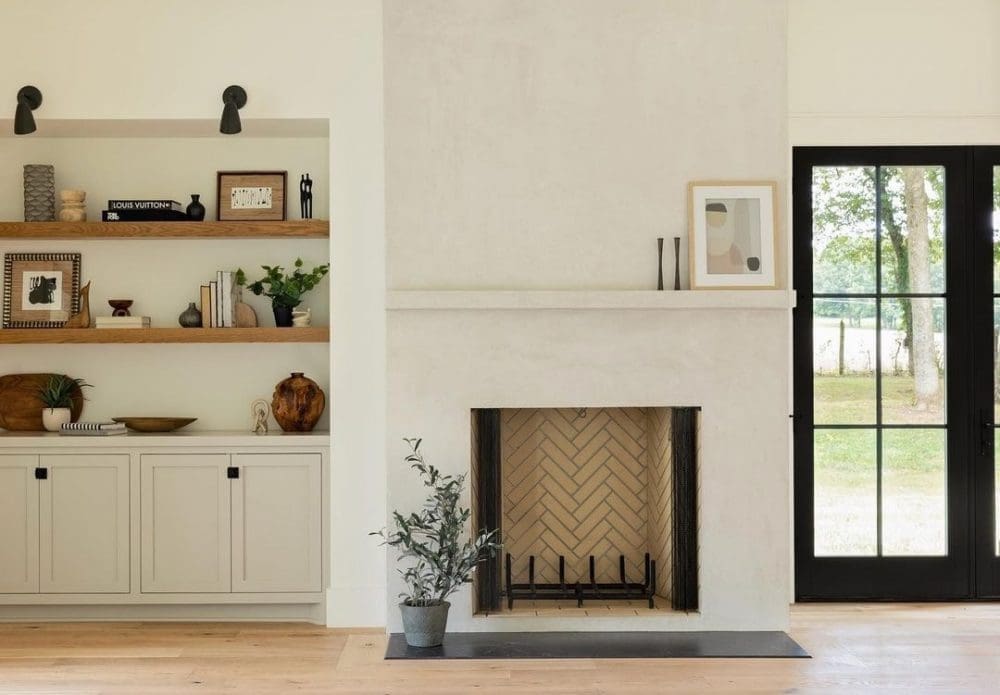
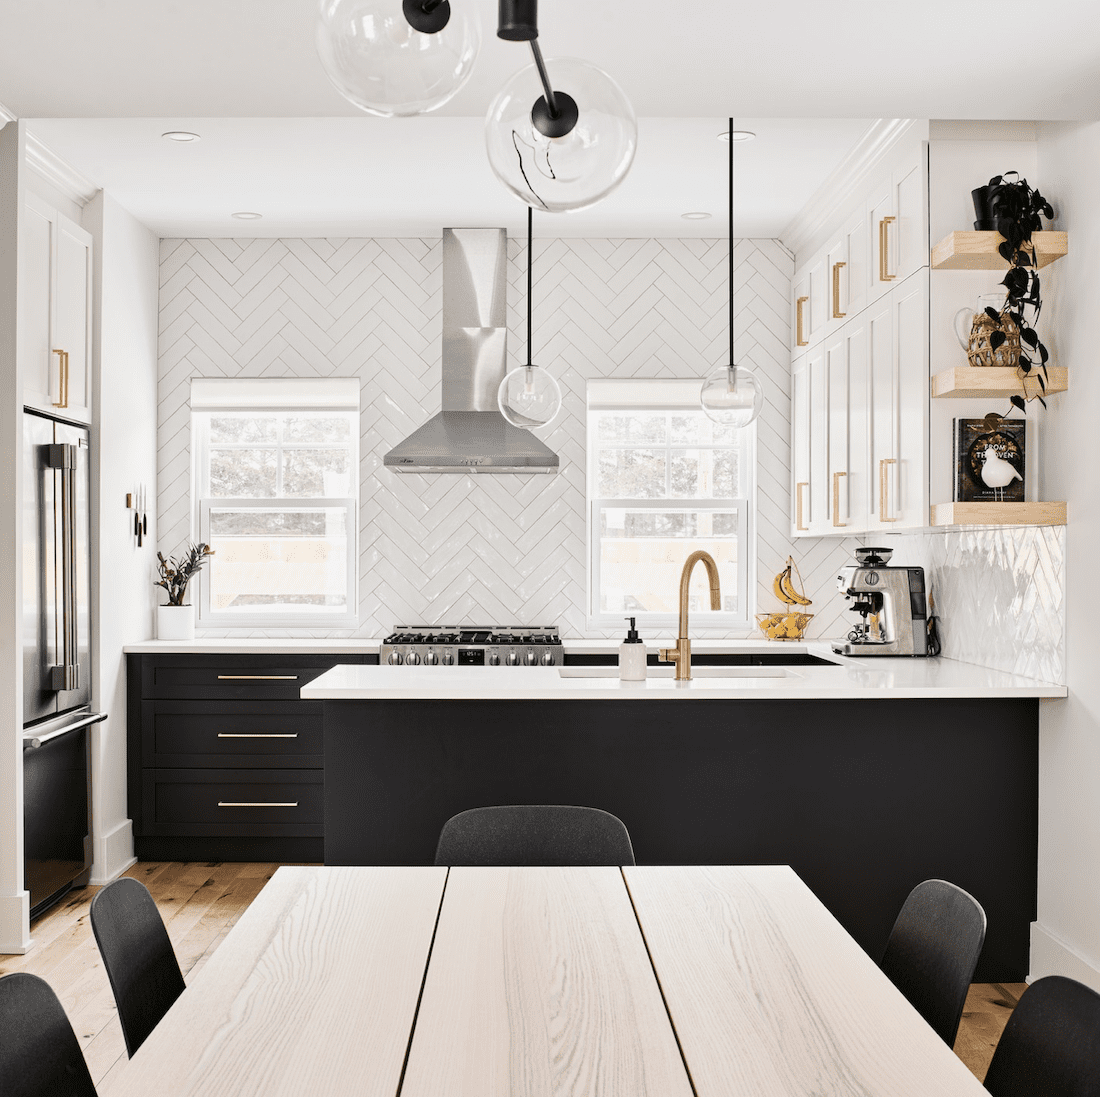
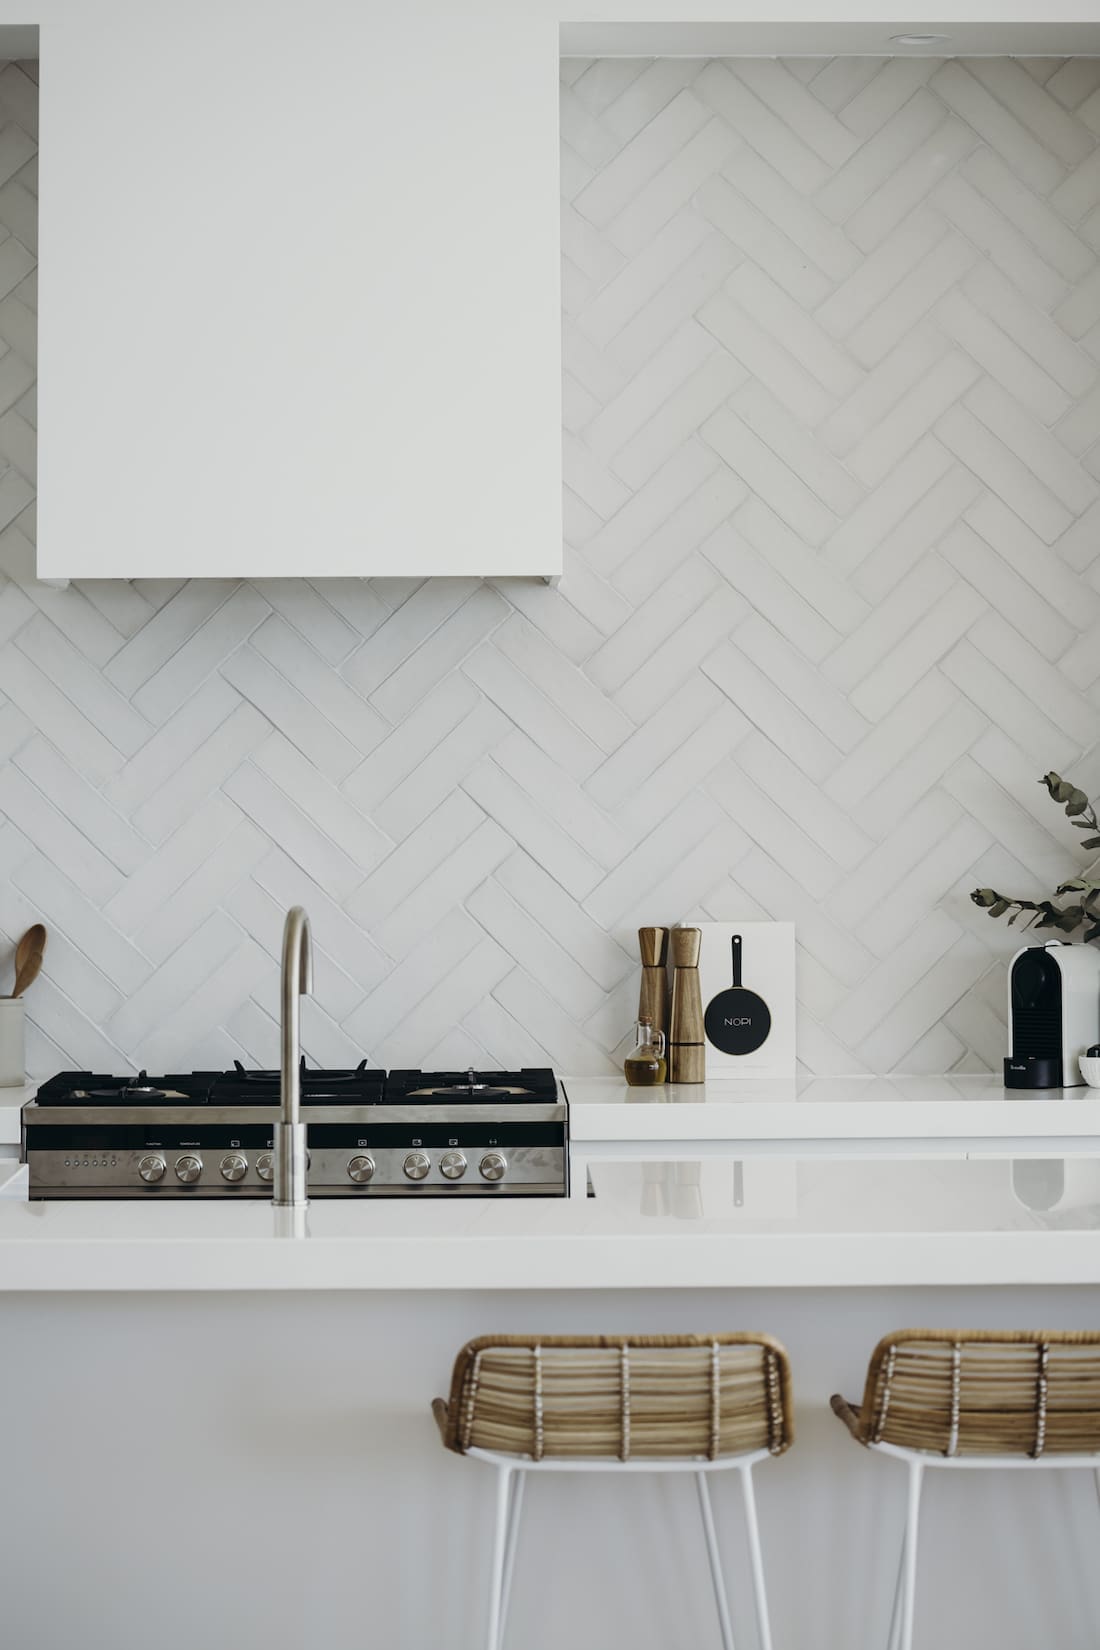
Herringbone subway tiles
Laying tiles in a herringbone pattern instantly creates a sense of luxe. Perfect for achieving a Hamptons, coastal, contemporary, industrial, traditional… basically any interior design style!
No matter your design direction, the herringbone pattern adds movement and depth to your space. Our tip, use restraint. The bold pattern of herringbone goes a long way so remember: less is more. Consider creating a striking feature wall behind your vanity or in the shower.
Fun fact, do you know where this pattern gets its name? It’s the way it resembles fish bones, in particular, the herring fish.
Double herringbone subway tiles
When one of a good thing isn’t enough, double it! A double herringbone subway pattern creates a bolder look, emphasising the angular lines of the herringbone pattern. It’s a fabulous option for coastal and contemporary style homes. Going for neutral coloured tiles can also create a more sophisticated, luxe and calm ambience in your space.
Basketweave
Gaining popularity, basketweave is a tile layout that uses 2, 3 or 4 subway tiles in alternating tile directions. Sometimes it’s also called cross hatch tile layout. To pull this look off, you need to select subway tiles in the right ratio or they won’t line up.
For example, a 300mm x 75mm sized subway tile would line up when 4 tiles are laid in alternating directions because 4 x 75 is 300mm which matches the length. Similarly, a 150mm x 75mm tile would match up when 2 tiles are laid in alternating directions.
Alternating corridor
Finally, another designer-approved way to lay subway tiles is the alternating corridor pattern. This is where rows of tiles are laid in alternating directions, creating the illusion of a corridor running between vertically stacked subway tiles.
While this method of laying subway tiles hasn’t been widely used in Australia yet, it’s a great option if you want to break away from the highly saturated brick bond pattern and try something a little different.
Have our design tips on modern ways to lay subway tiles helped you? If you’re gathering ideas for your next renovation, don’t forget to subscribe to Style Curator for more bathroom design inspiration, clever layouts and styling ideas.
Find more design inspo here


Comments are closed.