
It’s been a while in the making but I’m so excited to FINALLY share our bathroom renovation with you! For those of you who followed along with my Instagram stories, you’d know this wasn’t’ a simple cosmetic makeover — we completely demolished the space, moved plumbing and electrical about, and even changed from a swinging door to a cavity slider.
All these changes amounted to a lot of trades and some pretty long lead times. So, without further wait, let me show you around our newly renovated bathroom!
Related article: Everything you need to know about picking the right grout
Related article: How to create a digital mood board
Inspiration for the space
Our bathroom renovation came about due to water damage. So although I still loved the look of our previous bathroom, I decided to take the opportunity to give the space a fresh new feel. We also decided to resolve other issues in the space, like bad spatial planning.
Since building our house, I’ve had the opportunity to design dozens of bathrooms for others. I’ve become far more confident in creating bathroom schemes. So I was eager to use what I’ve learnt and create our own dream bathroom.
My goal was to create a bathroom that fits the contemporary style of our home, while also feeling light and luxe. While I was originally thinking of using marble feature tiles to tie in with the other marble accents in our home, my selections evolved during the design process.
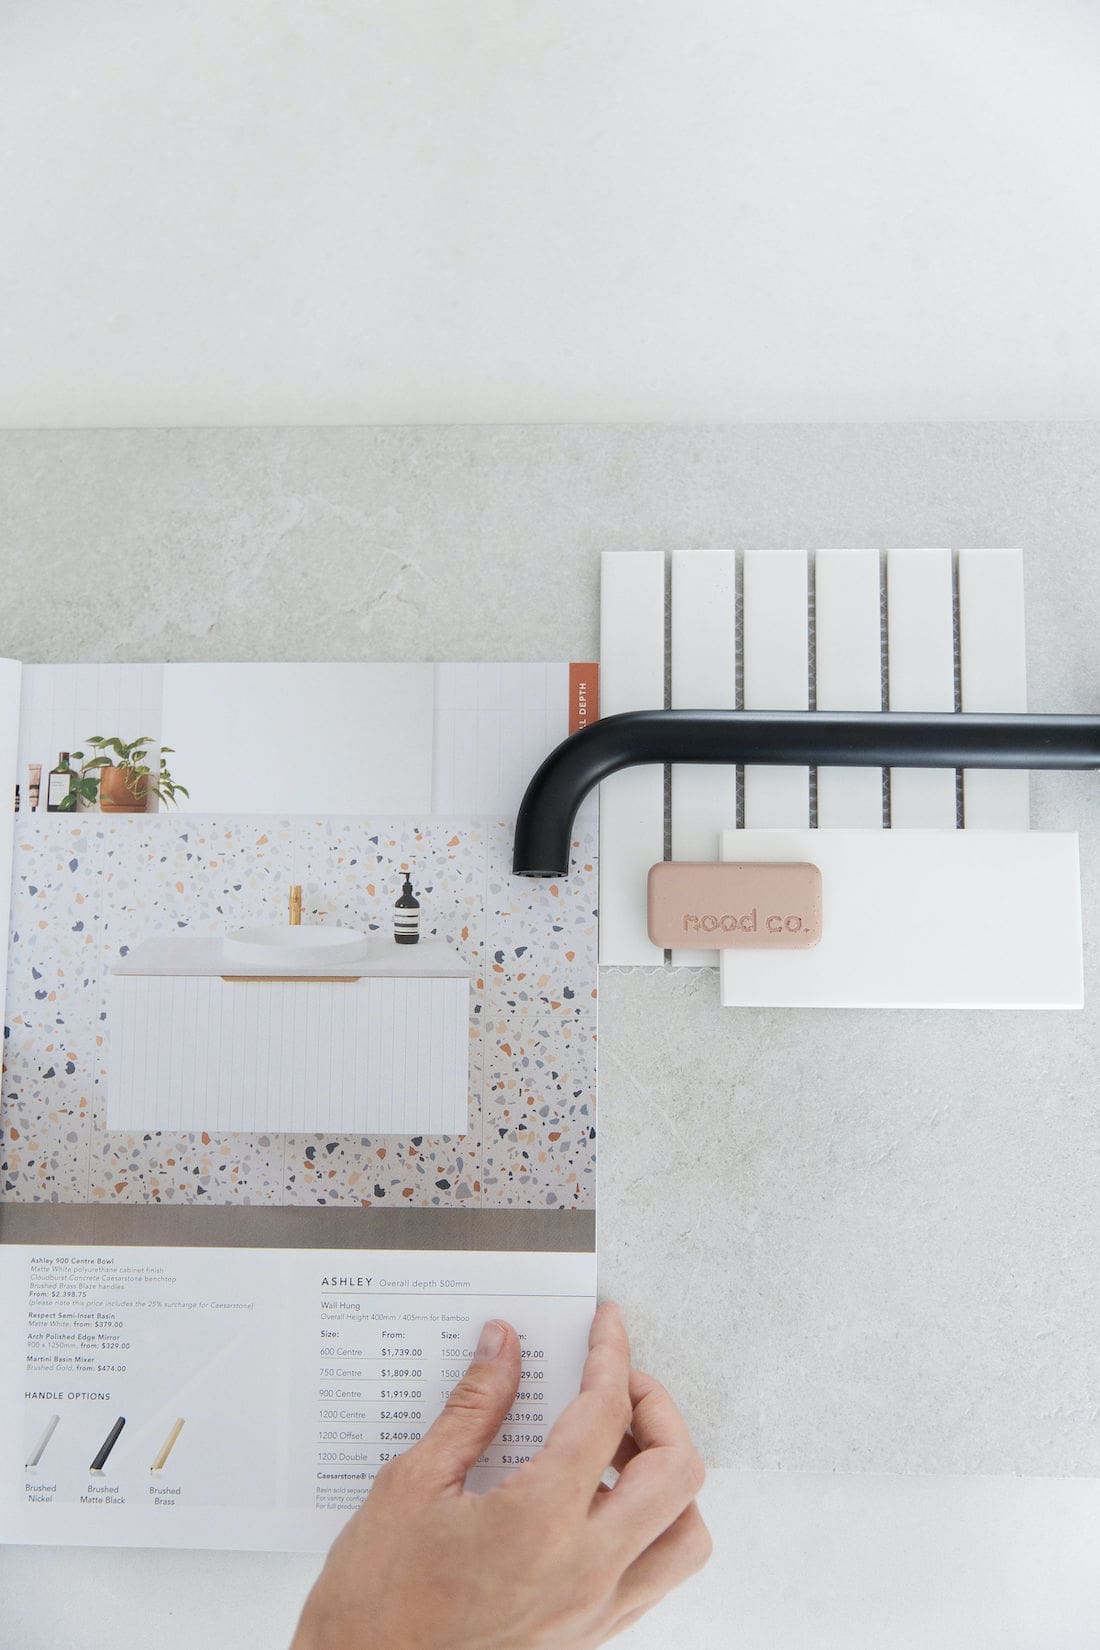
Here is the original mood board I created.
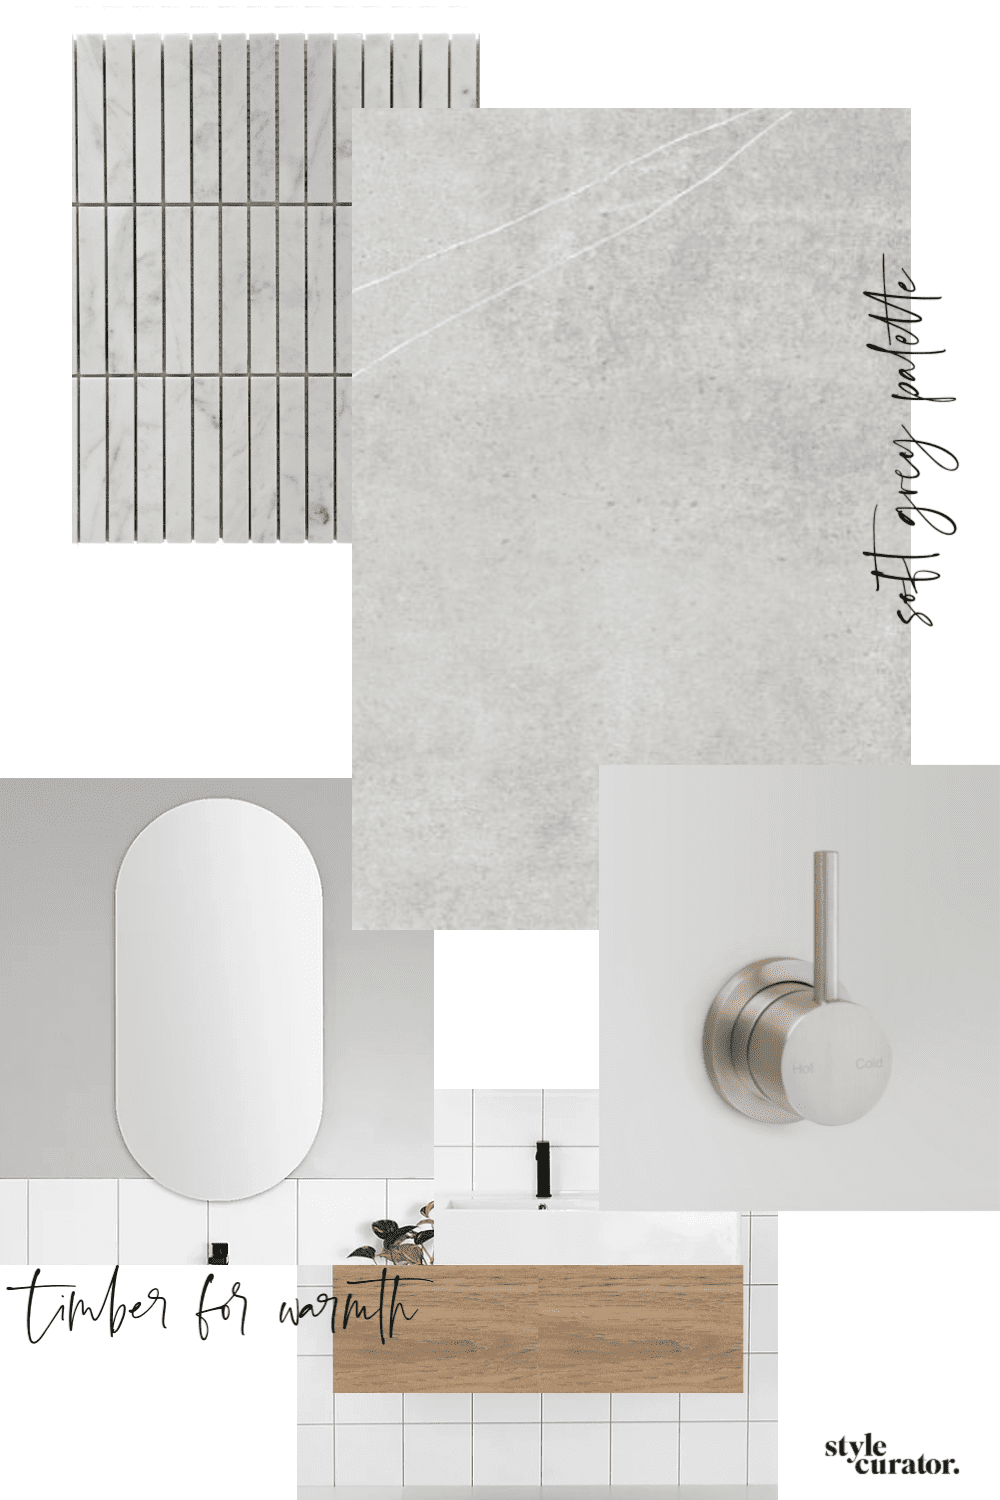
From this mood board, I refined my ideas further. I decided on a warmer, stone-look tile to fit with the tones of our home, like the polished concrete in the main living areas. It also felt like a more current tile choice to me as warmer tones are gaining popularity in design. Because of the subtle marble pattern in this tile, I had to change the marble mosaic feature tile. I actually questioned whether to use a feature tile at all but in the end locked in a matte white kitkat tile.
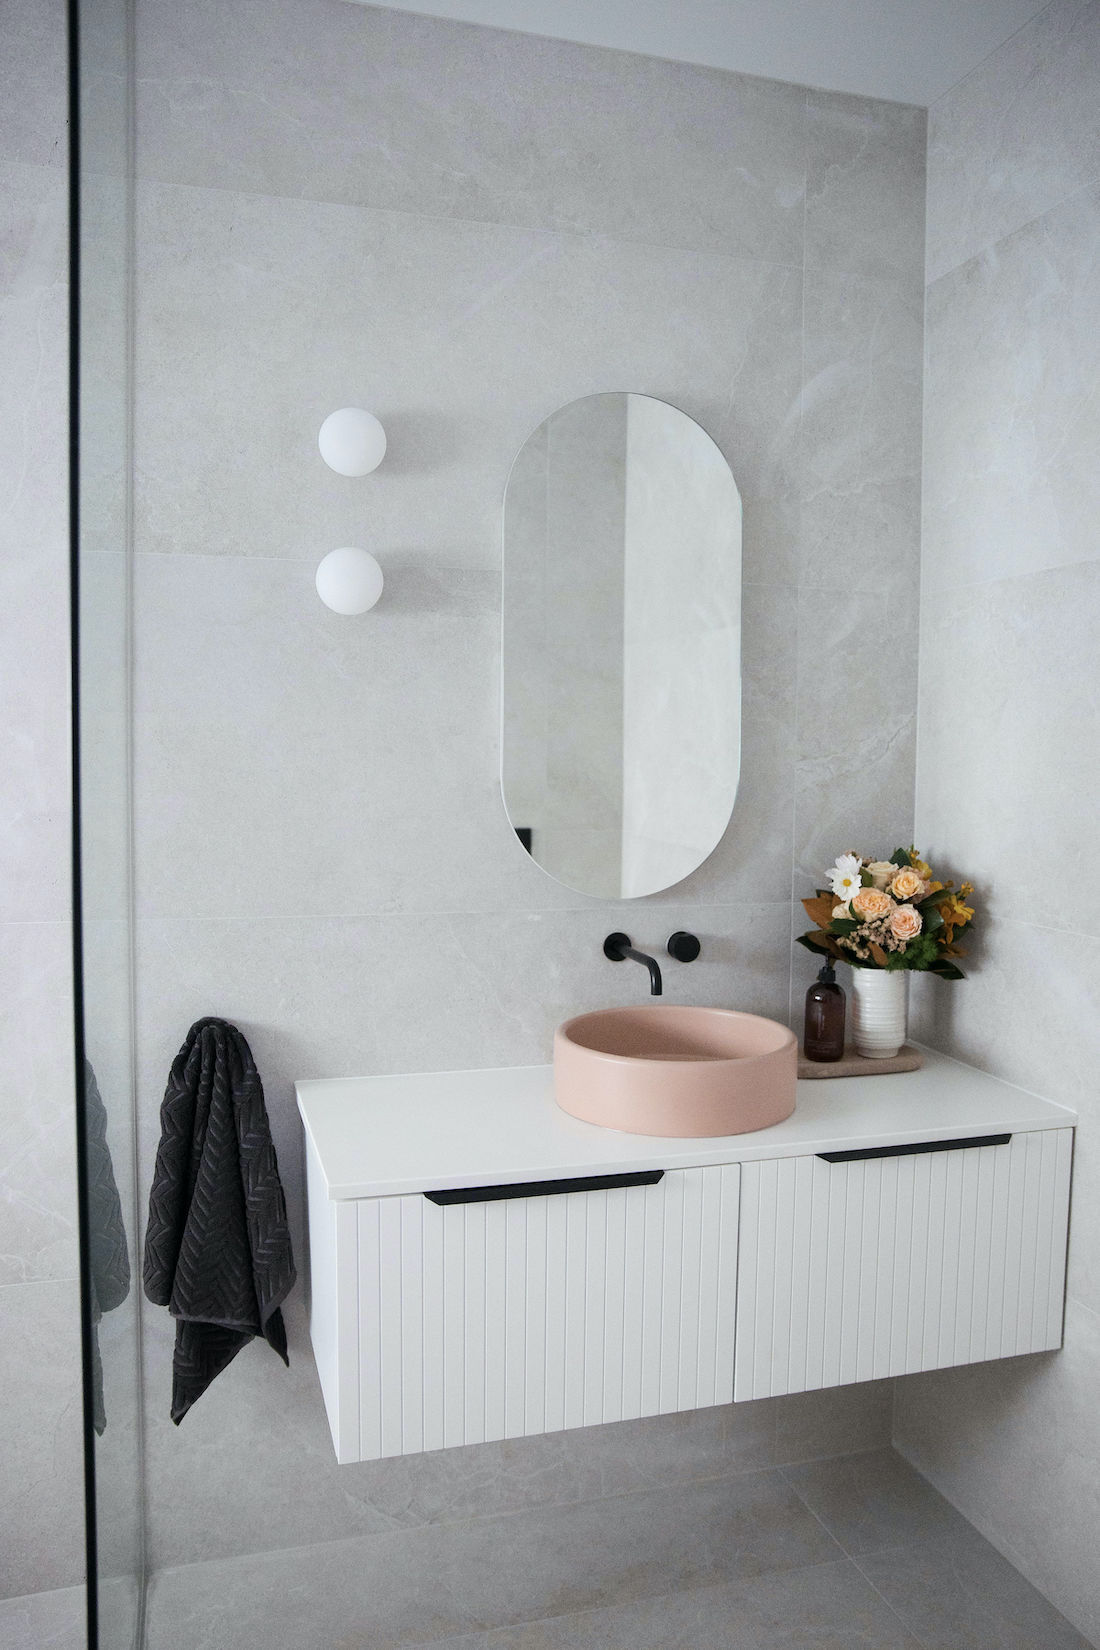
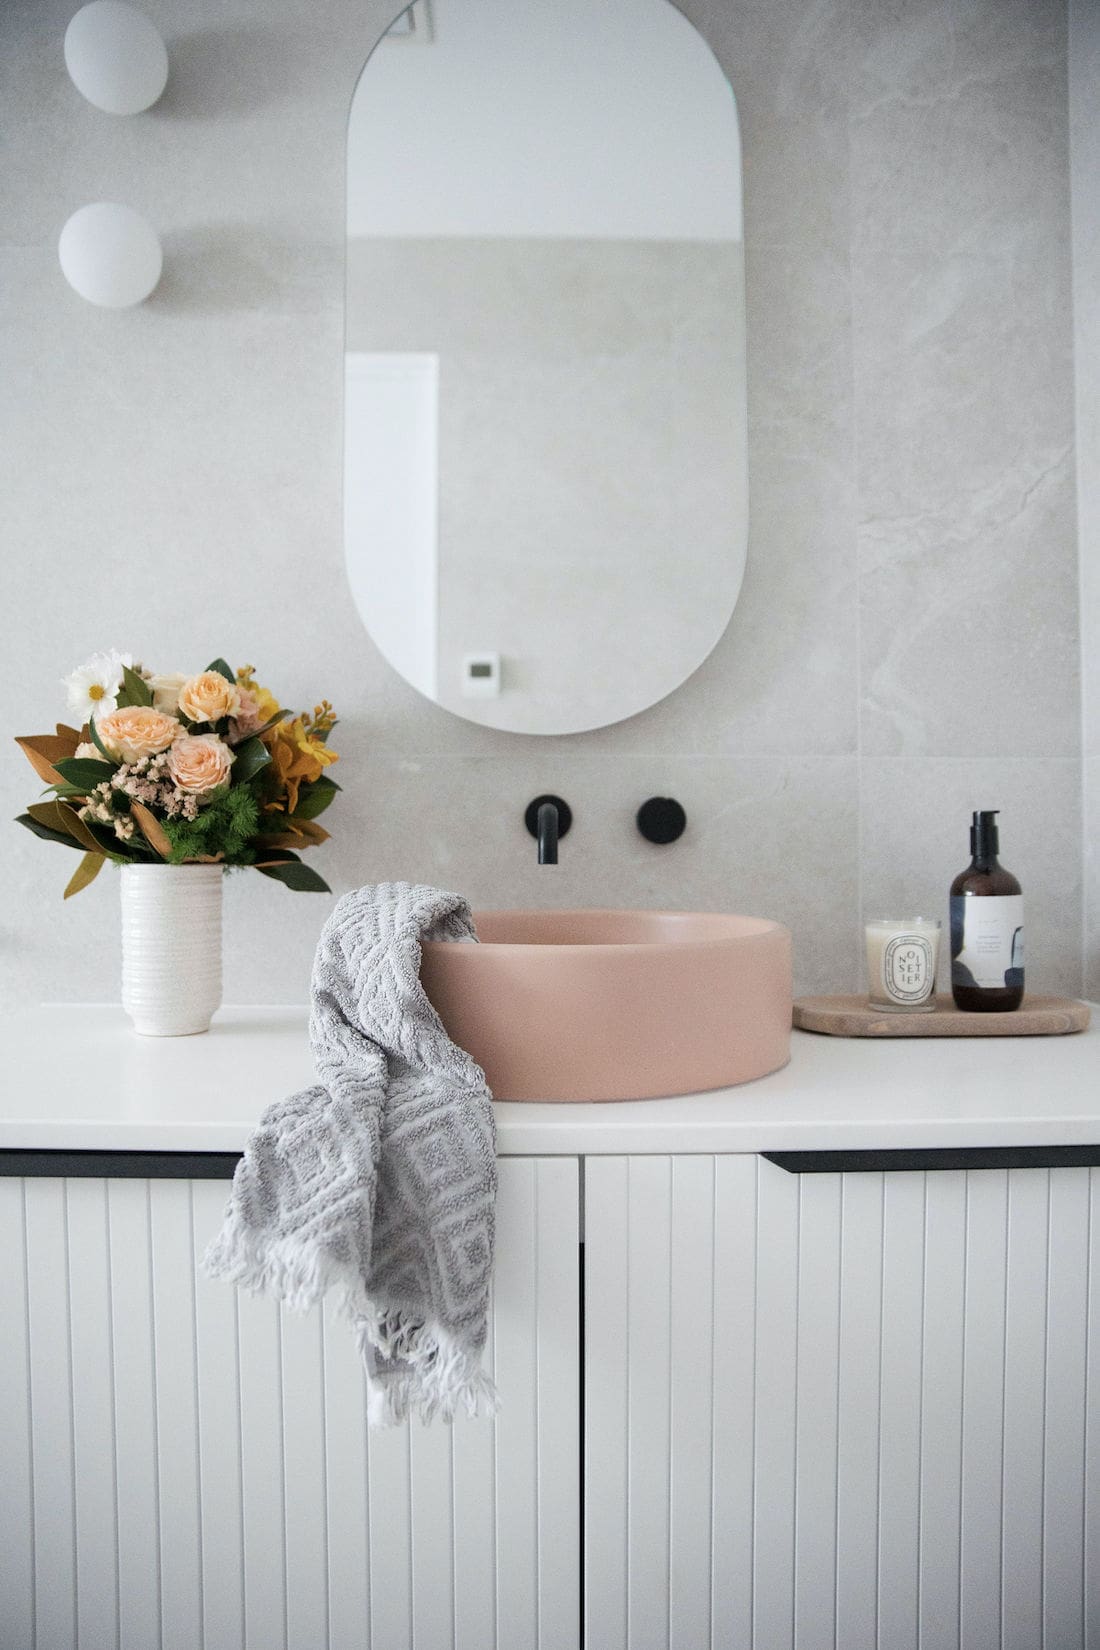
Next, I changed our vanity to a white vanity with a v-groove drawer front. With the added warmth in the tiles, I didn’t feel the need to use a timber vanity. I love the contemporary style of this vanity profile. The pill mirror stayed and I took the opportunity to add more storage space by switching it to a shaving cabinet (rather than just a mirror).
Although I love brushed platinum tapware, for consistency in our home, I reverted back to matte black.
Watch this quick reel to see a video mood board of the space coming together.
Major changes
Layout
Although I’ve talked a lot about the materials and look of our bathroom, the biggest change and main reason for the renovation was to fix the water damage and layout.
Previously, we had almost no usable floor space which made it awkward to do anything in here — especially bathing two young kids every night! I also hated that the first thing you saw as you entered the space was the toilet. And don’t even get me started on the cleaning nightmare that came with having a free-standing bath in such a tight space.
This photo is deceiving — a wide angle lens will do that 😉 — but here is our bathroom before. If you imagine the door open, you can visualise the lack of space I’m talking about.

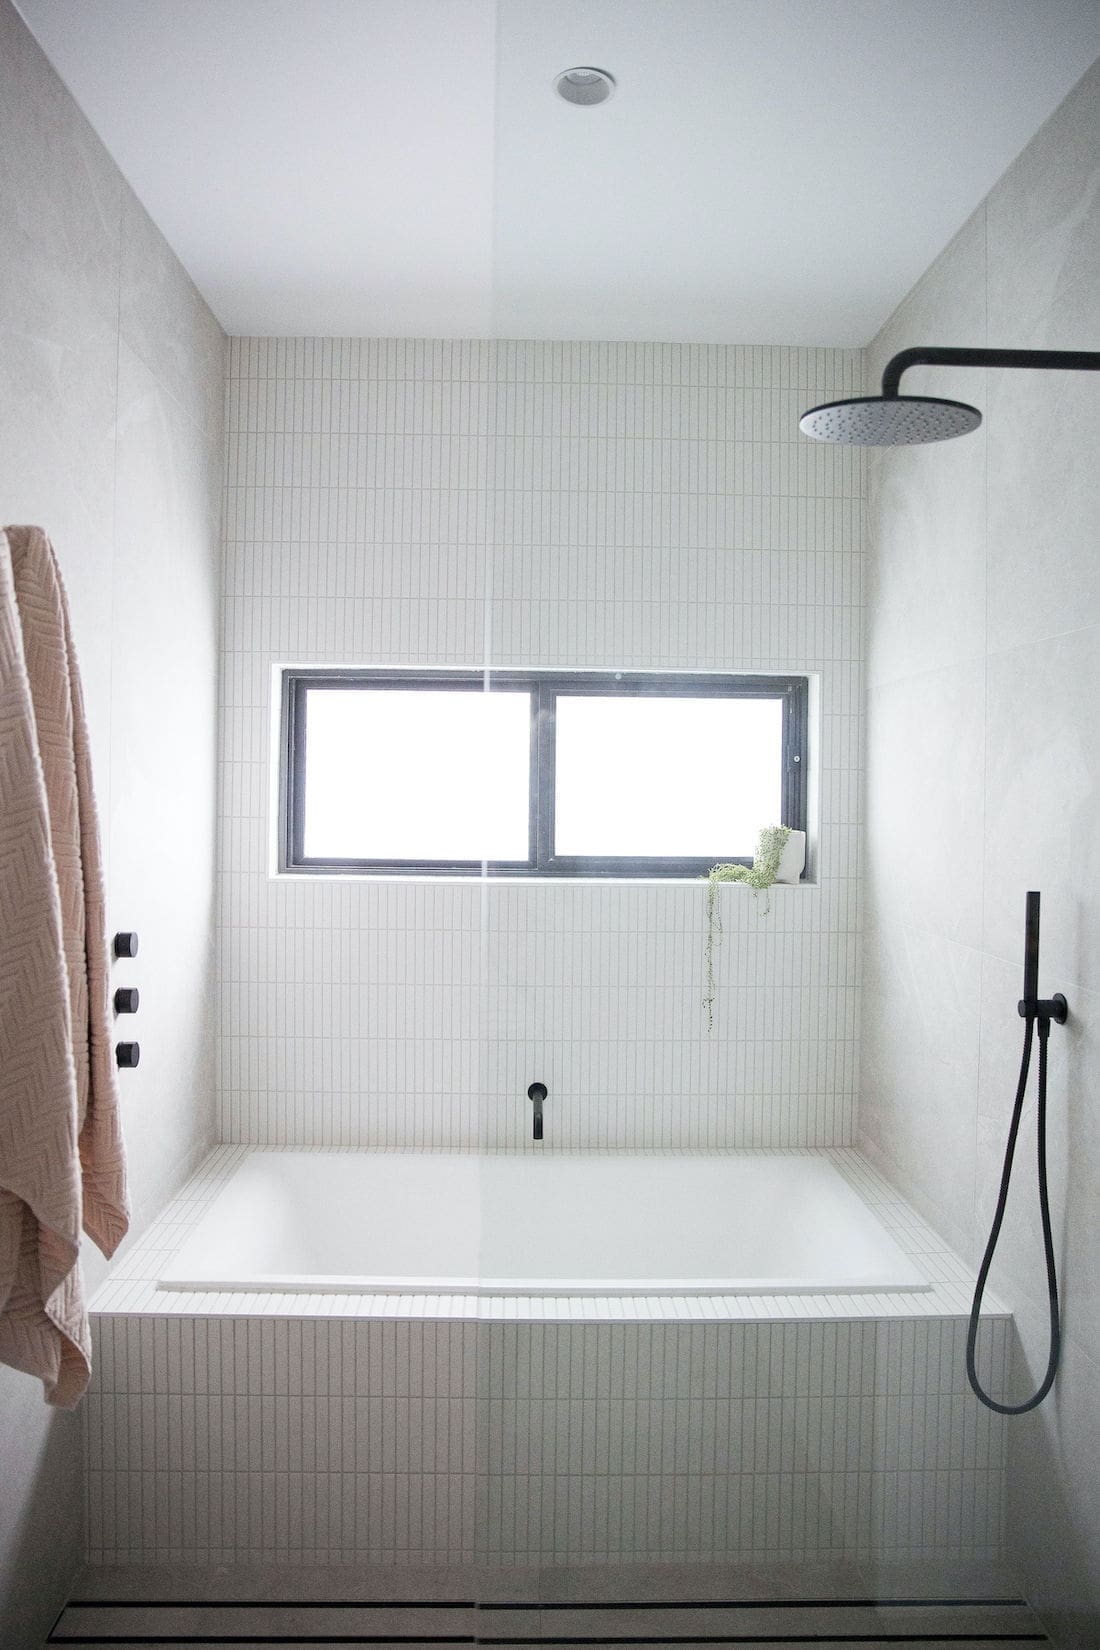
Because the room is quite narrow, it limited what layout options we had. We explored having a separate shower and bath, a shower over the bath, and a wet room with a shower next to the bath, which we ultimately decided on.
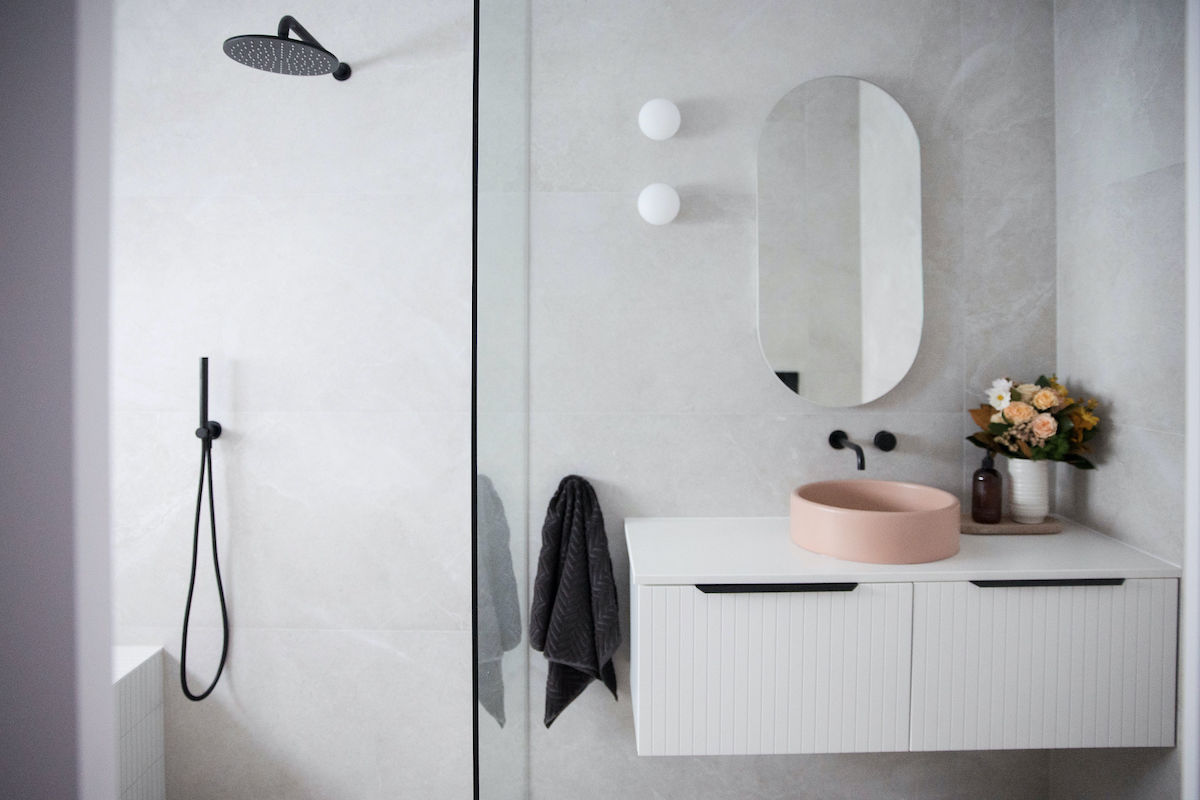
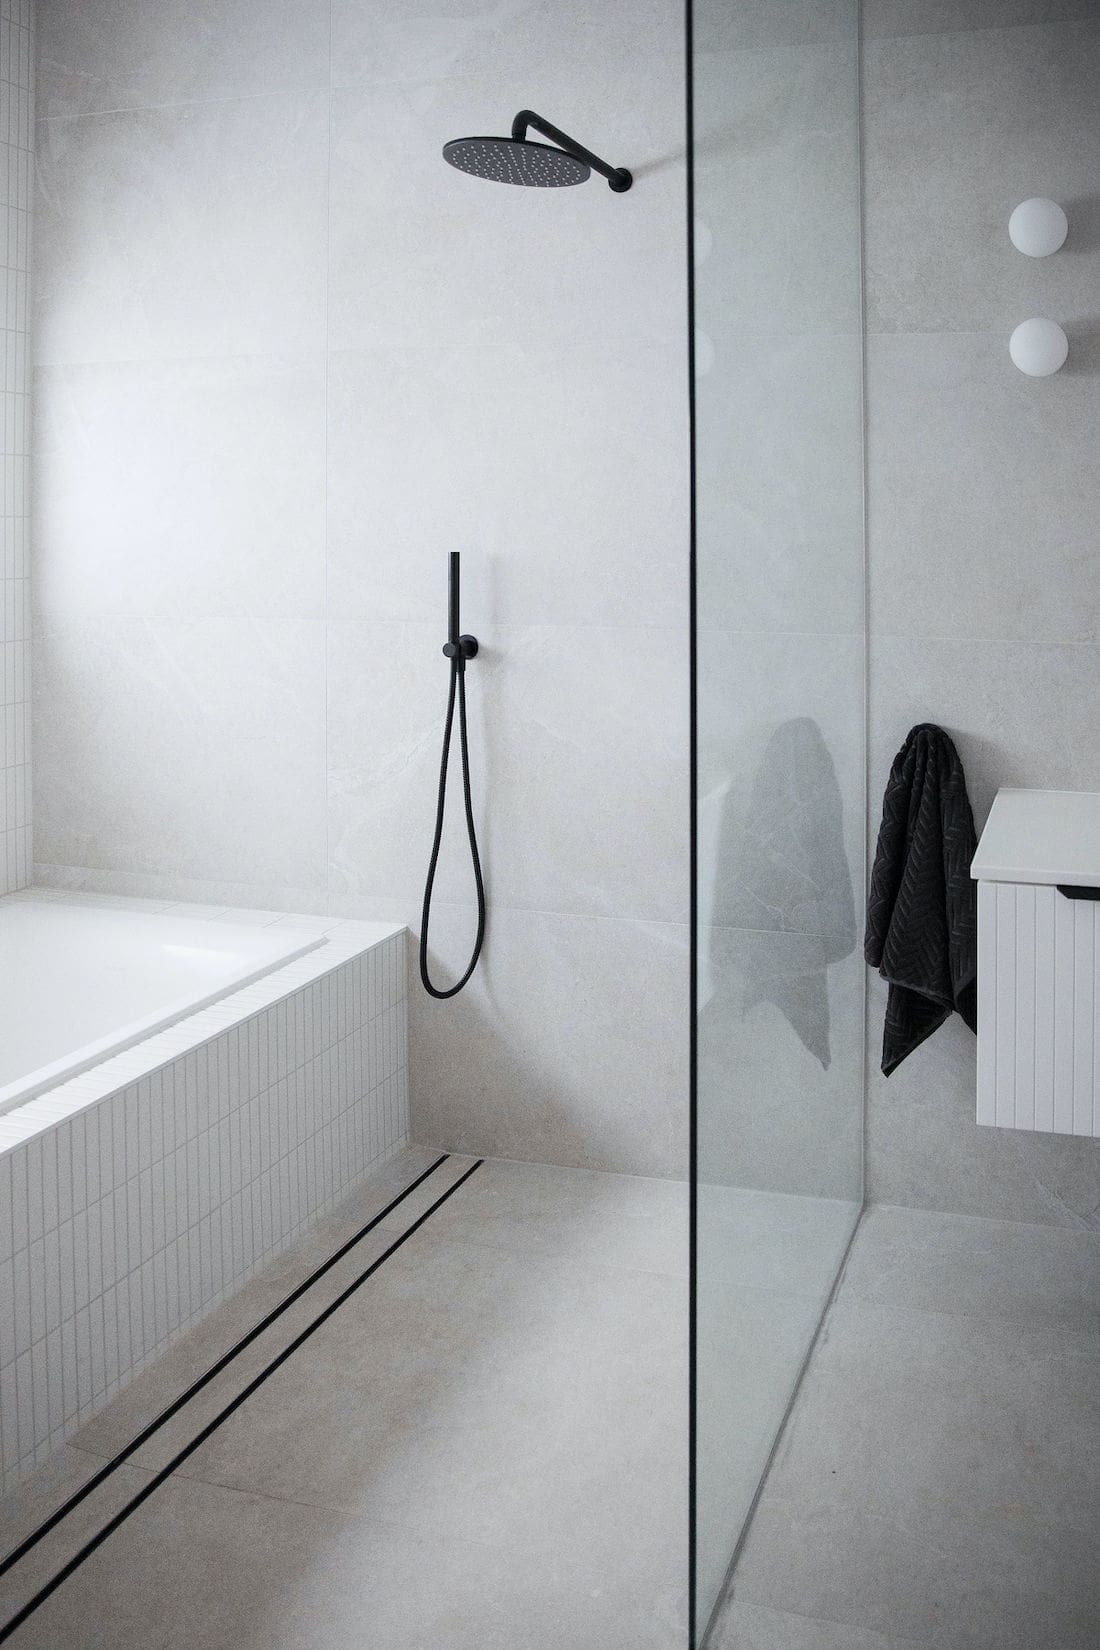
To eliminate the cleaning issues of not being able to get in and behind our previous free-standing bath, we created a hob for a drop-in bath instead. And by running a single panel of glass up into the ceiling, it has created a walk-in shower that feels spacious while only taking up a fraction of the space of our previous shower.
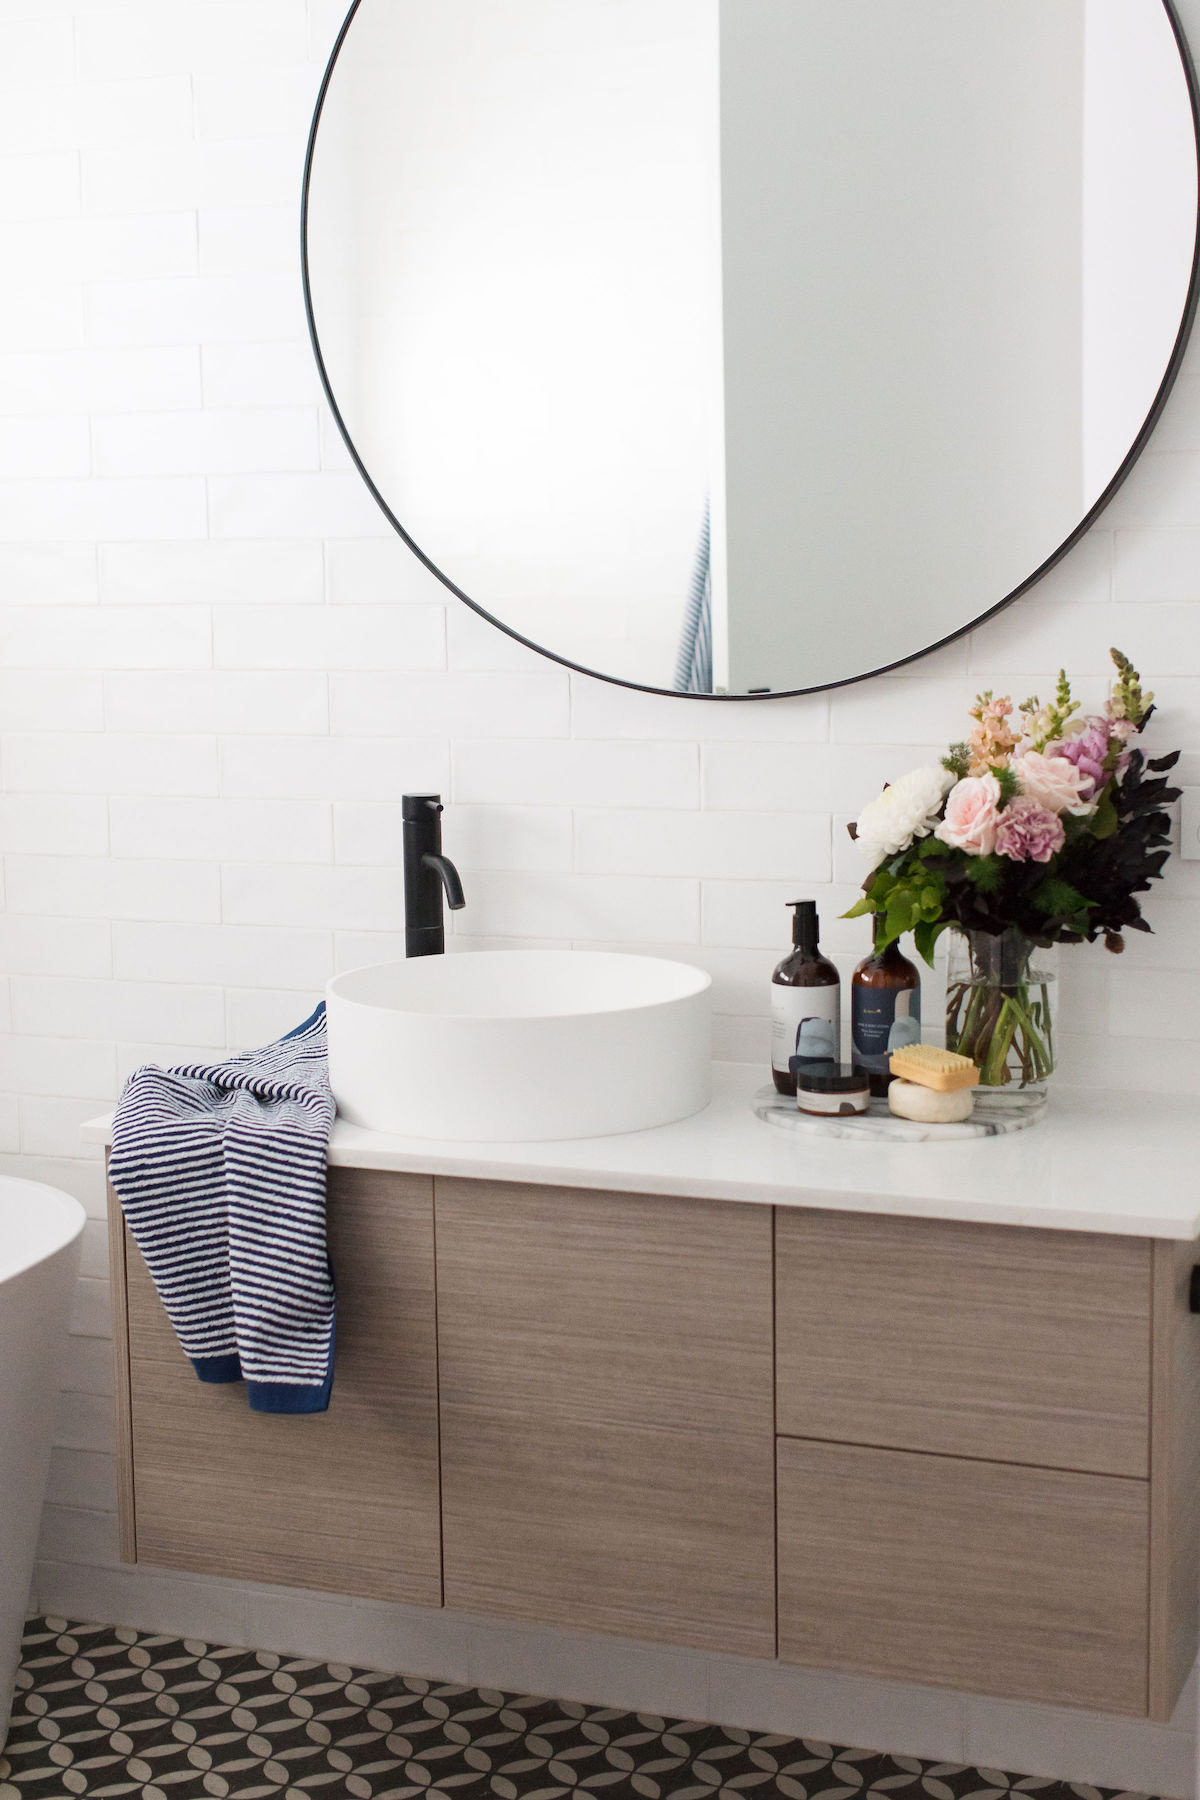
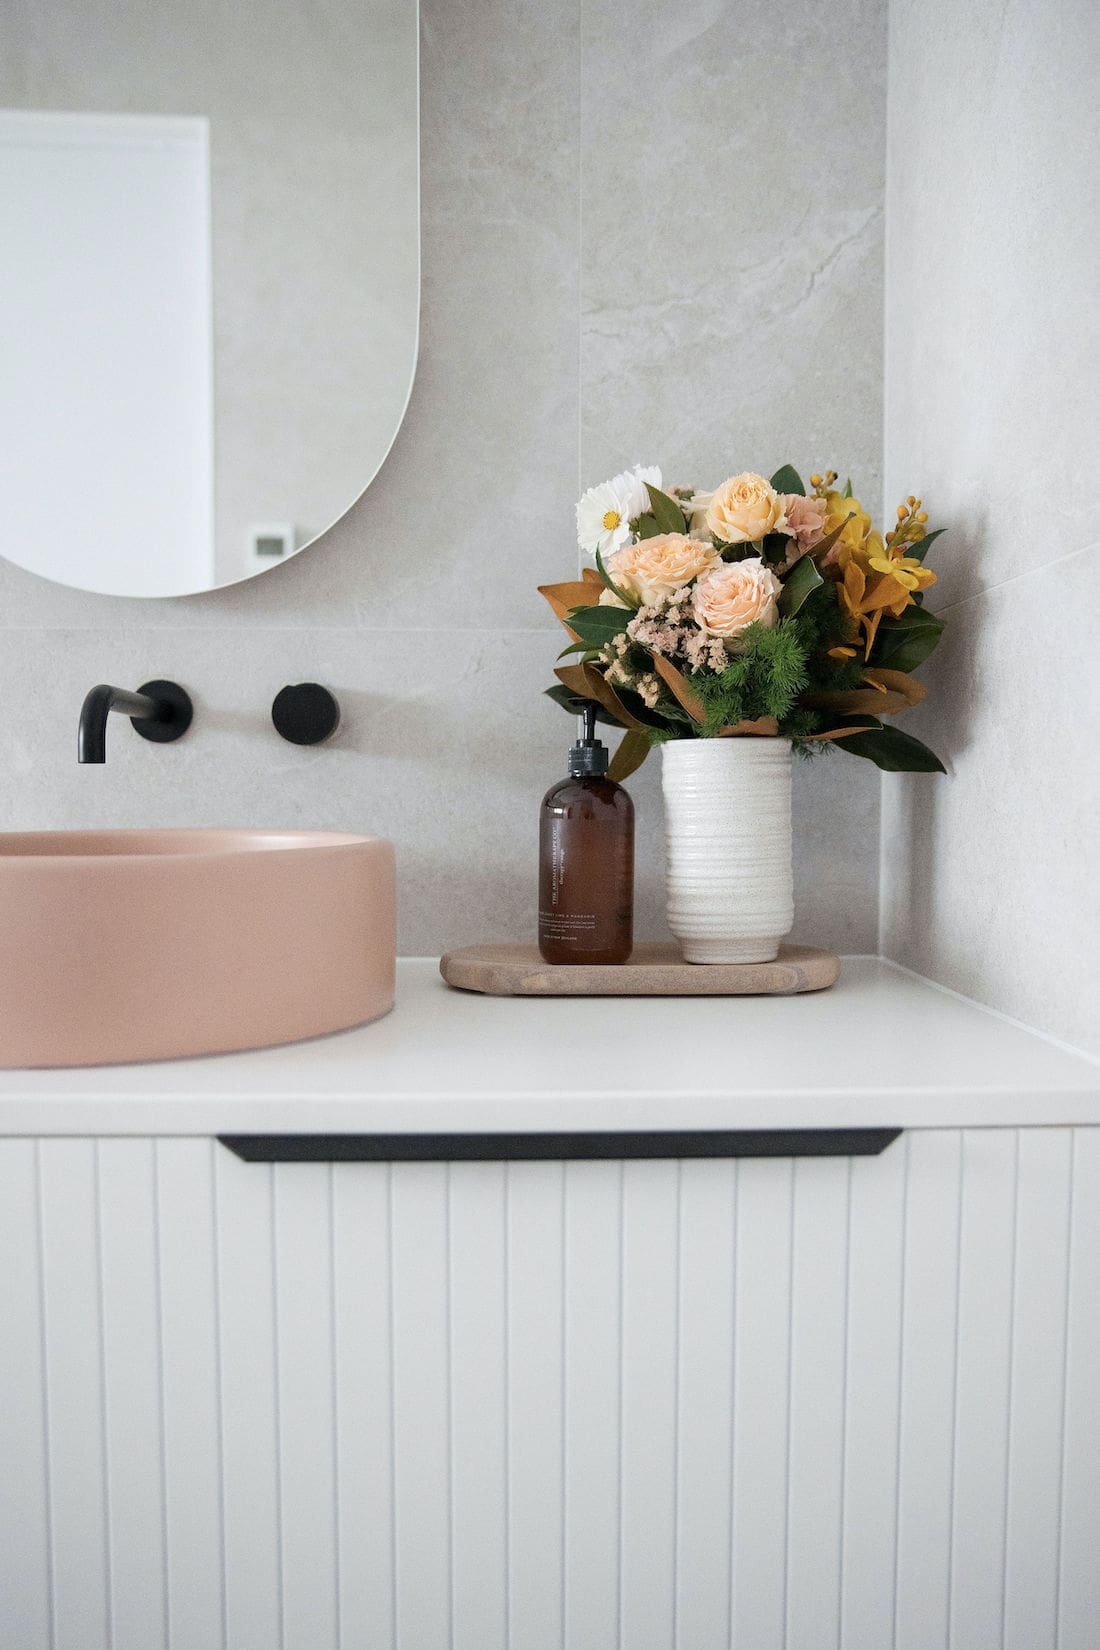
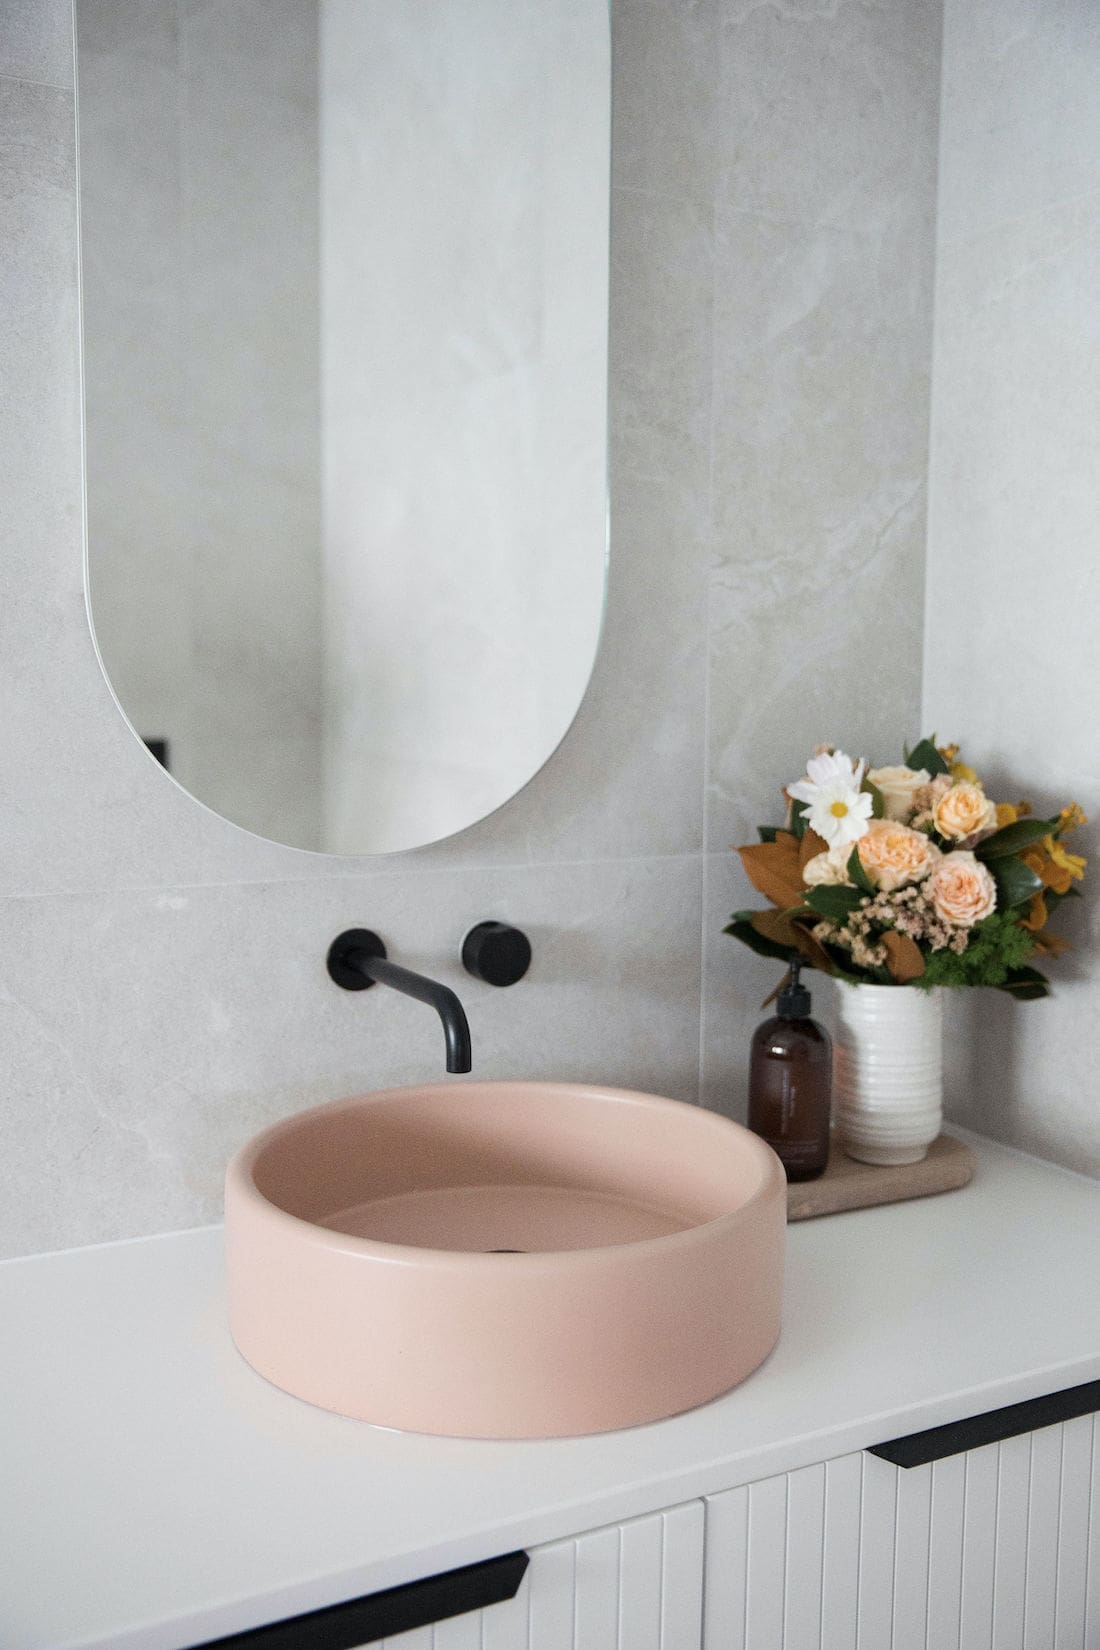
With the shower moving next to the bath, we pushed our vanity (previously in the middle of the room) to be hard against the right wall. As well as changing the style of the vanity, we changed from a basin mixer to a wall spout as I prefer the streamline look of a wall tap. I also changed the oversized round mirror to the pill shaving cabinet. This round mirror was not intended for bathroom use and had begun bubbling with corrosion.
Hot tip: always use a copper-free mirror in bathrooms.
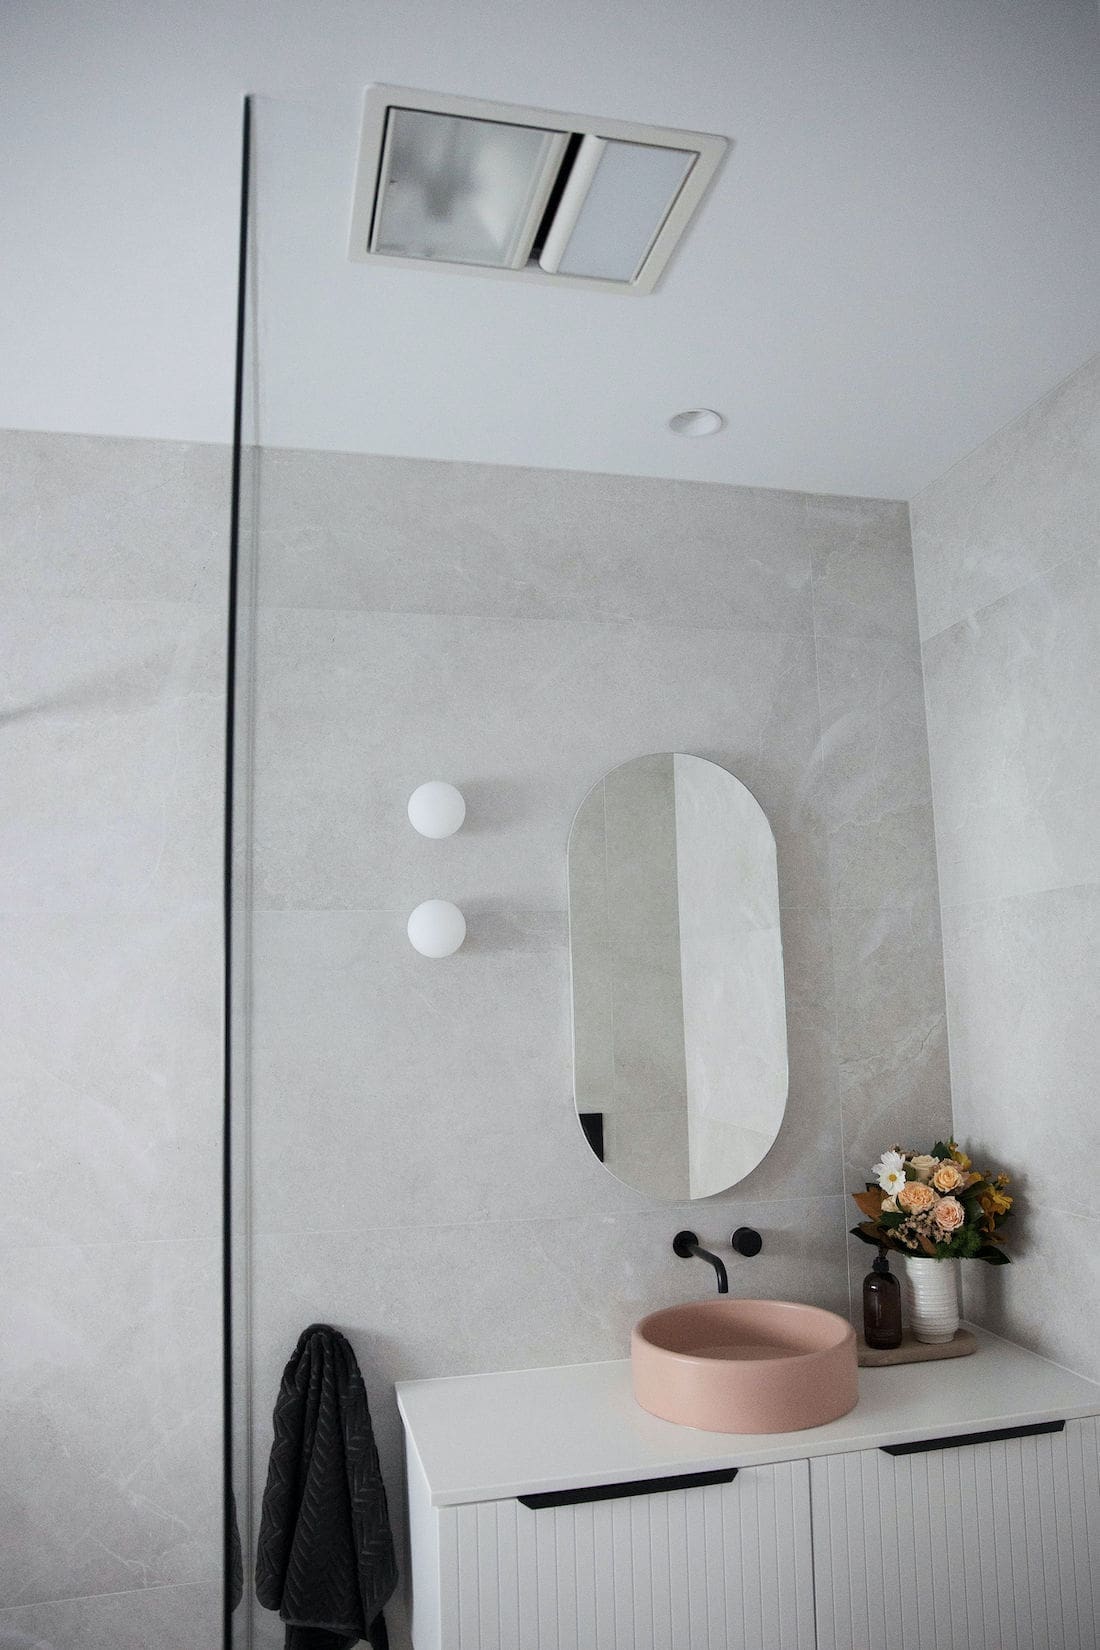
I love this combination of vanity and shaving cabinet — it’s contemporary and streamlined. It’s also more in proportion with the size of our bathroom. Those Flos wall lights add the most beautiful ambient lighting. We also installed LED strip lighting above and below the shaving cabinet, and under the vanity.
We also moved the toilet from being smack bang in the centre of the room to behind the vanity (watch the video above to see). Although it cost a lot in trades to dig more than a metre deep to move sewer pipes, it was one of the best decisions we made in here 😉
Products
As you can see from the before and after pics, the style of this bathroom changed significantly. More than just changing the look of products, we also changed the materials and finishes… after learning some tough lessons!
Our bathroom floor was previously a concrete encaustic tile that I LOVED for about 6 months and then couldn’t stand when I realised what a challenge it was to clean and maintain. I talk more about encaustic tiles in this article. We switched to porcelain tiles, which are far denser and hardwearing. I’m so pleased with how easy they are to care for!
The extra large tile format — 600 x 1200 size — significantly reduces the amount of grout needed which is the weakest part of tiling. Our tiler from Tiling Dynamix did an amazing job, achieving a 1mm grout join with those huge tiles in such a small space.
Tapware was something we skimped on in a few areas when we built our house. In our old bathroom, we used powder-coated tapware… and after a few years it began chipping badly.
Hot tip: always select PVD or electroplated tapware. So this time, we splurged on electroplated black tapware by Astra Walker. It’s far more durable as well as being a more recognised brand should we ever sell our house. We also changed from a pin mixer to a single continuous mixer for a minimalist look.
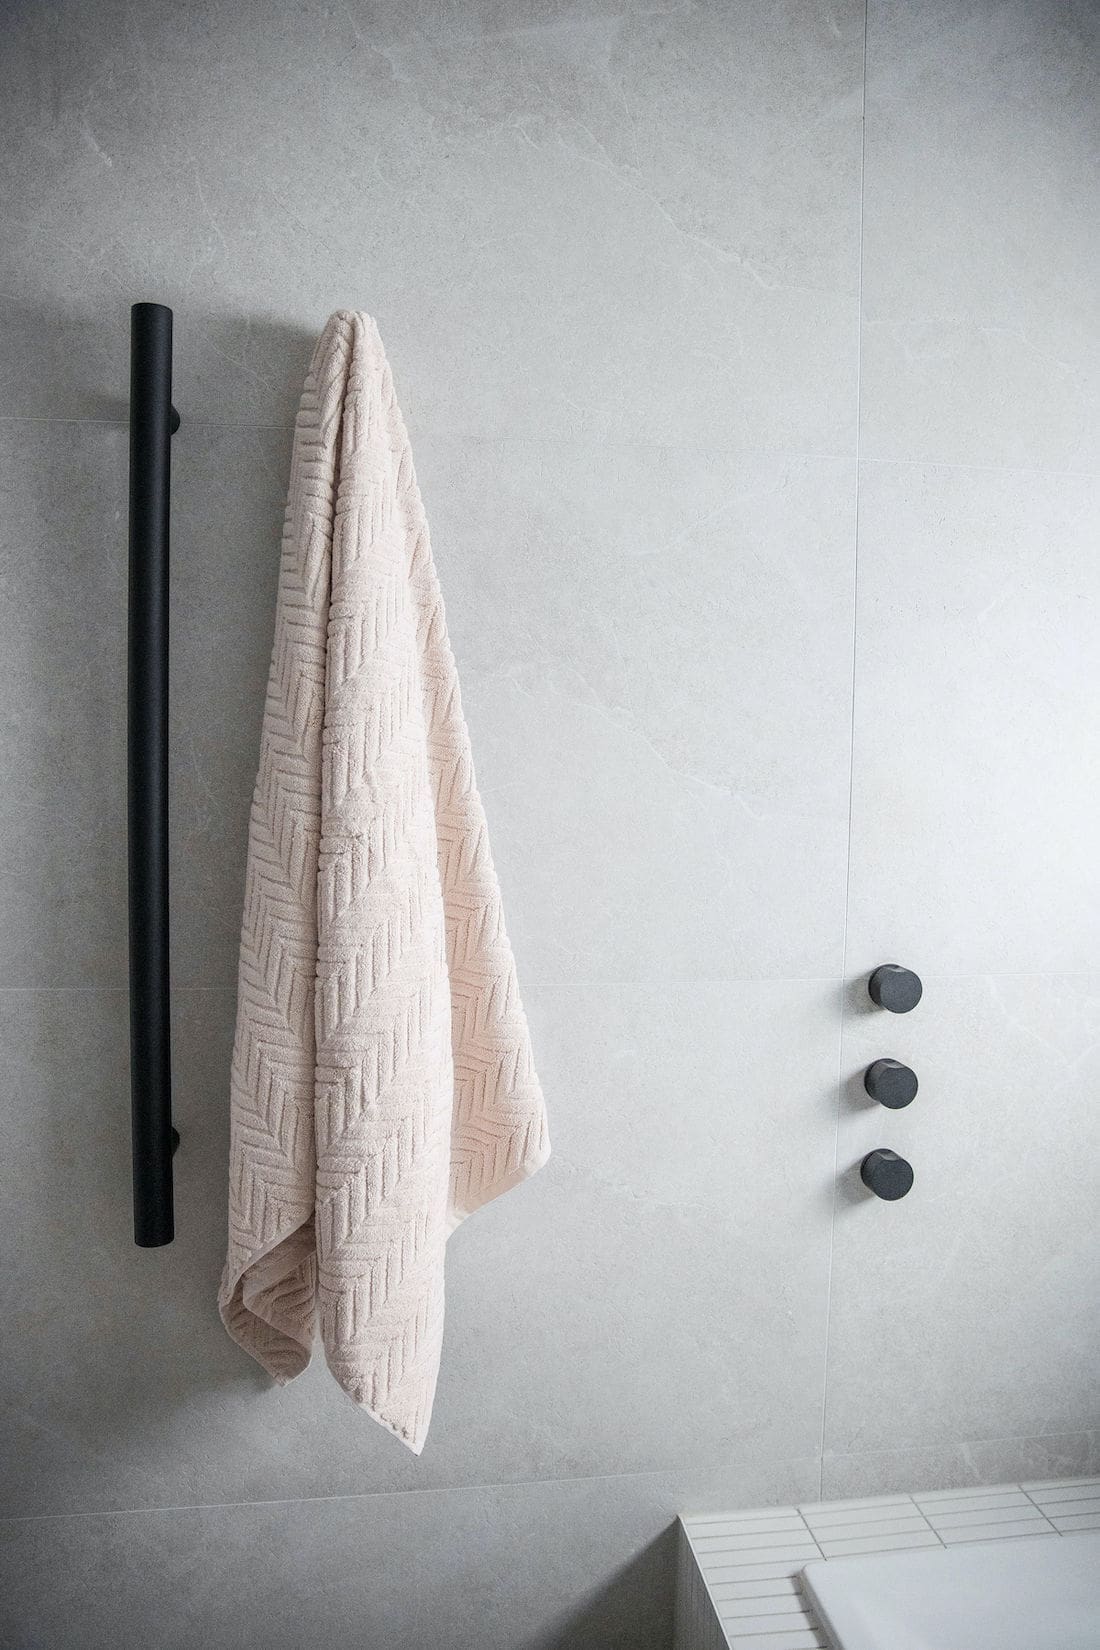
We added a few ‘nice to have’ features, including heated towel rails and underfloor heating. These black vertical bars are actually heated towel rails by Radiant Heating. Not only do they look more contemporary, they take up less wall space than ladder styles. (I also find they do a better job of warming towels!)
The underfloor heating was a suggestion by one of you who warned that wet rooms can become drafty. The underfloor heating makes it nice and toasty in here, eliminating this issue.
It’s not that sexy to talk toilets but toilet technology has come a long way in recent years. We changed to tornado flush, which is a new flushing system that cleans and flushes both the rim and bowl. This innovation makes it more hygienic and easier to keep your toilet clean.
We also switched the traditional style tastic to a more streamlined model from IXL. From their Luminate range, this sleek tastic is a bathroom heater, exhaust fan and light in one minimalist design. I love how it sits almost flush with the ceiling and drops away, to allow the other features of the bathroom be the focus.
We carried the streamline look right down to the smallest details, including the light switches. Throughout our home we’ve used Saturn Zen switches by Clipsal and I’m a big fan of their minimalist profile — plus I’m a sucker for those changeable icon buttons!

Favourite features
I’m trilled with how our new bathroom came together and although it was a big investment — we spent over $20,000 just on trades to demolish the space, move plumbing, change electrical and switch the door — it was worth it to achieve a more functional and inviting bathroom.
By far, what I’m most happy about is how all of the materials and finishes came together. The space feels tranquil and balanced but plays with shape, texture and lighting to achieve interest 😉
I’m also pleased that we addressed the issue of layout. It was tempting to just do a cosmetic makeover — it certainly would have taken less time and money! — but I knew spatial planning was an issue. And the new layout has resolved this problem. Hooray!
My top bathroom renovation tips
Create a mood board or materials board
There’s a good reason why interior stylists and designers swear by mood boards — they work!
The concept behind a mood board is to pull all of your ideas, products and materials together on a small scale. If it doesn’t work in this small scale, it most likely won’t work in real life — helping to save you from making costly mistakes. It also helps you refine your ideas and make changes… before it’s too late!
Whether you prefer a digital mood board or physical board, take the time to gather swatches and images to create a realistic representation of the space you’re planning to create. This is especially important when doing a bathroom renovation as they are such costly areas to reno. Look at what works well or what may be jarring. Is it too busy or does it lack interest? Try out different combinations and sit with them for several days or weeks before locking in your selections.
Don’t skimp on tiles
So often when I work with clients to design a bathroom, they look to save money on tiles. You may call me bias but I never suggest skimping on tiles. Tiles make up the largest surface area of a bathroom and set the tone for the space. You can immediately spot a low quality tile… so why plaster your walls in them?!
It also costs the same to lay a cheap tile as it does a mid-range/more expensive tile. And when you crunch the numbers, the savings you may make across a whole bathroom by using a cheaper tile is minimal yet the results speak for themselves.
Pick your trades wisely
There’s no point spending a fortune on beautiful products only to have them wrongly installed or ruined by poor trades. I’ve seen the most expensive products look shocking in a space when installed badly and more affordable products look amazing when care has been taken to install them well.
Perhaps we were too picky about our trades (this was one of the biggest delays part way through our project) but I’m glad we insisted on the best to do the work as they did a flawless job.
Special shout out to the team at Tiling Dynamix and Capital Craftsman for their outstanding tiling and carpentry work!
Don’t underestimate the power of lighting
An often overlooked aspect of design is lighting. For our bathroom, I employed the help of lighting expert James Nagel of Luxygen to develop a lighting plan and I LOVE the mood it sets in here.
In this space we have:
- tastic with light for general lighting
- two downlights for general lighting
- two wall lights for task lighting and ambient lighting
- LED strip lights above and below the shaving cabinet and below the vanity for ambient lighting.
He also suggested a low wall light on a sensor by the toilet, which we may install down the track (we have left provision for it).
Read this articles for all his tips on how to design a lighting plan for your bathroom.
Pick your heroes
It can be tempting to want to make a statement out of every aspect of your bathroom but I’m a firm believer in less is more.
There is a lot going on in a bathroom — tiles, vanity, mirror, tapware, bath, accessories, lighting — and if you try to make a statement out of everything, you end up with the sense of elements competing against each other. Rein in your ideas to pick your hero elements and let them steal the show.

Thanks so much for taking a tour of my completed bathroom renovation. I hope you got some ideas for your next project and if you have any questions, just pop them in the comments below and I’ll get back to you asap!
See more of my home
Photography by Thorson Photography
Disclaimer: Some products featured in my bathroom were gifted, however all opinions expressed in this post are my own.


Comments are closed.